A broken windshield usually means it's time to call in the pros but you can save yourself quite a bit on the bill if you remove the auto glass before the technician arrives to install the new one. It's also a handy skill to have if you like classic cars as finding replacements for specially curved glass can send you roaming through junkyards, where if you find it you have to remove the auto glass and bring it home to your restoration project. The process is deceptively simple, but it will still take practice and a good deal of strength to do.
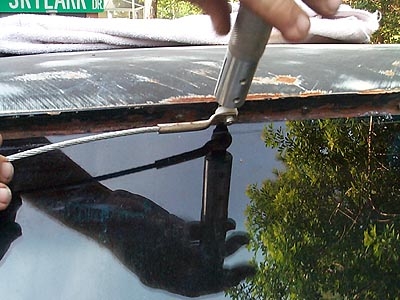
Gently pry up any trim around the auto glass using a flat head screwdriver. If you plan on reusing the trim, it is best to begin prying it off with the screwdriver and then pull it the rest of the way off, slowly, by hand. Do this on the exterior and interior of the glass you are removing.
Peel off any gasket that may be underneath the trim. Again, if it is in good repair, begin to lift it out using the tip of the screwdriver and pull it off by hand. This way you will be able to re-use it as well.
Insert your cold knife between the auto glass and the frame of the car starting at the top of the glass in the center. Being very careful to hold the blade of the knife perpendicular to the glass (an exact 90 degree angle), draw the knife towards you to cut through the frame seal of the auto glass. Repeat this all the way around the glass.

Push the glass out from the inside of the car. The auto glass is resting on tabs molded into the frame so as you push it off the tabs, insert one of your 2x4s between the auto glass and the frame to hold it away from the frame.
Remove the auto glass from the car by carefully lifting it out.