 Ken Brubaker
Senior Editor, Four Wheeler
Ken Brubaker
Senior Editor, Four Wheeler
We're installing this PreRunner Guardian front bumper for eary Ford Broncos from Wild Horses on a 1969 Ford Bronco. This is a heavy duty truck bumper comes with a winch mount, side protectors, and light tabs for four wheelers looking to install a winch or off road lights! Read more inside Four Wheeler Magazine.
bumper, front bumper, ford bumper, truck bumper, bumper guard, ford truck bumper, bumpers, truck bumpers, off road bumpers, front bumpers, heavy duty truck bumpers, prerunner bumper, pre runner bumper, ford bronco, ford bronco bumper, 1969 ford bronco, wild horse, wild horse products, four wheeler
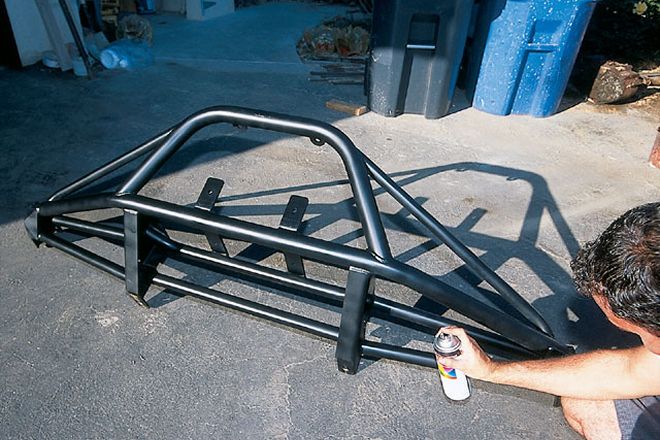
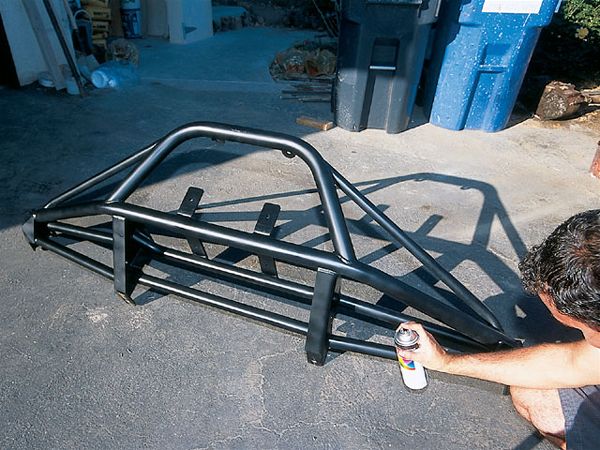 1. Since the Pre-Runner Guardian front bumper comes unpainted, our first step was to bust out the rattle can and bathe it in a few coats of semigloss. This is a great way to go because it allows easy touch-ups to trail scrapes and scratches.
One of the first things you realize after hitting the trail is that your rig's stock bumper just isn't going to cut it. A decent whack will make stock bumpers crumple like tin foil. To successfully negotiate the trails without worrying about damage, you need to get your hands on a bumper that is capable of taking a beating. With that in mind, we went to the folks at Wild Horses to add some armor to the front of our '69 Bronco. The Pre-Runner Guardian front bumper for early Broncos is made from 2-inch, 0.120-wall tubing, so these bumpers are plenty stout. The newer Guardian series also includes side protectors in its design to protect the vulnerable corners of your rig. Another highlight of the bumper is a ready-to-go winch mount that accepts most popular winches, making it ideal for those looking for a bashable winch mount. Two light tabs are also built into the bumper for those looking to add lights for nighttime excursions. Once painted, the bumper installs easily and took us one hour to throw on.


