
Overhead consoles seem like such a practical addition to a vehicle. They have handy drop-down compartments to keep sunglasses, cell phones, maps, wallets, and the garage-door openers. But after the newness of the vehicle wears off, which is usually a week, about the only thing that finds its way into the overhead console is dust.
On the other hand, when you get around to adding auxiliary lights, driving lights, foglights, an on-board air system, a winch, a second battery, and maybe even front and rear battery-cable quick-connects, there's no where to mount all the switches to control them.

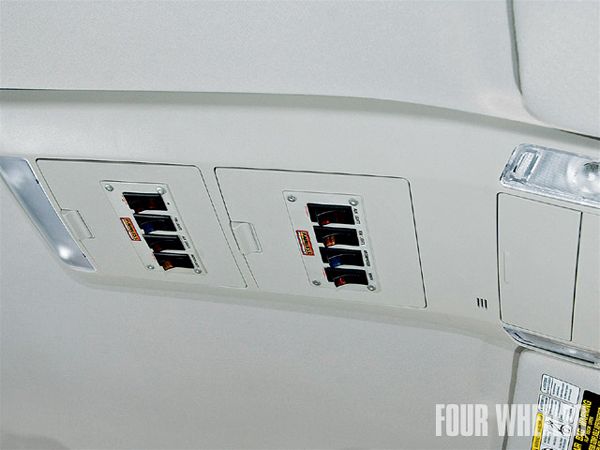
The perfect solution to this four-wheeler's paradox is to convert the unused compartments in the overhead console to a switch bank.
Placing switches in the overhead console's little compartments works great on several fronts: it provides easy operation of the switches; it allows them to be seen at a glance; it places them in a location for fast service; and it keeps the switches out of harm's way. Placing switches in the overhead console also makes wiring them easier because you're not working standing on your head under the dash.
Painless Wiring
Speaking of wiring, there are basically two ways to go about utilizing the overhead console as the vehicle's switching center. One is to go out and track down all the switches, wire, and relays on your own, hoping what you get is right for the job. We've done that before and it's both expensive and time consuming. The other method is to find a source that provides everything pre-wired.
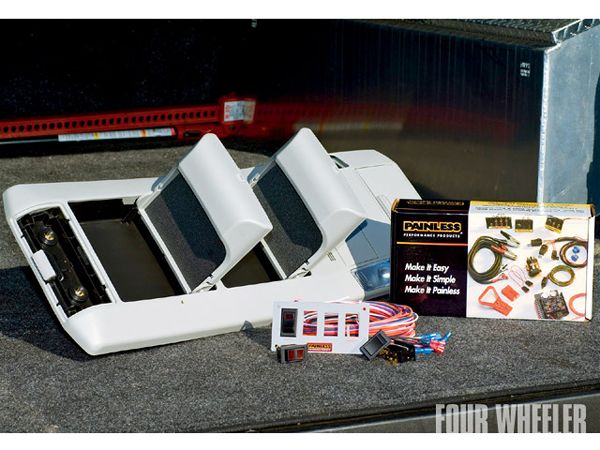
 Painless Performance Products' four-rocker switch panel kit includes everything needed to quickly install heavy-duty lighted switches into any vehicle. We used two kits, one each for the two flip-down compartments, for an installation in an '07 Toyota Tundra Double Cab's overhead console.
When it comes to wiring, the pre-wired route is my favorite, and there's no better one-stop wiring shop than Painless Performance Products. You need it, they have it-done, first-class.
So to turn the overhead console in an '07 Toyota Tundra Double Cab 4x4 into a full-on control panel, we utilized two universal four-rocker dash-panel kits (PN 50313) and a six-bank relay kit (PN 50108) from the folks at Painless to make the job, well, painless.
Note we didn't say "quick": Modifying the plastic console lids to fit the switch panels, mounting the ganged relays, and running the wiring takes a little time if it's done cleanly. But the job isn't mind-numbing-it's simply connecting colored-and-labeled wires from their switches to the relays and on to whatever item you need to switch on and off.
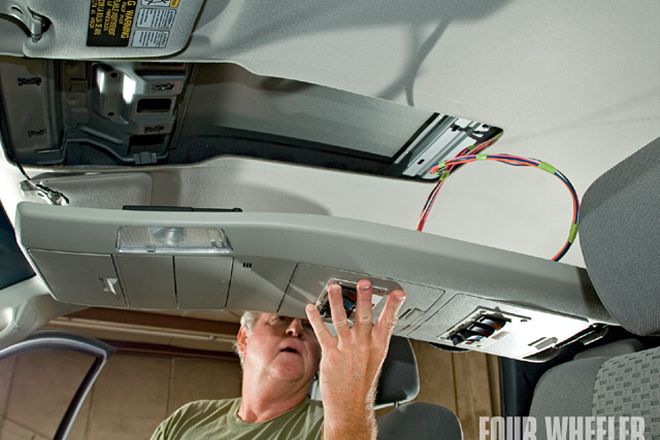
The two switch panels were installed in our Tundra's overhead console with the Painless Performance color-coded and labeled wires running from the switch banks between the headliner (which has to be partially dropped) and roof, down the driver-side "C"-pillar and behind the left rear doorsill kick panel where they connected to the wires coming from the battery, lights, and other accessories.
The transformed overhead console looks factory when completed. Best of all, now you can control anything electrical by simply raising a finger and rocking a switch, which lights up when the power is on. How cool is that?


