Long-Arm Lowering: Terraflex LCG Kit - Jp Magazine

Pete Trasborg Brand Manager, Jp

Our faithful '01 TJ has been around the magazine for about 10 years now and we decided it was time for an update on its old-school lift kit. We were at 41/2 inches of lift on a short-arm system, and we were tired of dealing with the handling quirks both on- and off-road. We decided that a long-arm lift kit would solve some of the problems, but felt that the Jeep was still just too high and unstable.

154 1010 Long Arm Lowering Jeep Wrangler Tj driver Side On Jack Stands Photo 34507338

We were running 35-inch tires and had an adequate amount of under-Jeep clearance that we didn't want to lose, but we felt the Jeep was more stable and climbed better with less lift and 32-33-inch tires. At the same time, this Jeep isn't a trailer queen, so we wanted better on-road handling.

We decided to go back down to a 33-inch tire and whatever lift height was required to clear it without limiting uptravel. We also wanted to minimize the loss of clearance that would inevitably come from lowering a Jeep and we wanted a complete lift kit that wouldn't require us to source other parts anywhere else. We've had had it with "complete" kits that were anything but.

154 1010 Long Arm Lowering Jeep Wrangler Tj stock And Teraflex Track Bar Photo 30464731 
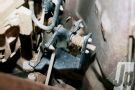
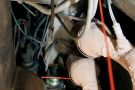
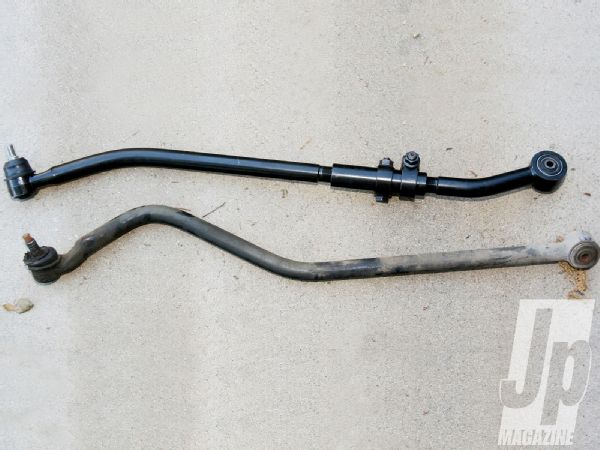
The stock track bar doesn't have enough bend in it at the axle end to allow much droop on the passenger side. The Teraflex track bar is much better suited to flex, and of course, is adjustable for whatever lift height we end up at.

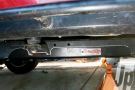
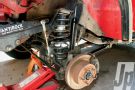
We used Teraflex in the past for the company's high-clearance Belly Up skidplate, and with its 11/2-inch gain in clearance over stock; we knew it would be a slam-dunk. So we started looking at the LCG (Low Center of Gravity) kits that the company produces and found that the Pro kit includes everything needed to install it, no holds barred. We went with a 3-inch LCG Pro kit for our TJ.

The kit includes literally everything. From brake lines and shocks to sway bar end links and even a steering box skidplate. We were confident we wouldn't have to run out to the store or order more parts.

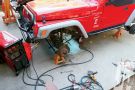
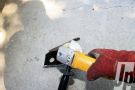
All of the instructions from Teraflex state to have a professional shop install the kit, but we wanted to do it ourselves, much like you might try to do at home. So, follow along as we lower our TJ and actually gain performance in the bargain. Stay tuned for next time where we work on the rear of the Jeep.

PhotosView Slideshow Before we even touched the actual lift kit, we knew that we would need to raise the engine mounts 1-inch in order to alleviate rear driveline angles. Our stock motor mounts have well over 100,000 miles on them and are showing signs of the rubber drying out and cracking. With those sings of forthcoming failure, rather than use simple spacers, we went to Mountain Off Road Enterprises for a set of 1-inch lift Bombproof motor mounts. Remember whenever you lift the engine; you'll need to relocate your fan shroud accordingly. The lower control arms mount to a bracket that cradles the bottom of the frame. The skidplate bolts through it into the stock skidplate holes. However, whenever you need to service the transmission or T-case and drop the skid plate, the lower control arm brackets are no longer bolted in. We traced the outline of the bracket on the frame so that we could grind off the paint for a good weld. As per the instructions, this will only be stitch-welded. The TJ T-case shifter is mounted to the body so any time the relationship between the body and T-case changes, binding can occur. The LCG kit includes an offset plate to correct the shifter geometry but we already had this Advance Adapter shifter linkage installed so we didn't need it. The new passenger-side upper control mount would interfere with the factory downtube, so we cut a section out of the factory exhaust. This tube is included in the kit, but doesn't line up that great with the factory exhaust. Since there are more exhaust-related issues to deal with when we do the rear, we'll deal with it at that point. The upper control arm mount needs to be welded to the frame before the exhaust can be replaced. Speaking of welding, this is not by any means a bolt-on kit. We used our Lincoln Electric Power Mig 255 to burn in the brackets. If you aren't a proficient welder, then you will want to have someone weld the brackets on for you. Remember, these brackets keep your axles under your Jeep. Don't mess around with your safety; use a quality 220-volt welder to burn the brackets in. On the driver's side, fuel lines, brake lines, and the hydraulic clutch line are very close to where the upper control arm bracket gets welded on. We simply used some zip ties to hold the lines up and away from the flame. One of the things we really like about this kit is that all the brackets come powdercoated in semi-gloss black. One of the things we don't like about this kit is all the powdercoating. Before any welding can occur, we needed to grind the powder off every surface near the weld area. For those in the rust belt the powdercoating will help extend the time before the bracket rusts. Once it is all welded up, we touched up the welds and brackets with semi-gloss black Rustoleum paint. To get the area inside the bracket we swiped a nozzle and straw off a WD-40 can. Make sure to spray some paint through it first, away from the work surface, to clear out any oil. When you are done painting, put the nozzle back on the WD-40 and spray some WD-40 through it. Otherwise the paint will likely cure in the straw making it impossible to use ever again. If your Jeep is already built, as this one was, the Pro kit might not be for you. We used the springs, shocks, control arms and brackets, but we have a Currie Antirock sway bar on the Jeep, so the included sway bar end link disconnects weren't necessary for us. We already had extended brake lines so rather than bleed the system, we left well-enough alone. As for the steering box skidplate, it won't work with our tubular front bumper.