 Harry Wagner
Contributor
Harry Wagner
Contributor
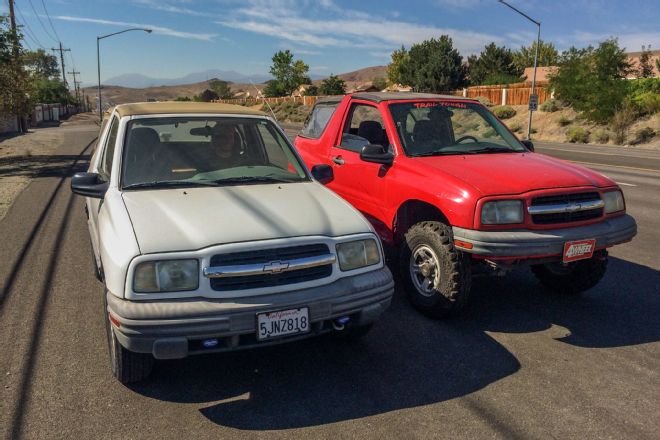
It has been months since we wrote an update on our Chevy Tracker project affectionately known as the Jet Puff (July ’15). Life has put this project on the back burner, but it hasn’t been completely abandoned. It has changed direction a few times though, which is the curse of a project that takes too long to complete. If Goldilocks were building a rig, she would want to take enough time so that no corners were cut but not so long than she got distracted by the latest and greatest new widget.
Shiny widgets don’t necessarily appeal to us, but we have made some unforced errors on the Jet Puff that set us back and added unnecessary expense. Originally we started with a 4WD Tracker with a 1.6L engine and purchased a Toyota Land Cruiser 80 Series front axle and 4Runner rear axle. None of those parts remain now, with the exception of some of the front axle components like hubs and spindles. The intent is for this to be a budget project, but the best way to save money is to not spend it twice. Now we have a 2WD Tracker with a 2.0L engine, a divorced Samurai transfer case from Trail Tough, and Toyota-based Diamond axles.
Why Toyota-based axles? There are several factors when deciding what drivetrain components to run, but perhaps none is more important than tire size. If you intended to run 40-inch-tall tires, consider 1-ton axles mandatory. Similarly, if you only plan to run 33-inch-tall tires, 1-tons will just result in getting the diff hung on every rock on the trail due to a lack of ground clearance. In the case of the Jet Puff, we plan to run 37-inch-tall Maxxis Trepadors on KMC Enduro beadlock rims. We consider 37s at the upper limit for half-ton axles, depending on other factors like driving style, gearing, vehicle weight, and horsepower. Of course, all half-ton axles are not the same, and thanks to RCV, Nitro Gear & Axle, Diamond Axle, and Spidertrax, the axles we put under our Tracker offer strength that rivals 1-ton components without the weight or ground clearance penalties. If only we had turned to these companies from the start; we could have saved ourselves a lot of time and money.
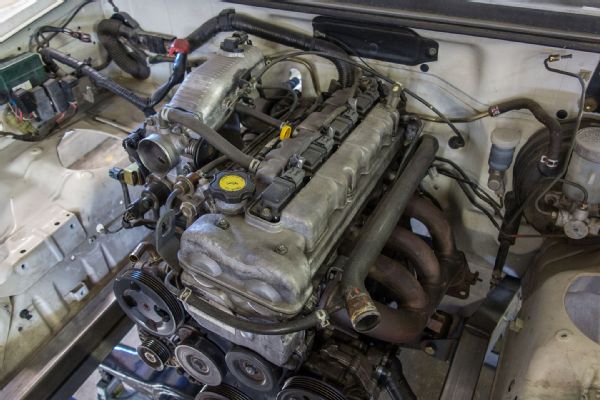 There are more powerful engines, and lighter engines, than the 225-pound 2.0L engine in our Tracker. The engine and transmission are the only drivetrain components we are retaining though, and doing so retains reliability and keeps an already large-scale project from becoming even more expensive and time consuming. The 2.0L engine makes 130 hp and 134 lb-ft of torque in stock form.
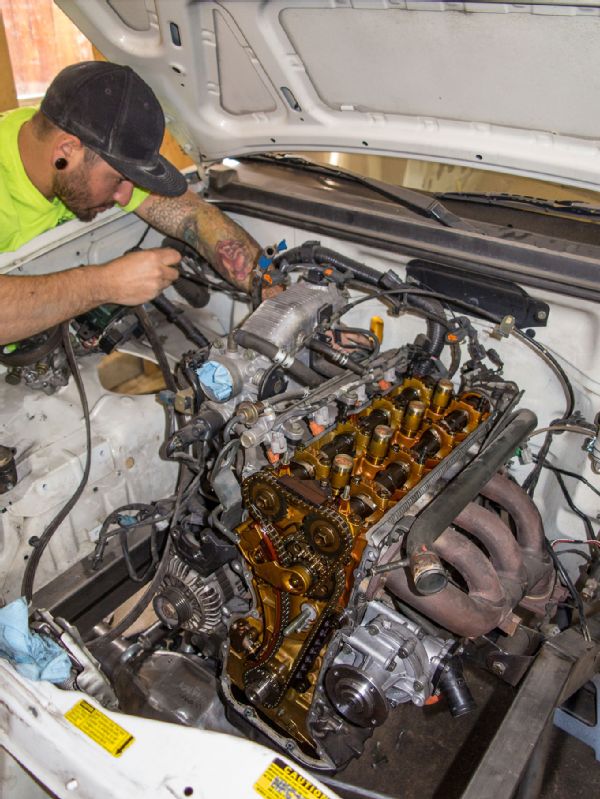 During the build we also performed some preventive maintenance on our new-to-us Tracker since we didn’t know what it had been subjected to in its previous life. The timing chain was replaced with a stock replacement part from RockAuto, along with new spark plugs, belts, and hoses.
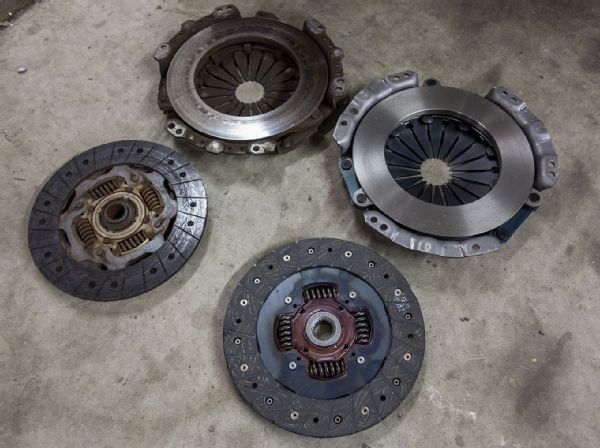 We retained the factory five-speed transmission but added a new Exedy clutch from RockAuto and resurfaced the flywheel. The M59 transmission only weighs 75 pounds, compared to 110 pounds for an AX15 or 195 pounds for an NV4500. The downside of the M59 is that First gear is a mere 3.65:1, so we will need to get our gearing in the transfer case and differentials.
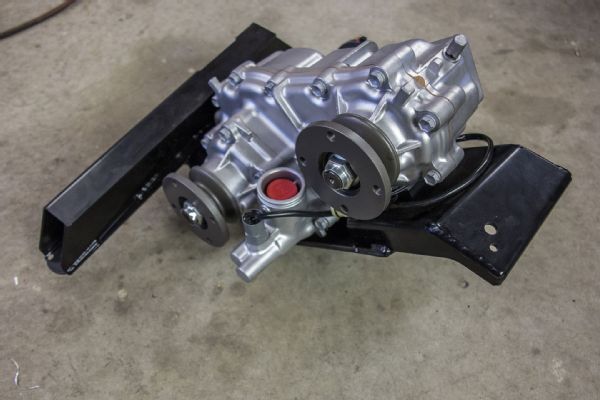 There are a lot of great transfer case options on the market, from the Advance Adapters Atlas II to Dana 300s and Toyota transfer cases. None of them are nearly as light as the 52-pound Samurai transfer case that we ordered from Trail Tough. The 6.4:1 Trail Tough Rockmonster gears offer the gear reduction we need, and they even lower the high range ratio by 17 percent, effectively turning our 5.29 Nitro gears into 6.19s.
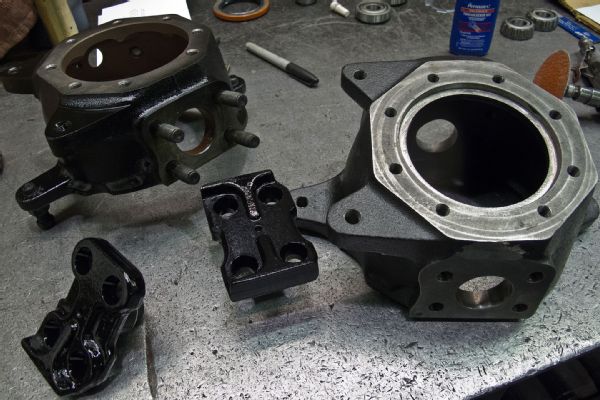
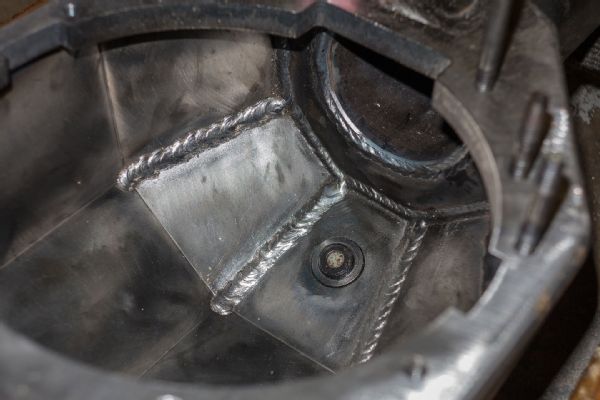 Both axlehousings were replaced with fabricated Diamond Axle housings that are stronger than the stamped factory housing and increase ground clearance by 3/4 inch under the differential. Diamond typically constructs the housings with 3-inch, 3/8-wall DOM axletubes, but we opted for 1/4-wall tubes in order to shave approximately 15 pounds from each housing.
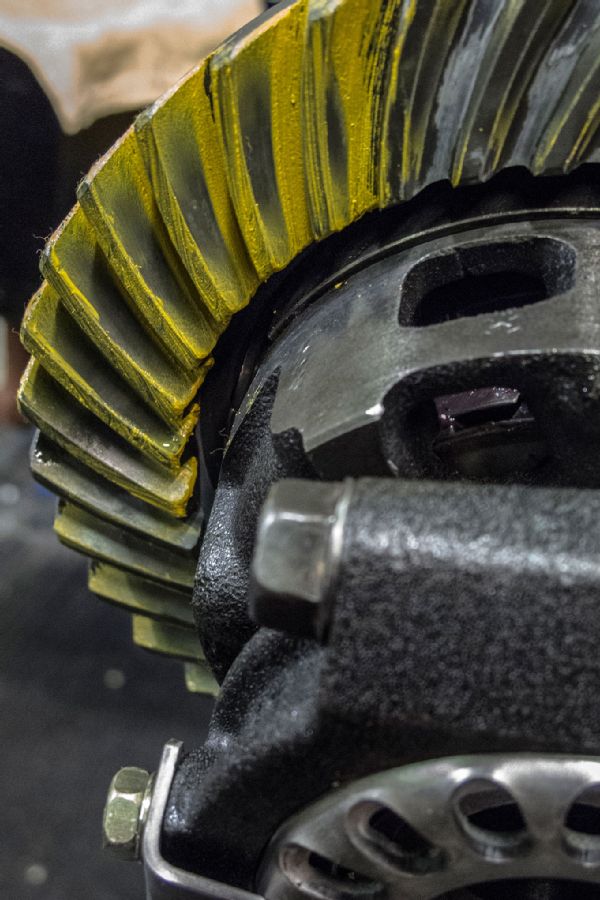 We hesitate to call Nitro Gear “Toyota specialists” because the company makes many parts for many other applications too. Nitro does make some unique Toyota components though, such as the big spline gear kits, which upgrade the pinion on 8-inch applications from 27 to 29 splines. We are running Nitro’s 5.29 ratio ring-and-pinions front and rear.
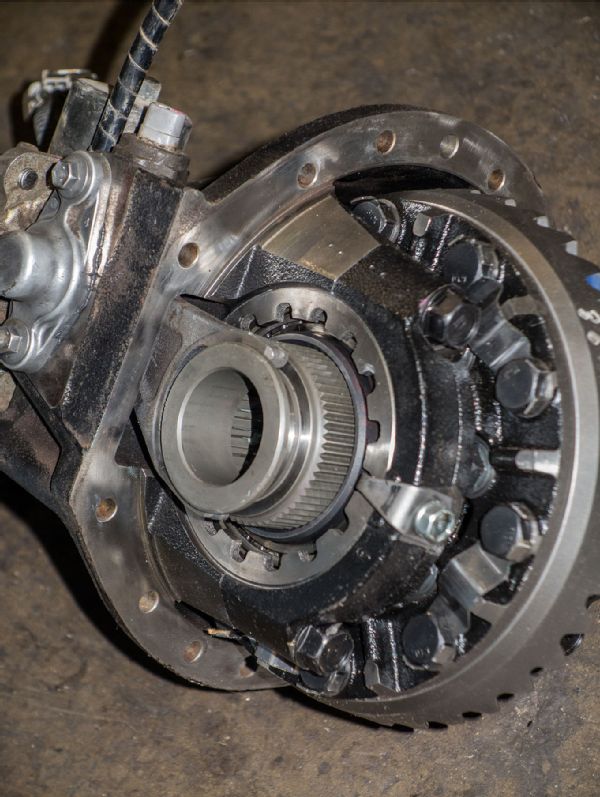 Toyota offered selectable lockers on a number of factory applications, including Tacomas, 4Runners, and Land Cruisers. We are using the high-pinion front differential from a Land Cruiser and the rear differential from a Tacoma. These lockers use an electronically controlled shift fork that is both robust and simple in operation.
 We started with an FJ80 Land Cruiser front axle, which was upgraded with Hellfire Fabworks knuckles in Part 1 (June ’15). We paid as much for this front axle as you would expect to pay for a used Dana 60 front axle, but in retrospect that may have been a mistake, as the only original components that were retained were the third member, spindles, and hubs.
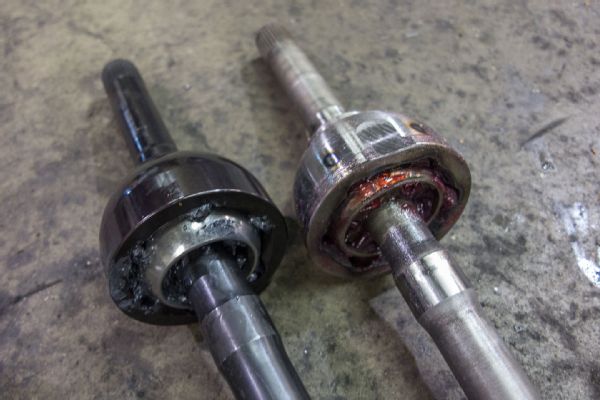 The factory Birfields and axles were upgraded to RCV chromoly Birfields and 300M axleshafts (RCV also offers chromoly axleshafts). In addition to being made from stronger materials, the RCV axleshafts are 30-spline at the Birfield instead of the stock 24 splines.
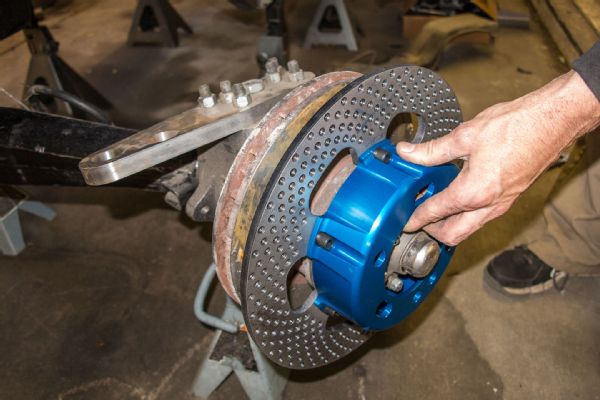 “Those factory brakes look pretty heavy,” Jesse Haines noted. We had never thought about changing the brakes to save weight, but Haines sees a lot of things that the average wheeler would miss. We will be replacing the vented rotors and cast calipers with Spidertrax cross-drilled rotors, aluminum hats, and lightweight aluminum calipers.
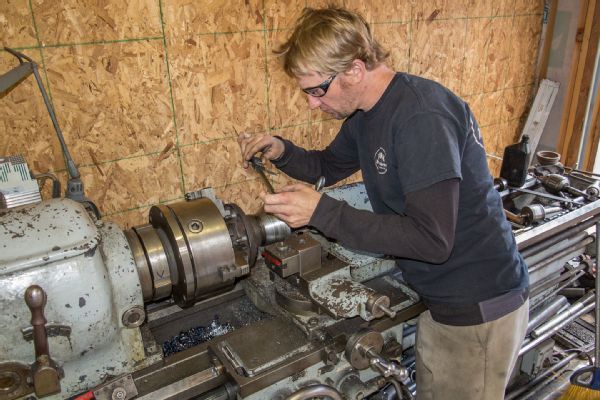 Spidertrax makes its brakes to match the unit bearings the company uses with its Spider9 axles, so Jesse Haines had to do some machine work in order to mate our Land Cruiser hubs to the Spidertrax brakes.
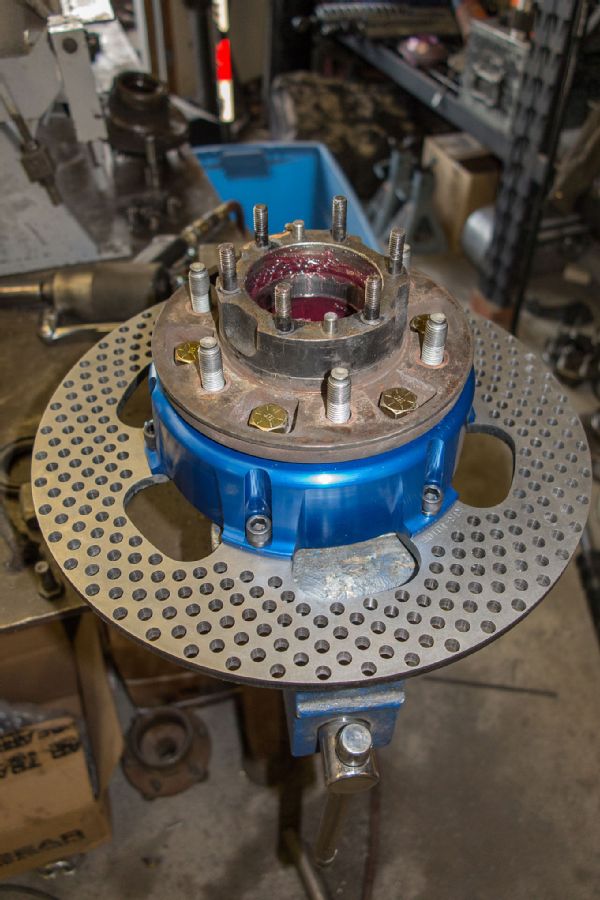 The back of the Land Cruiser hub was machined flat in order to mate it to the Spidertrax brake hat. The holes in the hat were larger than the mounting holes on the hub, so we used Grade 8 hardware, flat washers, and thread-locking compound to ensure that the hub and the rotor were safely mated together.
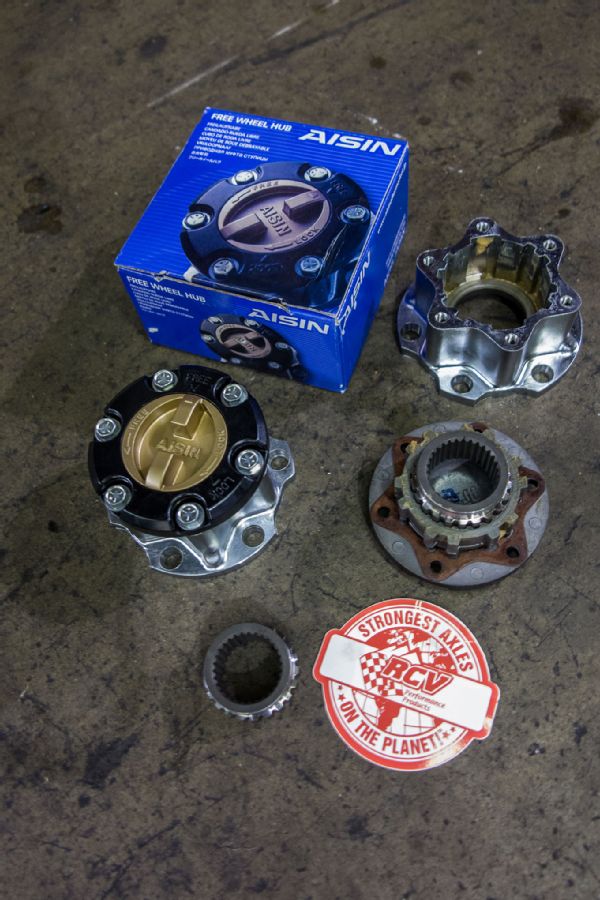 80 Series Land Cruiser axles come with drive flanges, but we swapped to Aisin hubs in order to allow us to unlock the hubs and drive the Jet Puff on the street. This might seem like a step backwards in terms of strength, but the addition of 300M hub gears from RCV ensures that we will never have to worry about hub strength again.
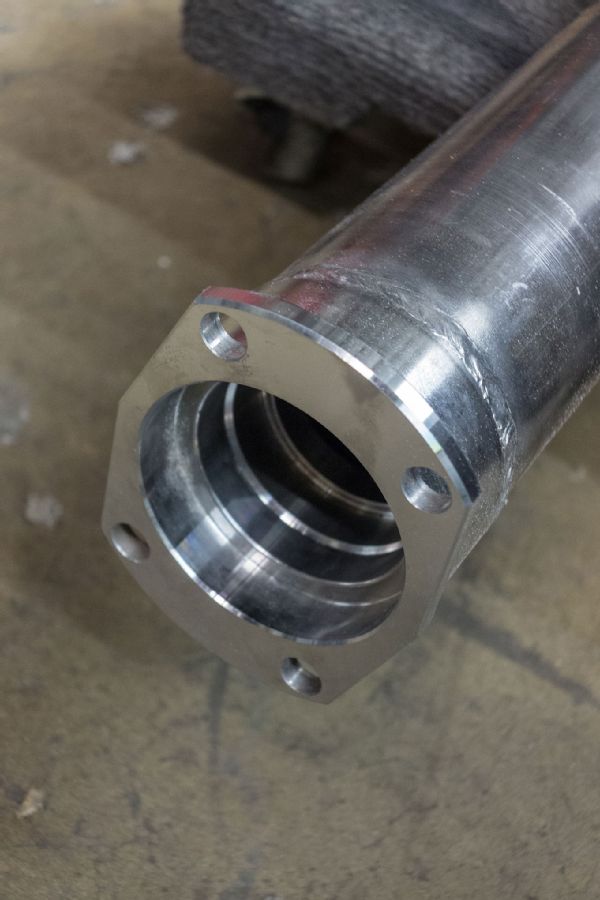 In the rear we will be running another Diamond axle fitted with a Toyota electric locker, 5.29 Nitro gears, and Spidertrax lightweight brakes. Our application uses an offset differential to match the output of the Samurai transfer case, so custom axleshafts are necessary. Diamond used Ford 9-inch big bearing housing ends that allow us to source custom axleshafts from a variety of sources.
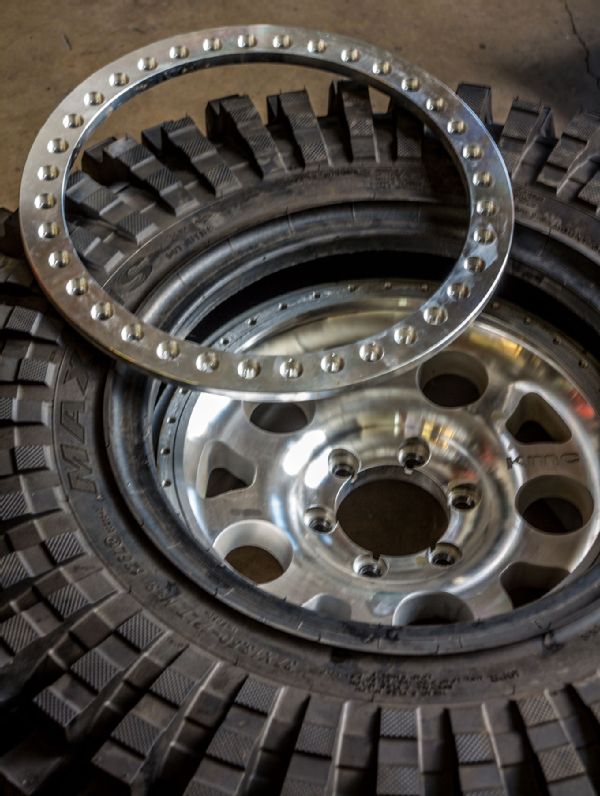 The axles will be capped by 37-inch Maxxis Trepador tires mounted on great-looking KMC Enduro beadlocks. Mounting the tires up was more difficult than past beadlocks we have installed, but we attribute this to the strong, stiff bias-ply sidewalls on the Maxxis tires.