 Pete Trasborg
Brand Manager, Jp
Pete Trasborg
Brand Manager, Jp
When it came time to upgrade the brakes on our unit bearing-shod Dana 30 front axle,we didn't want to spend weeks on end scouring junkyards and websites trying to find the perfect combination of parts. This Jeep is our daily-driver and there was no way we were going to take it apart and put it back together several times. We wanted better brakes without reinventing the wheel, and we'd heard a lot about bolt-on big brake kits on the market.
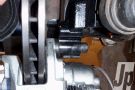
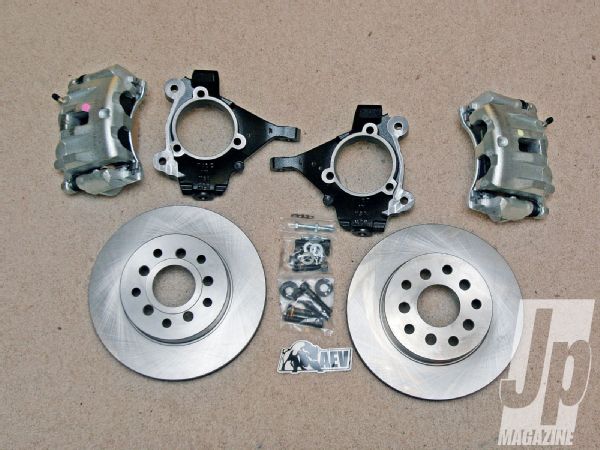 The kit is incredibly complete, down to replacement cotter pins for the ball joints, spacers, and longer bolts depending on what year Jeep you are putting the kit on.
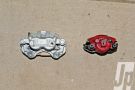
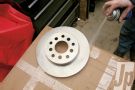
Bolt-on sounded really good and after a short time we discovered American Expedition Vehicles is offering not just one, but two kits. There is a 16-inch kit and a 17-inch kit available. They are so named for the suggested rim size. The 16-inch kit bumps the rotor size up to 12 inches and the 17-inch kit bumps it to 13.2 inches. Both kits include new dual-piston calipers and new nodular iron steering knuckles. The 17-inch kit adds a new master cylinder due to the amount of brake fluid the calipers require. Both kits will fit all TJs and LJs with the Dana 30 or 44 front axle, '91-and-up XJs, MJs, and YJs, and '93-'08 Grand Cherokees.
AEV suggests the 16-inch kit for tires under 35 inches and the 17-inch kit for Jeeps with a minimum of 37-inch tires. We are running 16-inch Rubicon rims and 33-inch Goodyear Silent Armor tires on our test Comanche so we opted for the 16-inch kit. We got our kit from Northridge 4x4. Northridge is a 4x4/Jeep parts store that has good prices and customer service. They also had the 16-inch kit in stock and were able to ship it out to us that day, which we liked.
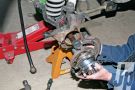
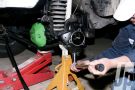
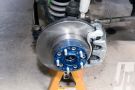
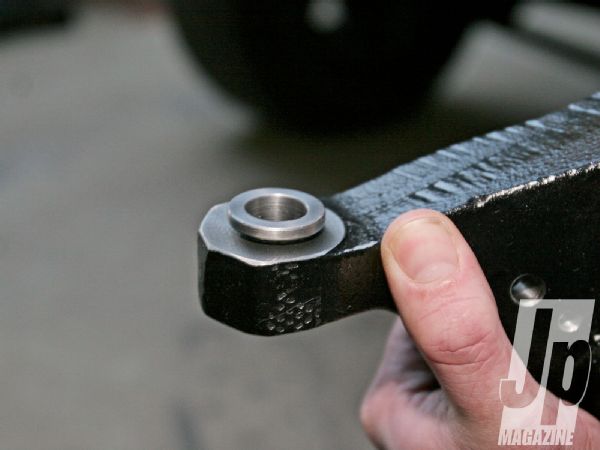 The first thing we did was drill a nice, big, 3/4-inch hole through our knuckle. We are running our steering over the knuckle, and as of press time, there is no over the knuckle option on this kit-so we drilled the new knuckles out and installed some inserts from Goferit Offroad so the taper would work with our steering. It would be cool to see an over the knuckle or even a high-steer option to this kit, since you are already in there.
AEV claims an approximate 25-foot decrease in stopping distance from 60 mph but our factory brakes were shot. So in the interest of honest reporting, we installed a new set of Raybestos pads and Brembo rotors from 4WD Hardware for a true apples-to-apples test of 60-0 stopping distances. Mind you, the parts we used were just high-quality factory replacements. AEV also cites an approximate 2.5-hour install time, which meant we could bump our braking performance and still have time to BBQ at the end of the day. Follow along as we test all the claims and give a blow-by-blow of the installation from our driveway and our desert test track.
How's It Work?
Before the install, even with Trasborg pushing on the brake pedal, we couldn't lock the brakes up on our MJ, and our 60-0 mph average stopping distance was 170 feet. We did three sets of three stops each to test, with cool down time between tests. The third stop of each test on the stock brakes resulted in much longer stopping distances. Not counting the run to the parts store for longer studs, the install took us about three hours. After the install, we were able to lock the brakes up and stopping distances greatly decreased. It took us a while to get the hang of panic stopping due to being able to lock up the brakes. Our 60-0 mph average came down to 137 feet, with much less brake fade. We were actually able to get five very hard stops in before we saw the same brake fade as we had with the stock brakes on the third pass.