
Last month we introduced you to our latest project, the Basket Case Chevelle. This '70 SS396 is undergoing a complete renovation at Muscle Car Restorations in Chippewa Falls, Wisconsin. We covered the seats last time (pun intended); now we're turning our attention to the carpet, headliner, and door panels.
Generally, headliners hold up fairly well. They are essentially upside down in the car so dust, dirt, and other debris doesn't settle on them as with the carpet. And they aren't exposed to sun damage like the seats, though heat can still be a problem. So unless your car's headliner has been torn, stained, or otherwise damaged, it might be salvageable with some cleaning.
This Chevelle was not so fortunate, but with the interior color change from red to black, it would have had to come out anyway. Besides, Muscle Car Restorations is doing a complete rotisserie resto and will paint the entire interior in the process, so it would have to come out for that.
If the headliner is still in place, then taking lots of close-up detailed photos of how it is glued in place around the edges and how the support rods are placed in the roof would be extremely valuable. Relatively few of us have had experience replacing one, so not relying on memory alone will make the job a lot easier. Leave the support rods in the liner as it is removed to keep them in order.
Carpet, on the other hand, is pretty much an automatic replacement, as is the factory sound deadener/insulation that was used under it. This is one area that Muscle Car Restorations differs from other restorers in that it likes to use a couple of heat- and sound-reducing products from Thermo-Tec under the carpet. That provides better sound control and can keep more of the engine, exhaust pipe, and muffler heat out of the interior with the added benefit of removing some weight from the car.
Your headliner might be salvageable with some cleaning
1. Because it must be folded for shipping, the headliner is often wrinkled when it comes out of the box. The wrinkles generally pull out fairly easily, but Muscle Car Restorations has found that a little steam can really help. A little time hanging in the hot sun can work, too. One really big tip here: Don't buy the headliner until you are ready to install it. With other projects at the shop, headliners that were otherwise new couldn't be used because the owners had stored them away for years in the original shipping box, and the wrinkles and creases could not be removed.
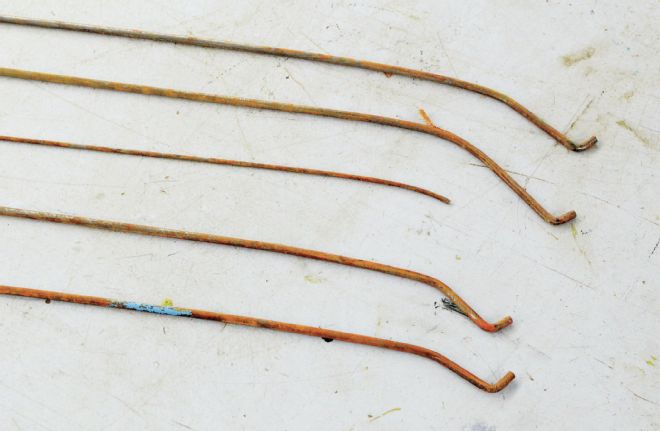
2. This Chevelle has five support rods that hold the headliner in place. They all have a slightly different length and shape, so after they were cleaned with a Scotch-Brite pad, they were numbered to keep them in the correct order.
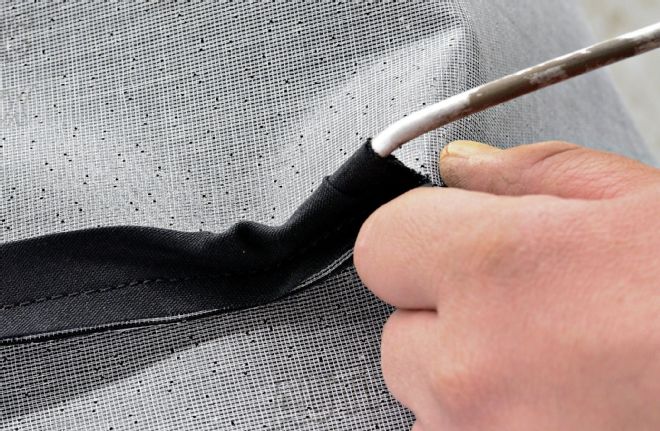
3. At first it might seem that the rods won't fit into the loops, but deburring and rounding the ends of the rods a little will help them go in without risking cutting the headliner. Even after taking those steps, the rods will likely have to be “walked” through the loop.
4. On either side of the roof are sets of three holes for each rod. Pick ones that render the rods tight but not overbowed.

5. The exception is the middle rod, which is thinner and shorter than the rest. It snaps into clips that are set into the roof support that runs across the middle. Those same clips also hold the dome light wires that run in from the side.
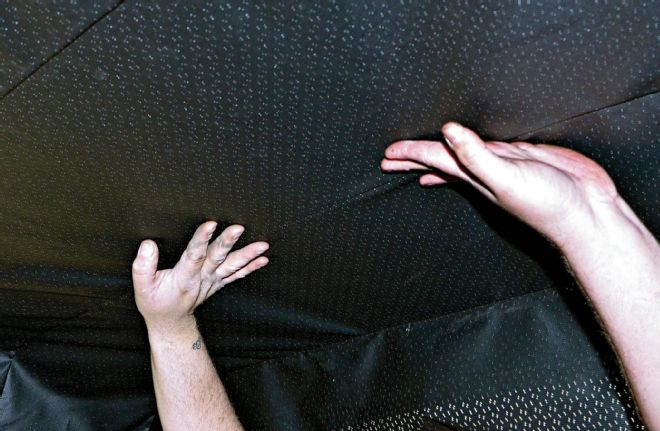
6. Once all the rods are in place, work the material to the outside, being careful to keep the liner centered.
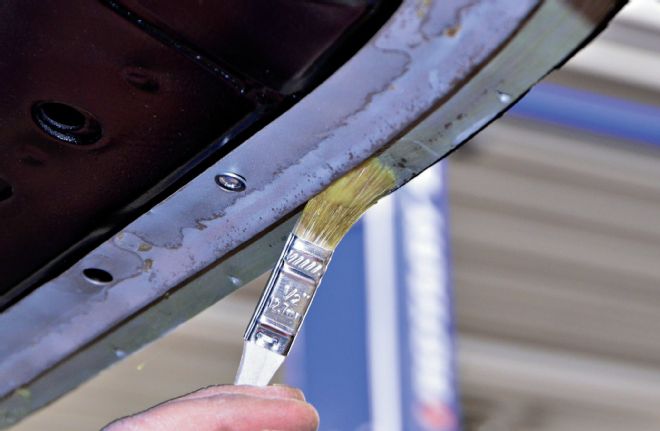
7. There are contact surfaces all the way around the roof that the headliner will be glued to. Muscle Car Restorations uses DAP Weldwood Contact Adhesive. It can be repositioned multiple times up to 24 hours from application, but it's best to get it done within a couple hours or so. Be generous but don't apply it too thick as the headliner is a porous surface.
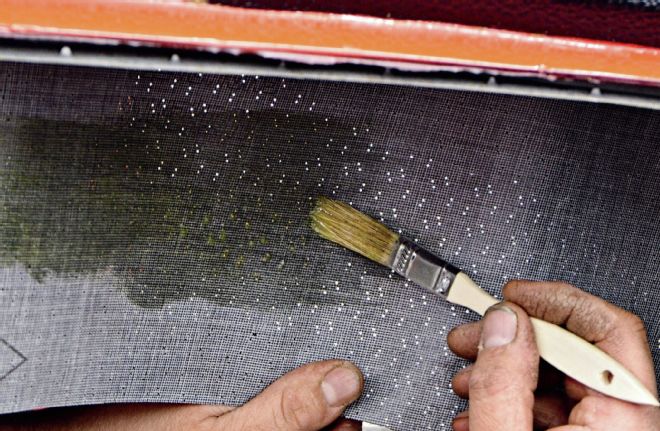
8. The adhesive is needed on the material as well, as it is a type of contact cement. Brush on a fairly wide swath as the exact contact area will move about as the liner is pulled and stretched in different directions. Again, good coverage is needed but not so much that it could show through.
9. Expect to do some fussing around when positioning the liner, as it will need to be stretched in all directions to pull out all of the wrinkles. Start in the middle on both sides and work your way to the front and the back. The back corners will be the most difficult, but stay with it and eventually you'll get it pulled tight in all directions. After you've got it pulled tight all the way around, go around one more time to stretch it just a bit more. This helps ensure that it won't sag after exposure to the hot outdoor sun.
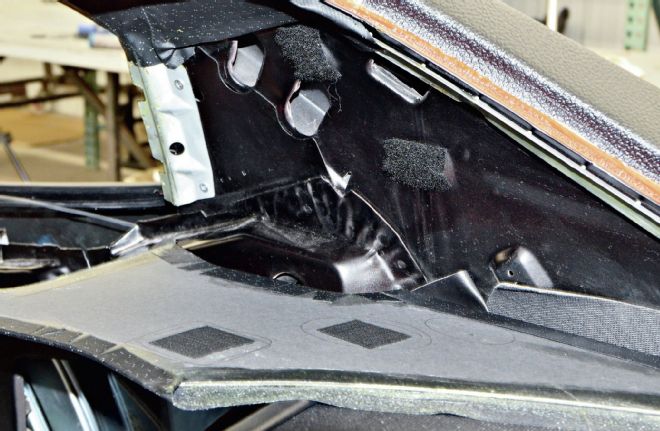
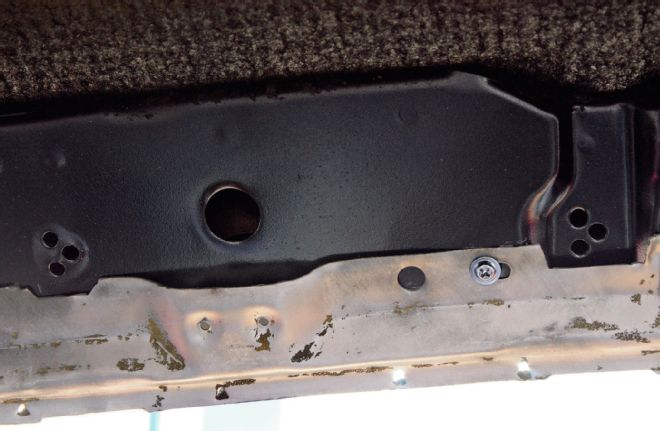
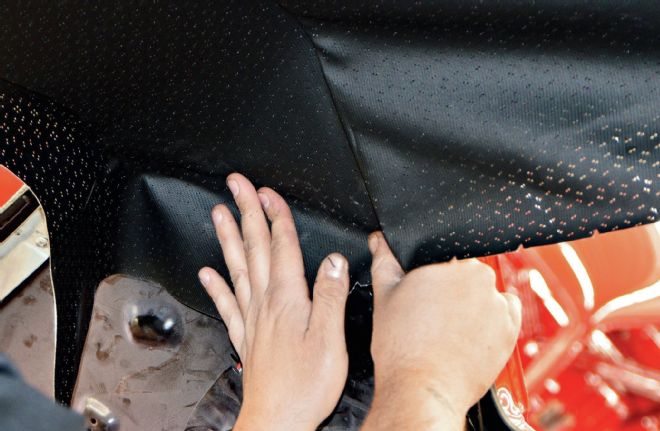
10. These details of the sail panel area show the contact points for the headliner corner and the sail panel. The top two mostly horizontal bars are for the headliner, while the sail panel will attach to the vertical bar on the left. The sail panel also wraps around the left horizontal bar on top of the headliner and is glued to another bar running underneath the edge of the rear window opening (partially obscured by the headliner material).
11. Actually, the adhesive is not the final hold for the headliner. After you are fully satisfied with its position and have trimmed off all but about the last inch of excess material, make some relief cuts in the remaining material and roll it around the edge and hook it onto the small perforated spikes that are punched in the mounting surface.
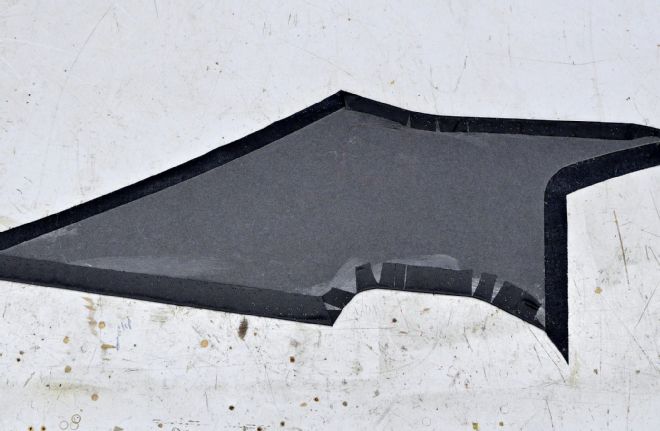
12. The sail panel comes from Legendary with the vinyl attached, but the top and bottom portions need to be folded over and glued to the back side. The long sloping left edge and the right side will glue to the car like the headliner.
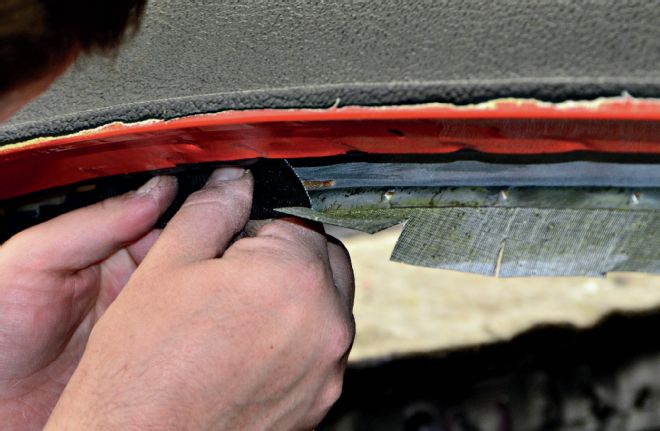
13. The factory used push-in clips to hold the sail panel to the car, but Muscle Car Restorations prefers to use heavy-duty Velcro so it can be easily adjusted for a perfect fit.
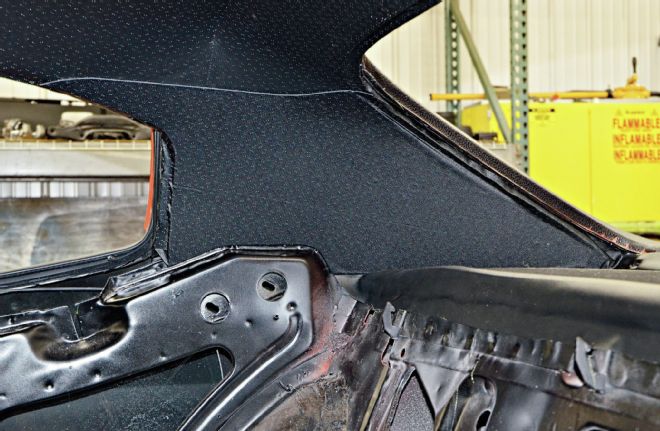
14. Here's how the finished sail panel should look, minus the final trim.
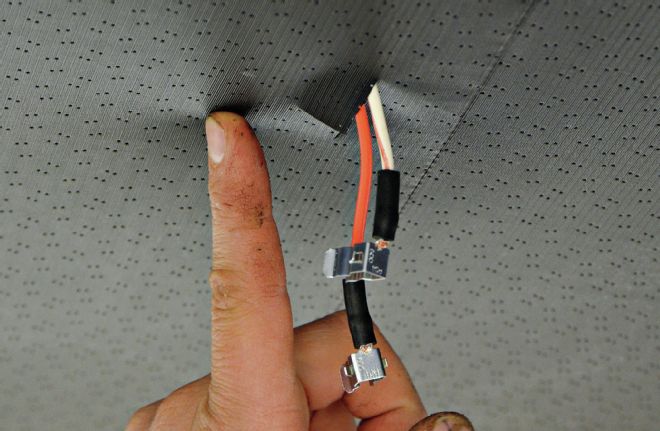
15. The dome light wires will need to be in place before the headliner is installed. Feel for the mounting holes so there is no doubt as to the light's mounting location and then cut an opening to pull the wires through. Triple check this one before you cut.
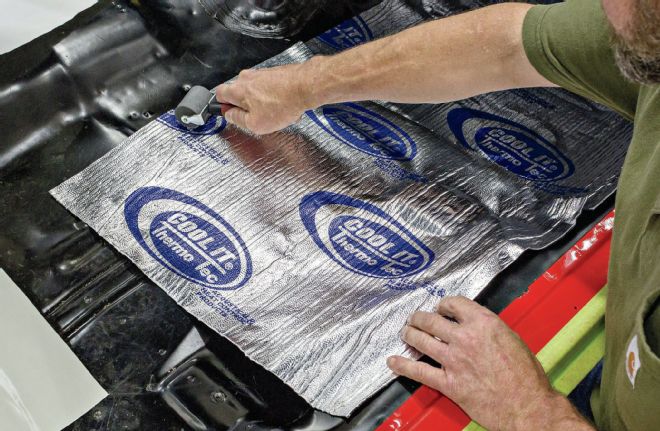
16. Now to the floor. Instead of using the factory type insulation under the carpet, Muscle Car Restorations opts to first apply a layer of Thermo-Tec's Suppressor Acoustical & Heat Control Mat. It is a 7-mil-thick, peel-and-stick product that is applied with a small roller.

17. On top of the stick-on mat, Muscle Car Restorations then shapes a layer of Thermo-Tec's Thermo-Guard FR heat and sound insulation over the lower firewall, transmission hump, driveshaft tunnel, and under the back seat. This is a ¼-inch thick synthetic fiber felt with a foil heat barrier that provides an additional layer of sound and heat control from the engine, trans, and mufflers. It is glued to the Heat Control Mat using Thermo-Tec's Heavy Duty Spray Adhesive.
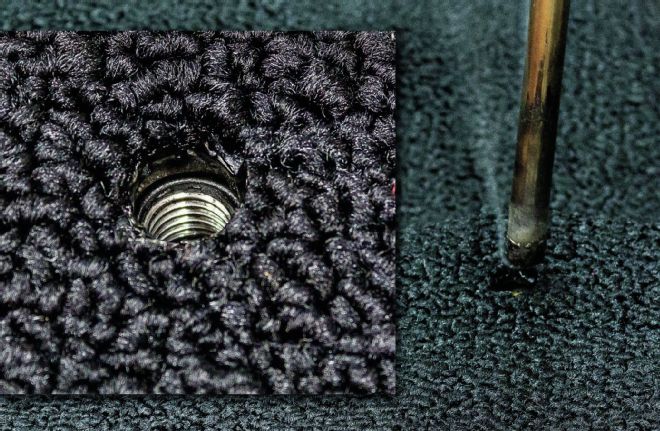
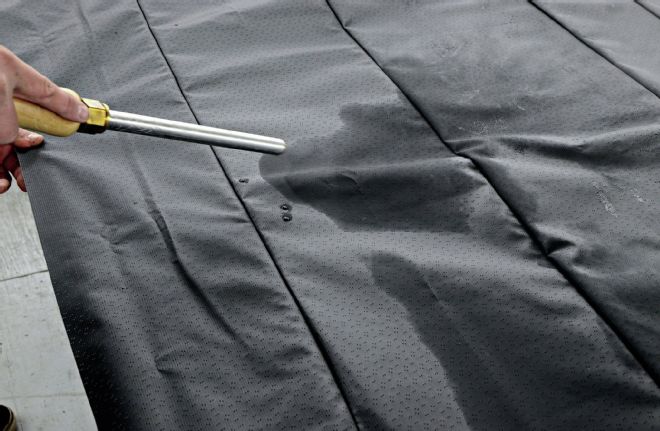
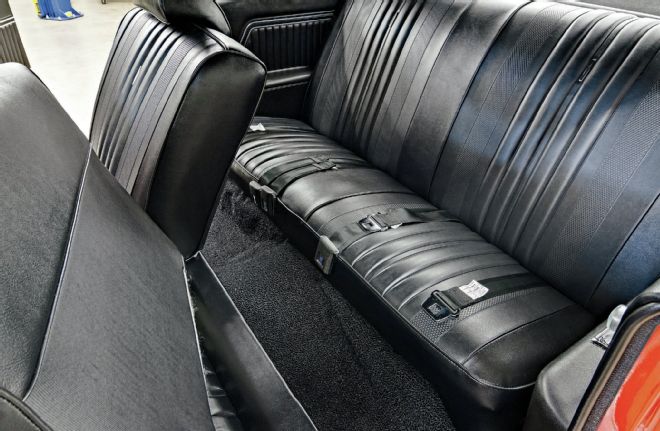
18. Laying in the carpet is pretty straightforward, but Muscle Car Restorations does have one really cool trick to help with the bolt holes that need to be made for seat belt mounts, and so on. After determining the exact placement for the hole, they heat up a metal rod and burn the hole through the carpet. The result is a perfectly round, clean hole effectively cauterized by the heat so it won't unravel in the future.
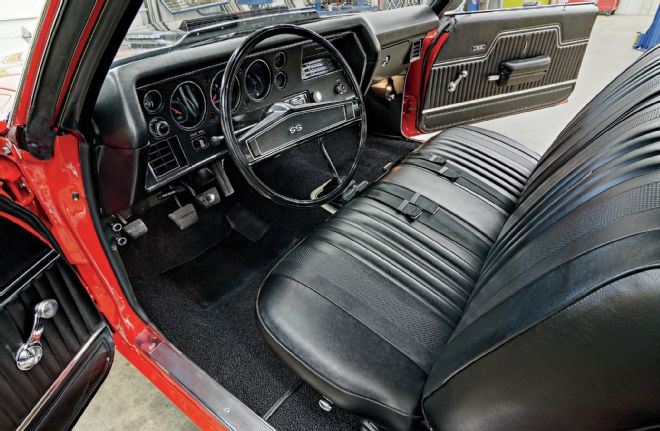
19. One of the problems with basket case cars is that many of the small parts often go missing. Fortunately, National Parts Depot can supply things like the pedal pads, seat adjustment knobs, bench seat-back release knobs, the interior coat hook, and dome light assembly.
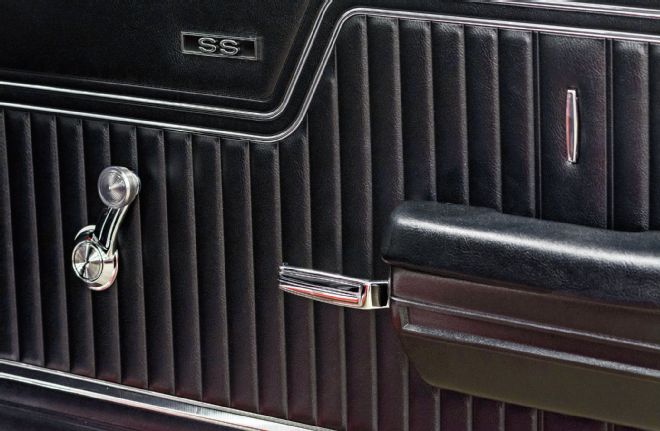
20. NPD also supplied the door panels, arm rests, door handles, window cranks, and door panel SS emblems, as well as all of the clips, springs, and other hardware necessary to attach them.