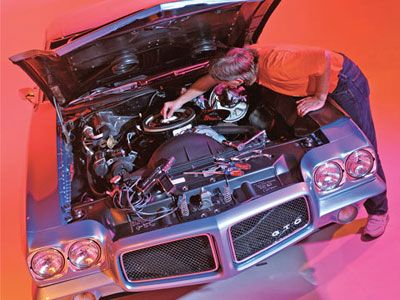
Lead Photo Of Troy Allison And His '71judge By Patrick Hill
It's cold, it's gray, it's winter. The holidays have passed, football season is ending, and you have some downtime on your hands. In between shoveling the driveway and running your daily driver through the car wash in the hopes of removing caustic road sludge, you can complete some easy projects on your Pontiac to ensure it looks and runs better than ever come spring. Here are 13 that can be done in a garage or ventilated work area, most of which don't take a lot of tools or time. Many of the products presented are from Eastwood because it caters to the DIY restorer, but there are a few performance enhancements from Pertronix as well. Get to work-spring is coming fast.
Rust Never Sleeps
Few things in the vintage automotive hobby are more satisfying than watching rust disappear. Eastwood's acid-free Rust Dissolver does what its name implies to ferrous oxide and other oxide coatings. It's safe for engine parts and chrome, and won't harm rubber, seals, vinyl, soft metals, or plastic. Keep the part wet to keep the product working-that's why dipping is recommended. It can take overnight to remove the rust, but it will leave the metal and firmly adhering plated coatings in good condition.
Fast Etch is an acid-based rust dissolver that leaves a zinc-phosphate coating, which is ready for top coating; it even resists the re-formation of rust prior to painting. It can be purchased in a gel form, which makes it easier to strip larger parts that can't be dipped. Fast Etch works more quickly than Rust Dissolver but can weaken the base metal if the product is left on it too long, so it should be inspected every 30 minutes. Don't let the product dry on the metal as the white film it will leave is not the desired result. Keep the metal wet until the steel has a uniform, gray appearance. Eastwood's PRE can be used to neutralize the Fast Etch prior to painting.
Both products can be saved and reused, but potency will deteriorate. Each one is temperature-sensitive, working faster in warmer temps like 70-100 degrees. Another plus is both products are virtually odor-free.
Moment Of Clarity
The plastic lenses on all models, plastic rear windows on convertibles, and late-model Pontiacs with yellowing headlight lenses can be cleared up using Eastwood's Clear Plastic Restoration Kit. It comes with polishing compound, a 3-inch foam hook-faced backing pad with a 1/4-inch mandrel, a 3-inch blue foam pad, and a 3-inch felt pad.
To begin, clean the lens thoroughly with soap and water, and rinse well. Mount the backing pad to a drill via the mandrel and attach the white-felt pad. Apply the compound to the pad with the provided mixing stick and polish the plastic in a slow, methodical manner, overlapping your work as you proceed. Mist the area with water from a spray bottle to keep it moist during polishing. Next, clean the area with water; then attach the foam pad and repeat the entire process. Finally, wipe it clean with a soft cloth.
Rattle-Can Resto
There are various components on your Pontiac that will benefit from spray-can refreshing. Sand with 320-grit paper or scuff the part with a Scotch-Brite pad to prepare it for paint, and use PRE to remove residual contaminants. You can use Self-Etching Primer under any of these paints to enhance adhesion by acid-etching the surface of bare iron, steel, stainless steel, and aluminum; then paint the part with the product that either most closely resembles its stock look, or get creative. AlumaBlast replicates fresh cast-aluminum surfaces; Spray Gray bare cast-iron; Detail Gray rough cast-aluminum and machined steel surfaces; and Silver Cad replicates the bluish silver tone of silver cad plating. Got a lot to paint? The Eastwood trigger handle reduces hand strain.
Masking Party
How do your wheels look after a season of driving? On any Pontiac that sees its share of road time, the wheels will need a repaint sooner rather than later. While you probably don't need someone to tell you how to paint your wheels, how about a timesaving tip on how to mask them? For painting the diamond-shaped as-cast areas of Snowflake wheels, while leaving the machined area natural, mask the whole wheel with the widest masking tape you can get and press it down so that the impression of the diamonds can be seen in its surface. Then use an X-Acto knife to cut the tape, following the edges of the machined areas.
There are wheel masks available for Rally II wheels, but this method is just as easy. After painting the entire wheel face with Argent Silver and letting it thoroughly dry, simply apply 2-inch wide masking tape to all of the spokes; then trim the tape along the edges of the spokes with the X-Acto knife. Tinfoil can be used with the tape to quickly mask and conform to the remainder of the rim so the Charcoal Gray can be sprayed without worry of overspray getting onto the silver.
Pointless Made Easy
Another simple upgrade is to a Pertronix Ignitor breakerless ignition, which eliminates points and the maintenance that they require. The Ignitor features rotating cobalt magnets that trigger a Hall Effect integrated circuit. The company states that it "delivers twice the voltage to the spark plugs, increasing horsepower, fuel economy, and spark plug life." This concealed under-the-cap unit requires no adjustment once correctly installed, and no maintenance. Current fall time is twice as long, resulting in increased coil output, and the unit will trigger most multispark CD ignitions.
Here's the basic install procedure: Remove the distributor, the cap, the rotor, and the points assembly, and install the Ignitor components. Measure the air gap between the magnet ring and the module with the distributor shaft fully seated in its housing (should be no more than 0.010 inch) and again with it pulled up (should be no more than 0.060). Shimming the magnet ring or the distributor gear may be required to set the proper gap. Reinstall the distributor in the same position from which it was removed; attach the wires to the coil; and reinstall the rotor, cap, and wires. Specific installation details come with the unit and a mechanically inclined hobbyist can compete the job in about an hour or two. The Ignitor II, an upgraded unit offering increased performance, can be had from Pertronix as well.
Spark Up
The Ignitor puts the Flame-Thrower coil's 40,000 volts to good use, as spark-plug gaps can be increased to 0.045 from 0.035 for more efficient combustion, resulting in more potential power and economy and improved driveability.
Custom-fit, stock-appearance, 500-ohm-per-foot resistance Flame-Thrower wires complete the enhanced ignition system. They feature a carbon-impregnated fiberglass center core and spiral-wound stainless steel alloy to provide two current paths, all wrapped up in 7mm silicone jackets that resist contaminants and high temps, yet fit in stock wire looms.
Elbow Grease
Stainless body trim or aluminum wheels dull? All you need is a soft cloth and light pressure to remove oxidation and light scratches with Autosol Metal Polish. It's also safe for plastic lenses like taillights and modern headlights as well.
Steering Clear Of Cracks
Got a cracked vintage, plastic Pontiac steering wheel? You can fix it with Eastwood's Complete Steering Wheel Restoration Kit featuring PC-7 epoxy and instructions. The Master Steering Wheel Restoration Kit (shown) comes with the Steering Wheel Restoration Handbook and Plastic Adhesion Promoter.
To make a basic repair, cut into the crack until you reach the metal core. Bevel or "V" the edges of the crack with a file. Clean the wheel thoroughly with PRE and then mix and fill the crack with the included PC-7 epoxy. Once its dry, 24 hours later, sand the area with 80-, 220-, and 320-grit sandpaper until smooth, clean with PRE, then apply light coats of the included Plastic Adhesion Promoter to the entire wheel, and top coat with an automotive-grade urethane paint within a 1/2 hour. Eastwood recommends its Boulevard Black (not shown) for our black '67 GTO wheel, or AutoColorLibrary (www.autocolorlibrary.com) can supply any exact factory paint color for your steering wheel.
Weekend Powder Coat
Want to produce durable finishes that go beyond rattle cans? Try a home HotCoat system. The finish is more durable than paint, but the process is somewhat more involved. First, this product is for the hands-on hobbyist who has a home air compressor. Second, you'll need an oven because you won't want your pizza to share the oven rack with your trick powdercoated valve covers. The Deluxe HotCoat kit provides all you need to get started, but the Elite HotCoat kit shown here adds the Beginner's Powder Coating book, a performance deflector that provides a more efficient spray pattern, a fluidizing attachment-which thwarts powder surging and more effectively uses the powder in the cup-and a choice of four half-pound containers of standard colors instead of two. It's impossible to fully explain how the system works in an article such as this, so look for a complete story on this product in a future issue.
Dressing For Exhaust
Calyx Manifold Dressing offers an easy way to turn your rusty exhaust manifolds to stock-appearing cast iron. How easy? If you have a fingertip, you're qualified to apply it. This product isn't paint but rather a paste that is applied with a rag and your finger or a small brush for tight spots. Since it's not sprayed, you don't even have to remove the manifolds. Wire brush off the loose rust and wipe the manifolds clean. Apply the product to cool manifolds, rubbing it into the pores of the metal, then start the Pontiac and let it run to operating temperature. Calyx is also great for easy touch ups at the shows.
Carb In Color
We covered upgrading your carb last month in "30 Low-Buck Mods," so this time we'll remind you that you can make it look great, too, by applying Carb Renew, while the unit is apart for the rebuild and power mods. For vintage Q-jets, bronze can be used on the throttle body and air horn, and silver on the base (Carter AFBs can use silver for whole body).
The formula of this translucent acrylic enamel has been improved to make it more resistant to fuel, most fuel additives, and heat, up to 300 degrees. Clean the parts with PRE, scuff with a Scotch-Brite pad, clean with PRE again, and apply a light coat of Carb Renew so that you can still see the base metal through it. A coat of Eastwood's extreme Diamond Clear (not shown) will further enhance resistance to fuel and additives. Don't use carburetor cleaner as it will attack the Carb Renew finish.
Brighter Blinking
When was the last time you observed your Pontiac's lamp intensity at night? Probably never, right? Well, take a look at how bright or dim the taillights, brake lights, marker lights, and blinkers are-chances are they could be brighter. Chrome Galvanize paint can be used to restore the reflective surfaces inside the housings, resulting in brighter lights like the marker/blinker shown.
Proper Tools To Get Covered
Reproduction seat covers are available for many Pontiacs from various restoration sources such as Legendary Auto Interiors (www.legendaryautointeriors.com). Removing the old cover and installing the new isn't a difficult job as long as you have patience and the right tools. Eastwood sells a Pro Upholstery Kit that includes stretching pliers to stretch the seat cover over the pads, straight hog-ring pliers, bent hog-ring pliers, and two packs of 100 hog rings to make the project easier.
Keep the new seat cover in a warm place prior to installing it so it will be more pliable and stretchable. Unbolt the seatback from the bottom, remove the hard shell from the seatback, the headrest (if so equipped), any trim pieces, and the tracks from the seat bottom. Cut off the old hog rings, peel the old covers off by pulling them back, turning them inside out as they come off. Check to make sure the foam under the old covers is still useable, and replace it if necessary; then transfer the hog-ring hold-down rods from the old covers to the new ones.
Install the new seat covers by setting the rod in the cover into the groove in the foam and hog ring to the rod in the foam, using the pliers; then stretch the cover over the foam, lining up the seams with edges of the foam and hog-ring the other sides. Try to minimize the wrinkles. Minor ones can be smoothed with a blow dryer or steamer, but if you have a lot, cut off the hog rings, adjust the cover, and repeat the process.
Products Used In This ArticlePart No.Source/ItemPrices16038Eastwood Rust Dissolver$39.99 per gallon20558ZPEastwood Fast-Etch Gel$36.99 per gallon10041ZEastwood PRE Painting Prep $11.99 per can*16014ZEastwood Self-Etch Primer$14.99 per can*10032ZEastwood Spray Gray$11.99 per can*10036ZEastwood Detail Gray$11.99 per can*10022ZEastwood Silver Cad $11.99 per can*10109ZEastwood Aluma Blast$11.99 per can*10024ZEastwood Underhood Black$11.99 per can*10199Eastwood Spray-Gun Trigger Handle$5.99 two-pack1181Pertronix Ignitor$86.28708102Pertronix 7mm Flame-Thrower Stock-Look Wires$48.6840011Pertronix 40,000V Flame Thrower Coil$31.8713175Eastwood Autosol $59.99 per can52196ZEastwood Master Steering Wheel Resto Kit$49.9952033Eastwood Pro Upholstery Kit$99.9911171Eastwood Calyx Manifold Dressing$19.9910179ZEastwood Bronze Carb Renew$11.99 per can*25292ZEastwood Chrome Galvanize paint$12.99 per can* 12859Eastwood Hot Coat Elite Kit$189.99 52286Eastwood Clear Plastic Resto Kit$44.99*50-cent discount per can when purchasing three or more