
The smallest part can often be the source of biggest gain regarding Pontiac power. Evidence can be found in the ring-and-pinion gear swap. Pound for pound, dollar for dollar, this change can provide you with more usable performance than many more expensive and complex modifications.
When considering a rear-gear swap, start with an overall view of the intended use for your Pontiac. For instance, your daily driver is not going to make you happy if you stuff in a set of 4.10:1 gears and hit the freeway. You're also going to be disheartened if all you do is drag race, and your car leaves the line like it's mired in molasses because of 2.56:1 cogs that were intended for highway and economy use.
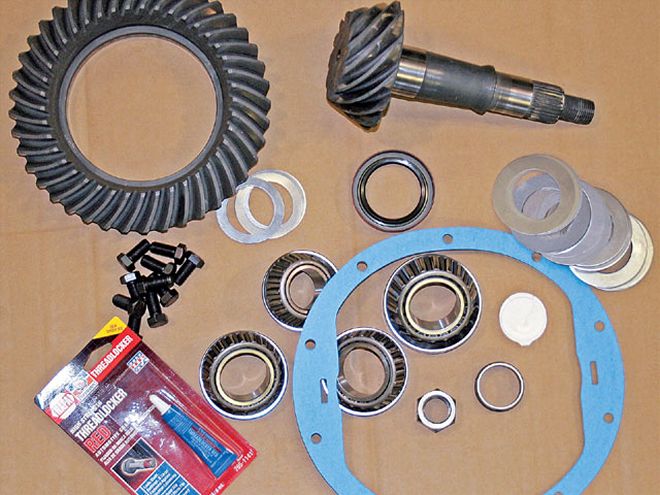 The parts for our swap included the GM 10/342 ring-and-pinion gear set from Precision Gear and the Ratech RAT-301K installation kit. After examining the Ratech kit, we opted to buy a Fel-Pro RDS-55028-1 differential cover gasket rather than use the paper-style one supplied.
Selecting our gear set was done via a mathematical formula and tempered with a good dose of common sense. The formula for the rear-gear ratio is (rpm times tire diameter)/(mph times 336) equals the rear-gear ratio. For example, (3,000 rpm times 26 inches)/(65 mph times 336) equals 3.57 for the rear-gear ratio. This calculation allowed us to select an rpm range we thought we could live with on the highway and still run the tallest gear that was practical for a street/strip setup.
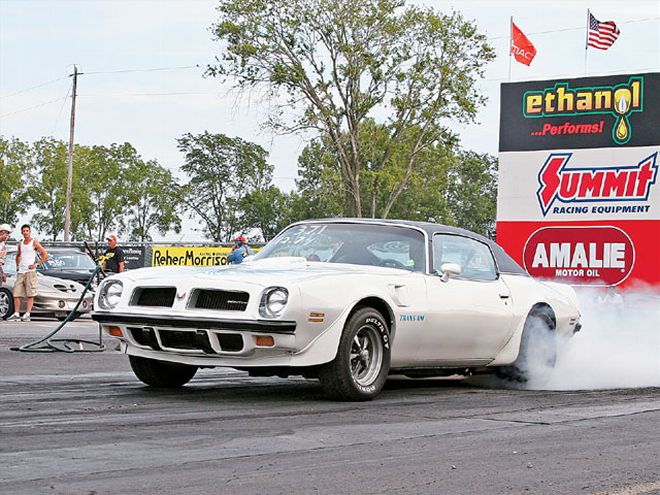
The subject of our gear change is a '74 462ci Trans Am. It was originally equipped with air conditioning, which mandated a 3.08 gear set from the factory. The closest applicable gear offering for the 8.5-inch, 10-bolt rear is the 3.42 ratio.
After some discussion with Bryan Blocker of Blocker's Performance and Restoration in Vilonia, Arkansas, we decided to replace the carrier bearings and pinion bearings while doing the swap. His reasoning was that the OEM bearings had more than 30 years of wear. Even if they passed a visual inspection, it would be foolish to disassemble the rearend without replacing the bearings. The axle bearings had been replaced a few months before.
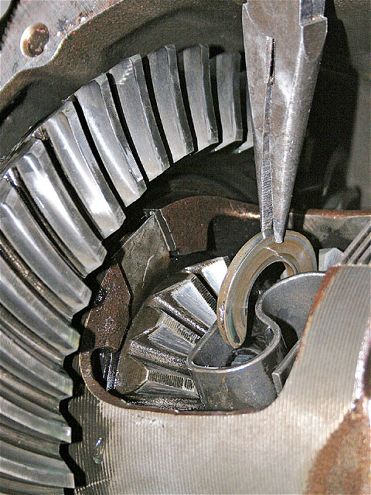
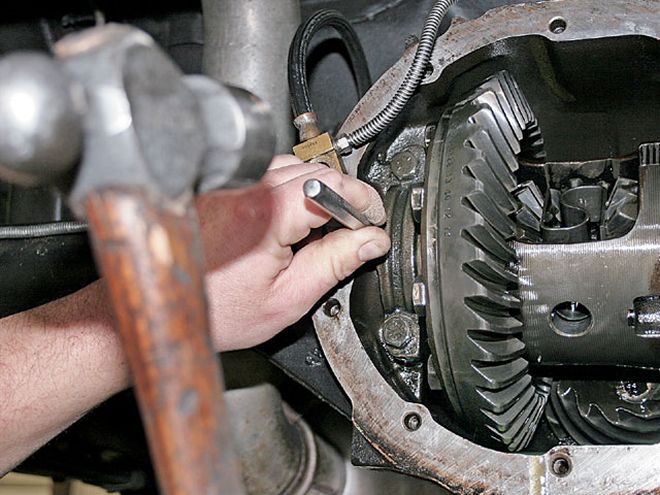
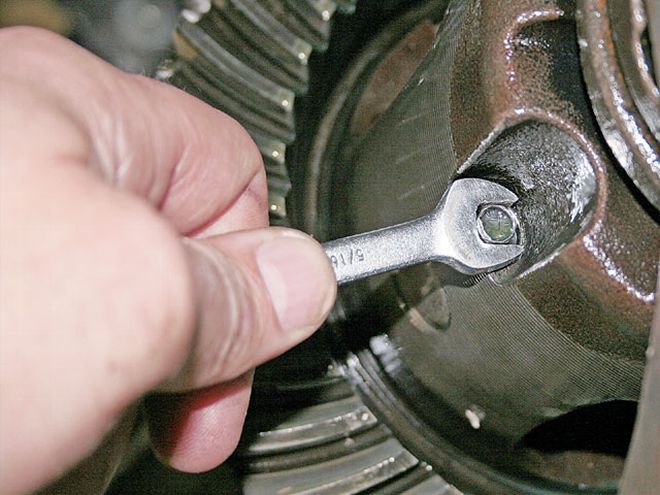 Bryan Blocker began the disassembly by unbolting the rear stabilizer bar from the down links and swinging it out of the way. Then we unbolted the differential cover and drained the case. While removing the 51/416 pinion-shaft retaining bolt, we used caution since it's easy to round off the head if it's lodged in place.
A call was made to the Precision Gear tech line, and the company agreed that our math was correct. The tech also recommended we stick with a regular gear set since the intended use was primarily street. Their Ultra-Lite series of racing gears would have been overkill in this application. We ordered the 3.42:1 gear for a GM 10-bolt differential (PN GM 10/342, $155.95)
A second call to Summit Racing netted a Ratech (PN RAT-310K, $89.99) installation kit that included all the needed bearings, shims, marking compound, seals, and gaskets. A local parts store provided the requisite gear oil and limited-slip additive for our upgraded rearend.
With the gear set selected, we wondered what kind of performance gain we might expect from changing to the deeper gears. Data for the T/A's performance in the eighth-mile was available. It had run a previous best of 8.13 at Centerville Dragway in Russelville, Arkansas. Would we see any additional performance by simply swapping gears?
Follow along as we perform the install in a day's time and return to the track for follow-up testing.
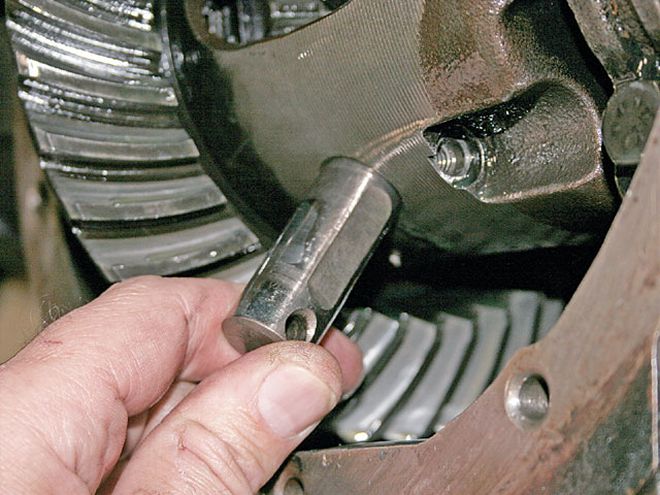 We positioned the differential for access to remove the bolt, pinion shaft, and C-clips without disturbing the unit. If we were to rotate the differential without the pinion shaft in place, the spider gears could walk and make reassembling the unit a nightmare. With the bolt removed, our pinion shaft slid out easily. If yours doesn't, a few gentle taps with a hammer should dislodge it.
Conclusion
We removed the carrier once again to facilitate the final assembly of the rearend. To install the crush collar, Bryan had to-of course-take out the pinion. He then reinstalled it with the outer pinion bearing, pinion seal, yoke, washer, and nut, torqueing the latter to 300-400 ft-lb in order to place the proper preload on the pinion bearings. Lastly, Bryan checked the backlash and contact pattern once again before bolting on the cover with its gasket and refilling the unit with fluid and limited-slip additive.
It should be noted that any new gear set requires a break-in procedure. Consult your installation instructions for the exact methods recommended by the manufacturer of your gears. Most require the car to be driven 15-20 miles, and then allowing the new gears to cool completely before driving it again. Many also caution against towing or spirited use during the first 500 miles. Improper break-in can lead to overheated and damaged gears.
See the "Drag Testing" sidebar to learn how the small detail of swapping 3.42s in place of 3.08s paid dividends on the strip after proper break-in.
 Then we pushed each axle inward with the hope the C-clips would simply fall into the differential case. They didn't, so we used long-nosed pliers (a magnet will work, too) to remove them.
Reading Patterns And Gear TermsToe: Inner end of the gearHeel: Outer end of the gearPitch Line: Halfway across the toothRoot: Bottom of the toothFace: Area above the pitch lineFlank: Area below the pitch lineConvex: Drive side of toothConcave: Coast side of tooth
The pattern should be in the middle of the tooth (pitch line), splitting the face and the flank. In theory, it should be even on the drive side and coast side, and even in width and diameter across the tooth with feathered edges.
Pinion depth affects the pattern. While it will change toe and heel a bit, it mostly moves the pattern up or down relative to the pitch line. Increasing pinion depth moves the pattern up toward the face, while decreasing it moves it down toward the flank. The coast and drive sides move opposite each other with changes in pinion depth.
Backlash affects the pattern. A decrease moves the pattern from heel toward toe; an increase does just the opposite. The drive and coast sides move evenly in both cases. A pattern toward the heel is quieter than one toward the toe.-Tom DeMauro
 We used a punch to mark both carrier-bearing caps for side and alignment so they could be returned to their original position on reassembly. We made one punch mark on the top-left bearing cap and two punch marks on the bottom-right cap.
Transmission Speedo Gear
Changing the rear-gear ratio requires a recalibration of the speedometer. This can involve changing the speedometer drive gear, driven gear, or both.
In this case, we determined that our speedometer was turning 5-mph faster than it should be because 50 mph on our speedometer showed an actual speed of 55 when tested. If we divide 55 by 50, we get 1.1 for our correction factor. That means the driven gear in the transmission is moving 0.1 faster than it should for our gear set. This can be corrected by adding teeth to the driven gear or by subtracting teeth from the drive gear.
There are two types of carriers for the driven gear. The first will hold driven gears that have 34-39 teeth, while the other can run driven gears with 40-45 teeth. The carrier in this Turbo 400 was for 34-39 teeth.
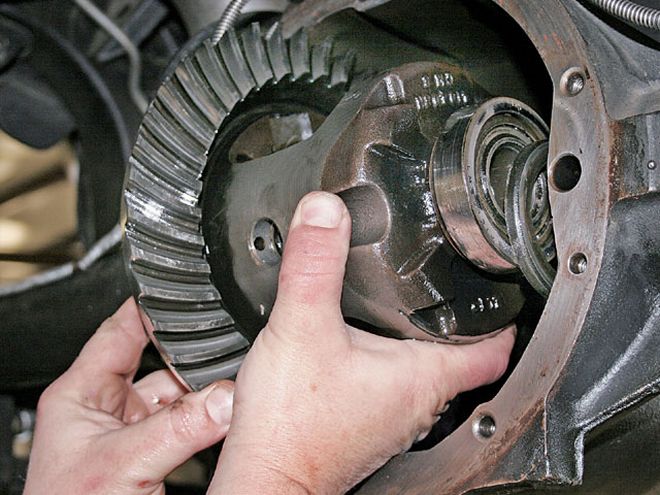 Next, we pulled the entire differential from the housing. This is where another set of hands is helpful as it can be pretty tight and quite heavy. We kept the left and right shim packs away from one another to measure the total thickness of each to ease reinstallation. If you intend to reuse your carrier bearings and races, note which side they came from, and be sure to return them to their respective sides upon reassembly.
Driven gears are color-coded to help determine the number of teeth they have. These colors can fade and be hard to identify. We confirmed our tooth count by marking a tooth with an indelible marker and counting the teeth. We did this more than once to be certain of the count. The driven gear that was matched to the original 3.08 ring-and-pinion gear set had 36 teeth, according to our factory service manual.
Our previously calculated correction factor of 1.1 can be used to determine how many teeth are needed to correct the speedometer. The existing driven-gear tooth count can be multiplied by the correction factor (36 times 1.1 equals 39.6).
We have two choices based on the results-either round up or down. Since our existing driven-gear carrier is capable of holding the 39-tooth gear but not the 40-tooth gear, we elected to go that route to avoid disassembly of the transmission to change the driven gear. If our speedometer is off, it will be minimal. The proper 39-tooth driven gear was purchased at a local GM dealer, and the speedometer correction was complete. TCI has a great chart on driven gears, colors, applications, and more on its Web site, www.tciauto.com.
 We checked for any obvious cracks or wear marks, and Bryan examined the bottom of the case for any debris. After passing the visual inspection, we cleaned up the housing, washing out the case and wiping it down with a clean rag.
Drag Testing
As with any track testing, it's virtually impossible to duplicate every factor. The biggest variable can often be the weather. For this reason, we attempted to return to Centerville Dragway with similar weather conditions.
The '74 Trans Am test car features a 462 engine, unported SD heads milled for 9.2:1 compression, Crower 247/252-degrees duration at 0.50 with 0.505/0.517-inch lift., a port-matched Performer RPM intake, a Speed Demon 850 carb, Hooker Super Comp 2-inch primary headers with 3.5-inch collectors, a 3-inch Torque Tech exhaust system, a Dr. Gas X-crossover, and Dynomax Super Turbo mufflers. The tires are M/T 275/60-15 drag radials pumped up to 17 psi on widened 15x8 Rally IIs.
Our initial runs were made on a crisp spring morning with temperatures in the upper 60s to lower 70s. The humidity was virtually nonexistent. In short, it was one of those perfect days at the track. The result was new personal bests for the T/A with the old 3.08 gears. Our follow-up testing was on a day that was an average of 10 degrees cooler but with similar humidity levels.
 Bryan employed an impact gun to remove the pinion nut. We used a rag wrapped around the pinion gear to keep it from freewheeling while he applied the power to break it loose and remove the old cog.
The first number to notice when comparing our runs from before and after the gear swap is the improved 60-foot time, which dropped an average of 0.14 seconds. This tells us the deeper gear ratio is getting the heavy car off the line quicker. That improvement was amplified at the 330-foot mark with an average drop of 0.19 in elapsed time. The averages kept getting better as the e.t.'s dropped by 0.23 seconds at the end of the eighth-mile track with a mile-per-hour increase of 1.49.
RESULTS 3.08:1 Gears 3.42:1 Gears Run 1 Run 2 Run 3 AVG Run 1 Run 2 Run 3 AVG 60-ft 1.92 1.95 1.96 1.94 1.83 1.80 1.79 1.80 330-ft 5.31 5.33 5.37 5.33 5.17 5.14 5.11 5.14 11/48-mile 8.13 8.14 8.20 8.15 7.96 7.93 7.87 7.92 MPH 87.78 87.75 87.50 87.67 88.41 88.64 90.45 89.16