
E-Mail: [email protected] * Mail: Hot Rod Pit Stop, 6420 Wilshire Blvd., Los Angeles, Ca 90048 * Fax: 323/782-2223 * Message Board: Hotrod.Com
Have a pesky driveability problem? Want some engine-combo advice? Planning on a drivetrain swap? Can't find a particular part you need? This is where I answer your tech questions-or as many of them within the magazine as space permits. Don't forget that you can also send digital photos of the car, engine, or part that you're having trouble with, and if it's properly exposed, in focus, and at least 300 dpi and 4x4 in size, we might publish them in the magazine. When e-mailing, don't forget to include your real first and last name (not screen name), and hometown or military unit, base, or ship in the message.-Marlan Davis
Hei Hookup
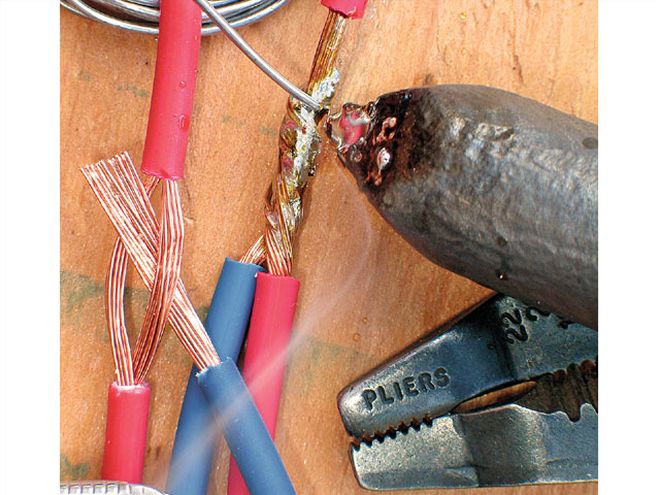
I have a '68 Oldsmobile Cutlass with the original Rocket 350. I installed an HEI distributor in place of the original points. To where should I hook the power-feed wire from my distributor? I previously ran it to the fuse box inside the car and connected it to the accessory jack. I was wondering if it would be OK to run it like this, or would I have to run the wire to my starter?Bryan HowardWaurika, OK
To operate at full strength, GM's HEI requires power delivery at full electrical system voltage at all times, both during cranking and when running down the highway. You're on the right track that the power-up wire for the existing points-type ignition shouldn't be used with an HEI because it contains a resistor wire or ballast resistor that reduces voltage under 14-volt "Run" conditions to avoid burning out the points.
Because battery voltage drops under heavy cranking loads, on the points-type system, a wire from the starter solenoid's R terminal sends battery voltage directly to the coil when the starter solenoid is engaged through the S terminal. On your car the wire that feeds through the neutral safety switch to the starter solenoid S terminal is purple as it comes off the ignition switch's solenoid terminal. The S and R bypass circuit is active when cranking only and won't operate the distributor in the Run position.
However, on most GM cars (including your Olds) the ignition switch's ignition terminal supplies power both in the switch's Crank or Start position as well as in its Run position. Therefore, bypassing the stock built-in resistor wire by splicing and soldering in a new 12-gauge wire from the HEI distributor's BAT terminal directly to the pink wire connected to the ignition switch's ignition terminal is all that's needed to ensure the HEI gets full power in both Crank and Run modes. Do not entirely remove the original pink wire coming off the switch, or other critical circuits will go missing in action. Due to the age of the original harness, this procedure is generally easier than removing the original firewall bulkhead connector to install a new wire in place of the factory resistor wire. Alternatively, getting power from a fuse-box jack marked unfused ignition (if present) is also acceptable. With any of these schemes, the bypass wire between the solenoid R terminal and ignition coil is no longer needed.
Note that an unfused ignition fuse-box tap is not the same as an accessory tap. The ignition switch's accessory terminal (and any corresponding fuse-box accessory jack) is hot only when the switch is in the Accessory position or the Run position. It is dead in Crank. With the HEI's power-feed connected to the fuse box's accessory jack, the distributor won't receive power under Crank unless the bypass wire from the starter R terminal is also retained. However, using the accessory circuit to supply HEI power in Run is not really a good idea as the accessory circuit supplies many different electrical devices, and under sustained Run conditions with all these accessories energized there can be excessive voltage drop to the distributor.
Tempest Four
I have in my possession an early '60s Pontiac 194.5ci Tempest four-cylinder. As you know, these engines were originally mated to rear-mounted transaxles. I was hoping to find a way of mating it to a standard rear-wheel-drive transmission, Turbohydro, or four-speed.Bret PetersonAustin, TX
The Tempest four-cylinder is essentially half a 389 V-8, so many V-8 parts bolt on (like the cylinder heads, for example). But as a cut-out from its big V-8 brother, the inline-four is missing two of the V-8's six rear block-face trans or bellhousing mounting bolts. Worse yet, as an early-'60s vintage Pontiac design, there are no provisions for a block-mounted starter. Instead, the starter bolts to the trans bellhousing or automatic trans case-and (you guessed it) the cut-off missing area is where the early V-8 starter would mount when using conventional V-8 transmissions. D'oh!
Adapter plates that mate late-model GM automatics to the early Pontiac V-8 are available from Wilcap and Nunzi's Automotive. The Wilcap adapter includes mounting provisions for a '66-'99 small-block Mopar gear-reduction two-bolt starter. Nunzi's kit uses the original GM starter that bolts to the trans or bellhousing.
With a modern automatic trans, Wilcap presently appears to be the better solution, because owner Patrick McGuire says his CNC-machining capability permits easy modification of its standard Pontiac V-8 adapter-plate configuration to accommodate the four's different bolt-pattern-if you can send Wilcap a pattern to work from (for example, an original four-cylinder block, the old transaxle the block bolted to, or quality blueprints).
For a manual trans, you would need to find a '61 to early '64 V-8 bellhousing with starter mounting provisions, then fabricate an additional adapter to bridge the "missing area" and support the bellhousing-mounted starter. Nunzi's can supply dimensions for the needed plate, but it's on you to make it or have it made.
Whether going manual or automatic, additional parts like late-model V-8 flywheels or flexplates, and in some cases a crank hub adapter, may also be needed.Hey, if it were easy it wouldn't be hot rodding.
Washer/Valvespring Interference
When using large-diameter valvesprings on small-block Chevy heads (such as AFR and Canfield), the center head bolt's hardened washer interferes with the adjacent springs, requiring mild grinding to provide clearance. But the washer rotates during use, creating the interference again. How can this be prevented?Dan GallmanTampa Bay, FL
Cynics would say if the fastener is properly tightened, the washer shouldn't rotate (something is flexing where it shouldn't be). That said, there are a number of quick fixes, depending on the severity of interference (and judging from your photo, it's pretty severe). First, there are reduced-diameter nuts and washers. ARP recommends using a 12-point head-bolt or stud-and-nut with a smaller washer. For example, its normal 71/416-inch-head-bolt hardened washer has a 131/416-inch od, but a 31/44-inch washer is also available. Alternatively, the side of the washer that sits against the head can be peened or broached with a cross-pattern and installed dry to resist rotation (but be sure to put lubricant on the washer's top side that bares against the bolt head or nut). Ultimately, you can countersink the washer register by at least the thickness of the washer so the washer sits below the spring bottom. If using a head bolt be sure you don't run out of thread engagement into the block and that the bolt doesn't bottom out. Most small-block Chevy OE blocks have head-bolt holes that open into the water jacket so the latter probably won't be a problem, but you can always shorten the fastener as necessary.
Note that on a tension application into a blind hole, the first thread or lead-in to the first thread should not be even with the top of the threaded female hole, but instead should begin above the threaded surface (unless the shank pare-down is less than the thread pitch's minor diameter). In no event should you home-die-cut threads on a hardened chrome-moly fastener; instead the threads must be rolled after heat-treat. If the threads do not extend sufficiently high on the now-lowered bolt or if the nut bottoms out on a head-stud, new fasteners of the appropriate length can be special-ordered from ARP.
Post-Muffler Exhaust Pipe ConfigurationI am putting a larger-diameter exhaust with an aftermarket muffler on my Ranger pickup. In the interest of eliminating backpressure and clearance issues, and because of my overall cheapness, I would like to use a turndown after the muffler. However, when discussing this, the answers typically get divided into two camps. One side says less backpressure is always good and cites reasons I have already mentioned to justify using a turndown. The other side says that turndowns are too loud and cause problems with scavenging.
I'm not that worried about the noise (if it does prove to be uncomfortable, I can always admit my mistake and put on a regular tailpipe), but the scavenging part is bothering me. The claim seems to be that it is necessary to have 10-12 inches of pipe after a muffler for proper scavenging. I've never heard this before and have always thought that less backpressure is best.
I also wonder how this could be as most FWD cars, many high-performance RWD cars (including Corvettes and Porsches), and even off-road vehicles like Jeeps and other 4x4s come from the factory with the tailpipe or turndown directly after the muffler(s).Just to settle my mind: Is there a definitive answer to this?Andrew MathiasTraverse City, MI
Uh, would you believe ... it depends? Namely, on the muffler style in use. Basically, there are three common muffler designs: straight-through, three-pass, and chambered. Most factory mufflers are the three-pass (U-turn) style, while most aftermarket designs are either straight-through (like Magnaflow) or chambered (like Flowmaster).
Three-pass and straight-through mufflers are relatively insensitive to exhaust-pipe length and (assuming no neck-down through the muffler) can basically be considered an extension of the header collector and/or exhaust pipe. They don't really care how much pipe is attached after the muffler.
It's a different story on a chamber-type muffler, which uses tuning baffles and Helmholtz resonating chambers. Traditionally the Helmholtz chamber is located at the front of the muffler with the baffles toward its rear. With this configuration, there needs to be at least 10 inches of exhaust pipe after the muffler to prevent reversion. Chamber mufflers have discrete pulses, and without the extra tailpipe, atmosphere tends to backflow into the muffler and impede flow. However, recently some Flowmaster mufflers have appeared with the resonating chamber in the rear and the baffled power chamber up front. They are designed for compatibility with import tuners and other late-model domestics with restricted mounting envelopes lacking room for long pipe lengths after the muffler. Thanks to the new reversed-chamber configuration, there is effectively at least 8 inches of straight-tubing flow-path within the muffler itself before the exhaust gas vents to atmosphere, which eliminates the need for long external tailpipe lengths after the muffler.
One other thing to remember about pipes, tubes, and ducts: In a perfect world, there should be a length of straight pipe equal to three times the pipe's diameter preceding any turn in the pipe or anyplace flow needs to merge or be uniform (for example, where individual header primary tubes merge to form a collector, exhaust pipes enter the muffler, or the intake duct mates with the MAF sensor).
Retrofit Hydraulic-Roller Cam Durability
I have been told by some professional engine builders that a hydraulic-roller-cam installation in a high-output street motor not originally designed for such a thing is not a good idea because of the relatively high valvespring pressures required to control valvetrain float at higher engine speeds. Supposedly, the 300-400-psi valvespring seat pressures can, over time, pull out rocker-arm studs and the valvesprings lose their tension more quickly than the lower-pressure springs used in flat-tappet cams. Other professional engine builders I have spoken to disagree with this supposition. What's your opinion?Doug DiehlNewburg, OR
The day of the sledgehammer approach to valvetrain components is past. Inevitably, the brute-force approach becomes counterproductive and you end up chasing your tail, resulting in bent parts, deflection, and lifter collapse. Nowadays the trend is to engineer the entire cam, lifter, pushrod, rocker arm, valvespring, and even the engine valves as an integrated package. Instead of automatically making everything heavier, engineers try to both decrease overall valvetrain mass and refine cam-lobe profiles to achieve more stable operation. As Comp Cams' Scooter Brothers put it, "Look at valve motion and its stability over the entire operating range. Determine what the valve is doing and work backward from there."
For example, Comp has developed new lightweight beehive valvesprings and in many instances recommends titanium retainers for street cars-not just race cars. (Lightweight engine valves help too, if you can afford 'em!) There is one exception to "the lighter is always better" rule: Thicker pushrods on engines with heavy valvetrains (like a Chevy Rat motor) improve stability, even as the valvespring and retainers get lighter.
The trend toward integrated cam and valvetrain combinations as the key for achieving maximum stability and longevity also calls into question the heretofore common practices of purchasing aftermarket heads preassembled with generic one-size-fits-all valvesprings as well as mixing cam and valvetrain components from different manufacturers.
As for pressed-in rocker-arm studs "pulling out," this has long been a concern on heads so equipped when upgrading to performance cams (regardless of lifter type). Small-block Chevy press-in-stud heads in good condition should be able to take about 130 pounds of seat pressure and 300-325 pounds of open loads, but unfortunately most are not in good condition. The standard baking and pickling head-reconditioning process actually ends up loosening the press-fit (most reconditioned heads have gone through this torture sometime in the past). These days, just about everyone moves up to screw-in studs.
If you don't have the latest lightweight parts, several things can be done to enhance longevity. First, a quality full-roller rocker arm is more stable and easier on the valvesprings than conventional stamped rockers. Second, backing off the hydraulic-lifter lash adjustment (lifter preload) to just 11/44 turn past zero lash (instead of the usual 11/42 to 31/44 turn) counteracts any lifter-collapse tendencies but may result in a slightly noisy valvetrain. Lifters that retain the internal plunger via True-Arc retainers are more suited to this reduced-preload procedure than econo lifters that use "paper-clip-style" retainers.
Where Do I Get...
...a 350 small-block Chevy motor mount kit and 700-R4 trans crossmember for the '51 Chevy 3100-series truck?Tony SerraDavis, CA
American Classic Truck Parts (Aubrey, TX; 940/365-9786; www.americanclassic.com) sells the small-block frame adapters (PN ME831), mount pads (PN ME832), a TH350/400/700-R4 trans crossmember (PN ME833), and a trans mount (PN TM-9).
...a flywheel to adapt an old-style 11-inch clutch and pressure plate to a new-style one-piece oil-seal crankshaft for a 305 Chevy with a 3-inch bolt-hole pattern?Rich MazackGilberton, PA
GM dealers offer the flywheel you need under PN 10105832.
a tester that sticks to the front windshield and logs e.t. and hp?Mike L. SmithTulsa, OK
You want the G-Tech/Pro from Tesla Electronics (Santa Monica, CA; 310/452-0030; www.gtechpro.com).
...bulletproof IRS parts for a '65 Corvette Stingray convertible with a 327/365hp engine that won't break under high-stress launches?Roberto MartinezBayamon, PR
Tom's Differentials (Paramount, CA; 562/634-8431 or 562/634-8452; www.tomsdifferentials.com) has everything needed to keep the Vette IRS alive.
...a California-legal computer chip to upgrade the performance of my '94 Chevrolet C1500 pickup?John FerreiraChatsworth, CA
Contact Hypertech Inc. (Bartlett, TN; 901/382-8888; www.hypertech-inc.com).
...the kit mentioned on Hotrod TV that makes the low beams stay on with the high beams on Chevy trucks?Charles BarnhillVia e-mail
The company is Painless Performance Products (Fort Worth, TX; 817/244-6898; www.painlessperformance.com).
information on putting GM 12-bolt gears into a Corvette IRS carrier?Tom JonesVia e-mail
New methods to do this have emerged, and we will have a complete story in the next month or two.