
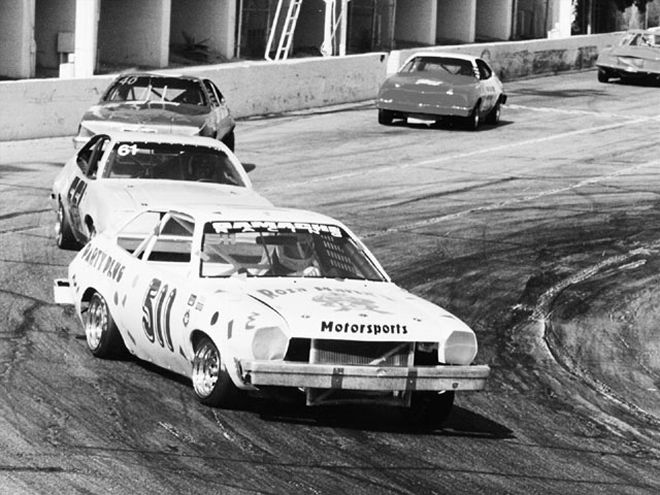
 Lou Gamache motors his Pinto around Orange Show Speedway in San Bernardino, California.
Editor's Note: Steve Smith has recently published a new book, Pony Stock/Mini Stock Racing Technology, which covers all aspects of preparing a Pony Stock, including a step-by-step buildup of a Ford 2300 engine.
We've gleaned some good tech tips for you from Smith's book, which you will definitely find interesting if you race in this division or are preparing to race a Pony Stock. All of the following information is from his book, but it represents just a fraction of the wealth of information found in it. If you are a Pony-Stock racer or race with a Ford 2300 engine, you need this book.
The world of Pony-Stock racing is still alive and well, even though the venerable Pinto is nearly three decades old. At almost every short track across the nation, the Pinto/Pony Stock is used as a beginner's class, making this one of the most popular racing divisions ever.
Choosing Which Pinto To Build As A RacerThe Pinto was manufactured from 1970 to 1980. The early-model Pinto was made from 1970 through 1973; the later model was made from 1974 through 1980. Although the body appearance is virtually the same, there are many differences between the early- and late-model cars. The early-model is several hundred pounds lighter. The sheetmetal is thinner, and there are much fewer sheetmetal reinforcements than in the later models. And, the car got heavier as the years progressed.
The front suspension of the two models is dimensionally different as well. The early and late spindles vary in height slightly, and the upper and lower A-arms differ a bit in length between the two models. The vertical spacing between the upper and lower inner and outer pivot points of the front suspension is slightly different. In 1974, the front brakes were changed from drum to disc brakes. And the steering rack in the early cars mounts to the chassis in a different way than in the later-model Pintos.
When you purchase a car to transform into a Pinto race car, the first stop should be a body shop. Put the chassis on a frame machine to be sure it is not bent. One racer we interviewed purchased a chassis that had been hit at the right front corner. The right front suspension mounting points were pushed back 51/48 inch during a hit on the front lower crossmember. When he built his race car, he was unaware of this problem. The car pushed very badly and burned off the right front tires.
To avoid this type of difficulty, take the car to a body shop (and a body shop could be one of your sponsors!). Ask the technicians to locate all of the reference points on the chassis and make corrections to anything that is bent. That will save you a lot of chassis adjustment guesses and handling problems on the track.
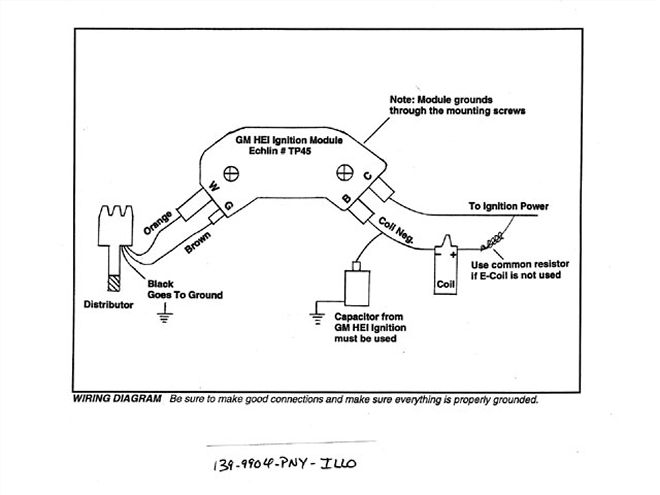
 Here's a stock Pinto 2.3 electronic ignition modified for racing with a General Motor HEI module adapted to the magnetic pickup Ford distributor.
Modifying The Pinto 2.3 Electronic Ignition For Racing
The stock Pinto 2.3 electronic ignition can be modified quite inexpensively to work for racing. A General Motors HEI module can be adapted to the magnetic pickup Ford distributor. Use areplacement ignition module such as Echlin PN TP45. The ignition module mounts to the distributor base where the vacuum advance goes. When this ignition module is installed, be sure to use the grease that comes with it because it is designed to dissipate the heat generated by the module. When using this system, install the Ford E-Coil, which is available from Echlin, PN IC24. Echlin replacement parts are available at local auto parts stores. If you use a standard coil instead of the E-Coil with the HEI module, use the stock capacitor mounted to the battery side of the module. If you use the E-Coil, this is not required.
Do not use the late-model 2.3 Mustang electronic distributor for racing modification. You cannot control the advance in this distributor. It has no vacuum or centrifugal advance. These functions are controlled by a computer chip.
Installing The GM HEI Module
To mount the GM HEI module on the side of the distributor, first remove the vacuum advance. File the external surface flat, and drill and tap for machine screws. With the shaft installed, face the rotor to a terminal on the distributor cap and hold the distributor in place. Then rotate the advance plate so the trailing edge of the star wheel lines up with the magnetic pickup.
The ignition signal is generated as the reluctor passes and leaves the pickup. The advance plate must be aligned so that the trailing edge of the reluctor lines up with the magnetic pickup while the rotor is pointing toward a terminal on the distributor cap. Spot-weld the advance plate in this position and the distributor will be phased properly. You can check the arc marks after it has been run to see where the rotor is actually firing.
The capacitor from the GM HEI ignition must be used (see wiring diagram). The system will not work without this. The capacitor is available with a modular plug or a bullet-type connector (Echlin PN RR170). The shell of the connector goes to ground. Connect the bullet terminal to the negative coil wire. The "W" terminal on the module is connected to the distributor brown lead, and the orange wire goes to the "G" terminal.
The ignition module can be remote-mounted up to 4 feet away from the distributor. To do that, mount the ignition module to a finned, aluminum heat sink (available from an electronics supply store) and run the orange and brown distributor leads through a metallic shielding to prevent radio static interference. Make sure the module housing is grounded to the engine and always use the special grease under the module so it radiates heat properly.
Diagnosing Electronic Ignition Problems
If you have carefully followed all the steps and you still have a problem getting a spark, the following should help you diagnose the problem:
1.Crank the engine and make sure the distributor turns. Check for a spark from the coil secondary wire to the ground. If you have a spark from the coil, the problem is with the rotor phasing (that is, the rotor doesn't point at a terminal inside the cap when it fires) or the spark is going to ground under the cap or rotor.
2.Check the distributor across the orange/brown leads using a digital volt/ohm meter set on 2 volts AC (that's right, AC!). At cranking speed it should make at least 0.6 to 0.8 volt AC minimum. It will probably be more in the area of 1.2 volts AC.
3.Check the coil. With the ignition switch on, both coil leads should have electrical current. The way the coil works is the module momentarily grounds the negative side of the coil, causing it to charge. The coil fires when the module releases the ground, just like good old-fashioned points. To simulate this, use a 12-volt test lamp and momentarily ground the negative coil terminal through the lamp when the ignition switch is on. You should observe a small spark from the coil secondary wire to ground each time you disconnect or release the circuit.
4. If the distributor and coil are fine, the problem could be wiring, a bad ignition module, a bad capacitor, or something not grounded (like the module base).
Cylinder Boring
Sonic testing should be used on the Ford 2300 block to check the thickness of the cylinder bores, especially if they will be overbored. Castings do not always have a uniform thickness. Sonic testing will show castings that are not suitable for racing use before you put a lot of time and money into block machining. Most good engine machine shops can provide this service for you for a reasonable fee.
A used block must always be overbored .030-inch to clean up the cylinder walls and get the bores perfectly round. It is safe to overbore the 2300 engine .040-inch, but it is best to start with .030-inch. After a year of racing the engine, do the additional .010-inch overbore to freshen it up. It is not advisable to overbore much beyond .040 inch because the cylinder walls are quite thin. When too much material is taken away they will flex, which adversely affects ring sealing.
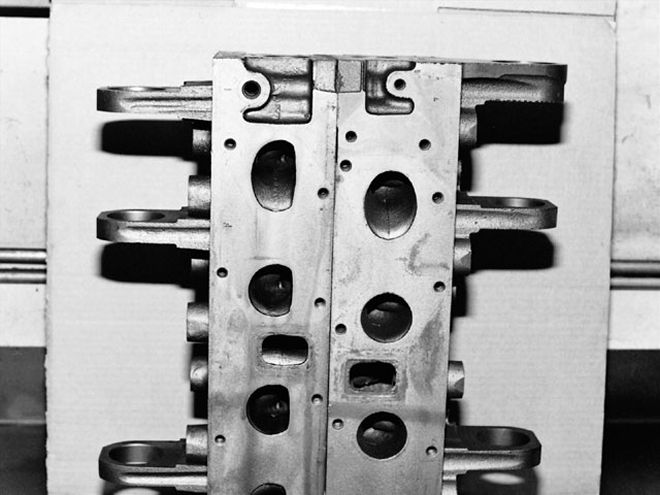 The cylinder head on the left has the D-port intake ports, while the head on the right is the oval-port head.
Prepping The Stock Head
The initial steps of head preparation are hot tanking to remove all sludge and deposits and Magnafluxing to check for cracks. These engines use stock cylinder heads from engines with thousands of miles on them. That means you have to be very careful when you check for cracks. With the 2300 heads, Magnafluxing is a critical step. The heads, especially in the valve seat area and between the intake and exhaust seats, may have developed internal cracks that are not visible to the eye. But Magnafluxing will show these flaws. Don't waste your time and money by skipping this step.
Stock Cylinder Head Choice
Several different heads have been used on the 2.3 engine over the years. They are distinguished by their intake port shapes and combustion chamber shape.
 The head on the left features the open combustion chamber shape, while the head on the right has the closed combustion chamber shape.
The open combustion chamber is shaped like a "D." The closed combustion chamber is heart-shaped.
The D-shaped heads flow the best of all the different 2.3 heads, either in stock form or ported and polished. The D-port open-chamber head is best for totally stock classes in which no head modifications are allowed.
The oval-port heads are the easiest to locate and the least expensive. They will make good power in a modified form (with at least some porting and polishing).
The round-port Ranger heads flow moderately well, but it is difficult to find a suitable intake manifold that flows correctly for them.
Exhaust Manifold Tip
When your rules dictate that a stock type of exhaust manifold be used, consider using the exhaust manifold from a late-model Ranger, Ford PN F57Z-9430-C. It is almost like a fabricated header system, yet it is a stock factory part.
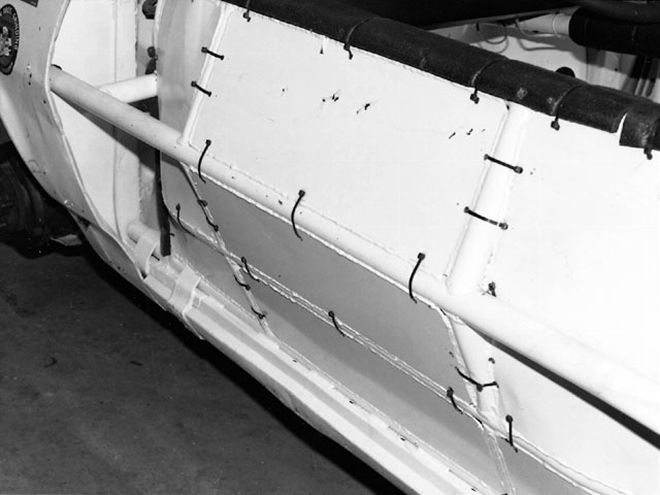 Use 11/48-inch-thick steel plating welded between the door bar tubes on the left side. This will prevent penetration into the driver's compartment.
Oil Pressure
The ideal oil pressure for a 2.3 racing engine is 10 psi for every 1,000 rpm. So, for example, if the engine is turning at 7,000 rpm, the oil pressure should be 70 psi at this point. The maximum oil pressure for this engine is 80 psi at 7,000 rpm at racing temperature, with the throttle wide open. Minimum oil pressure at 7,000 rpm is 50 psi. A major problem with the 2.3 engine is that the center main bearing will knock out if there is not sufficient oil pressure.
While the proper range of oil pressure is important to ensure engine longevity, excessive oil pressure creates problems. It wastes power, raises the oil temperature, and puts extra stress on the oil-pump drive components.
Driver Protection
Use 11/48-inch-thick steel-plating welded between the door bar tubes on the left side of the rollcage. This helps prevent cars and other objects from penetrating into the driver's compartment. It also helps to move more static weight to the left side and stiffen the chassis.
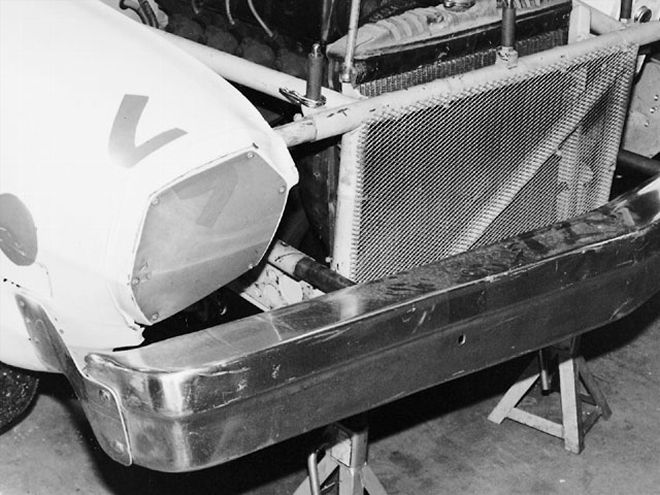 This Ford Fairmont bumper is made of lightweight aluminum and fits the Pinto's frontal shape well.
Bumpers
When designing your bumpers, keep in mind that they are going to get bent no matter how strong you build them. If you make the bumpers too strong, the frame will get bent before the bumper. Your bumper supports should be built so the bumper will absorb the crash rather than have it transferred to the chassis. Try to allow for a crush area so you can control where the bending will take place so it will not affect the handling. Don't tie the front bumper into the radiator supports, front hoop, or hoop uprights. If the radiator support gets bent, in most cases you will have a leaking radiator.
The '78-'79 Ford Fairmont bumpers (both front and rear) are the same width as Pinto bumpers, but they are made of aluminum, making them lighter and much more desirable. The Fairmont bumpers are very stout, but they are lightweight and can take a lot of abuse. The front Fairmont bumper follows the same curvature of the body as the front Pinto bumper.
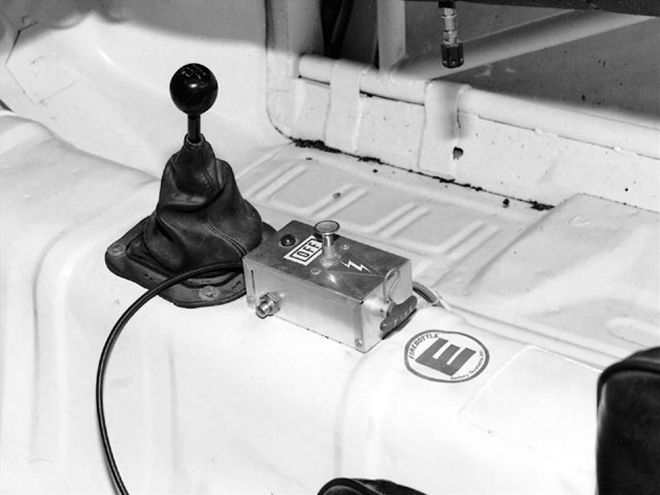 This racer crafted a very nice "central command module" out of an aluminum box purchased at Radio Shack. It incorporates an ignition on/off switch, a starter button (on the driver side), and a fire system release.
Windshield
A very effective way to save weight is by using a Lexan windshield. A stock Pinto glass windshield weighs 23 pounds, and the rubber molding that holds it weighs another 3 pounds. A 1/48-inch-thick Lexan windshield weighs only 4 pounds.
You can easily fabricate the Lexan windshield yourself. Start with a sheet of 11/48-inch-thick, 3-x6-foot Lexan, which you can purchase from a home-improvement store. The Lexan is used for storm windows and coated on one side for protection from ultraviolet rays.
Start by removing the glass windshield from the car, then make a pattern from it on a large sheet of cardboard. Transfer this pattern to the Lexan and cut it out. Clean and smooth the edges of the Lexan on a belt sander. Use leftover scraps of the Lexan for fabricating other small components such as spark plug wire looms and more.
Keep Your Race Car on a Diet
Keep a good bathroom scale handy in the shop when you are building your race car. It will help you make good decisions. Weigh everything, and you will become acutely aware of weight placement and how weight can be pared from the car or relocated for better advantage.
Throttle Stop
A throttle stop should be used to limit the travel of the throttle pedal. If the pedal stretches the throttle cable beyond a certain limit, the cable will snap. Throttle stops prevent broken cables.
The Finishing Touches Car Numbers
An inexpensive way to create car numbers and letters is to cut them out of vinyl, self-adhesive shelf paper. You can create a paper pattern for them by tracing off of your friends' high-dollar, professionally lettered and numbered late-model cars.
Paint the vinyl numbers with Krylon spray paint. The MEK in the spray paint binds into the vinyl, sets in, and stays flexible.
Paint
Paint your race car one of the colors that racer's tape and Krylon or VHT spray paint come in. This makes it very easy to touch up and repair weekly battle wounds on the sheetmetal. Having matching spray paint and tape allows you to keep a neat appearance on your car.
When choosing a paint color for your car, remember that lighter colors show up better at night.
Door Side Panels
Side door panels can be fabricated from a 4-x10-foot sheet of 24-gauge steel sheetmetal. The flat, steel sections can be cut in such a way that they can be used on either the left or right side of the car when turned one way or the other. Have the panels prepainted on both sides to match the car color. A sponsoring body shop might be helpful for this.
Attach the side panels to the body with prepainted rivets that match the car color, so the rivets blend in with the panels without the need for painting.
A clean set of panels, complete with sponsor names and decals, can be kept in the shop ready to be riveted on the car when it is displayed at public appearances and car shows for the sponsor.
Enterprise And Ingenuity
While writing Pony Stock/Mini Stock Racing Technology, I became acquainted with a very innovative and resourceful racer named Lou Gamache. Lou races a Pinto at Orange Show Speedway in San Bernardino, California. He stays very competitive on a policeman's salary and has an innate ability to find inexpensive yet effective ways to keep his car running reliably and up front.
Many of the car preparation tips presented here were shared by Gamache. He is a true racer who wants to help other racers succeed. Gamache also works very hard to promote his sponsors (Party Plus Rentals and Rosa Maria Restaurant) and the sport of auto racing. He enters his race car in car shows, uses it at school exhibitions (including the Say No To Drugs campaign), and displays it for race fans whenever possible. He always has something to hand out, making sure every fan goes away with a good remembrance of auto racing.