When it comes to lowering your classic Chevy and making it handle, stop, and steer like a new car, few shops are equipped like Classic Performance Products (CPP) to develop the parts required. Using modern technology like 3D printing to quickly develop products that fit as well as they perform, the thousands of hours they spend in R&D results in parts that fit without fuss, with performance results to boot. By using all this technology and some "seat of the pants" experience, CPP has come up with a "Deluxe" way to not only lower your truck, but also make it ride and perform like a sports car.
Recently, the guys at Bobco decided to branch out from their traditional Blue Oval roots and dip into the later Chevy market, building a '67 C10. With a long-established relationship with the folks over at CPP, it only made sense to turn to them when it came to sort out the steering, brakes, and suspension as well as mounting the LS drivetrain that's going to be installed. Wanting the most complete kit CPP could offer, they decided on the "Deluxe Chassis Upgrade Kit," which includes nearly every suspension component necessary to take the truck from stock to sport. Additionally, since the Bobco crew plans on dropping an LS engine between the C10's 'rails, they also ordered up CPP's new FitRite engine mount kit.
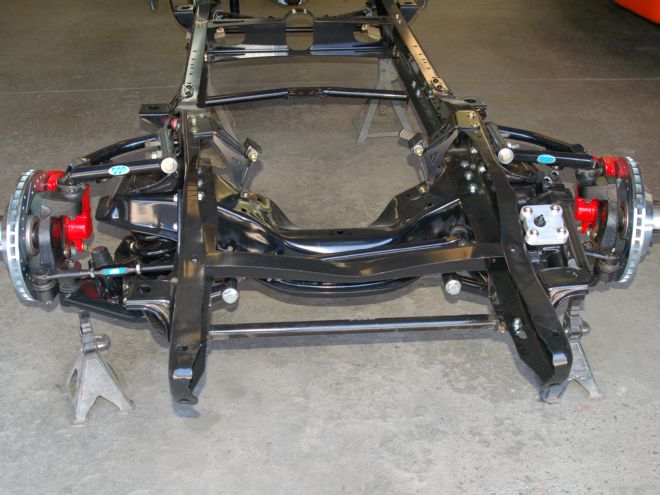
Installation of the new suspension components is pretty straightforward and is much easier with the cab and bed removed. Since the chassis is going to be powdercoated once initial assembly is complete, all the sheetmetal needed to be removed anyways. Most of the major components CPP offers in these kits are powdercoated either black or silver, enabling the customer to bolt on their components right out of the box.
We're going to tackle the front suspension first, showing the brake options that are available as well as what it takes to drop a modern LS drivetrain into a classic C10. With all the stock components removed, the bare chassis is ready for all that CPP bolt-on goodness.
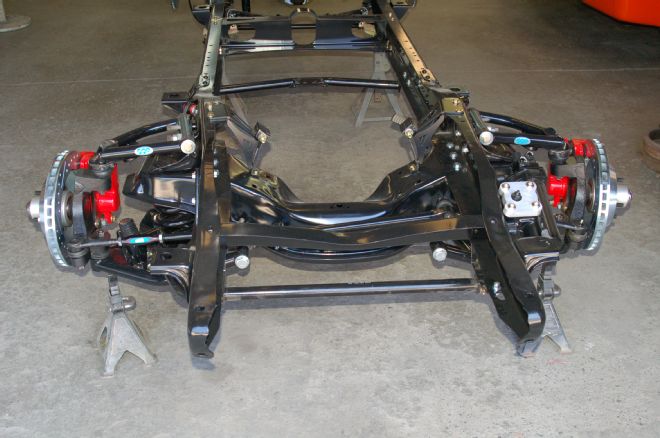
01 Check out how this C10 chassis went from a rusty mess to powdercoated performance perfection.
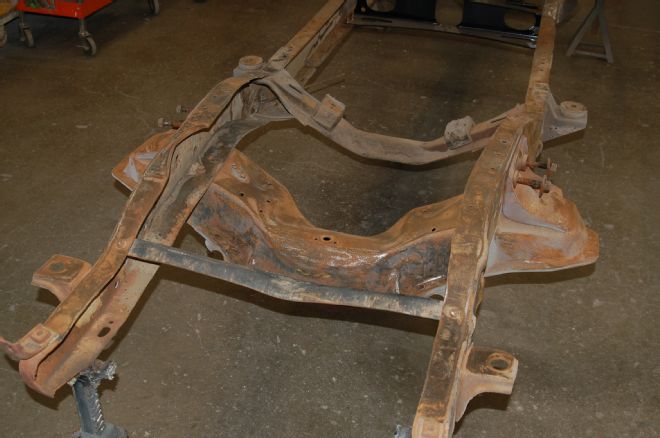
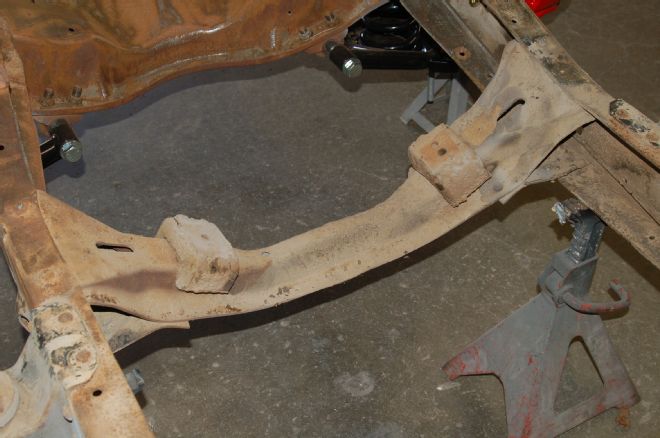
02 Starting with a stripped chassis makes this job nice and easy. This chassis features a front crossmember from an '86 C10; that gave the truck the five-lug disc brakes it had before we blew it apart. If your truck has a similar crossmember swap, be sure to order the corresponding components, in this case it will be '73-'87 parts as opposed to '67-'72.
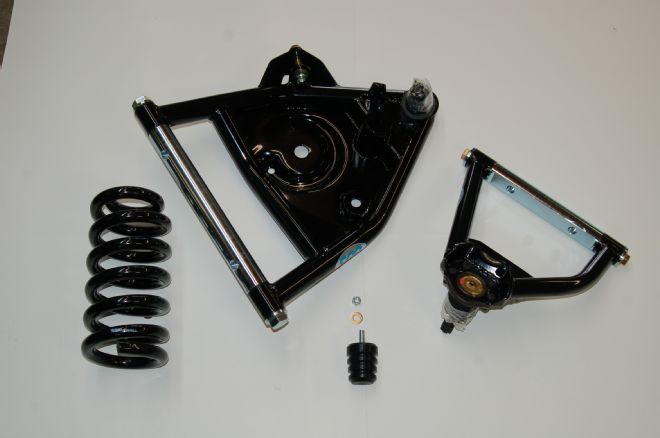
03 Here are the new CPP control arms, spring, and bumpstop. Bobco opted to use a 3-inch drop spring in conjunction with a 2-inch drop spindle, which should result in a total drop of 5 inches.
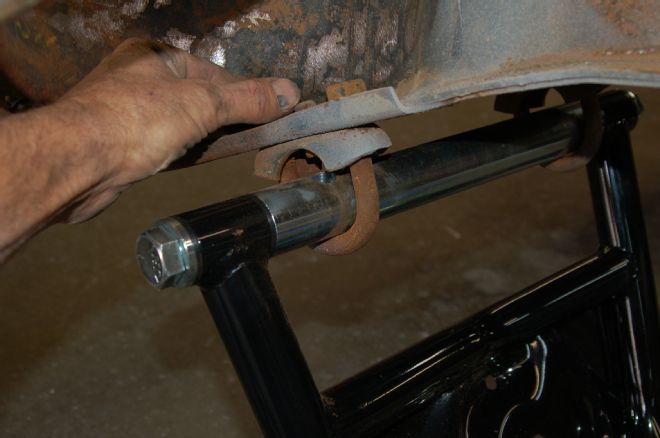
04 The lower arms are bolted in place using the stock U bolts and nuts so you want to hang on to those when you disassemble yours. CPP offers these U-bolts new as well, as part #6372LCUK for 7/16-inch diameter and #6372LCUK-5 for the ½-inch items. The silver cross-shafts have a notch in them that must align with a small pin that sticks down from the cradle on the crossmember.

05 With the control arms in place, the 3-inch dropped spring followed by the 2-inch drop spindle can be installed.
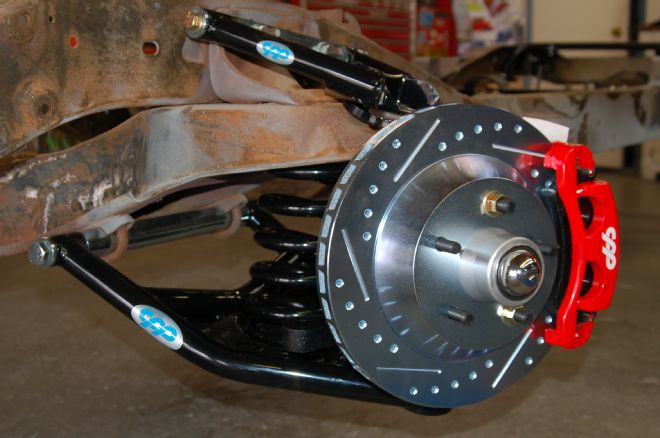
06 CPP ships their brake and spindle kits fully assembly, making mockup nice and easy. When it comes time for final assembly, the wheel bearings will be packed with high-temp axle grease. Bobco opted for larger, drilled and slotted 13-inch front rotors with Chevy 5x5-inch bolt pattern.
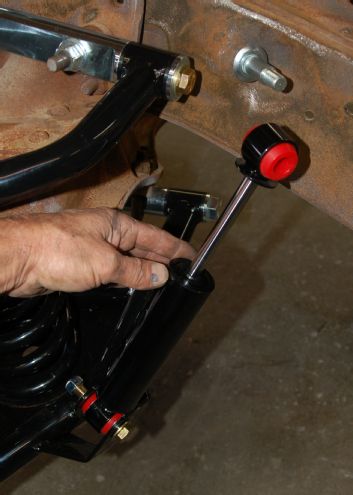
07 The Deluxe Chassis Kit also contains a set of new front shocks. Included with the shocks are the new upper mounting studs.
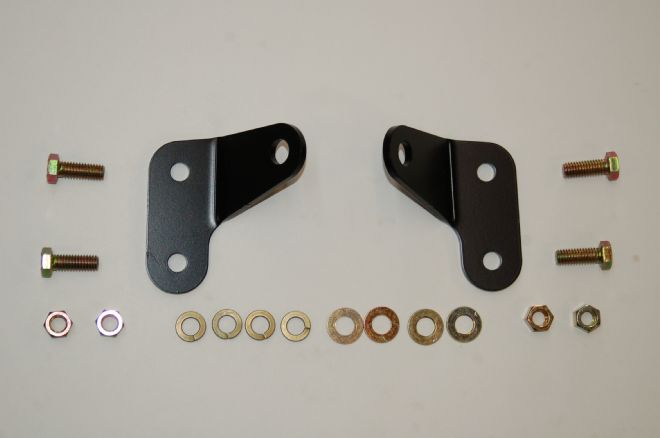
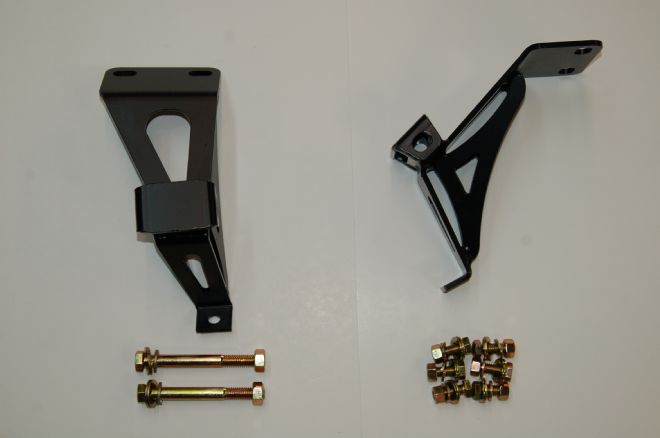
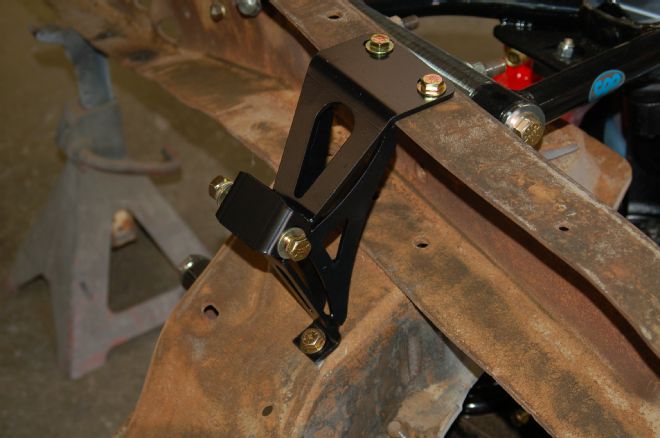
08 The stock shock stud is a common fail point on these trucks. To solve this problem, CPP has developed these cool little stiffener brackets that bolt onto the frame and support the upper shock stud.
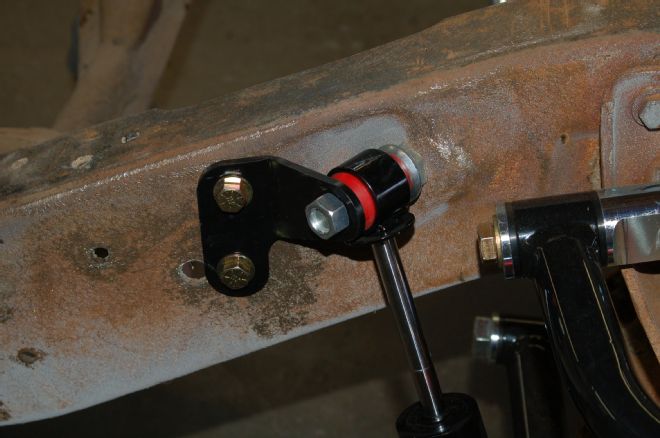
09 The shock stiffener brackets require two mounting holes be drilled through each framerail and attach at the end of the shock stud, serving to support the stud by putting it in double shear.
10 Rounding out the front kit is a new front sway bar. This baby is hefty, coming in at 1¼-inches in diameter. Between this front bar and the rear sway bar we plan on installing next month, this little C10 will really stay glued to the ground. The sway bar kit includes two new types of mounting brackets; one set for a fairly stock height truck and a shorter set (increased ground clearance) for lowered trucks.
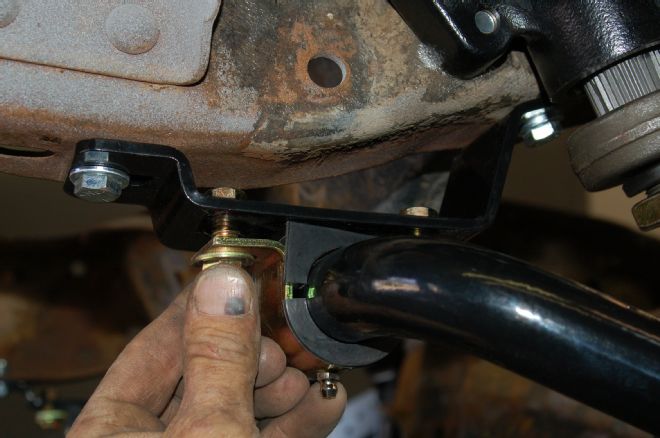
11 The new mounting brackets simply bolt to the frame followed by the new sway bar and bushings. These bolts are left loose until the endlinks and bushings are connected to the lower A-arms. Then everything is tightened up. Ideally, this is done when the truck is on the ground, fully loaded and at ride height.
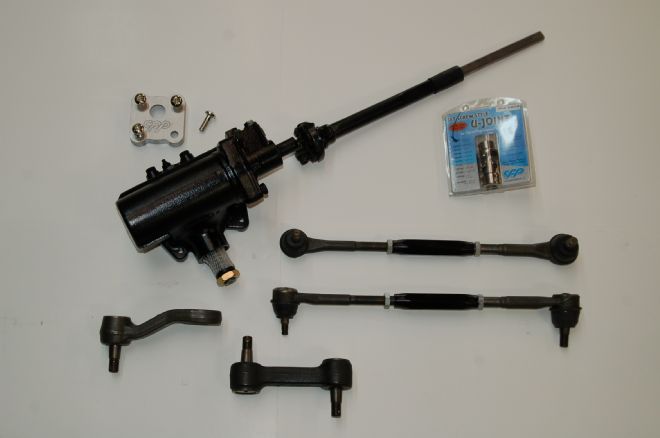
12 Shown here is the complete new steering system that comes as part of the Deluxe Kit. The new 500 series steering box is manufactured by CPP to their strict specifications with a 14:1 sport ratio and have been set up with simple inverted flare power steering hoses and the standard ¾-30 coupler.
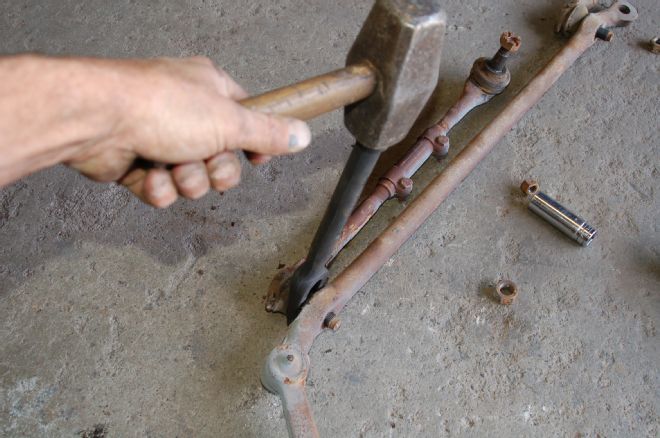
13 The only thing not included in the kit is the cross-shaft that connects all these rods and shafts back together as Chevy made subtle changes to it through the years. A ball joint separator is used to separate the centerlink from the old tie rod ends, Pitman arm, and idler arm. After mock up, this bar will go with the frame to be powdercoated.
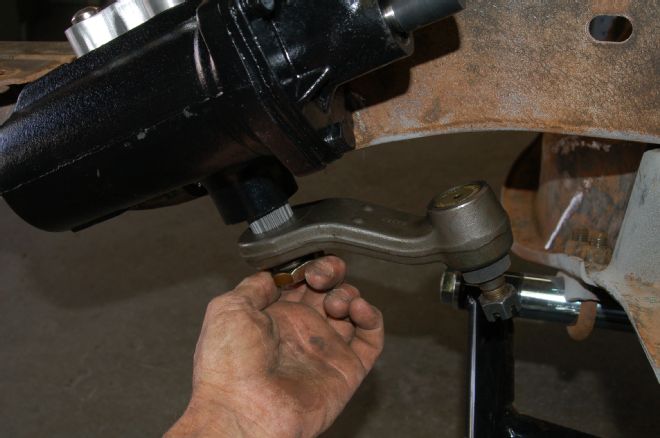
14 A new Pitman arm is installed on the new box before the centerlink assembly is attached.
15 Before the LS drivetrain can be dropped in place, the stock bellhousing engine mount crossmember needs to be removed. First, the rivets are ground flush with the frame before they're driven out thanks to a pneumatic chisel.
16 CPP's engine mount stands offer plenty of header clearance and are a stark contradiction to what was previously available for these old trucks.
17 Made to bolt in place using existing holes from the old stock mounts, these beauties did just that with the supplied hardware.
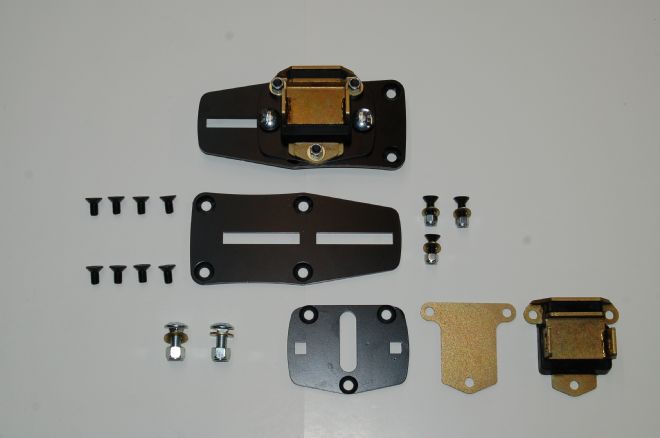
18 To make mounting that LS engine easier, CPP included their new LS FitRite motor mount kit. These mounts offer the flexibility of being able to move the engine fore and aft for better firewall, oil pan, or radiator clearance.
19 The adapter plates are bolted to the engine, then the motor mounts bolt to the plates. CPP also makes a set with adapter plates that are shorter in length.
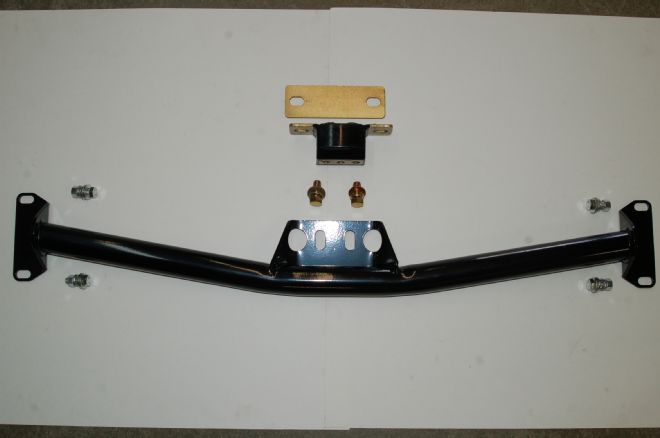
20 Of the many different transmission mount crossmembers that CPP makes, here's the one for the C10 pickups. Of course it comes with all the needed mounting hardware.
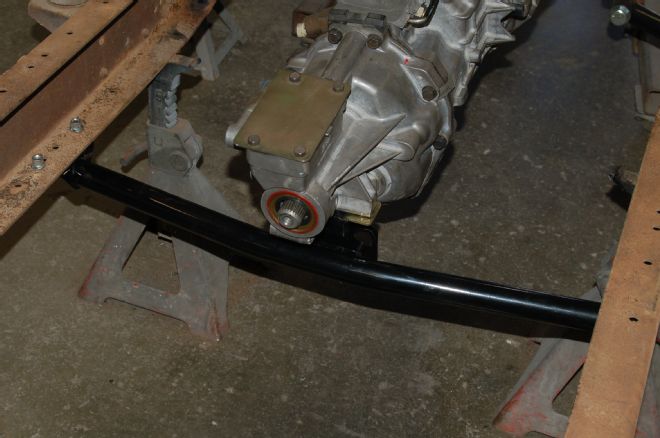
21 With the motor resting on the mounts at the front, the transmission crossmember can be located. Once in place, it's checked for center and then the holes can be drilled in the chassis and the assembly mounted for good.
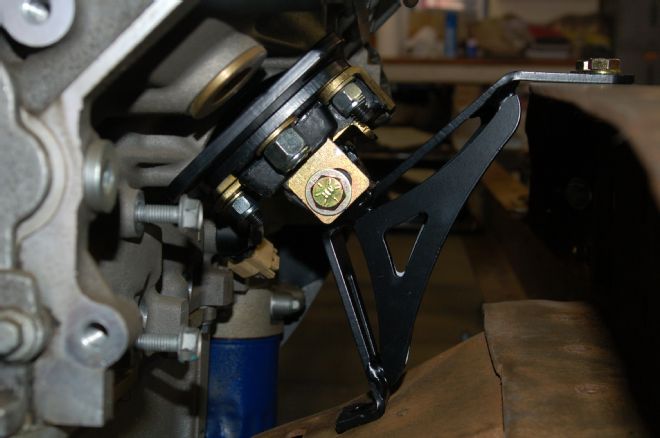
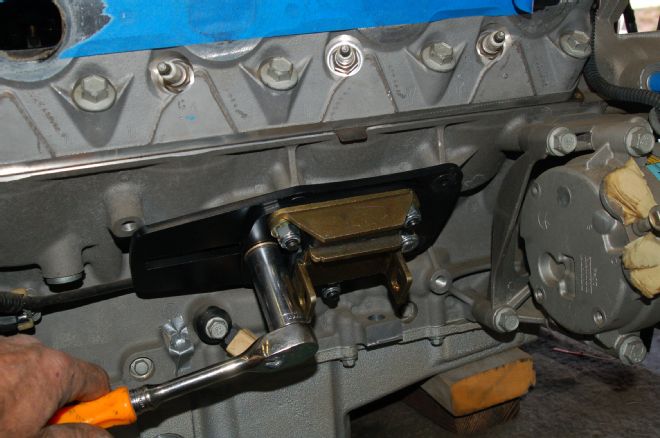
22 With the motor in place, here's a look at the assembled engine mount.
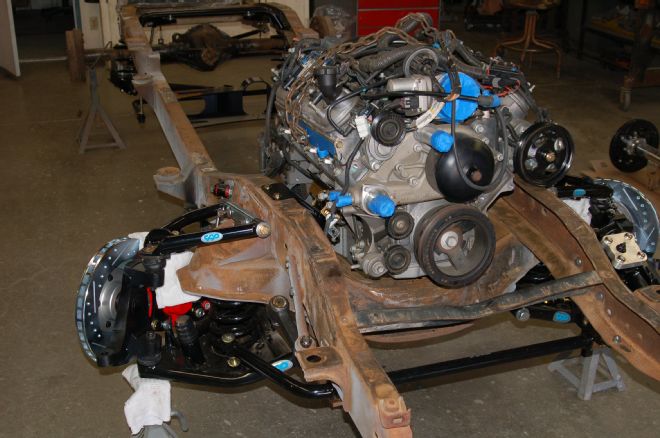
23 The LS engine fits like a glove with the GTO pan hugging the crossmember just right. The stock A/C compressor will be replaced with a smaller Sanden SD-7 unit and the top framerails will be trimmed where necessary for extra clearance of the accessories. Even with the GTO front accessory drive, the alternator ended up clearing just fine with a small trim to the top of the framerail.