To many traditionalists, welding pieces of metal to tie the front and rear subframes together may seem a bit bizarre. Hot rodding typically involves replacing an existing part with enhanced hardware, not adding something that the factory never bothered installing in the first place. To the contrary, if yesterday's muscle cars had anywhere near the grip level provided by today's suspension and tire technology, every unibody that came out of Detroit would be severely inadequate by modern standards. Case in point: Bill Reilly's 1969 Dodge Dart packs a 550 hp small-block, big sticky tires, and one of the best Mopar suspension systems in existence: a Reilly Motorsports AlterKtion coilover front k-member, and its companion Street Lynx rear coilover four-link conversion. Since that's way too much for a stock A-Body chassis, Bill decided to stiffen it up by welding in a set of U.S. Car Tool subframe connectors.
...these boxed channels not only stiffen the car, but directly tie the front and rear suspensions together, making it act like a full frame.
As a man who has been instrumental in changing the world of Mopar suspension systems, time and time again, Bill has witnessed the importance of providing a firm foundation of support for the suspension. It is for that reason that Reilly Motorsports offers U.S. Cartool subframe connectors on its website as an option for its upgraded suspension systems for Mopar A-, B-, and E-Bodies. The subframe connectors are in fact what allows the RMS gear to do its job; these boxed channels not only stiffen the car, but directly tie the front and rear suspensions together, making it act like a full frame. In fact, Mopars with weld-in subframe connectors are theoretically stiffer than even full-frame cars because of the added buttressing effect of the OE subframe.
Weld-in subframe connectors can work with the stock unibody chassis to create the ideal situation. Says Bill Reilly: "When building an all-around performance car, stiffening up the chassis is a necessary point. Adding subframe connectors to a unibody car makes a huge difference in performance," Bill explains. "Most people don't fully understand why body flex is a problem, and how it adversely affects handling. Even with a good suspension system, if the body flexes it can't fully control the movement of the wheels. If you stiffen up the chassis, you enable the suspension to take care of the movement of the wheels and the body as it goes over the road, and then you can fine tune the suspension any way you want."
Weld-in subframe connectors can work with the stock unibody chassis to create the ideal situation.
Over the years, Reilly has had great success with U.S. Car Tool subframe connectors, and the company offers chassis stiffening hardware for just about every Mopar muscle car ever built. Best of all, they're extremely affordable, with the '67-75 A-Body subframe connectors coming in at just $169. Unlike other designs that either bolt in, or attach only at the front and rear subframe assemblies, the U.S. Car Tool subframe connectors are weld-in form-fitting units that attach to the entire length of the floorpan. "Even bolt-in subframe connectors make a huge difference in stiffness. The difference between weld-in subframe connectors and bolt-in units is as big as comparing bolt-in units to a car that has no subframe connectors at all," says Bill.
Bill might be a seasoned pro, but he says any competent welder can install the U.S. Car Tool subframe connectors in about eight hours. We've got the same ones in our '68 Plymouth Valiant project, and tackled the job in well under that time. A job like this typically would take even less time, except for the fact that the floorpans require welding at a moderate pace in order to prevent overheating the thin factory metal. It's a small price to pay in both time and money for a simple chassis enhancement that provides substantial benefits in handling and ride quality.
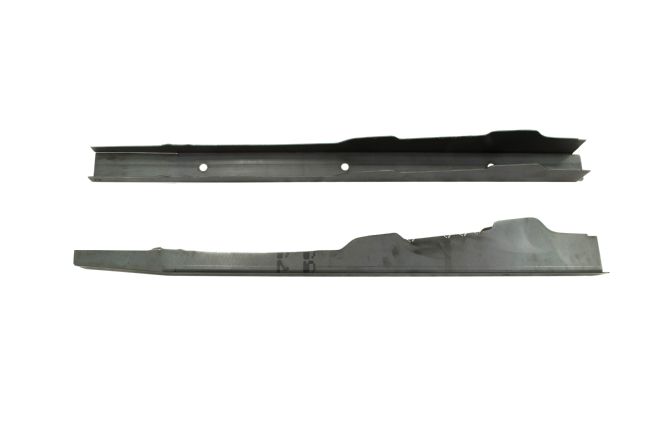
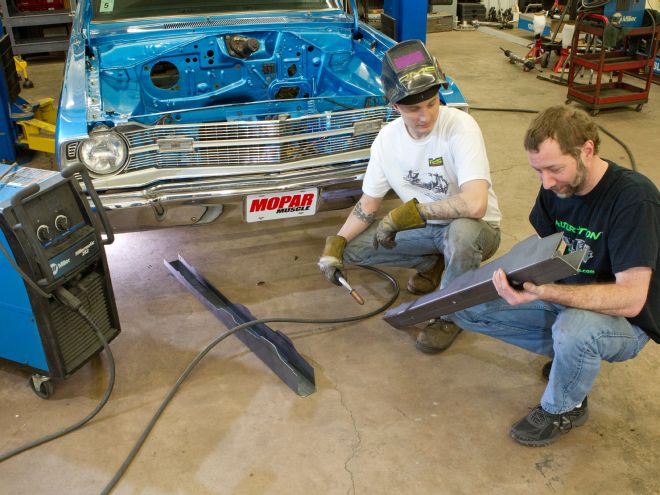
1. In contrast to the 16-gauge factory framerails, the 12-gauge steel U.S. Car Tool subframe connectors (PN USCT1M1104) are some seriously stout units. They're CNC cut and bent for an extremely precise fit.
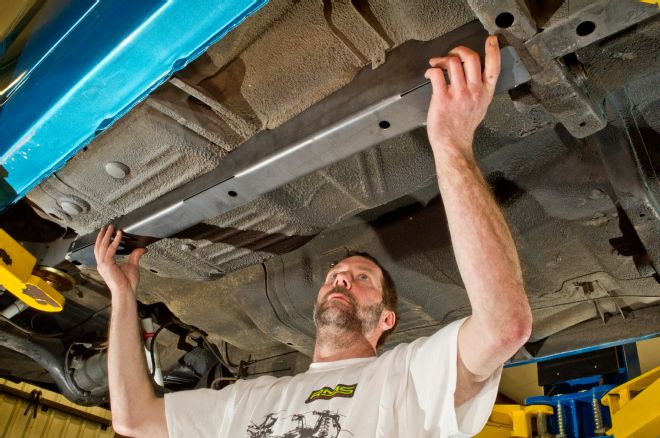
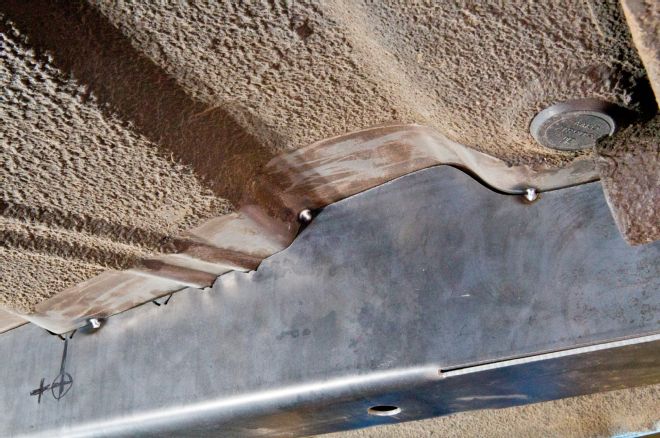
2. By tying the front and rear subframes together, the connectors essentially transform a unibody Dart into a full-frame car. An initial test fit reveals any minor grinding that may be required to ensure a snug fit between the top of the SFCs and the floorpan. According to Reilly, variations in factory floorpan stampings can necessitate minor grinding, as can floorpans that have been replaced with aftermarket metal.
3. There's a lot of conflicting information floating around regarding how a vehicle should be supported when installing subframe connectors. With the chassis supported by the framerails on a two-post lift, an easy trick Bill uses to ensure that the car is level is by checking to see if the doors open and close easily. Shims can be used on either of the four lift points to level the car out if necessary.
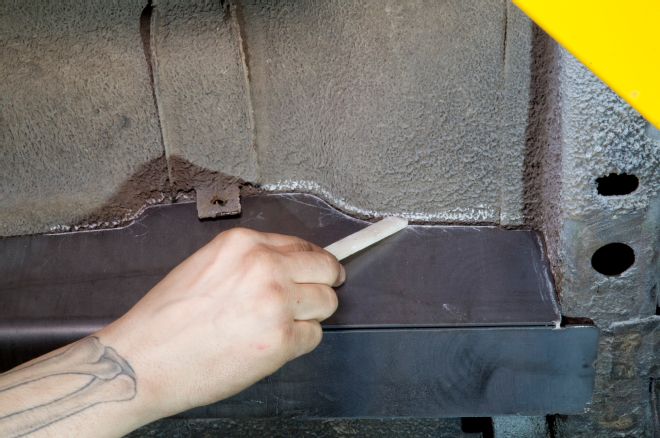
4. Prepping the undercarriage for welding requires removing the undercoating. Marking around the perimeter of the subframe connectors with chalk helps determine which sections of the floorpan must be stripped down to bare metal.

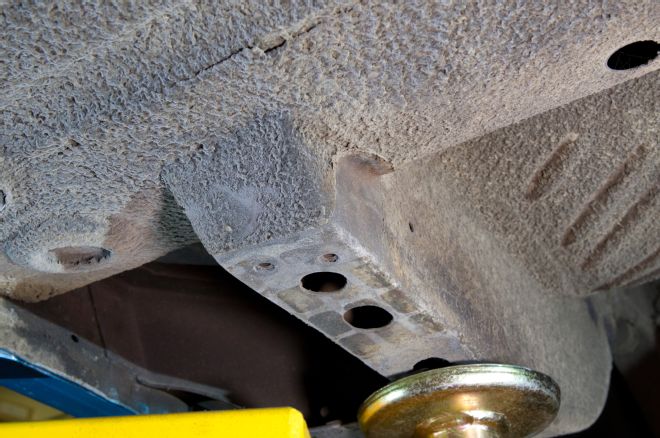
5. Since the stock parking brake cable runs diagonally, it must pass through the driver-side subframe connector. The cable is positioned outside the SFC at the front of the car, and inside the SFC at the rear of the car. At the front of the car, Bill marked the intersection point of the cable to determine where to drill an access hole.
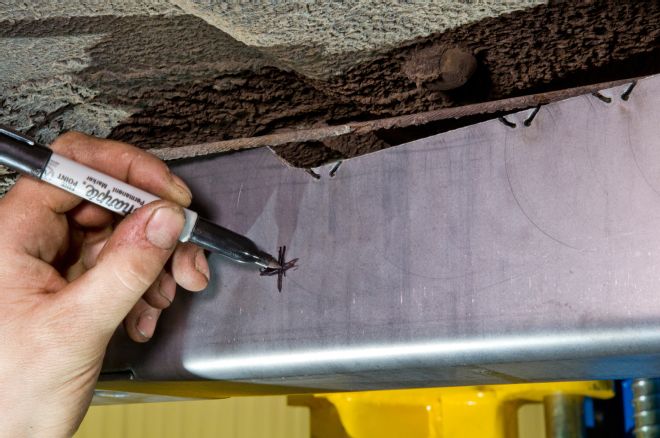
6. The rear access hole for the parking brake cable was drilled roughly halfway down the length of the subframe connector. To determine the correct height of the hole, Bill measured from the floorpan, then transferred that distance from the top of the SFC down to the location of the hole. Next, the parking brake cable was removed.

7. To remove the undercoating, Bill relied on an acetylene torch and a putty knife for much of the heavy lifting. He then cleaned the floors down to bare metal using a wire wheel brush. Although air tools are preferable, Bill says that a ½-inch drill will work just as well.
8. Welding generates lots of heat, so Bill recommends removing an extra one to two inches of undercoating on each side of the subframe connectors. There is no need to grind the floors, as a wire wheel brush gets the metal adequately clean for welding purposes.
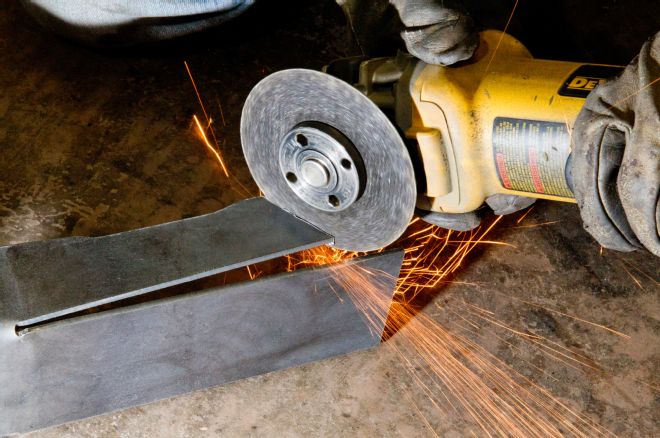
9. For added installation flexibility, the U.S. CarTool subframe connectors extend several inches beyond the front of the rear framerails. Since Bill's Dart had a dent on the driver-side rear framerail, he cut a couple of inches of material off the end of the SFC in order to position it in front of the dent.
10. Lightly pushing the subframe connectors into the floorpan with support stands or a floor jack helps close up small gaps. Next, high areas on the connectors are ground down, and knockout tabs removed where necessary. Finally, Bill laid down tack welds spaced six to 12 inches apart.
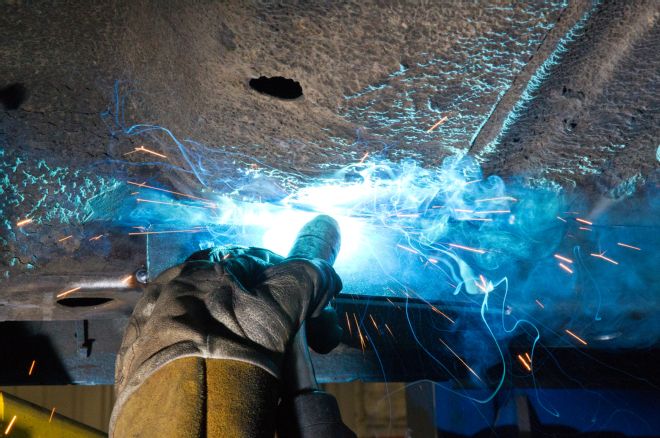
11. After tacking the subframe connectors into place, Bill laid down the final stitch welds. Bill recommends limiting the length of each stitch to two or three inches, then moving back and forth until the entire length of the subframe connector has been welded to the floor. This takes patience, but it's imperative in order to prevent melting the thin stock floors. It should go without saying, to avoid conflagration, remove your carpet and interior before welding on your floorpan.
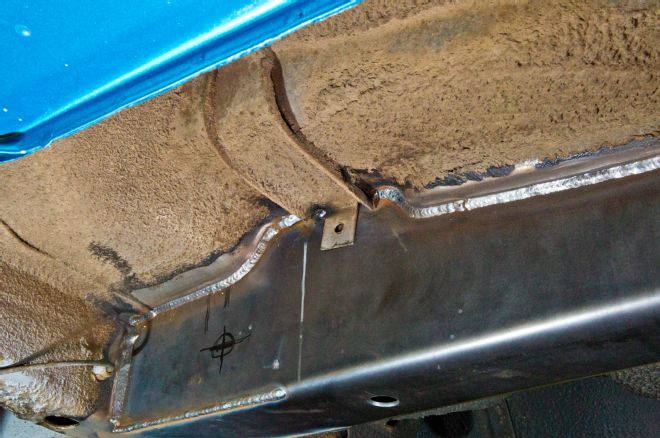
12. With all the welding complete, Bill drilled out the holes for the parking brake cable using a ½-inch bit. He then leaned the drill sideways to elongate the holes into ovals.

13. The final step involved applying some Eastwood Rubberized Undercoating to the floorpan (PN 16007Z, $9.99), and spraying the subframe connectors and the factory framerails with Eastwood's Rust Encapsulator (PN 16060Z, $19.99). Once everything dried up, Bill ran the parking brake cable through the driver-side SFC and reconnected it to the hand lever.