People have been splitting wishbones on traditional rods for decades. Admittedly, more common with front ’bones, and originally necessary to clear the oil pan on heavily lowered cars, rear wishbones have also been split over the years. However, while this is a sketchy practice at best, even when the torque tube is retained, it’s a recipe for disaster when an open driveline is used (assuming no other links or torque arm are added to the suspension).
A torque tube prevents the rearend from rotating about its own axis. If this is removed, early Ford wishbones simply aren’t strong enough—nor were they designed to be—to prevent the rearend rotating. The result? Snapped wishbones. Here’s where ladder bars are an ideal replacement. With mounts above and below the axle housing, ladder bars can prevent such rotation. Oh, and before you pen us an email or letter, we know some cars have been on the road for years using split ’bones with and without a torque arm with no problems. Let’s just say they’re the lucky ones, as from an engineering standpoint the practice has many flaws.
So, what to do if you want the appearance of early split ’bones on a traditional car? This was the problem Shane and Steven Hill encountered when the ’40 Ford ’bones they’d used (with an additional torque arm) on their A roadster pickup failed. We’d seen and admired this mainly homebuilt rod around locally, so we were surprised when we spied it during a recent visit to Kiwi Steve’s Hot Rod Shop in Brea, California. Turns out our pal the Kiwi had a solution to the wishbone problem, one that ensured the Hills’ pickup wouldn’t be back in his shop for this particular problem again. Here’s the vintage-style solution he and Anders Berg came up with to an age-old hot rod problem.
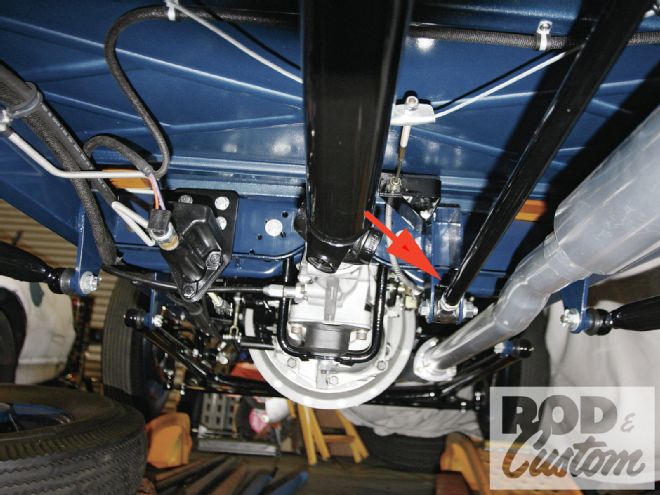 1 When first built, using split ’40 Ford rear ’bones and converted to open drive, the Hills added a third link, a torque arm if you will, to make up for the lack of a torque tube (arrow).
 2 The torque arm pivoted, and still does, at its forward end in the same plane as the ’bones.
 3 At its rear end, the arm locates atop the axle tube.
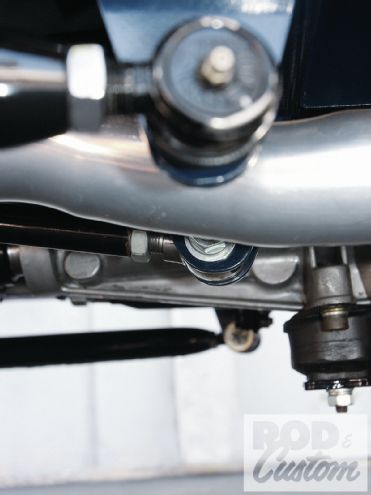
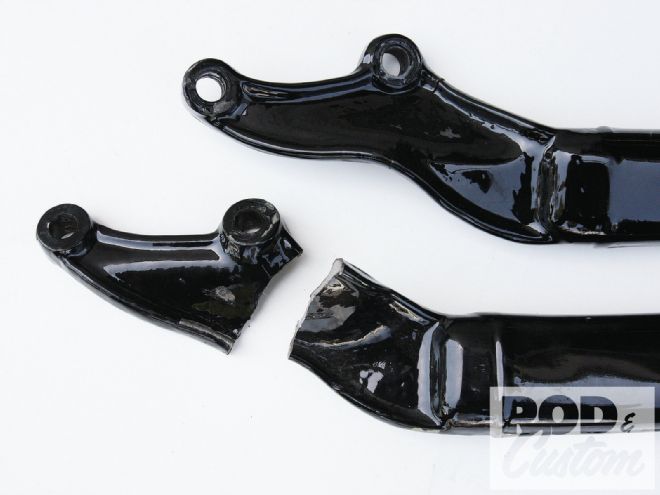 4 Here’s the reason for the modifications shown here. While the redesigned suspension links (the split ’bones and the torque arm) were geometrically correct, the increase in power combined with the fact that ’bones simply weren’t designed to operate as ladder bars eventually led to this failure.
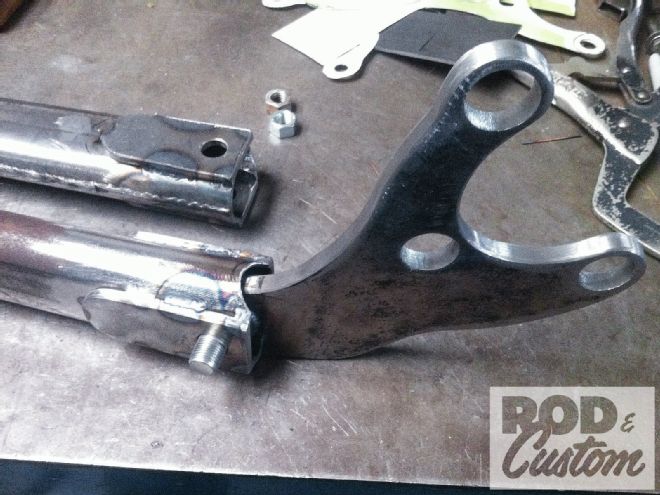
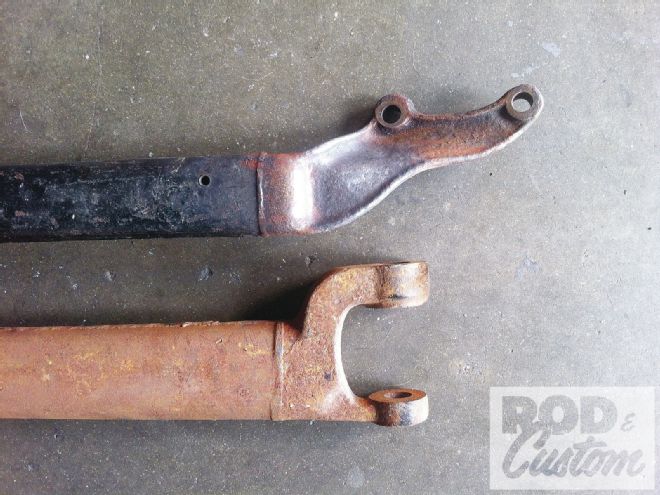 5 Here’s another possible reason for the failure. To align the cast section of the ’bones with the axle housing ends once split, they were heated and bent, at the point where they failed. The lower ’bone is a ’48 Lincoln front, which was used as it is larger and has a thicker wall than the Ford version.
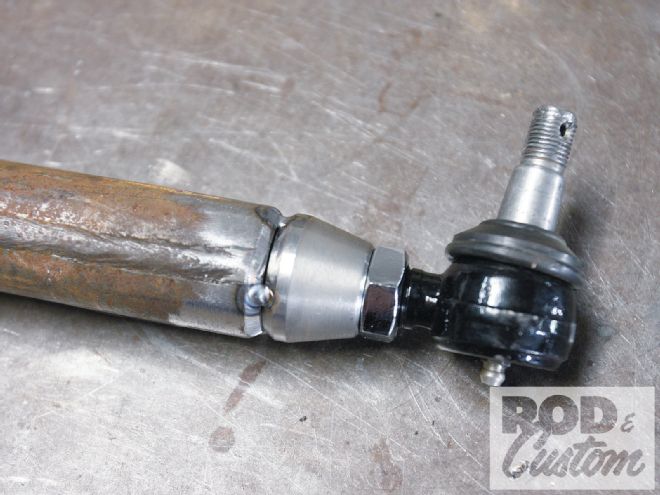 6 Proprietary threaded bungs were welded to the forward ends of the Lincoln ’bones, with the early Ford tie-rod ends reused from the original build.
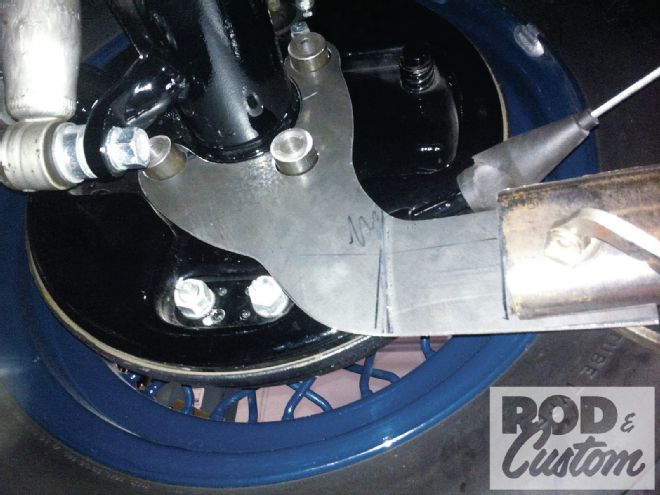 7 This sheetmetal template was made to check for fit and clearance issues around the e-brake cables and brake adjusters.
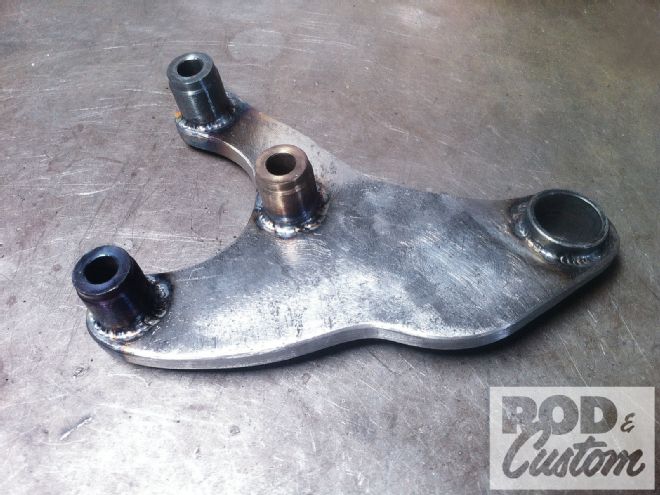
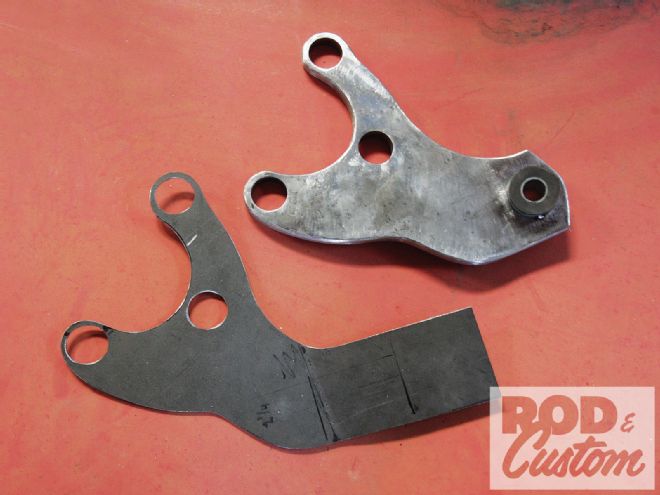 8 The template was then replicated in 3/8-inch steel, with a urethane bushing added.
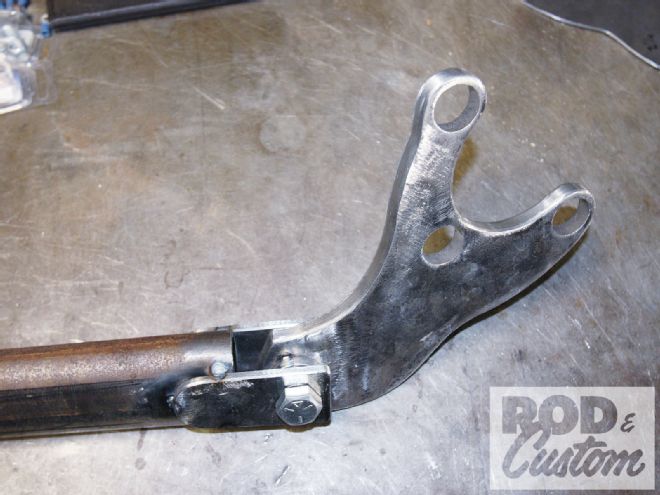 9 Here’s the bracket, bent to suit and attached to the shortened ’bone using two 1/4-inch tabs.
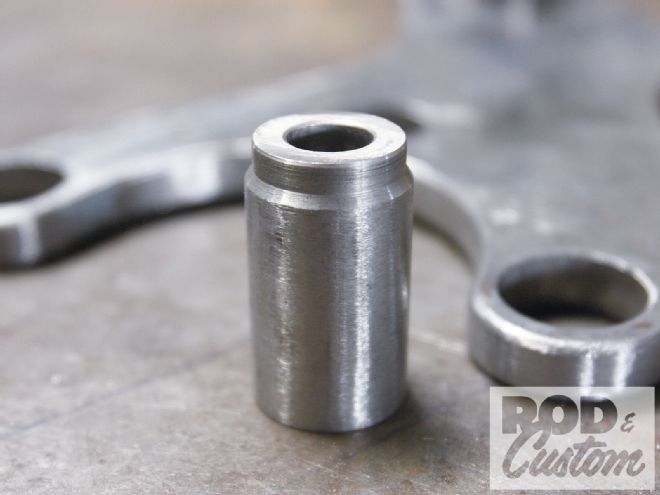 10 Each bracket received three of these bungs, machined from 1-inch OD steel tubing. The end of each bung was machined like so …
 11 … in order to fit the small recess in the lugs on the ends of the axle tubes. An old tube is shown here.
 12 Here’s the completed assembly with the bungs in place, picking up on the stock axle tube mounting holes.
 13 It was at this point the design was modified slightly, the brackets altered to pivot inside the ’bone, but retaining the 1/4-inch plates for strength.
 14 The final design, TIG welded and ready for powdercoating.
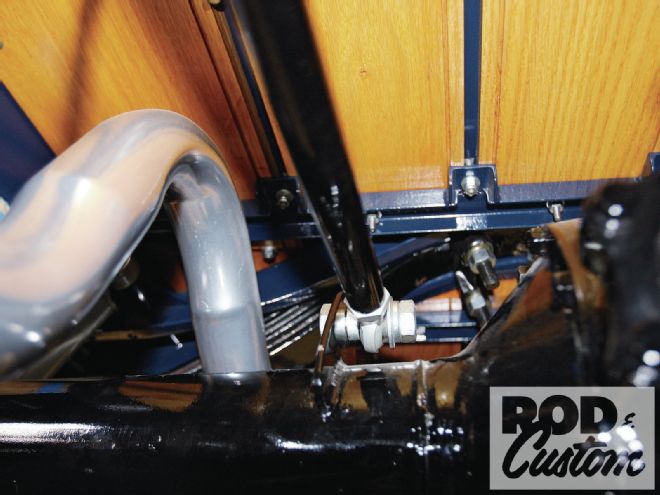
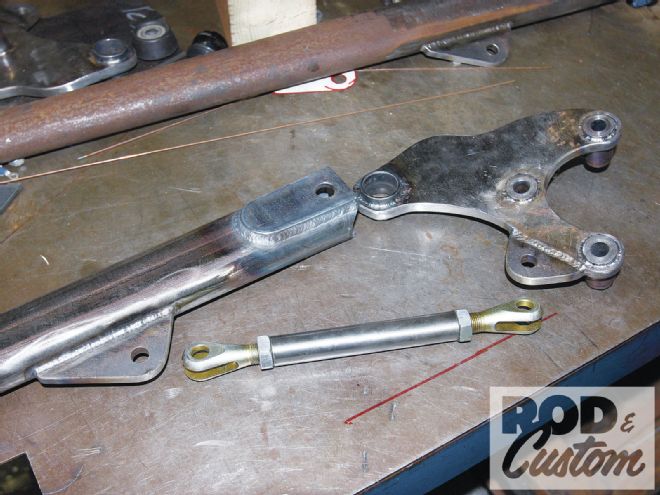 15 A brace was added between the ’bone and the top of the bracket to allow for adjustment for the pinion angle, as well as to lock the assembly solid, similar to a ladder bar yet with a little cushioning provided by the urethane bushing to prevent fracture.
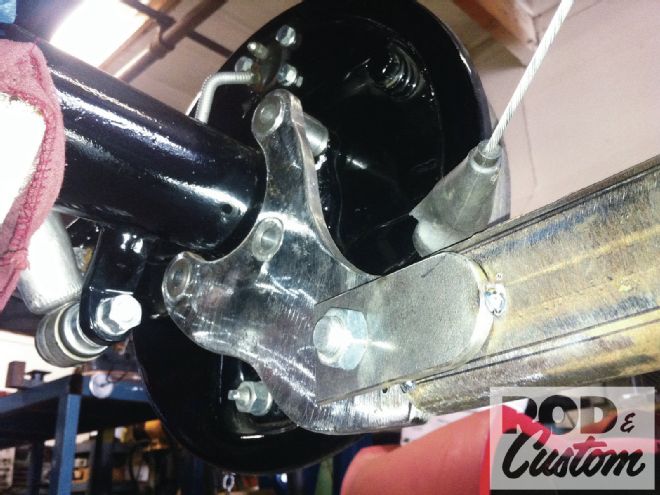
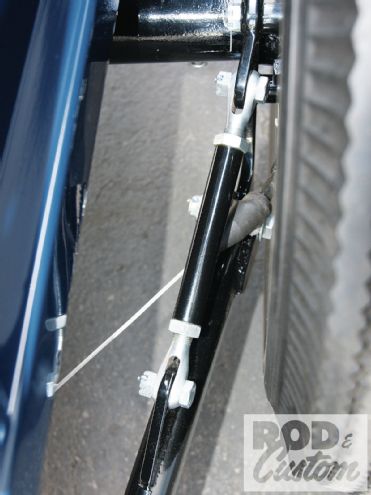 16 With old-style castle nuts and cotter pins used, the assembly takes on an early appearance. It’s also somewhat hidden behind the tire.
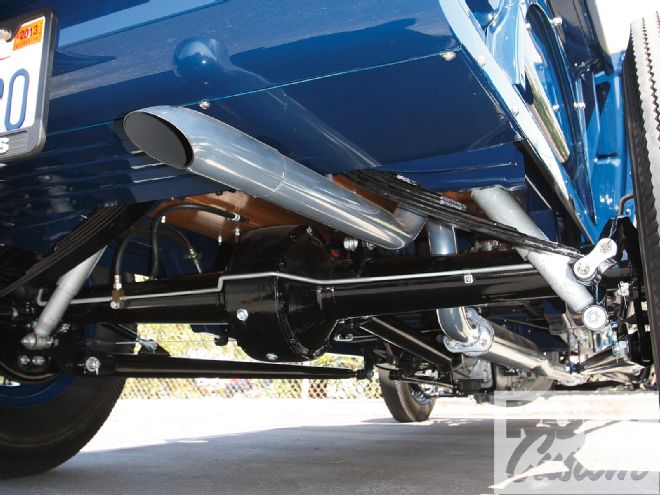
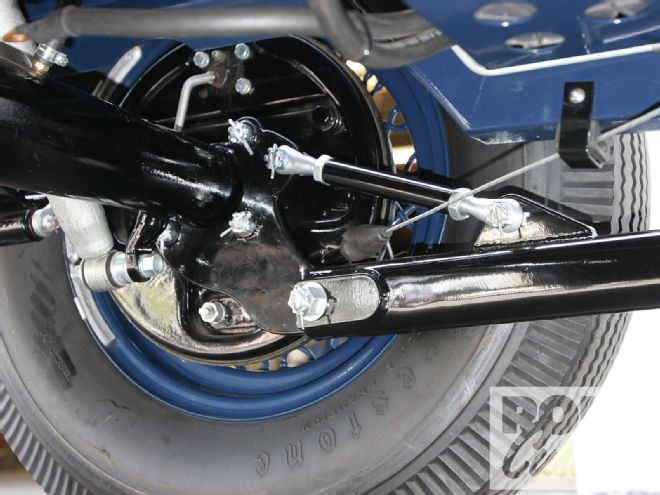 17 The finished, and improved, suspension, providing reliability with somewhat period looks.
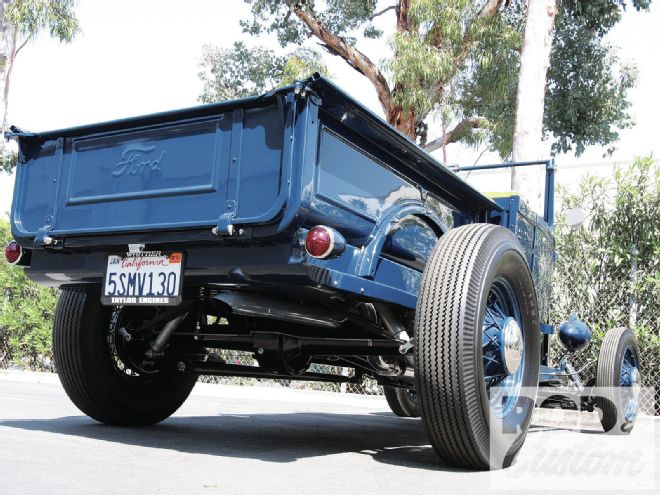 18 The roadster pickup still has split ’bones on the rear, but is no longer prone to breakage.