Our first installment of the Online Deuce showed you how we molded a roll pan onto the back body panel, in place of the stock gas tank.
Now, the chassis and bolt-on parts are back in the shop, freshly coated with Ultra Orange Pearl from House of Kolor. The engine, trans, and third member were painted steel gray metallic, and I couldn't be happier with the color choices, as my lifelong dream finally begins to take shape. By the way, this dream is being made possible thanks to Barry White, proprietor of Street Rod Repair Company. We've been friends since the late '80s when I was the "Road Warrior" for Juliano's. This latest installment will focus on brake-line plumbing and installing the engine, trans, and exhaust system.
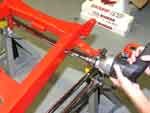
In order to fabricate your brake plumbing system, you'll need two drills (heavy duty and standard), the necessary drill bits; a 47-degree flaring tool (use single flares only for stainless), a 3/16-inch tubing bender, a roll of Teflon tape, and an assortment of hand tools.
To be safe, order 20 feet of 3/16-inch stainless tubing, four through-frame fittings, four 1/8th pipe to -3, 90-degree fittings, two 1/8th pipe to -3 "T" fittings, fourteen -3 nuts and sleeves, four 1/8th pipe to -3 straight fittings, two banjo fittings (if using a Corvette master cylinder), one brake light switch fitting, two 2-pound check valves (if using four-wheel discs), one package of SRRC line clamps, and one SRRC low-pressure brake light switch. Please note: With the exception of the banjo fittings for the master cylinder, all of the fittings used here are of the AN variety. So much for the laundry list. Let's plumb!
With its debut set for the SRMA Reception at SEMA, we've made more progress since shooting this brake line piece. Now, the body is bolted in place, the doors are hung, and a few other tasks are done and out of the way. We'll show you more as things progress.