With the short block assembled for our 383 supercharged project motor, it's time to shift our attention once again; this time to the heads and valvetrain. Like the rotating assembly, when it came to choosing the top end and valvetrain components, I consulted the professionals at Comp Cams and listened to what they recommended.
To handle the valvetrain duty, Comp recommended their 268XFI kit, the foundation of which is a hydraulic roller camshaft (#12-466-8) with duration values of 268-degrees intake and 276-degrees exhaust at 0.006-inch tappet lift. Comp specs this cam from 1,800 rpm up through 5,800, putting the power exactly where we want it. Though we're using a later block that features the ability to run a factory roller setup, we opted to build our motor as if it were a factory flat tappet setup to show what's involved in converting an early motor to a roller setup.
That said, the 268XFI kit also came with a set of Retro-Fit Hydraulic Roller Lifters. Since roller lifters need to stay aligned with the lobes of the cam, a link bar connects each pair, preventing them from rotating on the camshaft. The factory setup uses a spider plate to control lifter rotation and mounts off a pair of bosses cast into the valley area of the block; early blocks, however, do not feature this, so the link bar setup is a perfect solution. A Magnum timing set rounds off the 268XFI kit, capable of advancing or retarding the camshaft four degrees. To actuate the valves, a set of High Energy 5/16-inch pushrods relay the cam's motions to a set of Ultra Pro Magnum roller rocker arms with a 1.6 ratio.
Topping our short block is a pair of Racing Head Service (RHS) Pro Action heads. RHS recommended a 72cc combustion chamber for our engine in order to keep the static compression ratio below 9:1. This is necessary in a supercharged setup since the blower will add a point or two worth of compression, depending on the boost level. We also chose a runner length of 200 cc in an attempt to keep the intake velocity up for low rpm conditions, while still providing plenty of volume to move the air and fuel at high-rpm situations. Keeping all our components in place will be the responsibility of ARP fasteners.
To feed the beast, or at least provide the foundation for what's going to feed the beast, an Edelbrock RPM intake manifold (#7101) will be used. Capable of producing plenty of torque from 1,500 to 6,500 rpm, the dual plane RPM intake features all the advantages of a modern intake, while still maintaining an outward appearance of a vintage four-barrel manifold. Since we're planning on dressing up our engine to appear as stock as possible, I'll be taking advantage of the fact that the 7101 can be machined for an oil fill tube, to further enhance the 283 look.

01-02 The guys at Comp Cams recommended camshaft kit SK12-466-8 from their XFI line to best suit our supercharged small-block, which comes complete with a 268XFI camshaft, retrofit link bar hydraulic roller lifters, and timing set. Designed to use with hydraulic roller lifters, the XTREME Fuel Injection camshaft features the newest and quickest lobe profiles in the Xtreme family, yielding a terrific increase in performance from 1,800 rpm right through 5,800. This will result in an engine with plenty of low-end torque while still maintaining enough top end to give the blower plenty of time to build boost. The high lift (0.57-inch intake and 0.565-inch exhaust) will work great with the RHS heads we'll be using while the wide lobe separation (113-degrees) will help broaden the power band while raising the torque as the rpms increase. With 218-degrees duration on the intake side and 224-degrees exhaust (at 0.050-inch lift), our 268XFI cam should provide plenty of grunt while still allowing a decent vacuum signal for the power brake booster and a smooth idle.
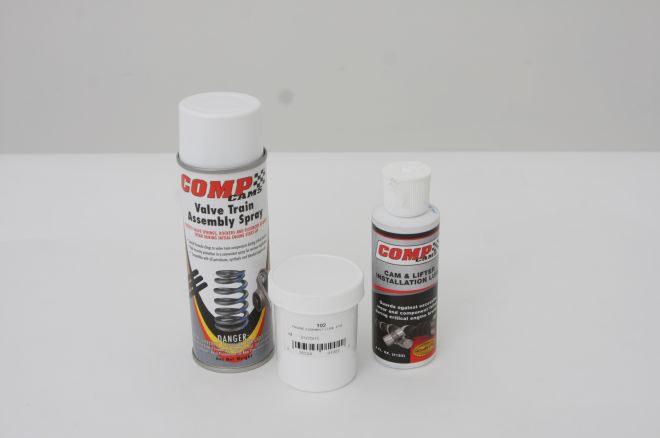
03 I've been using Comp Cams assembly lube (#102) throughout the engine build, but will be adding Comp's Cam and Lifter Installation Lube to the mix when it comes to the top end. Formulated to cling to valvetrain components, Comp's Valve Train Assembly Spray will also be applied to the entire valvetrain once assembly is complete to protect the components during initial startup.
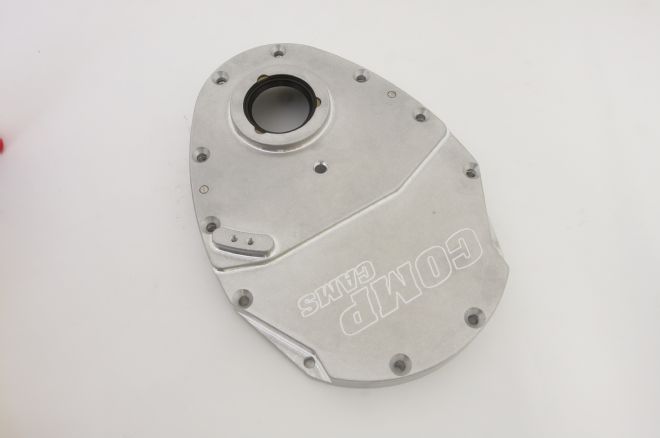
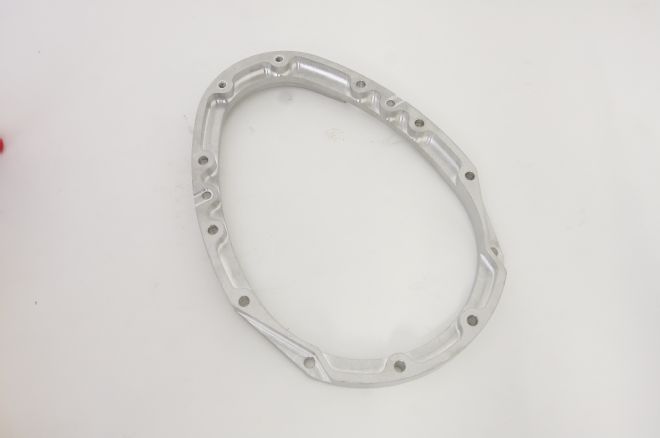
04-05 On early flat tappet engines, controlling forward endplay was accomplished by the timing cover. This was a rudimentary method, however, as the relatively thin sheetmetal covers flexed and allowed the camshaft endplay to increase under load. Normally, this is a non-issue, since flat tappet cams were ground so that the cam lobe spun the lifters, imparting a rearward thrust in the process. Hydraulic camshafts, however, are not ground with the same taper, so a better option for controlling forward thrust is necessary. On later blocks equipped with a hydraulic camshaft, a thrust plate was used to prevent cam walk. Our engine is machined to accept the plate, but to illustrate a hydraulic upgrade in an early block, we're going to use a Comp Cams two-piece billet aluminum timing cover and thrust button to control and initially adjust the forward thrust. The two-piece cover means we won't have to disrupt the oil pan seal to access the camshaft or timing chain in the future and the super rigid construction will control deflection and therefore the forward thrust of the camshaft. It also features an integrated timing pointer and built-in access hole for checking endplay.
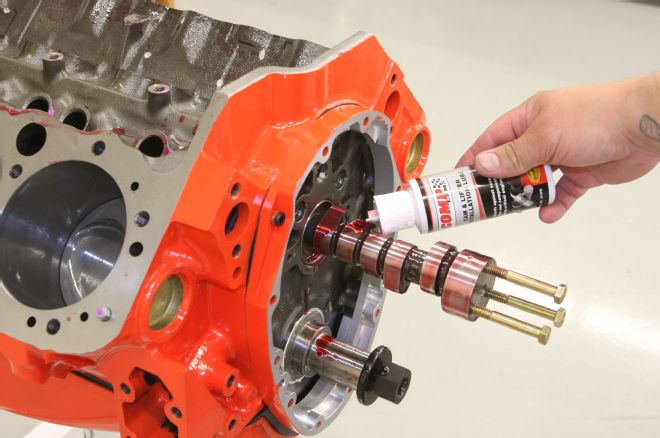
06 Before the camshaft is installed, every lobe is liberally coated in Cam & Lifter Installation Lube. We also checked the cam bearing clearances before assembly, just like we did on all the other rotating surfaces.
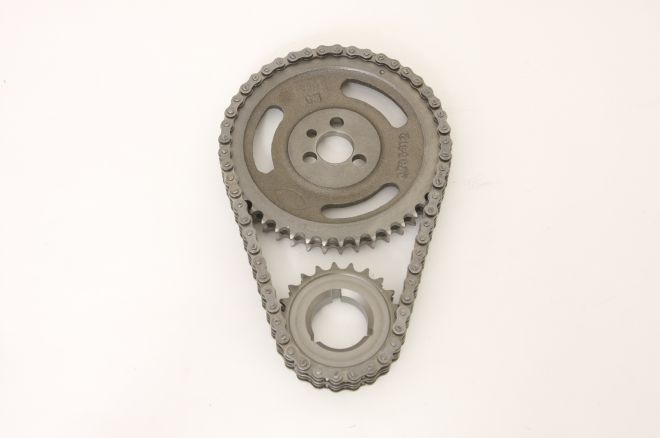
07 Comp Cams' Magnum Timing Set features a crank gear with three keyways for different camshaft timing options (0 degrees, 4 degrees advance, and 4 degrees retard). We'll be using the round timing mark, which will leave the camshaft at the OEM setting.
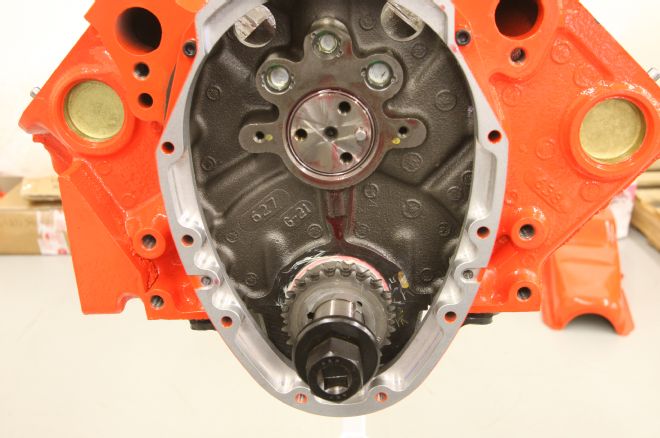
08 With the gear and keyway installed on the snout of the crank and fastened by an ARP bolt, it's then rotated so that the "O" timing mark is at 12 o'clock.
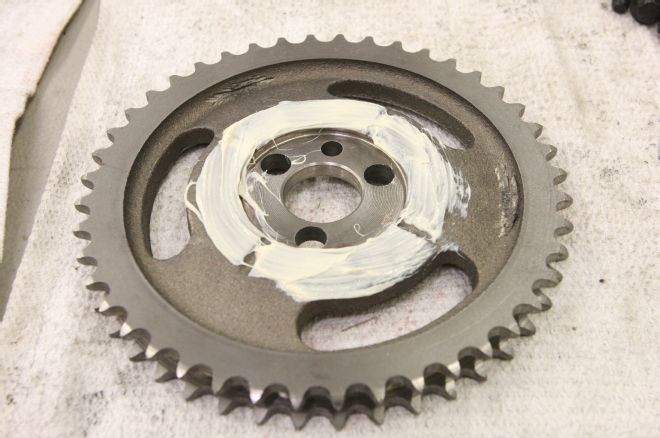
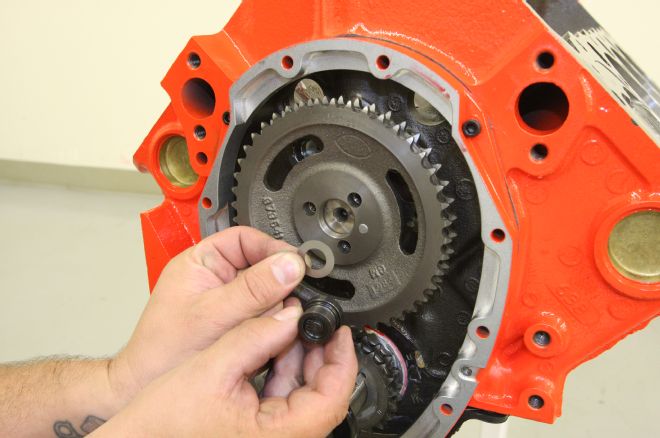
09 The camshaft gear can contact the front of the block and features reliefs machined into the surface of the gear to allow oil to lubricate the surface. A coat of assembly lube insures this surface is properly lubricated during initial startup.
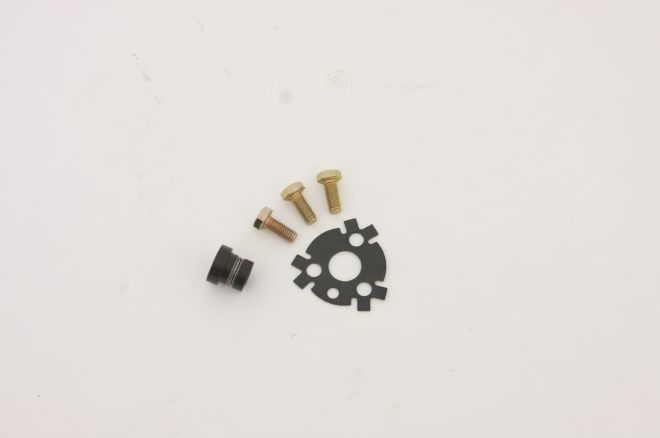
10 This is the camshaft button and retaining plate that will control the forward thrust of the camshaft against the billet timing cover. The button features a needle roller bearing for minimal wear on either the nose of the cam or the timing cover.
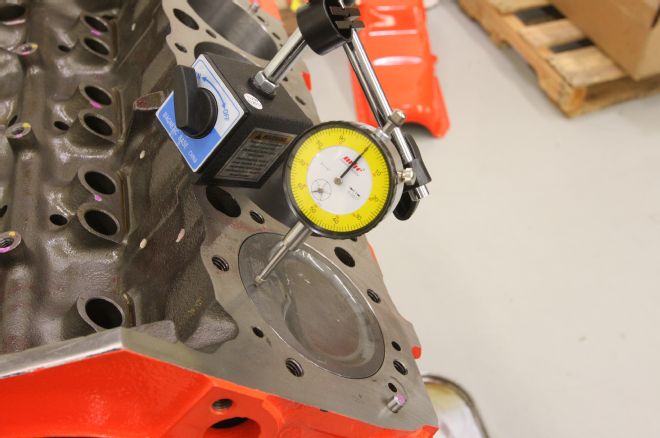
11 Camshaft forward endplay should be between 0.005 to 0.010-inches, adjusted by the adding or removing of shims behind cam button.

12 With the timing gear, button, and retaining plate installed, it's time to check the endplay. We started with no shims installed.
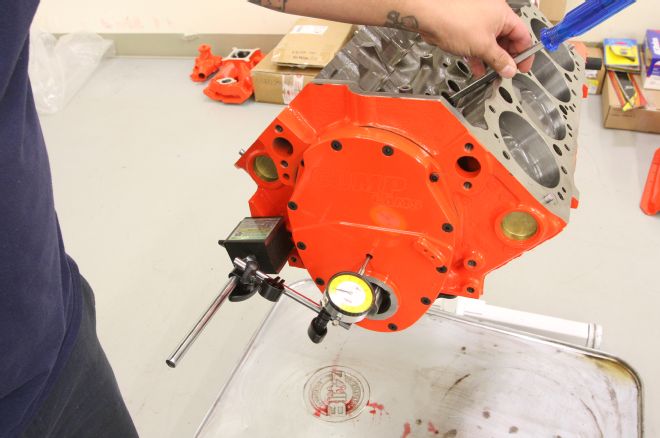
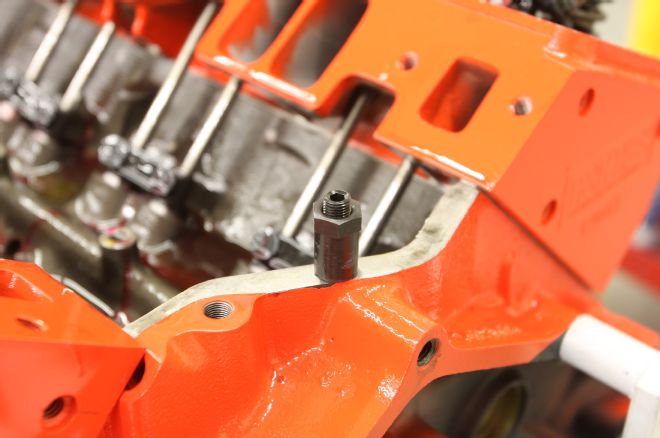
13 The timing cover needs to be installed to check the endplay and a dial indicator needs to be used to measure the lateral movement of the camshaft. Using a screwdriver inserted through a lifter bore, the cam can be moved fore and aft and the amount noted on the dial indicator, this is the camshaft endplay. Two shims were necessary to bring our setup within spec before the timing chain could be installed and the cover buttoned up for a final time.
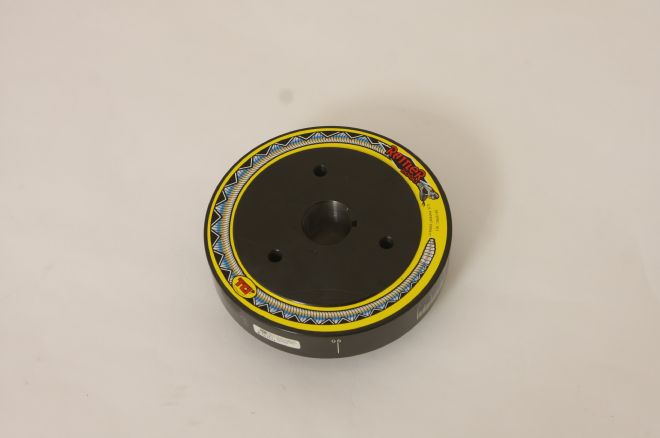
14 Though our engine is of the internally balanced variety, we still need to install a harmonic damper. TCI's Rattler Absorber fits the bill perfectly by counteracting crankshaft vibrations by using internal rollers that automatically offset the twisting forces that cause these vibrations. Simply put, the Rattler is an absorber that eliminates the source of torsional vibration instead of dampening it.
15 Using a dial indicator, we rotated the engine to top dead center...
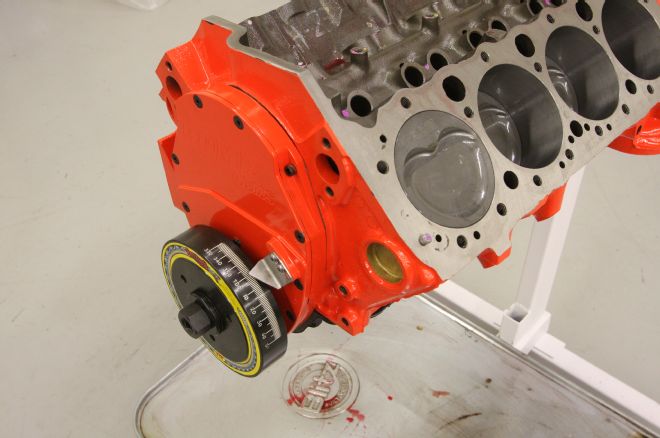
16 ...before installing our damper and timing pointer.
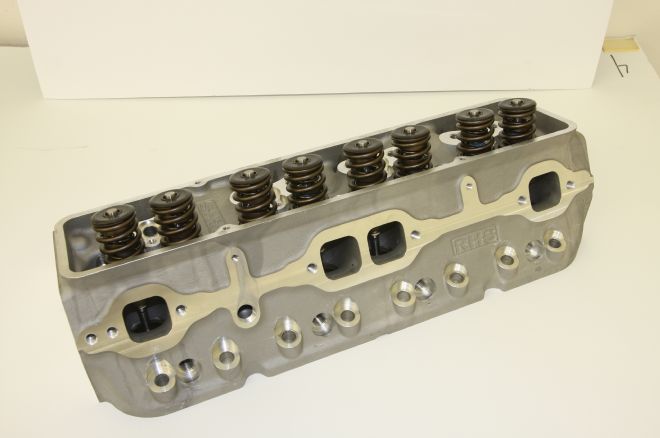
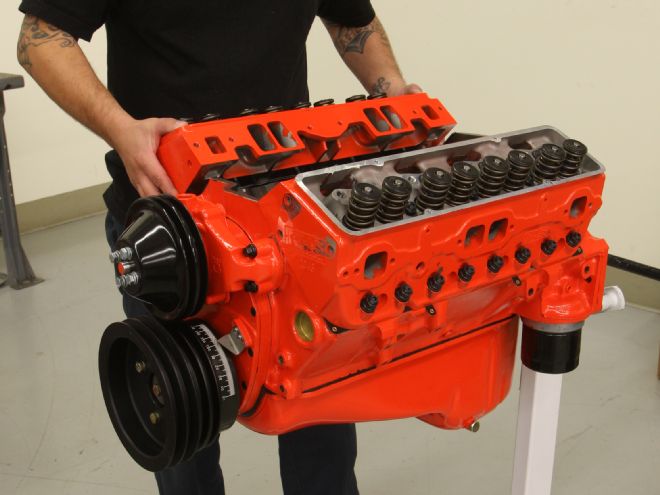
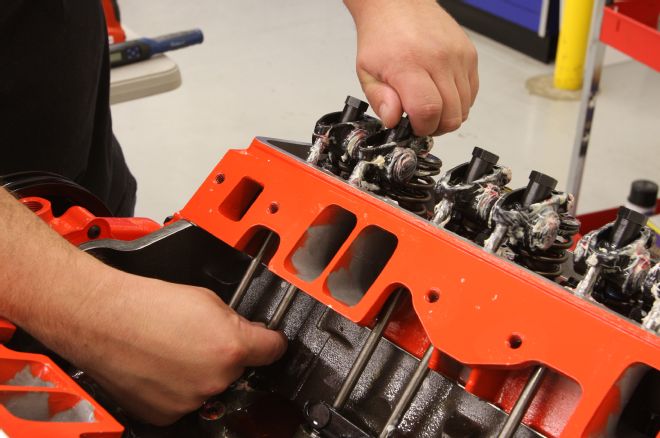
17-18 To top off our engine, we'll be using Racing Head Service (RHS) Pro Action aluminum heads assembled with Comp Cams components spec'd to match our existing valvetrain. We chose a 200cc runner volume to give our street engine plenty of low-end torque without sacrificing anything from the top end as they'll still be plenty capable past the predicted rpm range of our engine.
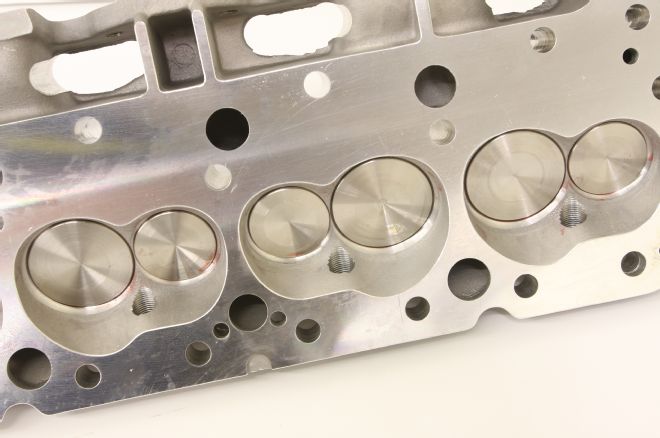
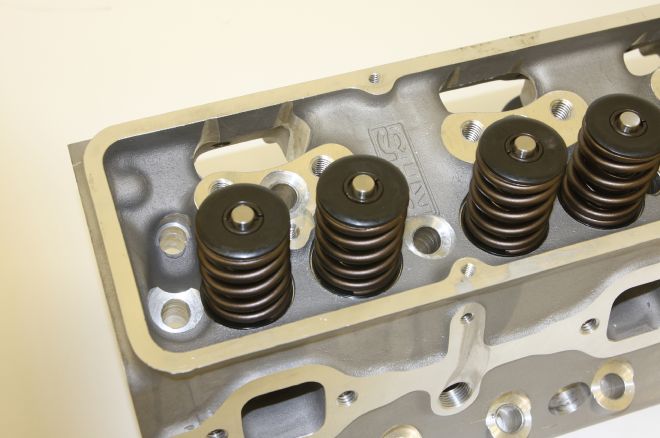
19 We chose a larger combustion chamber volume (72cc), which when combined with our -16cc pistons, should help keep the static compression ratio down below 9:1. Resting in hardened, multi-angle seats are 2.020-inch intake valves and 1.600-inch exhaust valves.
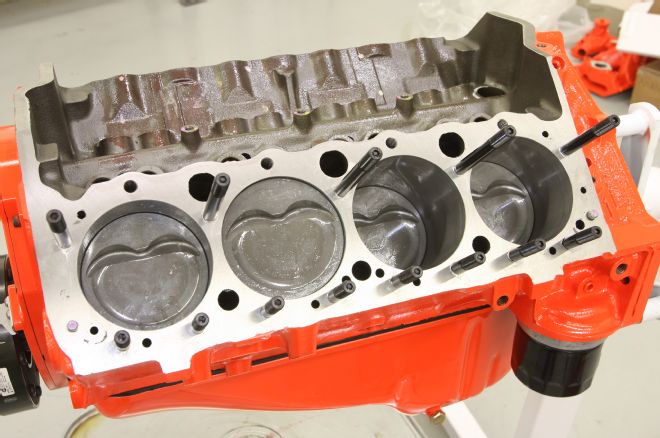
20 A set of ARP head studs will be good insurance in preventing blown head gaskets and ensuring proper combustion pressure since our supercharged engine could see slightly more pressure than a bog standard 350. Like the main studs, the head studs are only installed finger tight using ARP Ultra-Torque Assembly Lube in blind holes and ARP Thread Sealer where they intrude the coolant passages. Fel-Pro Perma Torque MLS gaskets will ensure the combustion gasses don't escape the confines of the cylinder.
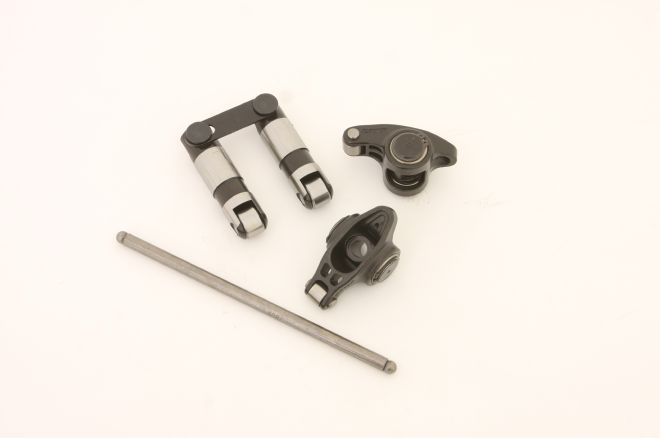
21 Included in our XFI camshaft kit are link bar hydraulic roller lifters. We added a set of Comp Cams Ultra Pro Magnum roller rocker arms with a 1.6 ratio and a set of High Energy 5/16-inch pushrods.
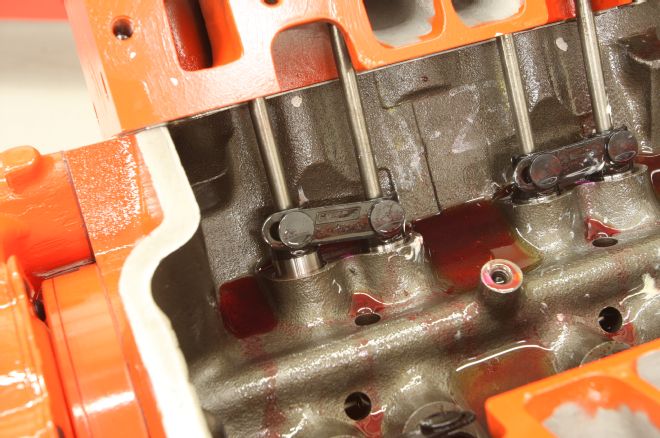
22 Though our Summit block features the raised bosses on the valley floor that will accept the spider plate that controls roller lifter rotation, we again opted to run Comp's "retrofit" components to show the options available for the early engines as well as the late. Unlike a flat tappet lifter where lifter rotation is necessary, with a roller lifter, not only is it unnecessary, it's undesirable as the roller won't work properly if clocked 90-degrees. Therefore, some method of keeping the lifter from spinning in its bore is required, achieved using Comp's link bar setup.
23 Comp Cams Hi Tech Poly Lock rocker arm adjusting nuts make valve adjustments a breeze and also ensure that your engine's valvetrain won't need constant attention by utilizing a set screw to effectively "lock" the adjustment in place.
24 Adjusting the valves using Comp's Poly Locks is easy. First, the engine must be rotated so that the lifter for the valve in question is on the base circle on the cam. Then, while rotation the pushrod, the Poly Lock is slowly tightened by hand, stopping once resistance is felt in the pushrod. The excess slack is now removed from the pushrod, putting the assembly at a zero lash state.
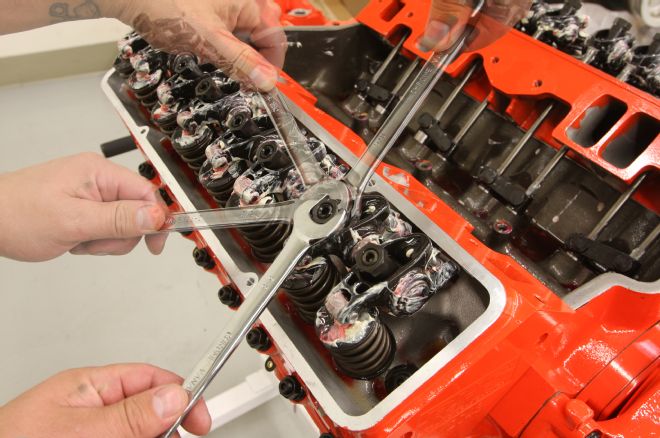
25 Next, the Poly Lock is rotated another half turn, preloading the rocker arm, pushrod, and lifter.
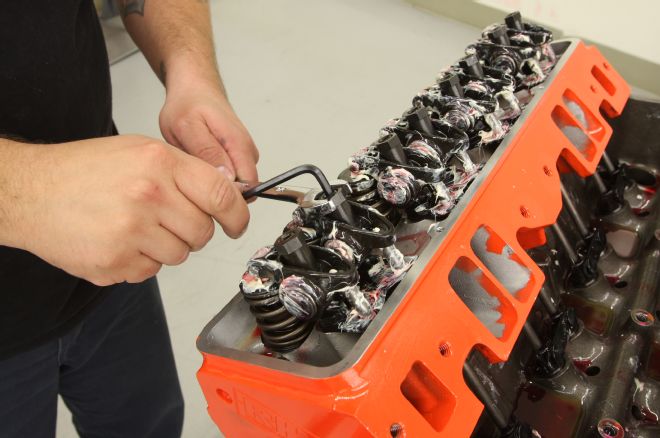
26 With the valve adjusted, the center set screw is then tightened, locking the adjustment in place.
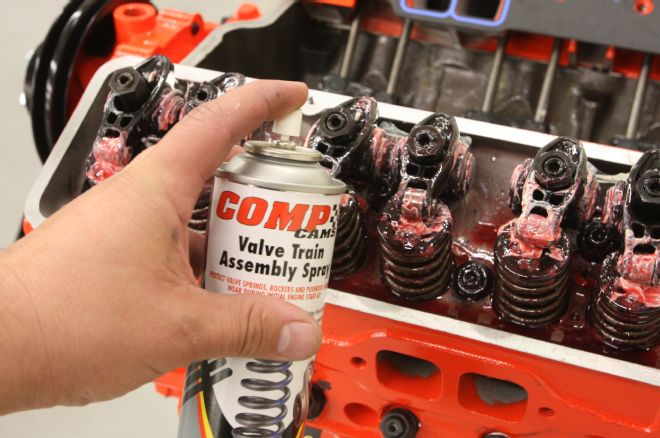
27 To ensure that everything receives plenty of lubrication upon initial startup, a liberal dousing in Comp Cams Valve Train Assembly Spray was applied once all the valves were adjusted.
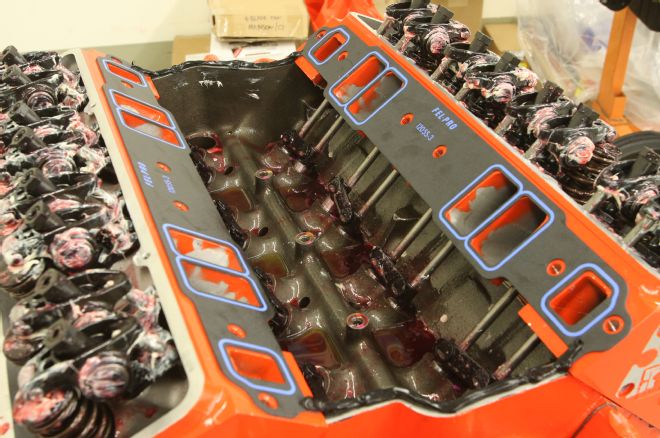
28 At this point, the long block's built and it's time to top it off with an intake and a pair of valve covers. Another set of Fel-Pro gaskets are installed first, followed by the pretty bits.
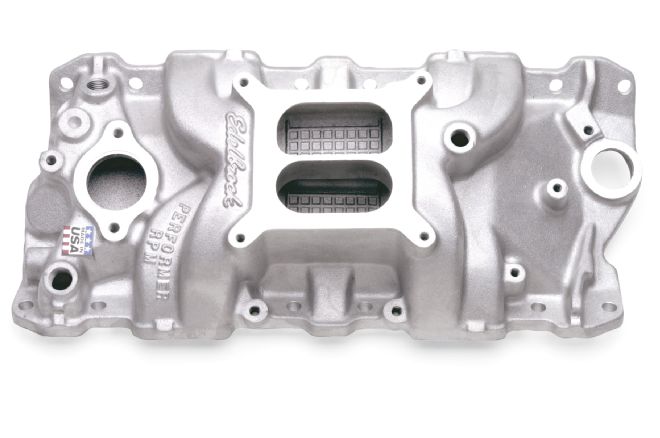
29 To stick with our vintage theme, I opted to use an Edelbrock Performer RPM intake manifold since it still has the outward appearance of a regular four-barrel intake (as opposed to a single plane manifold) and yet it can still perform through the rev range that we're aiming for. The fact that it will accept an oil fill tube means I can further dress the engine up in a vintage style.
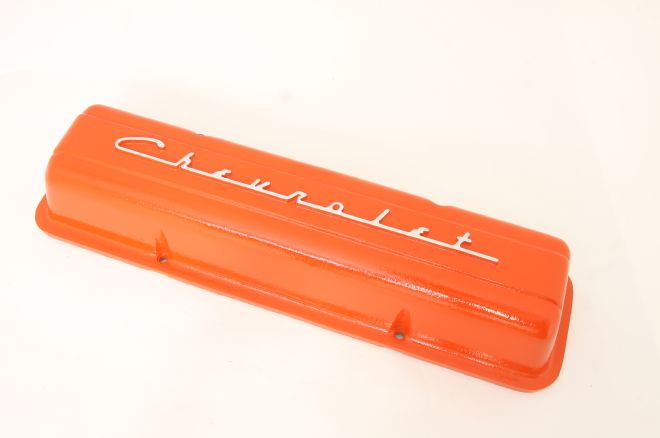
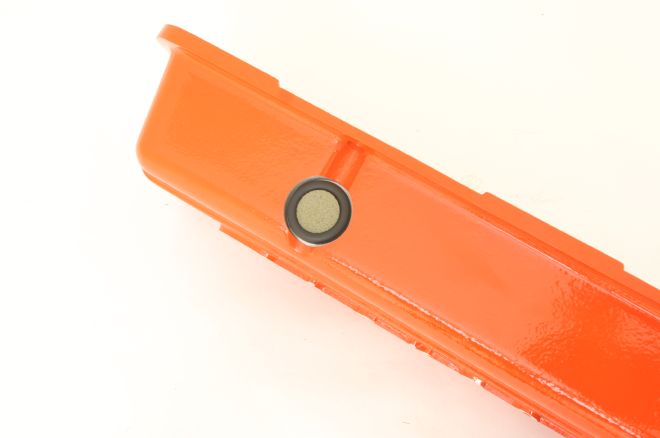
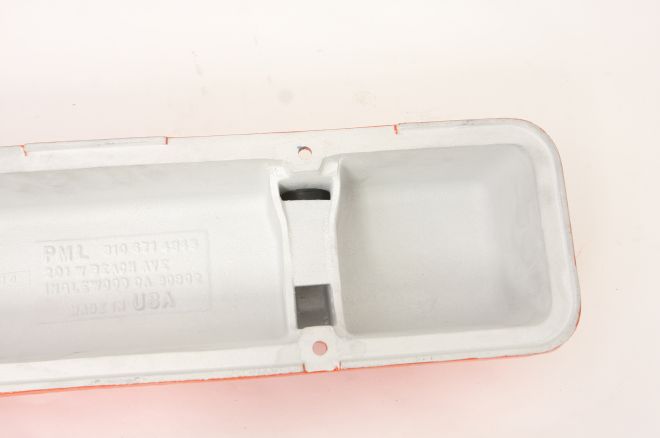
30-32 Valve covers are one of the most important aspects when it comes to building a traditional style engine and nobody makes a nicer, stock appearing valve cover than PML. These cast aluminum covers came powdercoated Chevy orange and feature a built-in baffle with a pair of push-in breathers to help evacuate excess crankcase pressure while limiting oil loss.

33 With the intake painted to match and the motor buttoned up, our stroker motor might look like a vintage 283, but it's going to pack the power and reliability of a similarly sized late-model engine!
A Vintage Look For A Modern Intake
Machining an Edelbrock Intake for an Oil Fill Tube
Back before PCV valves were standard lexicon among hot rodders, venting a motor was oftentimes a simple matter of letting the crankcase vent to the atmosphere via either a road draft tube or a breather apparatus of some sort. When it became passé to dump raw hydrocarbons into the atmosphere, more exotic methods were adopted. If you're building an engine that yearns to identify with a certain era's aesthetic, then simple things like crankcase ventilation and oil fill start to become important build aspects.
And what better way to achieve said aesthetic than to incorporate an oil fill tube to a modern intake manifold? To get the fuel into our motor, we're going to use an Edelbrock Performer RPM intake manifold. While outwardly similar in appearance to an original four-barrel manifold from a 283, it features a port design that is 100-percent 21st century technology, providing power like a single-plane and throttle response like a dual-plane. Couple that with the ability to add an oil fill tube for that vintage look and you've got the best of both worlds.
Unfortunately, if you want to add an oil fill tube to your Edelbrock manifold, you're going to have to approach your local machine shop with a six-pack and a smile as Edelbrock doesn't offer it "out the door." They do, however, offer everything it takes to make a modern intake look the part on a vintage motor, which is worth its weight in salt.
For our 383 build, Edelbrock sent us everything we needed, intake, tube, and breather cap, and we did the rest thanks to our trusty Millrite milling machine. There's just no substitute for the right tools is there?! CT
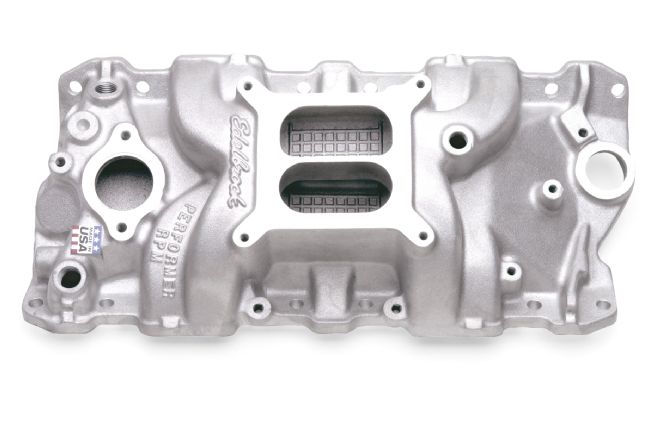
01 Here's our Edelbrock Performer RPM intake before any modifications have been made. Note the cast pad at the front of the intake that allows the machining of the oil fill tube.
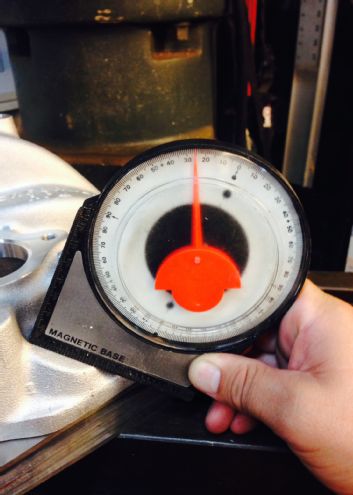
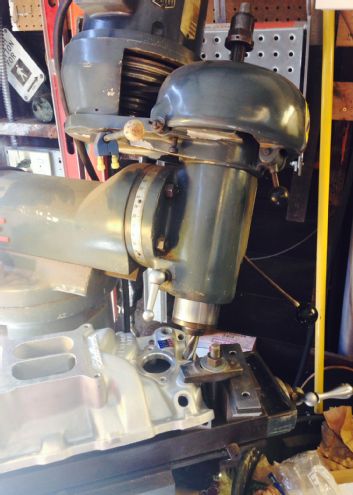
02 The first step is to set up the milling machine. This meant finding the proper angle of the pad's surface and adjusting the machine to suit. For our setup, 25 degrees was the magic number.
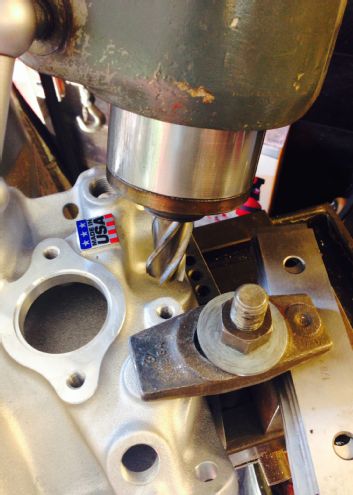
03 Edelbrock specs a hole size of 1.250 inches for the oil fill tube. An end mill of similar size makes simple work of the procedure; however, we were not so lucky. So, we started by drilling a clearance hole in the manifold, followed by a 1-inch bore cut by a corresponding end mill.
04 Here's the whole enchilada pictured for reference.
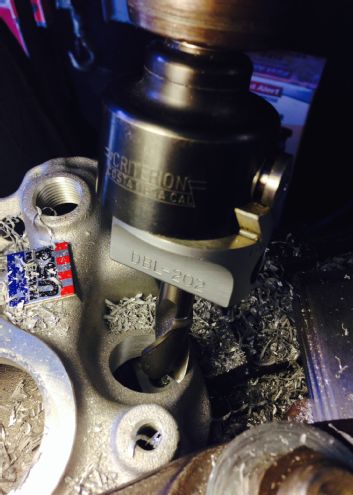
05 For any boring work (no pun intended!) where I don't have a corresponding end mill to give me the proper finished diameter, I turn to my Criterion DBL-202 boring head to get the job done. Adjusted to bore the exact diameter hole (1.250-inch), it was a simple matter of running the head through the intake and we were ready to install the tube.
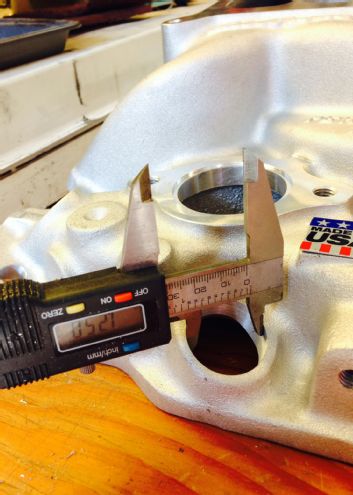
06 The machined hole checks out perfectly and we're ready to install the oil fill tube.
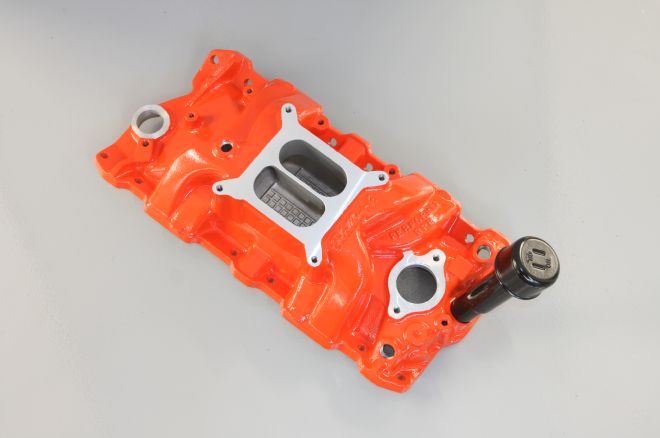
07 First, the intake manifold is shot in Eastwood's Chevy Orange High Temp Engine Paint, while the tube is shot is my favorite Satin Chassis Black before taking a nap in the freezer. Letting the tube chill for a few hours allows it to shrink ever so slightly, while the intake remained room temperature. This made driving the tube into the machined hole a simple affair, accomplished by a 2x4 and a mallet. The result is a combination that looks more at home on a vintage 283 than a modern 383 stroker motor.