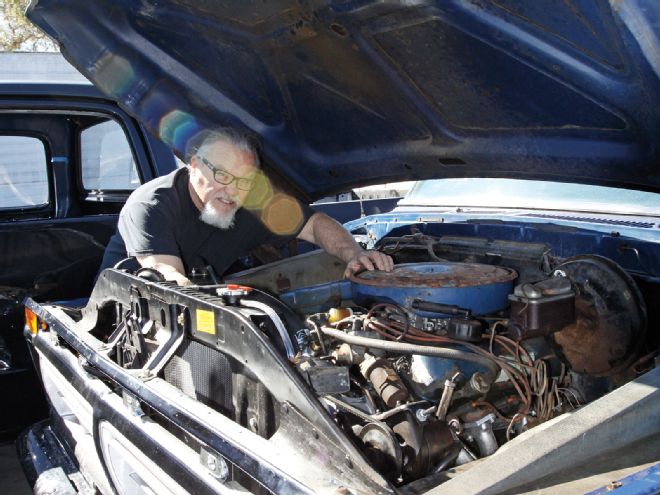
If you're thinking the 1976 Ford F-250 featured on these pages looks a little familiar, you're right. In last month's "A Classic Truck Can Survive" we covered installing a set of smog-legal Hedman Elite headers sourced from Summit Racing, and replaced a bad freeze plug while it was exposed. I did the work in my driveway on jackstands and, as usual, I made a few missteps determining the best order in which to do things. The corrected methods will appear in the captions.
In addition, time constraints associated with meeting a deadline caused me to use parts that I wouldn't recommend. A good example was not opting for a mini-starter when I believe that all header installations should include a mini-starter to provide more room and avoid future starter problems associated with heat exposure.
The main idea is to inform CT readers that a nice original truck doesn't have to be scrapped just because it's a year/model that's required to pass a smog test. Vehicle emissions inspection requirements vary from state to state and in different countries. For specific information check with SEMA SAN (www.semasan.com) to find out what the emission requirements are in your area. It's surprising how many states require smog certification. All it takes is a little research in Summit Racing's catalog to find the right parts and pick up performance, while still retaining smog compliance.
Before I could drive the 1976 up to the Muffler Man in Placentia, California, to have the Flowmaster catalytic converters and 2-into-2 muffler installed, the cooling system had to be reassembled. A point made in last month's issue was anytime one disassembles a truck to install a specific part it's always a good idea to check if there's anything else that needs attention. There's no sense in having to do the job twice. Removing the water pump, radiator, and hoses made it a lot easier to install the Hedman headers, plus make some much-needed repairs and improvements to the stock cooling system.
 1. Memory can't always be trusted; it's a good idea to take numerous reference photos before one starts. Running without a fan shroud is a very dangerous situation and a guarantee the cooling system will not operate properly.
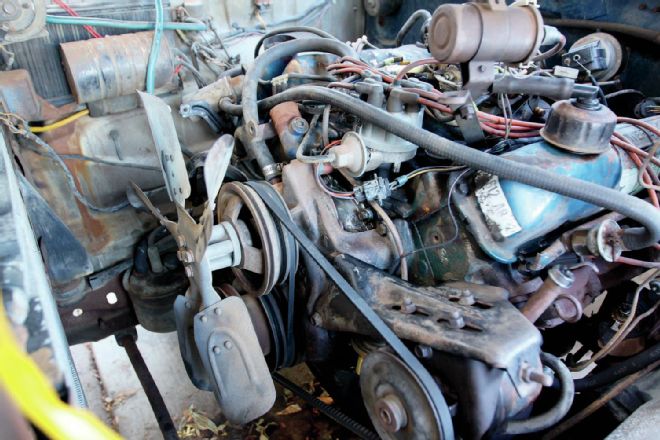
 2. The power steering pump, alternator, and smog pump had to be removed in order to access removing the heavy stock cast-iron water pump.
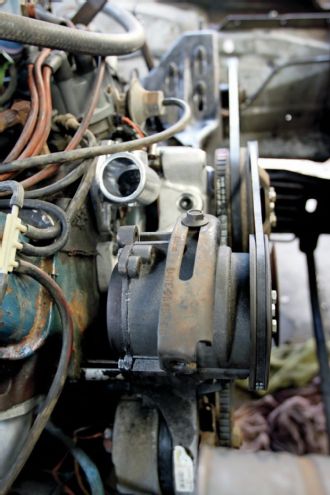
 3. Before mounting the Edelbrock aluminum water pump it was necessary to use a gasket scraper along with a new single edge razor blade to make sure the mounting surface was absolutely spotless.
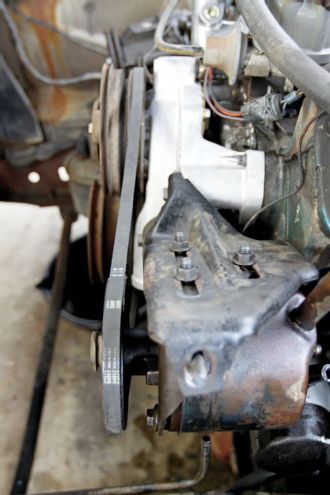 4. Here's the Edelbrock water pump properly installed. Note the bend (crook) in the power steering belt. A crooked tracking belt will prematurely destroy the alternator, power steering pump, and water pump bearings.
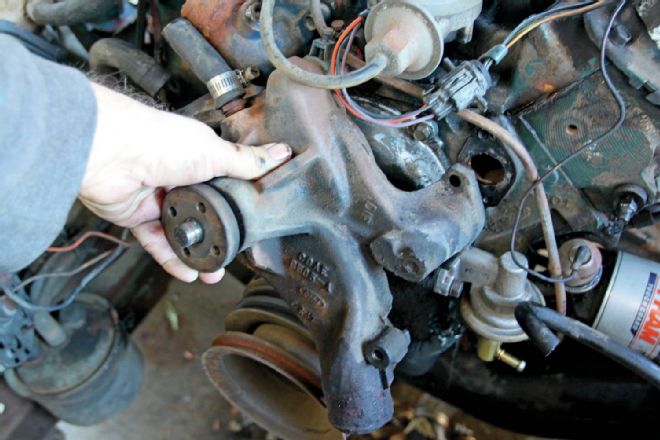
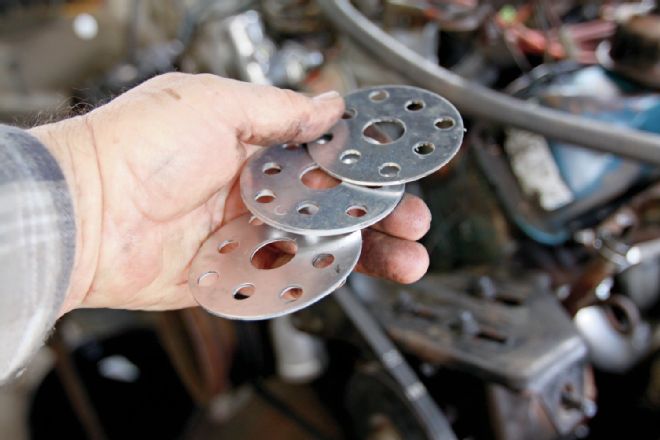 5. Summit Racing offers universal bolt pattern adjusting shims that work to properly align Ford, Chevy, or Chrysler water pump pulleys.
 6. Shimming the water pump pulley requires a repeated process of stacking the water pump pulley shims and mounting the pulley and then checking for belt alignment.
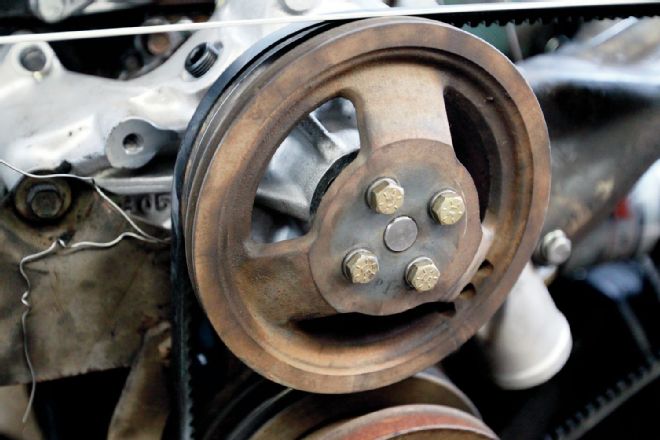 7. With proper belt alignment, and the lack of spinning a heavy fan, the bearings in the Edelbrock water pump will last for a very long time. Maintaining antifreeze in the cooling system helps water pump lubrication.
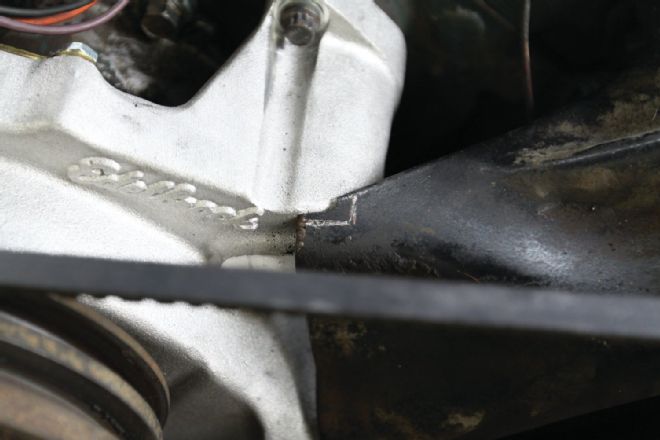 8. Proper belt alignment can be affected by mounting brackets that do not fit squarely. Spots of interference can be corrected by grinding the mounting bracket to fit square.
 9. Sighting from the side will reveal if the belts run true (straight). Using a straight edge as an alignment gauge will confirm the belts are running true.
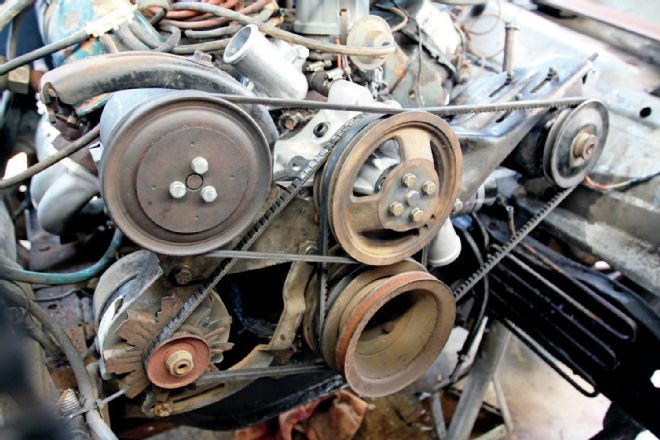 10. Correct belt tension ensures the power steering pump, alternator, and smog pump will operate properly. A squealing belt indicates slippage. An overtightened belt will cause bearings to fail.
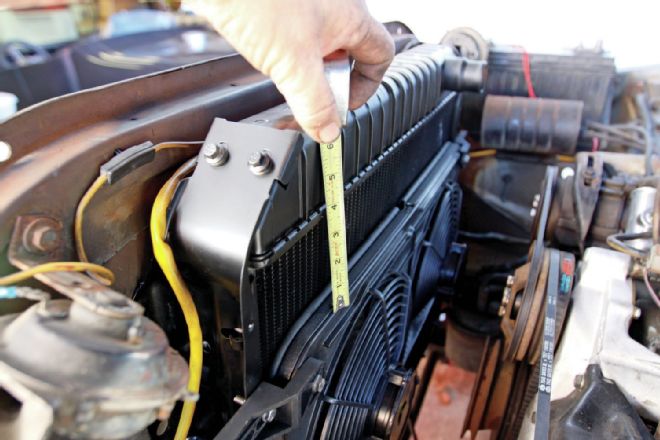 11. With the radiator installed into place, the correct mounting position for the Summit Racing dual-fan was determined. This is also the time to determine where the mounting bracket's length should be cut.
Something that few people seem to understand when they have a shop make repairs to their vehicle is the chain of events that can occur. Because I did the work myself I was able to watch the cooling system fall apart in steps before my very eyes. The radiator leaked, so I took it to a local radiator shop for repairs. I prefer a brass and copper radiator over anything, but when the shop owner said he wanted over $400 to re-core my original radiator I popped for the $200 plastic and aluminum cheapie from China.
At the time I was planning on selling the truck, but I changed my mind. With the radiator now able to hold full pressure, next in line to fail was the water pump seal. Considering the labor involved, a cheap rebuilt pump was out of the question, plus I was now looking to make the truck perform at its best. The obvious choice was an Edelbrock aluminum water pump because aluminum dissipates heat better, weighs less, and yes, everything looks better with a cool Edelbrock logo on it.
The stock Ford mechanical fan pulled a lot of air through the radiator whether it was needed or not, plus it made a tremendous amount of noise and robbed horsepower. Couple this with the fact a mechanical fan puts a lot of unnecessary load on water pump bearings and seals, the swap to Summit Racing's dual electric fan with a Derale controller was a clear choice. Not only do electric fans save on wear and tear, they free up horsepower and greatly improve A/C efficiency by accelerating heat exchange through the condenser at all speeds.
Lee and Jake at the Muffler Man did a really sanitary installation of the Flowmaster catalytic converters and 2-into-2 muffler with dual tailpipes. In addition to knocking the exhaust emissions way down, the Flowmaster cats seem to act quite well as resonators. Lee was careful to make non-restrictive bends in the head and tailpipes, and the system sounds powerful without a lot of extra noise or drone.
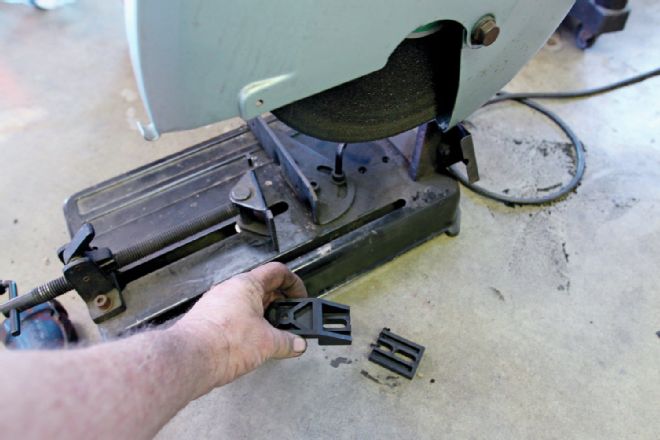 12. The best way to install (mount) the dual fan to the radiator is with the radiator out of the truck. A chop saw guarantees perfectly square cuts to mounting bracket overhang.
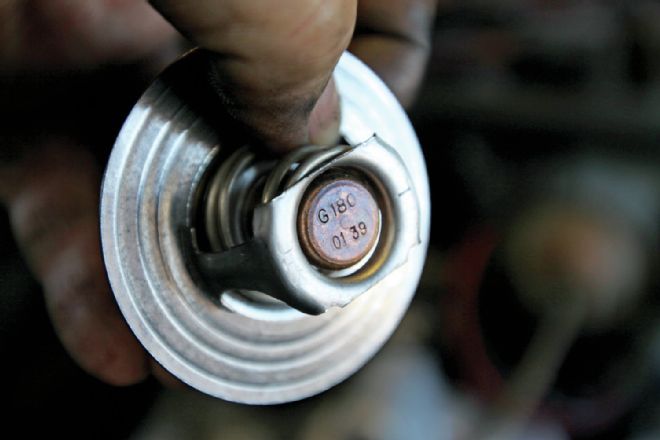 13. All thermostat ratings are marked in this manner. Always check the desired thermostat temperature matches the rating on the bottom of the thermostat probe.
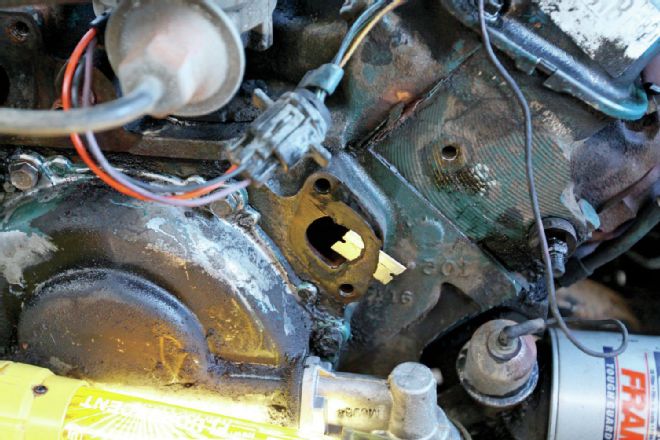
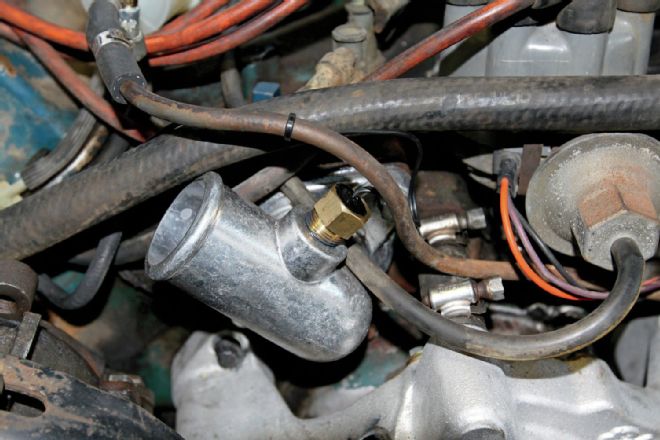 14. The new Summit Racing aluminum thermostat neck (housing) for Ford FE engines includes the perfect bung for placing (installing) the Derale fan controller probe (thermo-switch).
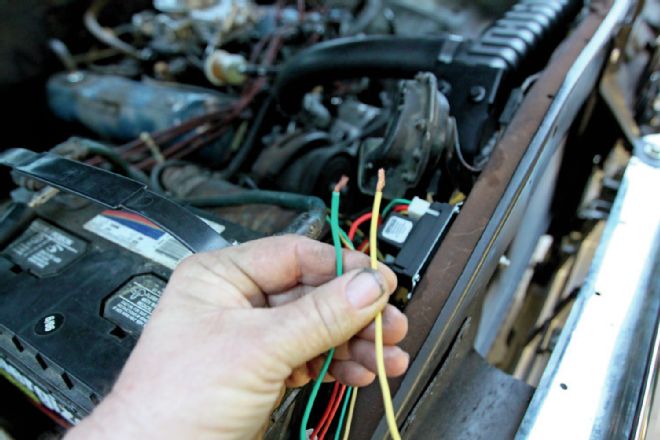 15. The yellow wire from the Derale controller harness connects to a hot lead switched in line with the ignition switch. It is controlled by the thermo-switch. The green lead is for fan override and connects to the A/C compressor hot lead.
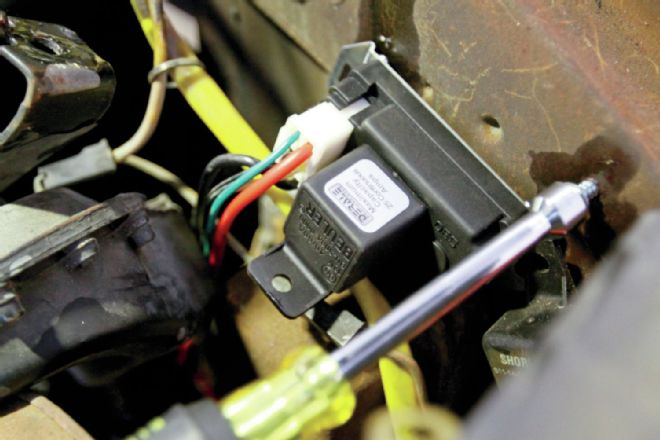 16. Wiring should always be kept as short as possible. I mounted the Derale controller unit adjacent the battery on the radiator core support.
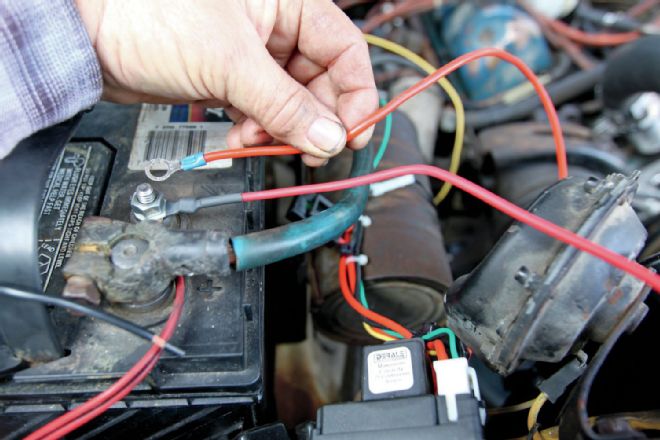 17. I like using marine batteries because they have additional lugs built in. The loose red hot lead runs from the battery to the blue positive (+) lead on the Summit Racing dual fan. The fused red hot lead from the controller runs to the black (–) negative lead on the SR dual fan.
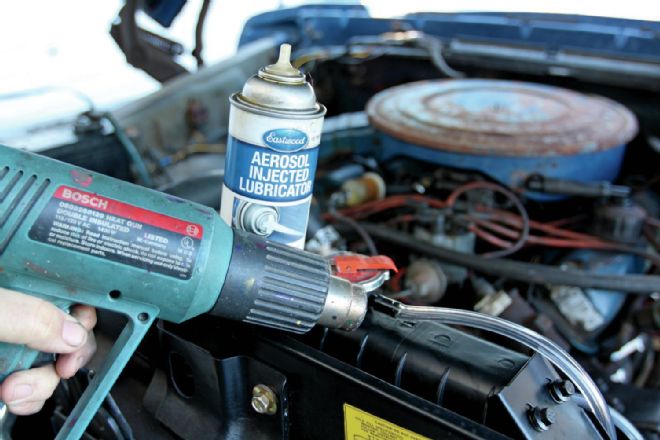 18. Antifreeze is poisonous. The coolant overflow line should always be connected to an overflow bottle. A heat gun or a good lubricant eases hose installation.
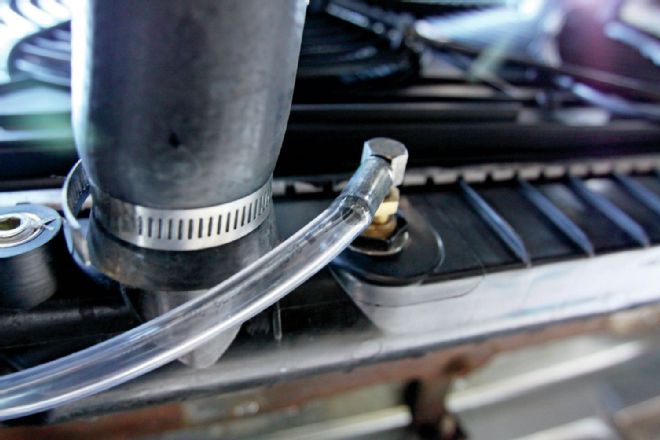 19. Clean, huh? Numerous times I've run the radiator overflow line to an unused transmission cooler in the radiator and so far it has worked just fine.
 20. Hedman ball flange collector ends made it easy for Lee to adjust the angle they needed to point to.
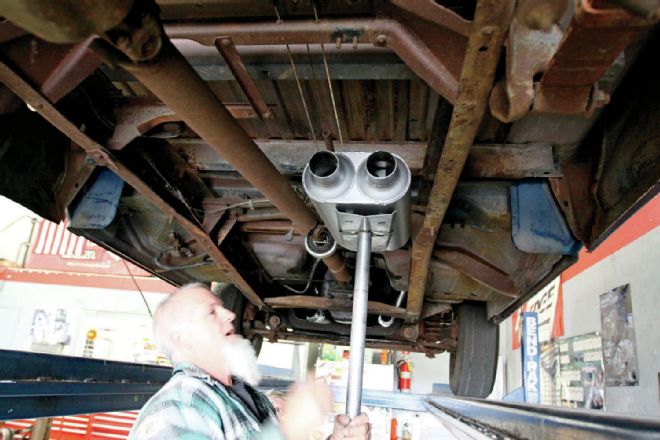 21. The next step was for Lee to determine where the Flowmaster dual-inlet muffler needed to be mounted. Next the Flowmaster catalytic converters were mounted in parallel as close to the collectors as possible.
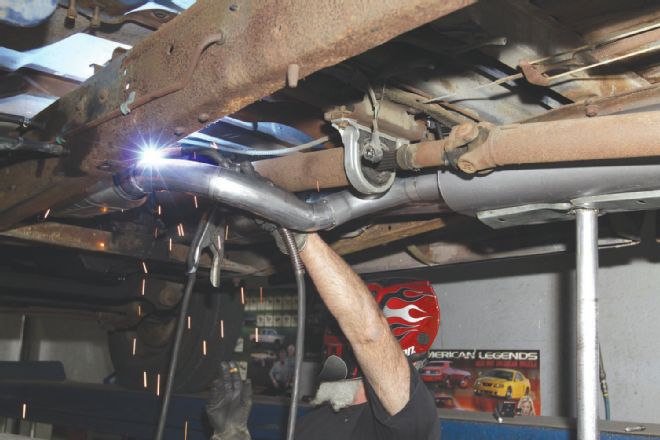 22. The most difficult pipe to fabricate was the driver side crossover circumventing the driveshaft. Note Lee made it in two pieces to minimize restrictive kinks.
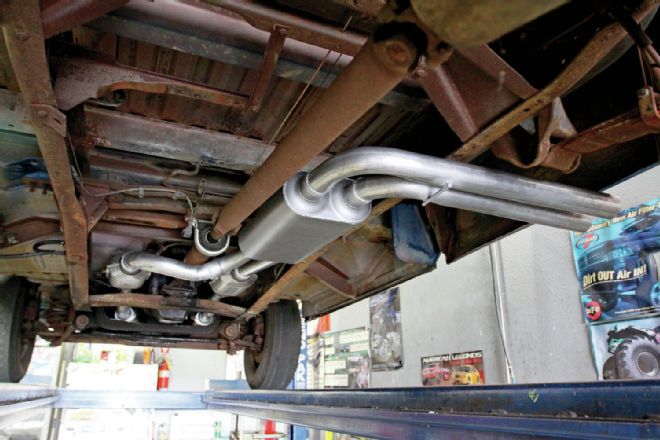 23. Here's the complete system from the Hedman headers to the Flowmaster cats back to the Flowmaster 2-into-2 muffler into dual outlets exiting in front of the rear fenderwell.