This 1976 Ford F-250 was found in the side yard at Chuck's Glass in Huntington Beach, California. That was in 2011, but I'd known of the F-250 since the 1980s back when Chuck and my dad belonged to the Huntington Beach Gun Club based out of Huntington Beach's police pistol range. My dad passed away in 2003, but I'll never forget hearing him speak of Chuck's 1968, 1972, and 1976 Ford F-250 glass trucks, and what nice shape he kept them in.
The closer I got to the blue 1976 F-250, the cleaner it looked. It had original paint and there wasn't a dent in the body, or even inside the bed. I asked Chuck what his plans were for the Ford and he said he was going to junk the truck. I couldn't believe he would scrap such a nice truck and asked why. Chuck explained the Ford had been parked ever since he drove it home from an oil change where the shop forgot to put the oil back in it. Chuck said on top of hearing a knock in the engine the truck was a 1976 year model and he didn't want to have to deal with passing a smog test.
Anyone living in a state where a smog test is required knows it can be an extremely frustrating experience. My first run-in with an ignorant smog device inspector was in 1970 when I drove a bone-stock 1967 Chevy SS427 Impala from Michigan back home to California and had to get California plates. Back in those days all that was required was a visual inspection and PCV test. The state-licensed smog ignoramus took one look at the stock 385-horse 427 engine and accused me of doing an engine swap. It took another two stations before I found a smog guy who knew anything about cars. Not a lot has changed since then, the state continues to require a visual inspection, and one is still at the mercy of whoever is doing the visual inspection before the smog test can proceed.
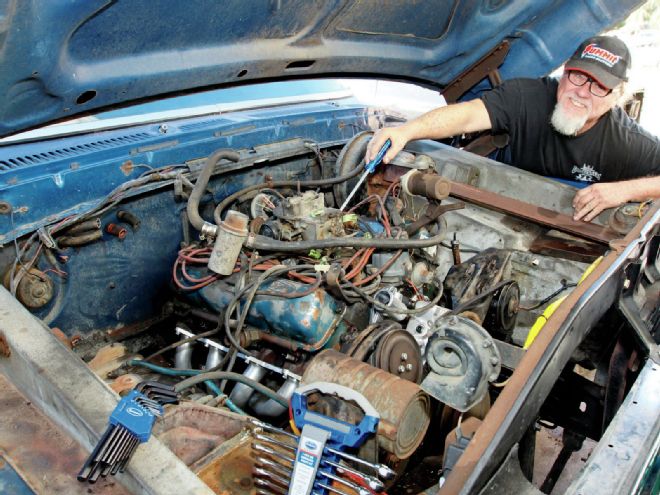
 1. To start gaining access, the first step was to pare off unwanted bulk such as a non-functioning dealer-installed A/C unit. I love having A/C, maybe at a later date I'll install a modern upgraded 134 unit.
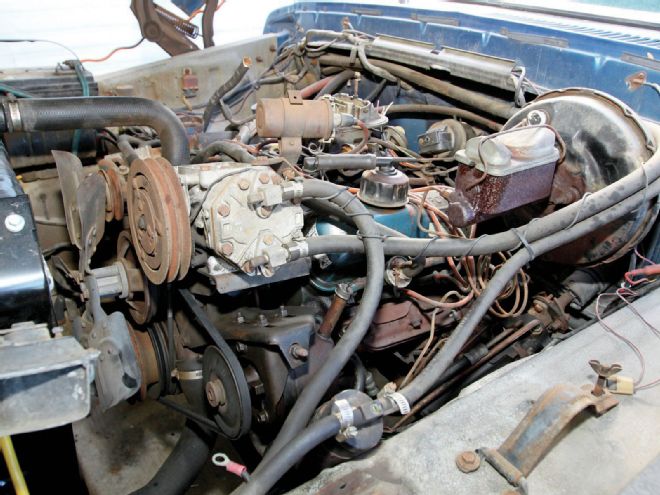
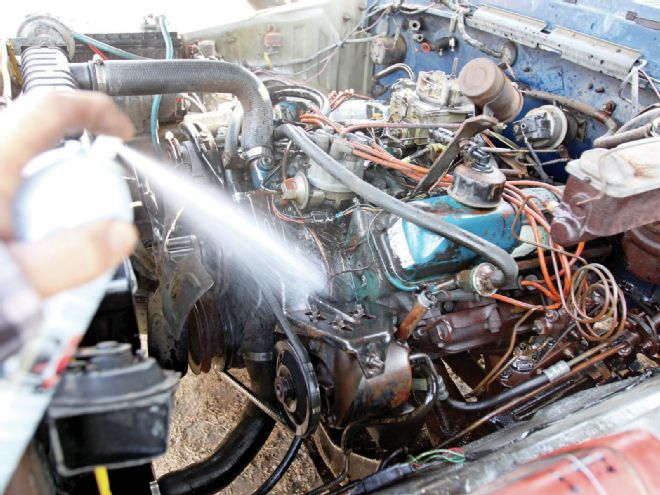 2. Future mechanical problems can be hiding under caked-on grease. Degreasing the engine compartment is a must. Spraying the pristine firewall with degreaser was a mistake as it dulled the blue paint.
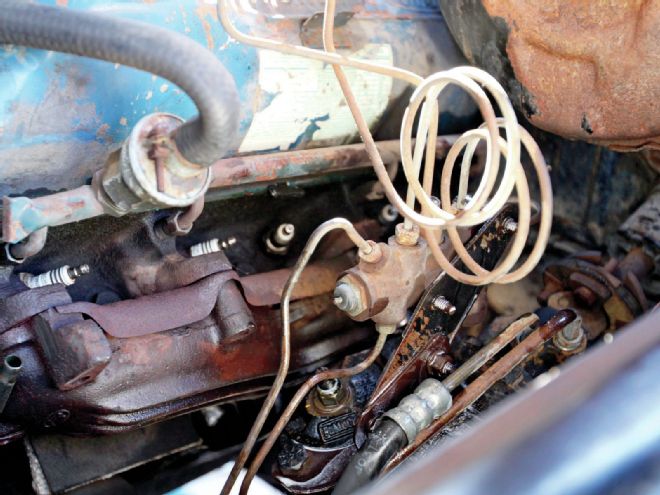
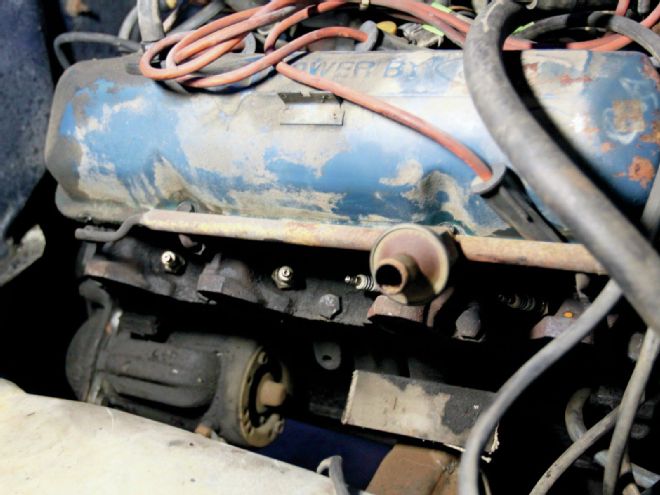
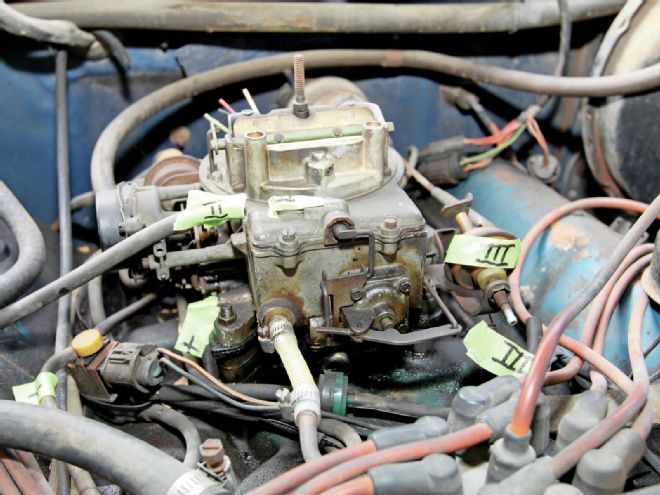 3. The emissions schematic decal was missing. Before disconnecting the smog hoses I tagged corresponding numbers at each connection. Its hard to believe a smog inspector will know exactly where every hose should go on a 38-year-old truck.
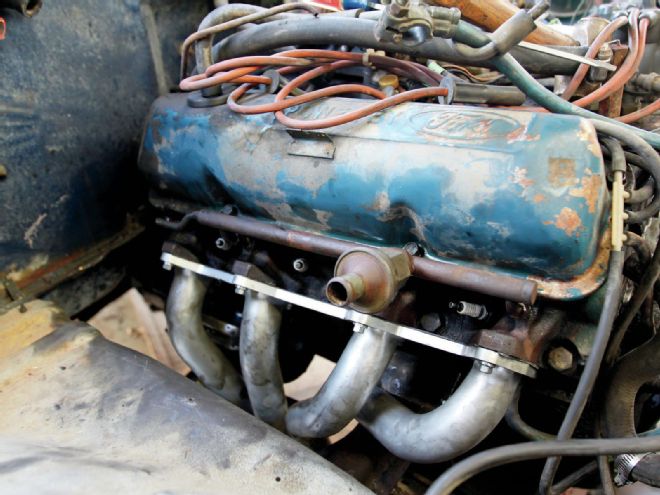
 4. It's not revealed in the header installation instructions. All header installs begin by figuring out if the headers install from the top of the engine or from the bottom. The 360/390-inch Fords install from the bottom.
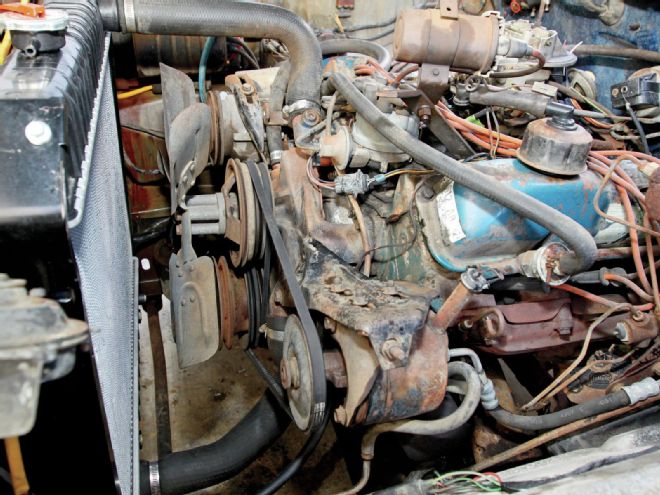
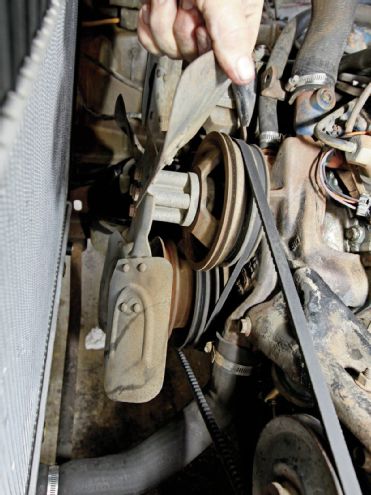 5. Test the water pump bearing by shaking the fan. If there's any slop the bearing is on its way out. Without a shroud this noisy power-robbing mechanical fan is dangerous. Next month we're converting to electric.
6. Passenger side view: Hedman Hedders warned its headers will not fit on a F-250 Custom Camper because of the auxiliary gas tank. Note how the existing custom dual exhaust was stacked to clear the auxiliary tank.
5. Test the water pump bearing by shaking the fan. If there's any slop the bearing is on its way out. Without a shroud this noisy power-robbing mechanical fan is dangerous. Next month we're converting to electric.
6. Passenger side view: Hedman Hedders warned its headers will not fit on a F-250 Custom Camper because of the auxiliary gas tank. Note how the existing custom dual exhaust was stacked to clear the auxiliary tank.
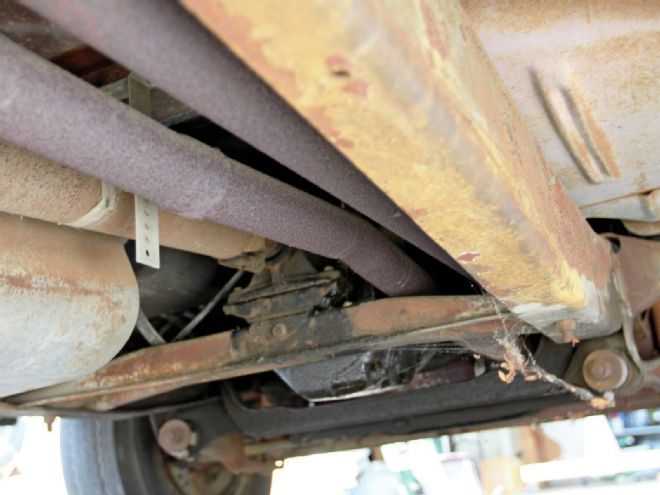
 7. Driver side view auxiliary tank: Doing exhaust work in a driveway on jackstands is a royal pain. I used a reciprocating saw to cut the old exhaust off in sections. Custom campers come standard with front and rear swaybars.
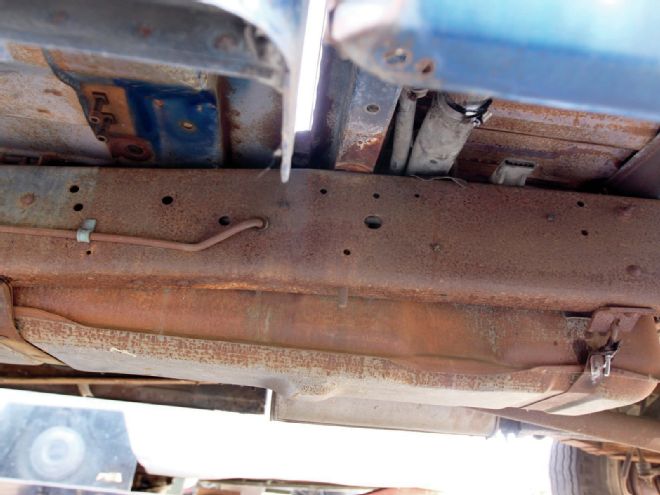
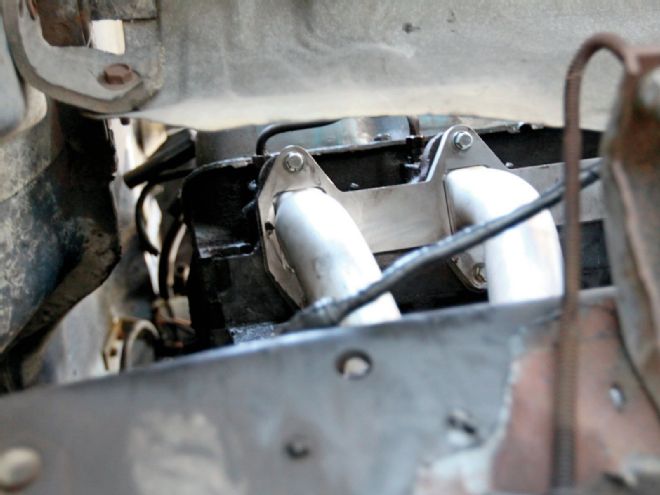
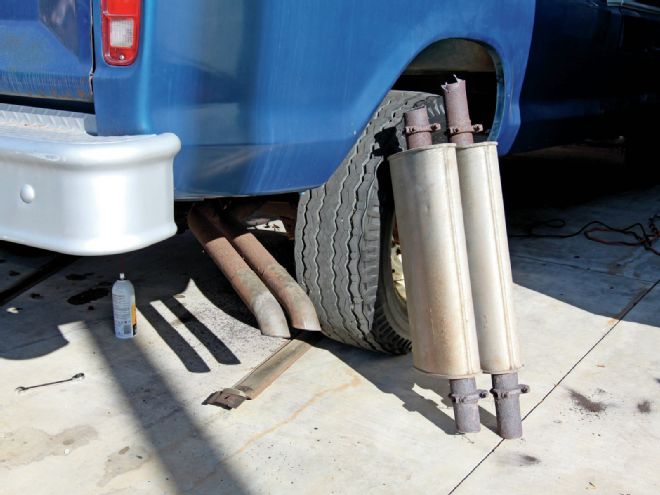 8. These mufflers were welded together as a heavy unit. The new exhaust system with lighter Flowmaster mufflers will exit in front of the rear wheels.
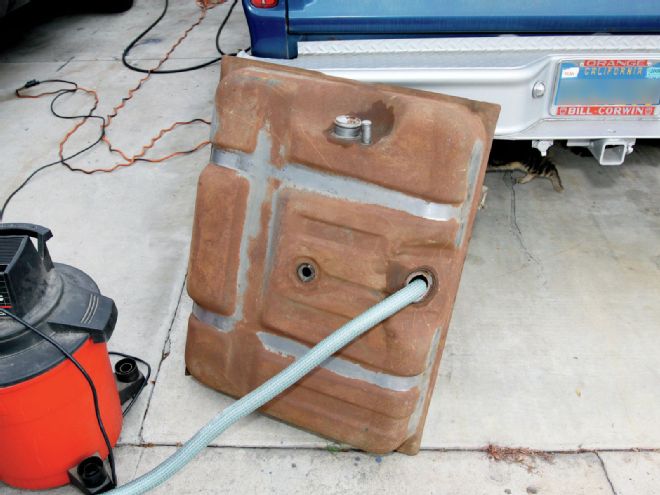 9. Many a fuel pump has been replaced when the fuel supply problem was at the gas tank. Check for collapsed fuel hoses. Throwing loose nuts and bolts into the tank works on cleaning a tank in real good condition. It costs just a little more than boiling-out to buy a new gas tank.
 10. See the wet bolts? For any disassembly work it's a good idea to presoak with penetrating oil. I didn't break the lines, the proportioning valve pushed to one side for clearance.
 11. Head pipe removed this was revealed. Look for bad soft (freeze) plugs, and anything else in need of repair while you're removing the old exhaust system.
 12. A slide-hammer works great to remove bad freeze plugs. Scrape and sand clean the heavy rust formations left behind.
The main focus of this article is how to install Hedman Elite headers and induction on big-block Fords that need to remain smog-legal plus gain a little horsepower and fuel mileage in the process. In addition I'd like to inspire CLASSIC TRUCKS readers to look into non-exempt trucks. This is an untapped source of slightly later-model classic trucks that can be had for considerably less money. Beyond California's borders there are numerous states that enforce vehicle emission laws. To learn the smog requirements for your state please visit www.semasan.com.
Getting back to my 1976, fortunately the factory smog equipment on the truck has never been tampered with, and because the GVW (gross vehicle weight) is over 6,000 pounds it wasn't originally required to have a catalytic converter. In 1975 all cars were required to run a catalytic converter, but trucks over 6,000 GVW weren't until 1979 (1978 in California).
Preparing a 360-inch Ford engine with some miles on it to pass smog can be a hassle, so we're going to install a pair of Flowmaster catalytic converters to hedge the bet. In the mid-1970s, factory-installed catalytic converters were heavy, extremely restrictive, and parasitic loss was substantial. The new Flowmaster cats are one-quarter the size, much lighter, and flow as efficiently as high-performance mufflers. In this month's edition we'll cover installing a set of smog-legal Hedman headers, and pay special attention to any repairs that should be handled while things are easier to access. In next month's issue we'll hang the exhaust system from the cats back, freshen up the cooling system for summer, and then go pass a smog test.
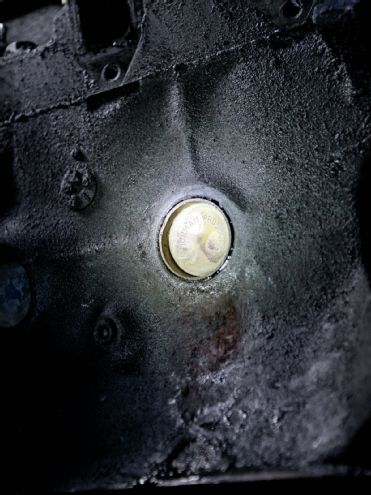 13. For a good seal use Permatex Form-a-Gasket on the opening. I like to replace steel freeze plugs with brass.
 14. To avoid exhaust leaks a good clean surface is needed: I sanded and scraped the exhaust port face clean before mounting the header. Note the factory motor mount heat shield will have to be bent down to allow clearance for the headers on each side.
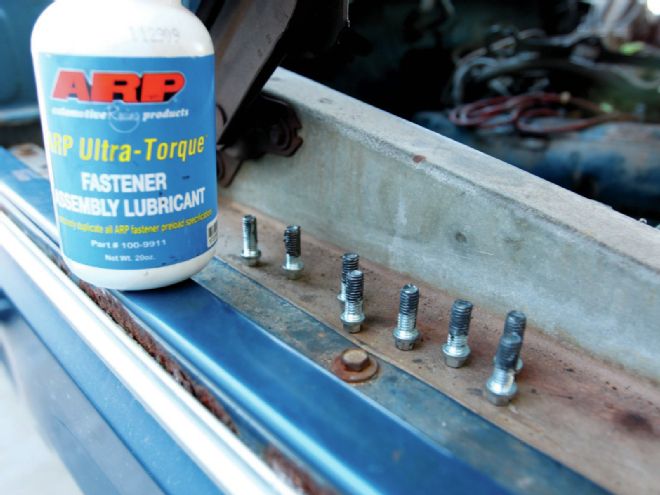
15. Using antiseize on exhaust system hardware is a good idea. I prefer to use ARP Ultra-Torque, Summit Racing sells it.
14. To avoid exhaust leaks a good clean surface is needed: I sanded and scraped the exhaust port face clean before mounting the header. Note the factory motor mount heat shield will have to be bent down to allow clearance for the headers on each side.
15. Using antiseize on exhaust system hardware is a good idea. I prefer to use ARP Ultra-Torque, Summit Racing sells it.
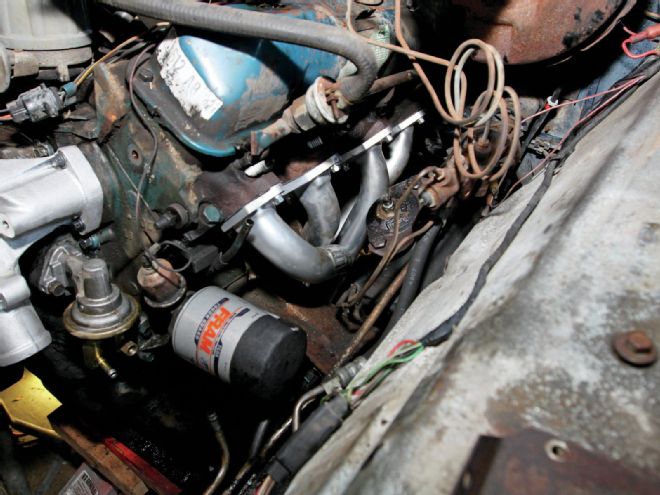
 16. The driver side header installs from the bottom. For stick-shift models the clutch linkage will have to be removed for clearance. Note the smog pump rail remains in place.
17. Before installing the first bolt I positioned the header gasket into place. Start the bolt with your left hand, and hold the gasket into place with your right. Tighten the bolts down evenly as you would torque a head gasket.
16. The driver side header installs from the bottom. For stick-shift models the clutch linkage will have to be removed for clearance. Note the smog pump rail remains in place.
17. Before installing the first bolt I positioned the header gasket into place. Start the bolt with your left hand, and hold the gasket into place with your right. Tighten the bolts down evenly as you would torque a head gasket.
 18. To install the passenger side header the starter and smog rail will have to be removed. The motor mount heat shield will have to be bent downward for clearance.
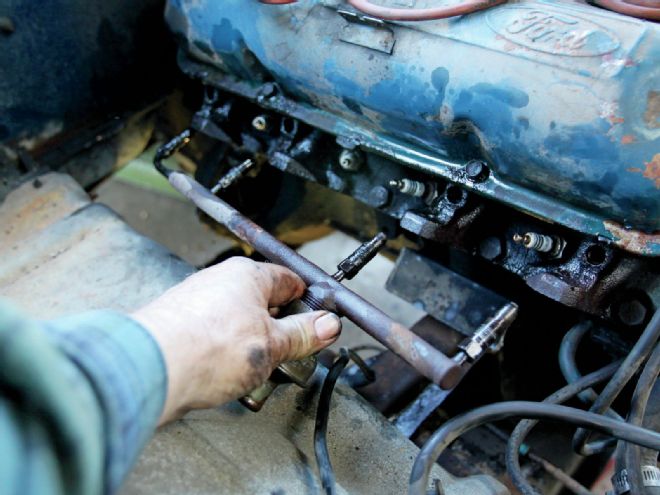 19. Removing a smog rail can be real mean. Presoak with penetrating oil, and use a flare-nut wrench to avoid rounding the flats.
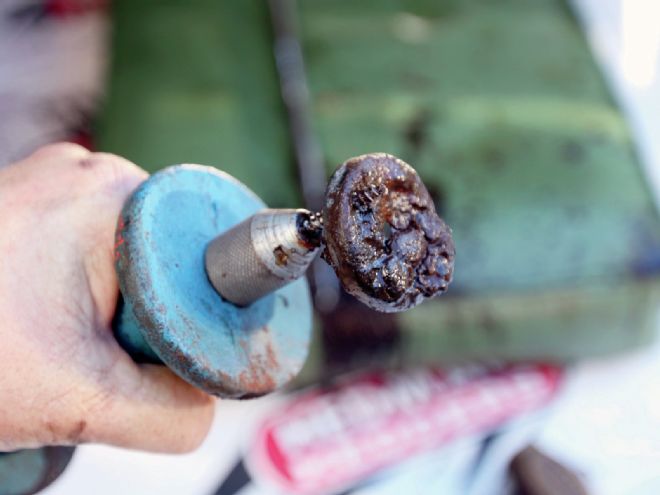
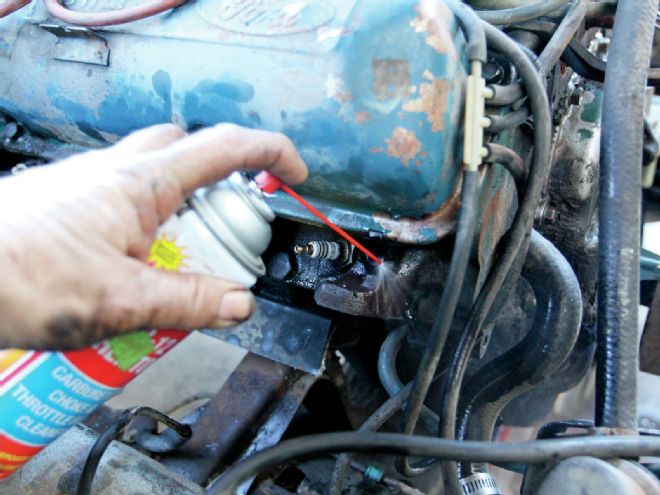 20. I like to use carburetor spray for flushing out carbon deposits before reassembly. Pre-soaking stubborn spark plugs with spray carburetor cleaner works great.
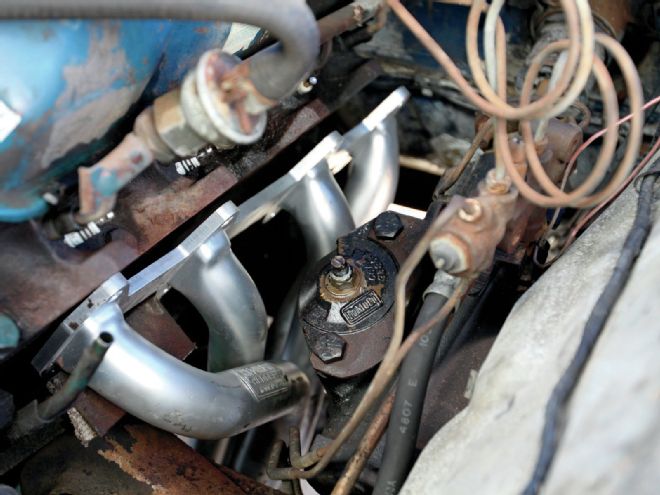
 21. Tightening the header bolts on the passenger side was accomplished partly by accessing bolts through the fenderwell and frame.
 22. A good investment, installing a mini-starter will make your life easier. I had my hands full. The stock starter must be left in hanging place in order to install the header from below.
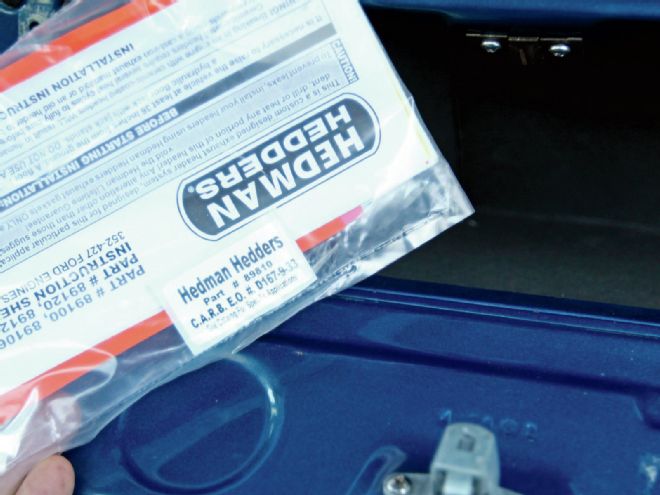 23. It can be stuck to the radiator core support. Do not lose the CARB EO tag that proves your Hedman headers are smog-legal. I keep mine locked in the glovebox.