Our friend Will has been having us build him a truck a little bit at a time for years. The truck was originally his brother’s but, unfortunately, his brother passed away so Will is continuing the build, a bit at a time, in memory of his brother. Every year he has money budgeted towards the truck and Bobco, taking the next steps within that budget.

Since his brother was a gearhead too, Will is building it with a high-performance engine. A Ford Motorsports 390hp, stroked, 351Windsor backed by a built C6 trans, aluminum heads, a high-rise intake, and a 700cfm Holley carburetor. Coming soon are a custom set of long tube headers and exhaust system. These “big” little engines are really strong runners and keeping them cool is no problem with either a fresh stock-style replacement radiator or a high-quality aftermarket aluminum crossflow-style radiator. While we purchased this crossflow through Summit Racing, many aftermarket parts retailers like Mid Fifties, Cool Craft, and countless other sources also carry both versions—heck, you can even get the stock-style radiators in aluminum these days.
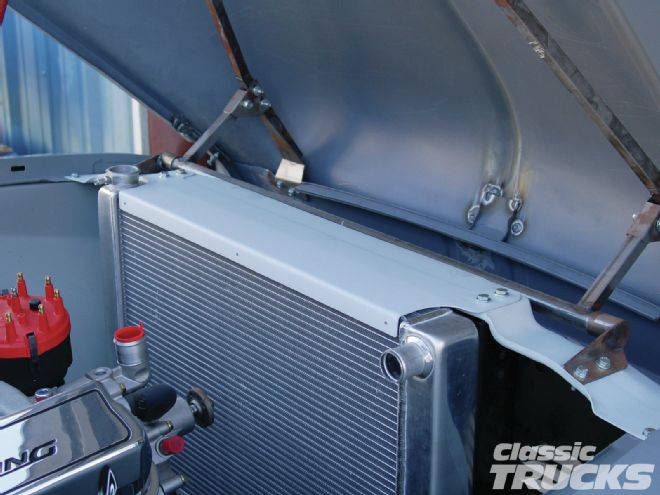
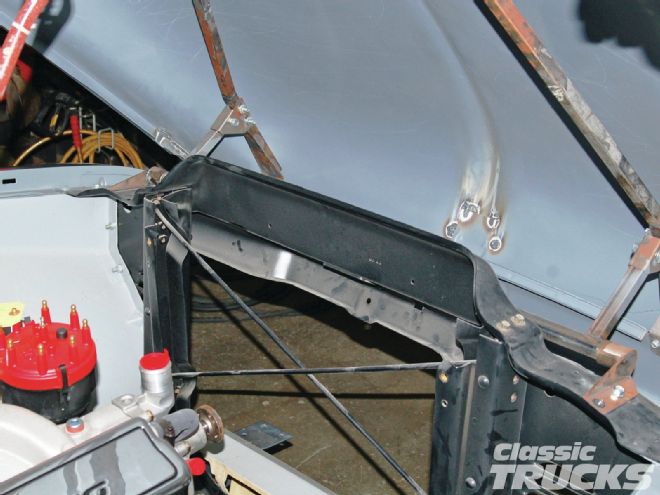
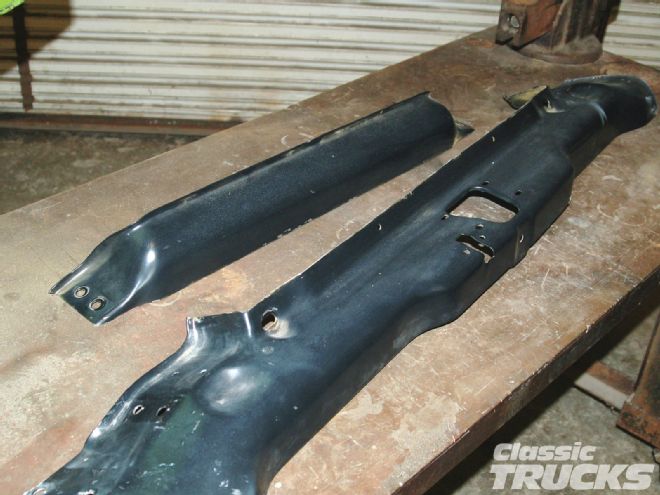
While you can’t beat the big stock tank on those radiators for a great classic look, Will wanted something a little more contemporary looking. He thought an aluminum crossflow would fit his plan better and also wanted the top valance cut down to remove the big lump that used to cover the stock radiator and half its tank. No problem, I’ve cut these down before. We’ll end up with a nice, flat, top cover for the radiator that will double as a top mount. On the bottom I’ll make some brackets to form a cradle for each side and mount those to the original radiator mount. A fill piece for the space left under the radiator will be nice, too. That will help direct all the passing air through the radiator and shroud. Looking from the engine side, it will clean up the look of our U-shaped radiator mount, as well. I would say the basic skill level would be moderate. The sheetmetal is all flat so there is nothing tricky there. The mounts can be whatever you come up with.
 Mounting a crossflow radiator into an F-100 is not hard but it will leave you with a big opening above the radiator from the large rise in the valance where it followed the stock radiator tank. The stock radiator mounting brackets will need to be removed also. You could make a filler piece for that area or just leave it. Depends on the look you’re after. I chose to cut that area down and clean up the whole top of the new radiator with a flat sheetmetal mounting piece.
The following photo captions show a couple of neat tricks I used when fabricating the new mounting assembly—transferring holes exactly and welding on mounting nuts.
As I said before, the radiator was sourced from Summit Racing. It’s so easy these days to just open a catalog, pick want you need, and it’s on your doorstep within a day or so. We chose a Griffin because they had what we needed and I have used Griffin’s radiators for years with great success. They are priced right, too.
 Since I’m going to cut it apart 3/4-inch above the top of the front mounting holes, I ran a piece of 3/4-inch tape for a guideline.
Electric fans will come next, mounted within a custom made fan shroud. Mounting points for the future shroud were built into the new crossflow mounting assembly.
I have found the best way to control the fan(s) is with a temperature controlled switch available from Hotronics. They have the senders preset for 160-, 180-, and 200-degree fan switching. The senders come in 3⁄8- and 1/2-inch pipe thread and also come polished. I like installing them in the intake manifold by the thermostat. A small control box is mounted under the dash and controls the fan(s). Very reliable, very clean.
 The bottom edge of the tape is at the top of the mounting holes I use for reference and that puts the top edge of my tape at the 3/4-inch cut line. A couple of minutes with a small cutoff wheel and we have valance with a flattop.
Follow along as I give this top valance a flat top and mount aluminum crossflow radiator. Keen eyes will notice my mistake. I originally ordered a 16-inch tall radiator at first, and although it would have cooled the engine, it just wasn’t tall enough to look right. Checking Summit’s catalog again, I saw they had the same radiator that is 19 inches tall and fills the whole opening like it should. Bigger is always better anyway, and the biggest you can fit is really the best choice when you’re building a street cruiser. CT