These days, it's hard to argue the merits of modern conveniences like independent suspension, fuel injection, power steering, and air conditioning as all of these things make the overall experience of owning a classic truck that much more enjoyable. But there comes a time when these contemporary amenities just don't fit into the build style of certain era projects.

That having been said, the 1952 Ford F-1 pickup I've been building over the last few years includes a number of modern services that I wouldn't normally have fathomed putting into a vehicle some years back. Concessions were made however, for when it came to things like putting a power rack-and-pinion unit in when I upgraded the straight axle to a Heidts Mustang II setup, I just couldn't think of a reason not to. For one, you can't see the rack for the most part and I managed to hide the pump as well beneath the driver's side head of the Hemi. The truck is supposed to end up as my daily driver and having driven cars for years with a stock box, it just seemed like the most logical thing to do. And if my wife ever wants to drive it, it will make it that much easier for her to hop in and enjoy.
The other amenity I decided to go with was a Vintage Air climate control unit, a Compac Gen-II kit to be exact. While I regressed on my decision to keep everything period perfect by placing the compressor in plain view on the passenger side of the engine, I decided that my daily comfort was more important than any armchair quarterback's opinion of whether or not it was "traditional." I did, however, want to maintain the interior of the truck true to the '50s aesthetic I had set out on. I grafted a '52 Pontiac dash into the cab and wanted to maintain the old time vibe throughout the interior. With that in mind, I hit a brick wall when it came time to decide how to get the cool air into the cab. Dash mounted vents were out of the question as they stand out like a sore thumb on a car that's based in a mid-'50s build style. That sent me thinking and after a few "Q&A" sessions with Rick Love at Vintage Air, we came up with a solution that would offer maximum performance from their unit and satisfy my desire to keep everything vintage in appearance.
What we came up with was to take a stock-style heater box and modify it to act as a three-vent central unit, feeding the center of the cab and the floor, and use two under-dash louvers on either side of the cab, modified to tuck up under the dash when not in use. That solved both of our problems, as Rick argued that the box alone would not sufficiently cool the cab evenly, distributing the majority of the air directly onto the occupants legs while leaving the upper torso area high and well, hot; resulting in a sweaty driver with numb legs. That didn't sound too good!
The process began by mounting the evaporator as high under the dash as possible to keep it fairly hidden and disassembling the heater box. The box was then modified to direct the air as much as possible out the front door vent and up towards the occupants while the side doors were relegated to a rather minimal use, as the Compac Gen-II evaporator has built-in floor vents. The under-dash louvers were then mounted via hinges on the bottom of the dash with cupboard door magnets allowing them to be tucked up and held out of sight when not in use. The end result is an interior that retains the '50s aesthetic while benefitting from all the creature comforts that come with a modern A/C system.
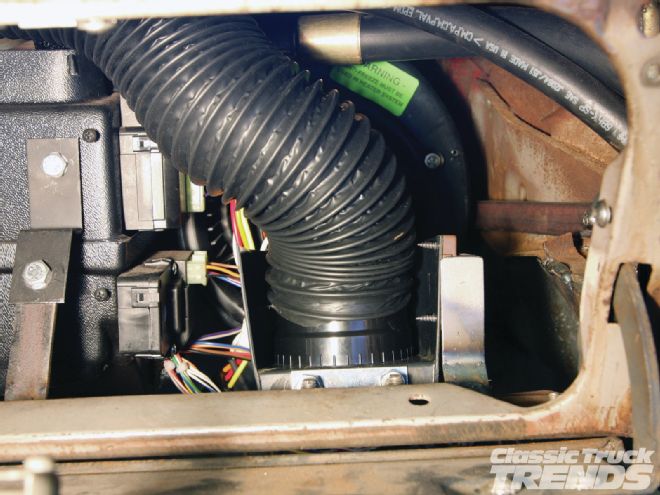
The Vintage Air Compac Gen-II evaporator was the first thing to be installed. We took advantage of the tall dash and mounted it as high as possible to hide it. Mounting it this high renders the stock glove box pretty useless; we’ll use the space instead to mount the stereo head unit and other odds and ends.
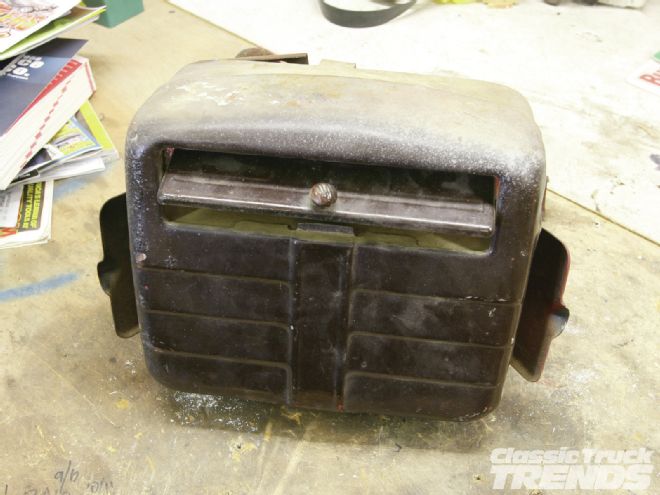
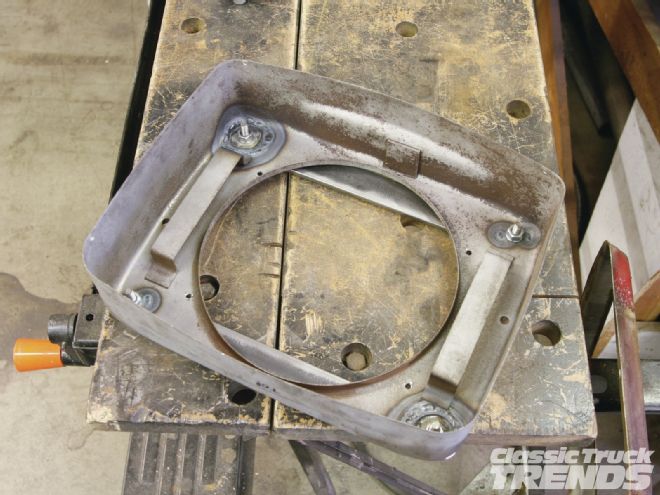
Here’s the original heater box that came in our ’52 Ford F-1 pickup. It mounted on the passenger’s side firewall behind and under the glove box.
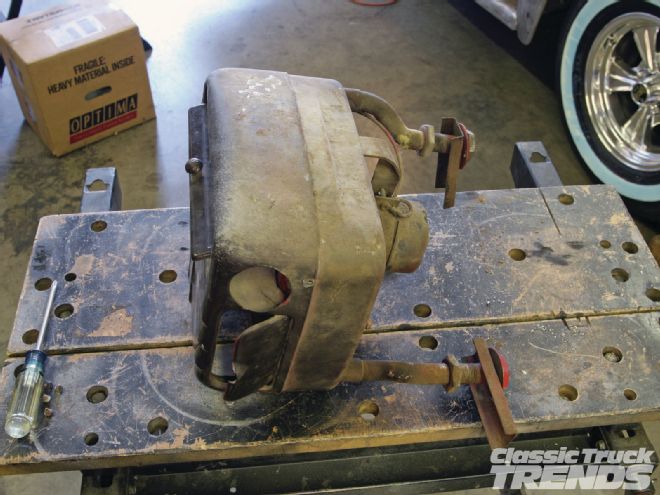
Before we start, we need to disassemble the unit and get rid of the heater core, fan, and plumbing bits associated with the heater.
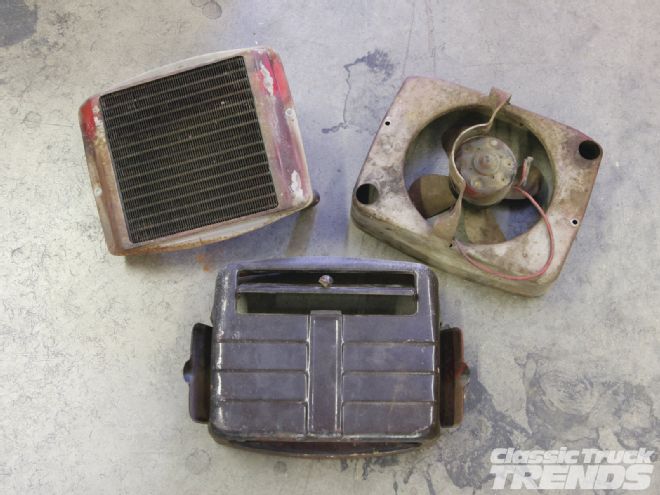
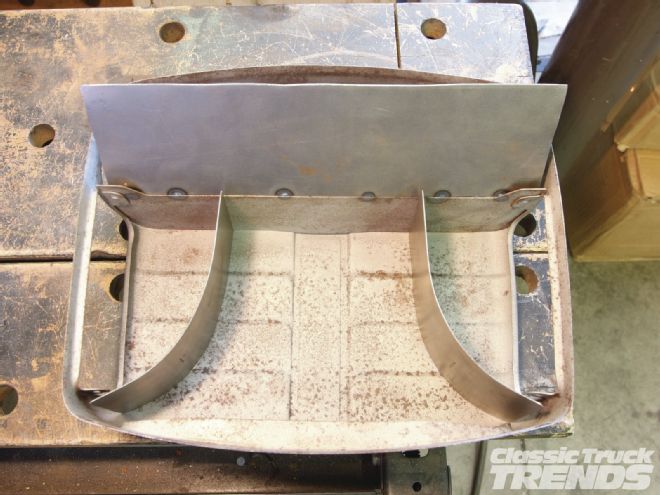
Here’s the heater box broke down in three pieces. The heater core and plumbing is one unit while the fan attaches to the rear half of the box. The front half houses the doors and floor vent.
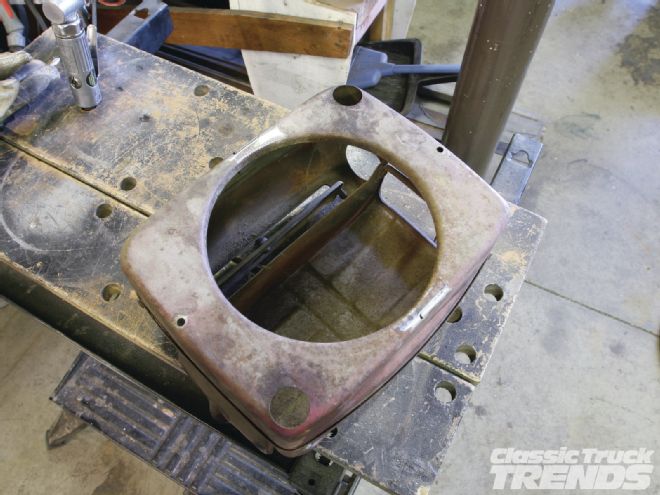
With the core and fan removed, the two halves are reassembled for visual sake. That big hole in the center where the fan went and the two larger holes at opposite corners, where the heater hoses attached, all need to be filled.
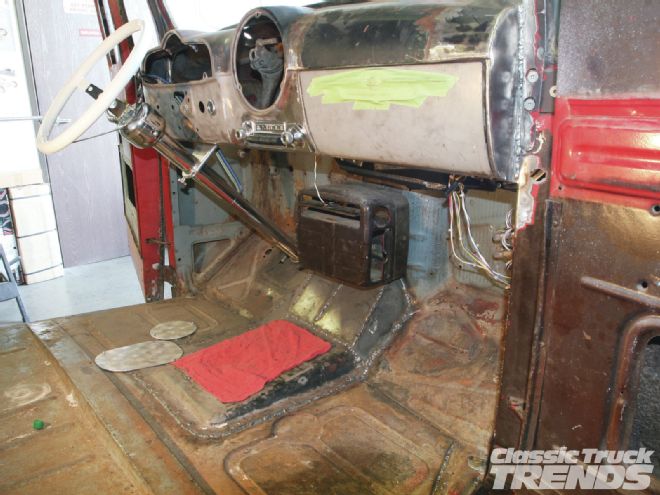
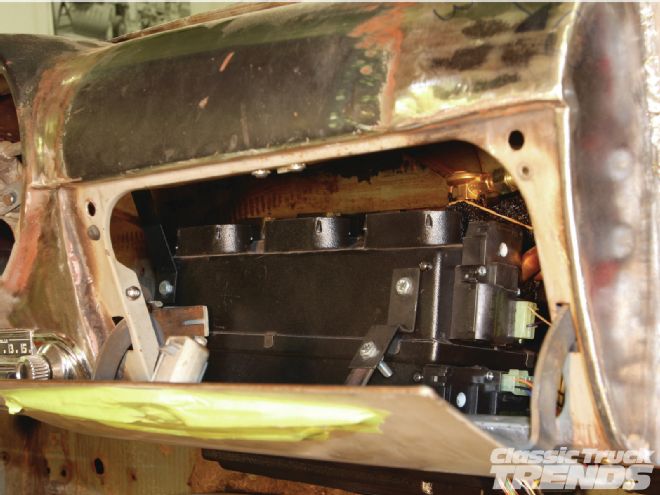
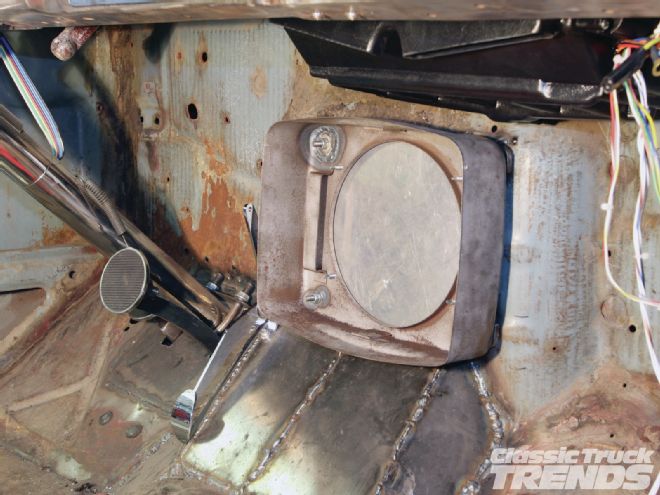
We decided to relocate the box to the center of the truck to better act as a central vent system. There was just enough space between the trans tunnel and evaporator core.

There were two small holes at opposite corners already and we decided to use those at the first set of mounting points. Those large holes were filled with washers, the center holes acting as the other two mounting holes, all spaced out evenly. A piece of aluminum was cut to fit and screwed to the back of the heater box to fill the large void.
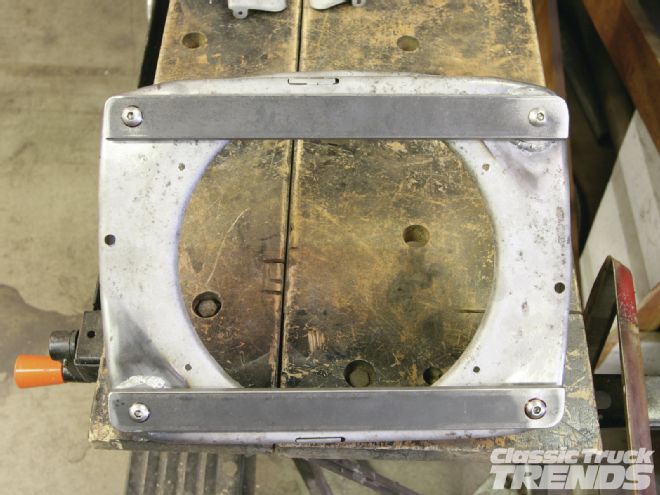
Instead of trying to bolt the heater box through the firewall (a two-man job), we decided to fashion up a pair of bases that will be welded directly to the cab-side of the firewall with studs that the heater box will attach to (a one-man job).
Here’s an inside look of the mounting setup for the back half of the box.
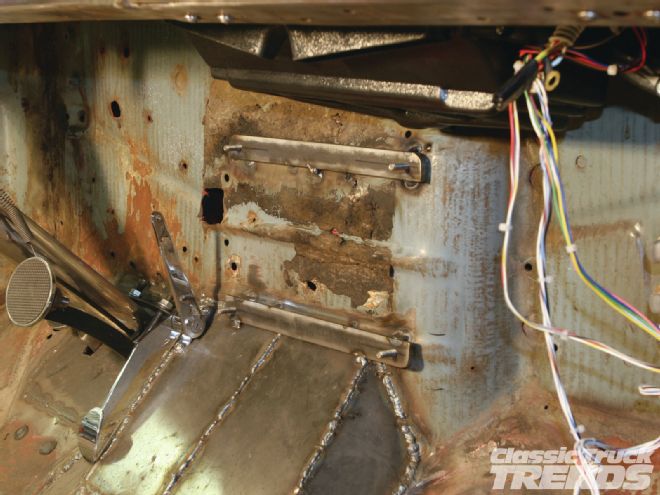
The bases were then welded to the firewall giving a solid, level foundation for the heater box to attach to.
This mounting setup also enabled the box to be assembled to the cab in sections, making it accessible without having to remove the entire unit from the truck.
The front half of the box attaches with four sheetmetal screws.
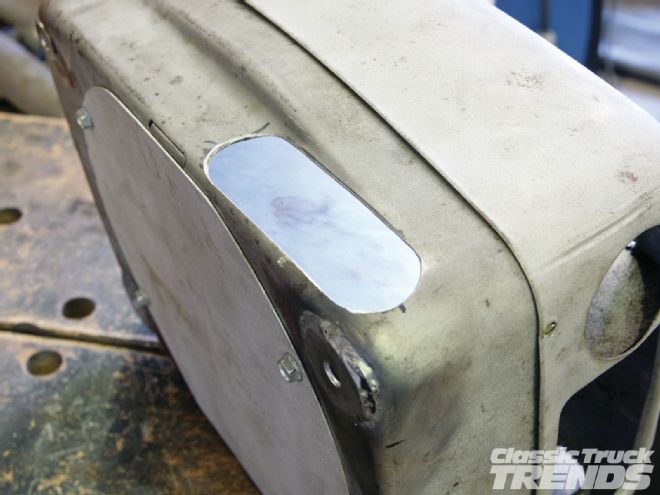
The mounting complete, it’s now time to start converting the box to operate as a central outlet unit. First, a hole is cut to accept the duct hose.
First, a hole is cut to accept the duct hose. This is the inlet for the box.
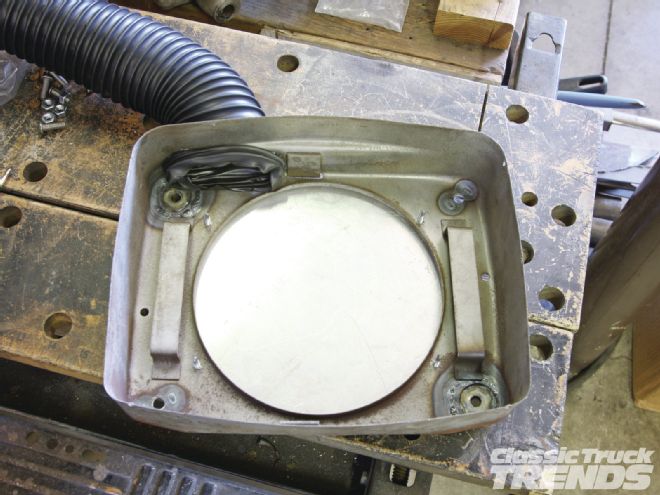
Since simply dumping the air via the inlet into the box and letting it flow out of the doors would be pretty ineffective, a few modifications need to be made to the internals of the box to ensure it works as expected. The first is a plenum that will direct the majority of the air out the front door. The door will point up towards the center of the cab.
The next step is to make a pair of plenums that will direct air out the side doors as well.
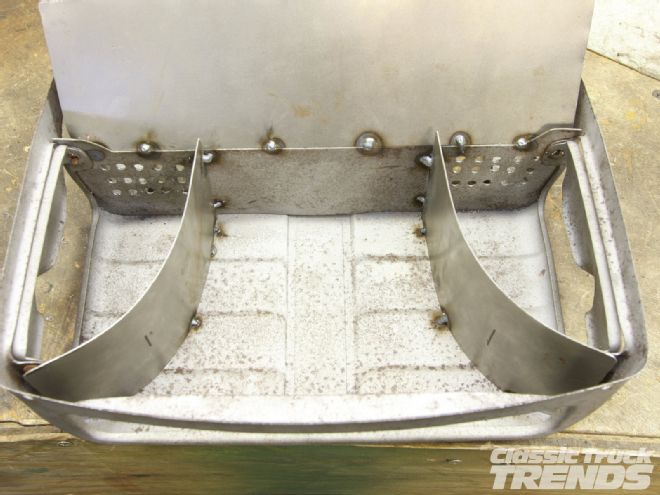
To allow the air to drop down to the side doors, a series of holes were drilled on both sides of the plenums. Since the Vintage Air evaporator has a pair of built-in floor outlets, the amount of air we need out the side doors is marginal, hence the rather restricted flow.
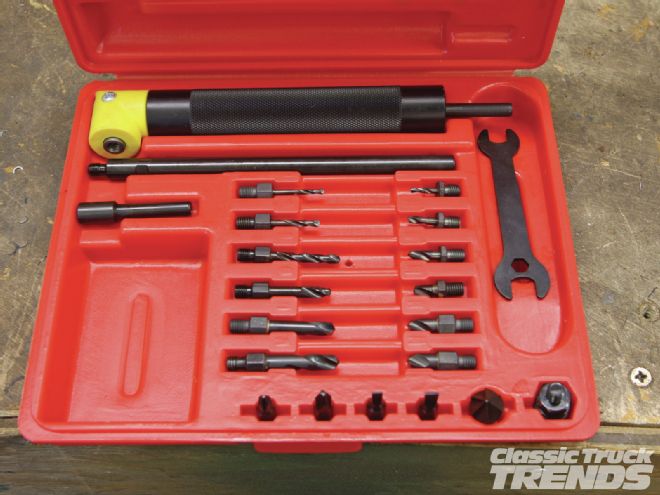
This right angle drill attachment kit from Graham Tool Co. worked great to drill the tight holes in the box.

To confine the air to the side plenums and keep it from gathering in the open back half of the box, we filled it with a piece of foam. A simple solution and easier than welding the side plenums shut, it also allows us access to the mounting points of the side doors.
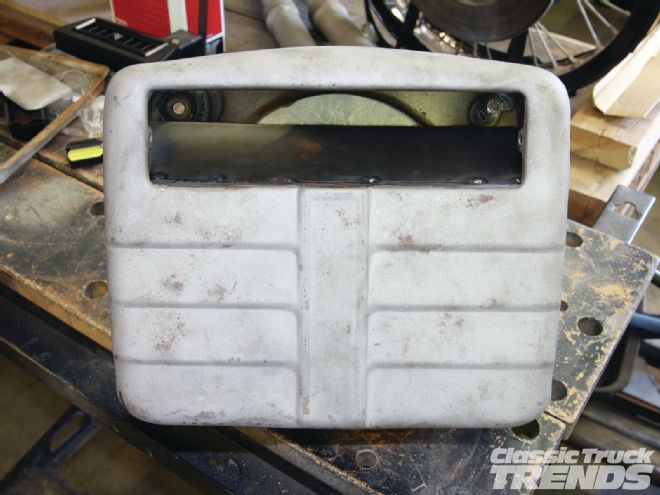
Here’s a shot of the side plenum area with the doors installed and the two box halves mated.
The front door was reversed from the stock design so that it directs the air up towards the passengers, as opposed to towards the floor. The box is now installed and ready to rock!

Here are three different outlets offered by Vintage Air. The left is a direct flow defrost duct, while the other two are under-dash louvers.
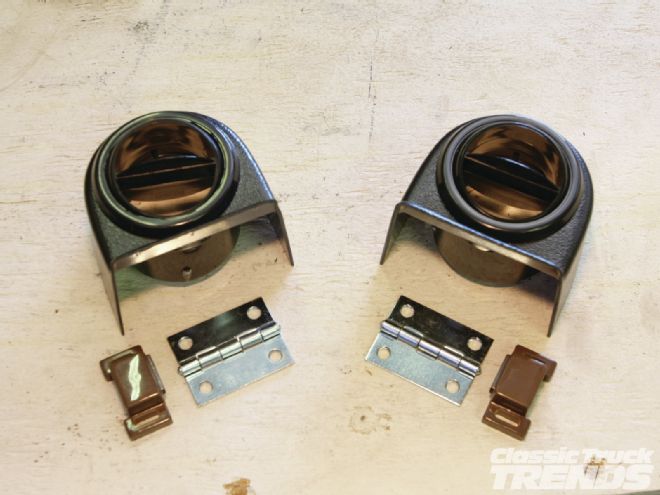
We’re going to install a pair of under dash vents on opposite ends of the dash, but with a little twist. Since we want to tone down the presence of the A/C unit, the vents are going to be hide-away, tucking up under the dash when not in use; out of sight, out of mind.
The mounting surface of the vent is attached to a hinge and a cabinet door release is mounted to one side to hold it in place when it’s in the hidden position.
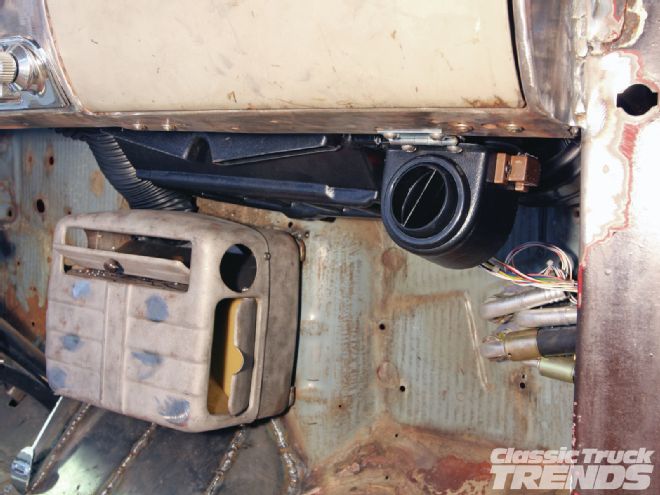
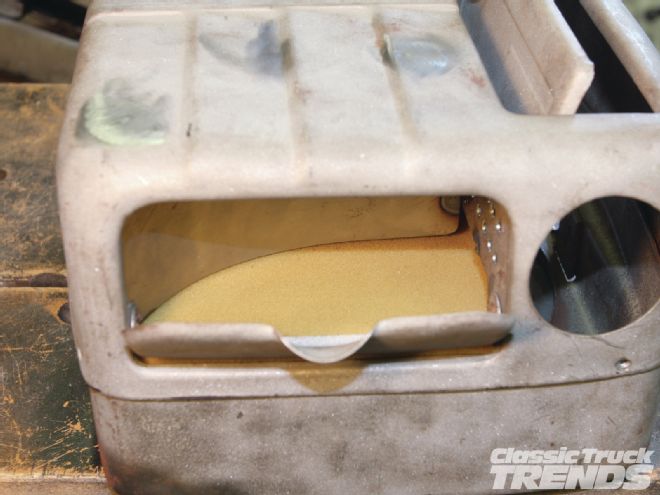
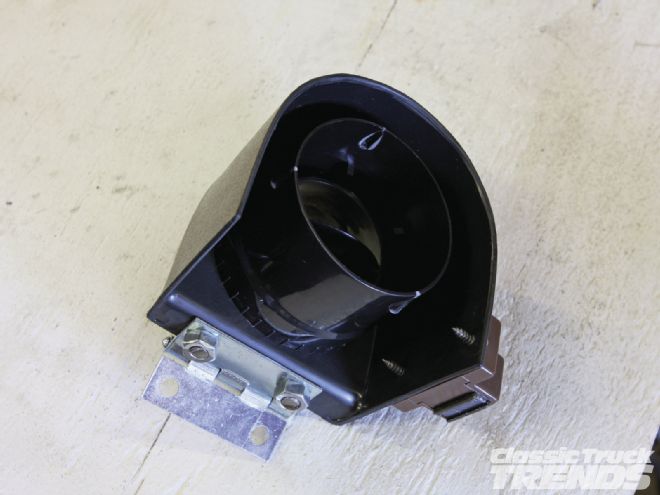
Here’s a shot of the passenger side vent in the “operating” position …
...and the same vent in the “hidden” position, as viewed through the glove box.

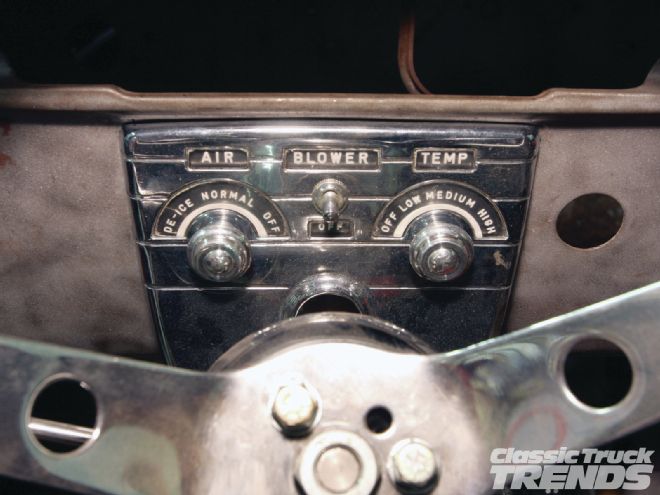
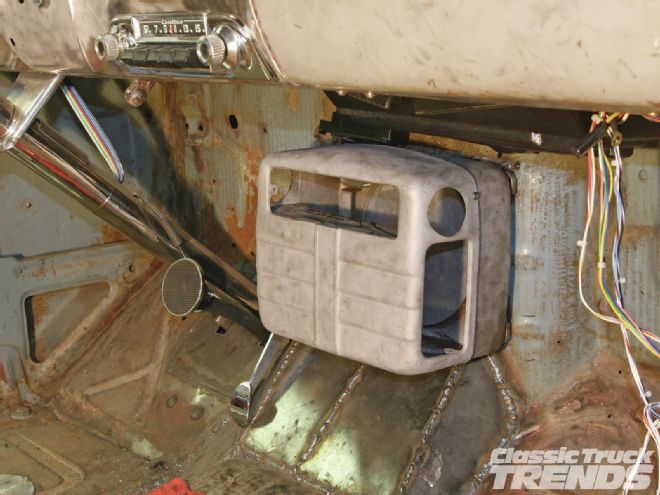
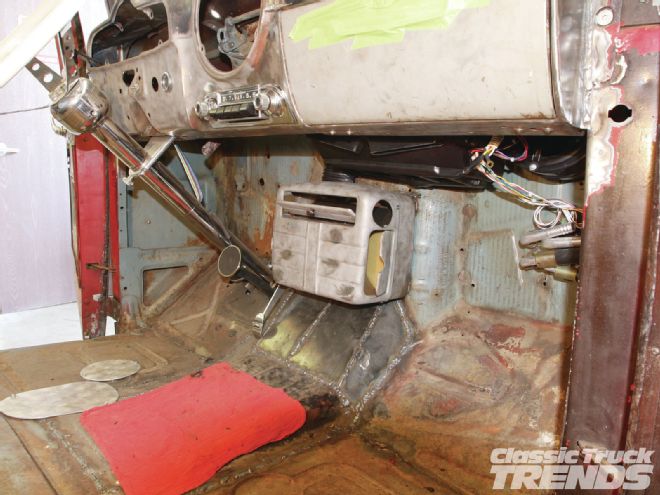
The last piece of the puzzle of our low-key A/C install is to mount the controls. The ’52 Pontiac dash we grafted into the F-1 had a neat control panel that mounts just above the steering column, housing the controls for the stock heater. We removed the controls from a Vintage Air Gen-II under-dash pod and relocated the “fan” and “mode” controls to the stock “air” and “temp” locations on the Pontiac panel, while the two “temperature” controls were mounted on the dash next to the headlight switch. At first glance, the dash looks stock with two extra, nondescript knobs.