Many of the technical stories in this magazine are based on engine-building and testing; it's the bread-and-butter of our hobby. However, very often we forget that not everyone has several successful engine builds under their belt. This leads us to skip over the minute details of engine assembly, assuming that the elemental stuff is common knowledge. Of course, everyone has to start somewhere, and most of us logged hours of experience tinkering and tuning before we'd ever dug in and attempted to actually rebuild one of these beasts. The nature of internal combustion engines and the precision tolerances their mechanical bits operate with makes engine-building somewhat intimidating. The expense of such projects and the damage that can so easily be done if everything isn't just right is enough to scare off plenty of veteran rodders, so it stands to reason that newbies often shy away.
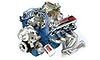
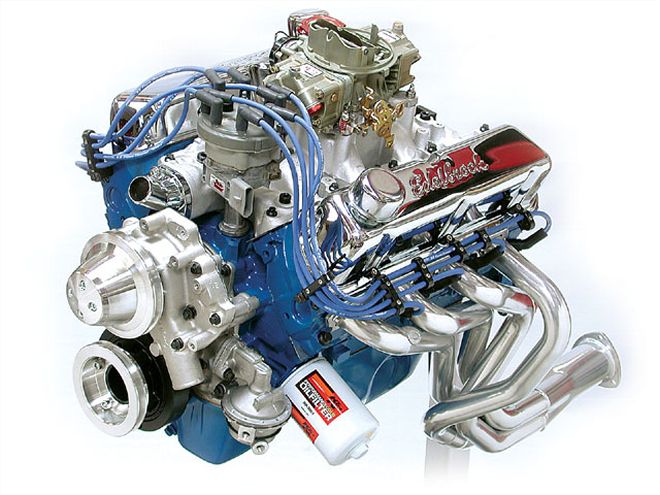
We've been over the basics before, but usually with a small-block Chevy as the basis. So, to mix it up a little, we opted to screw a small Ford together. The bulk of the information in this article will be general, so that anyone wanting to rebuild an engine can benefit, but to provide examples, our 5.0L Ford will serve to illustrate the text.
Prepare to RepairThe entire process of rebuilding your engine could be handled by a competent machine shop, but of course, the idea here is to do it yourself. You won't be able to eliminate the need for the machine shop altogether, but keep in mind that the more the machine shop does, the more you will owe them. At the same time, there are certain services/procedures that you shouldn't cheap out on.
Obviously, if you're planning to rebuild an engine, you need to start with something. If the engine in your car has already expired, that's probably your core. However, if you're still driving your car and want to minimize down time, consider finding a core so that you can get through the rebuilding process before tearing down your transportation. In any case, there are pitfalls to avoid in selecting a core.
First, if your engine has drawn its last breath, you should determine why before you assume that it can be restored to former glory. If it grenaded in spectacular fashion, it might be scrap metal. In some cases, finding an alternate core may be cheaper than having the original repaired.
Step one for all situations should be disassembly of the core. By taking care of this yourself, you're saving charges from the machine shop. Now is the time to clean and bag everything that will be reused during reassembly. Invest in a box of resealable freezer bags, the kind with a white area for labeling, and get a permanent marker. After the bolts and other small parts are clean, bag 'em and tag 'em.
The disassembly process should also be treated as a sort of engine autopsy-you want to determine the condition of the engine, particularly if it failed, prior to sending it to the machinist. The machine shop will still have the final say, but there's no sense in paying them to inspect stuff that's obviously junk. Spun bearings usually do significant damage to bearing journals on the crankshaft and often damage the bearing saddles and caps as well. This can mean that the crank, rods, or block-or all of the above-may require extra work or replacement. Again, the machinist can tell you for sure whether the parts are salvageable or not if there's any question.
If you need to obtain a core, you may want to source a core service, since many offer parts that are already cleaned and inspected, allowing you to avoid more junk. This might not be the cheapest route, but these places often have an exchange warranty in case the parts prove to be damaged when the machine shop checks them out. If you don't have an engine, you may want to start with a whole assembly, so you'll have all the small parts and specialty fasteners to put it back together.
The Machine ShopTry to get a recommendation for a machine shop. Not all are created equal, and it will benefit you to find a shop that has approachable staff. For instance, it's common for certain specifications to be altered in order to recondition the used parts-cylinders are over-bored, crank journals are undercut, and so on. For this reason, you shouldn't order your new parts until the machinist gives you the word. The shop will determine what overbore you should go with and whether or not the crank has to be undercut, and by how much. This is particularly important if you're unsure about the history of your core-it may have been rebuilt once already.
Once the guys at the shop have verified that your parts are good and taken the initial measurements, have them alert you so you can order parts, unless you want them to do it for you. The machinist will want the pistons prior to performing the final hone, so order the stuff promptly. When you receive the parts after the work is done, the shop should give you a rundown of everything that was done, along with the specs for the areas that were resized.
Back at the RanchOnce your parts are back in your possession, and you're preparing to start assembling, make sure that you first clean all the parts thoroughly since the machining process will leave metal shavings behind.
We've outlined the reassembly steps in detail in the photo captions, but remember that this is general information, so you really should have some good printed reference material on hand that is specific for your application to provide specifications and procedural guidance. Take your time, and seek advice when you have questions or doubts. When it's all together, make sure to pre-lube, follow the cam break-in specs (for flat-tappet cams), and resist the urge to wring the new engine out until you get a few miles on it. If you did it right, you should be set for many miles to come.
Ford 302: Engine SpecificationsNote: These are the specs for our 5.0L engine, with the parts we selected. Always verify specifications for engine-building, especially when using aftermarket upgrades
Torque Specs Main cap 65 lb-ft (ARP); 60-70 lb-ft (stock) Rod cap 50 lb-ft or 0.0063-inch stretch (ARP); 19-24 lb-ft (stock) Cylinder head 65 lb-ft (ARP); 65-72 lb-ft (stock) Intake manifold 23-25 lb-ft Critical Tolerances Main bearing clearance 0.0025-0.0030 inch (0.0027) Rod bearing clearance 0.0020-0.0030 inch (0.0026) Rod side clearance 0.0100-0.0200-inch (0.0140) Crank endplay 0.0004-0.0008-inch (0.0006) Parts List Item Source Type Part Number Pistons Speed-Pro forged L2482F-030 Rings Speed-Pro plasma-moly R-9903-30 Connecting rods Scat I-beam 3-ICR-5090-P Rod bearings Speed-Pro Super Duty Alloy 8-7160CH Rod bolts (stock replacement) ARP stock 51/416-inch 154-6002 Rod bolts (included w/rods) ARP Sportsman 31/48-inch 150-6005 Crankshaft Scat forged 4-302-3000-5090-2123 Main bearings Speed-Pro Super Duty Alloy 129M Main studs ARP stud kit 254-5501 Oil pump Speed-Pro standard volume 224-41128 Oil pump drive ARP hardened 154-7901 Camshaft (kit) Comp Cams complete kit K-35-238-3 Camshaft bolt ARP stainless 154-1001 Cam bearings Speed-Pro standard 1204M Fuel pump Federal-Mogul stock 5.0 HO {{{M}}}-6904 Carburetor Quick Fuel Technology 650-cfm vacuum 650PROVAC Intake manifold Edelbrock RPM Air-Gap 7521 Carb studs ARP stainless 400-2401 Valve covers Edelbrock Signature Series 4460 Water pump Edelbrock reverse rotation 8840 Gasket set Fel-Pro engine set* 2804 Headers Hooker 131/44-inch 6222-1 Harmonic balancer Pioneer stock 28 oz. 872018 Balancer bolt ARP black oxide 150-2501 Pulley set March single V-groove 01614 Head bolt kit ARP black oxide, 6-pt. 154-3601 Engine dress-up bolt kit ARP black oxide 554-9801 *Fel-Pro complete engine gasket set comes with two-piece rear main seal; one-piece seal must be purchased separately (PN 2922)116-0407-First-1Before you can build, you'll need a core to work with. This might be the engine out of your car, or you may consider getting another. If you go with what you already have, know that your car will be down for a while-this process doesn't happen over a weekend.
116-0407-First-3Now is the best time to clean all the nuts and bolts and other small parts that will be reused. Get yourself a tub, some solvent, a wire brush, and some heavy-duty rubber gloves and start scrubbing. You'll thank yourself later on if you invest in some freezer storage bags with labels to bag and tag everything now.
116-0407-First-4When preparing to take your parts to the machine shop, you should have a bare block with main caps bolted and marked in place, your crank should be wrapped in plastic or cloth to avoid damage to the journals (even if they will be turned), and the piston/rod assemblies should be kept together with the caps bolted together, also in their original locations and orientations.
116-0407-First-12Another pitfall of engine-building is proper seal installation. The rear main seal on most older-style V-8 engines uses two halves, which must be installed correctly prior to installing the crank, and facing the right direction for proper sealing. Screw this up and your engine will leak like a waterfall. The lip of a typical neoprene seal should face inward, toward the crankcase. This is so crankcase pressure will force it against the crank, sealing the joint between the two. Our 302 was a late-model type, using a one-piece seal that simply taps into place surrounding the crank flange.
116-0407-First-23Now the timing cover and oil pan can be installed. For the small-block Ford, make sure the factory dowel sleeves are in place-there should be one on each side in the lower holes for the cover. If yours are missing, you can get new ones either from Ford or from Pioneer's line of replacements. If you can, get one of the newer one-piece oil pan gaskets, like those offered by Fel-Pro for certain applications. They're easier to use, seal well, and can often be reused.
116-0407-First-25The intake is the cherry on top of your new engine-just make sure it seals properly. Many V-8 small-blocks use separate gaskets to seal the manifold to each head, and then end-seals for the block. Popular opinion dictates that the end seals be ditched in favor of a healthy bead of sealant. Quality intake gaskets claim to require no sealer, but a thin film around the water ports isn't a bad idea. Set the intake straight down to avoid moving the gaskets, and start all of the bolts before tightening any of them. Again, use a factory torque spec, and even more importantly, follow the torque sequence. This is another area where it's often best to go around the pattern a few times, tightening a little more with each pass.