
It's been a problem for quite some time: Mopar owners have been the last ones on the performance hard-parts list for too long. But the huge resurgence in interest has tweaked many in the aftermarket companies to step up their R&D and come up with well-thought-out products. Flowmaster Exhaust is one such company. Recently, it released its 3-inch exhaust system to fit B-Body Mopars and more is on the way. We heard from Flowmaster and saw the ad for its new system. It was time to put it to the test.
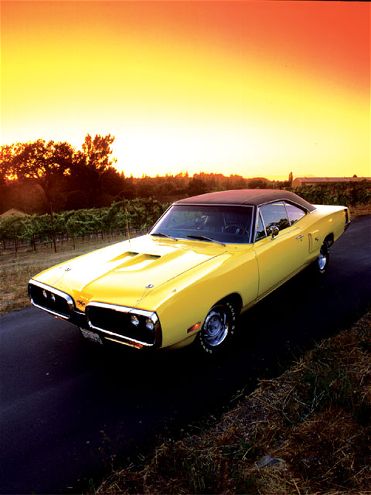
David Hoffman of Sebastopol, California, decided his performance-upgraded '70 Coronet R/T didn't have the sound he would have liked it to have. After some investigation, he discovered the exhaust system that came fitted to the car was not doing its job adequately. Sure, it sent the spent gasses out the back of the car, but he first noticed something wasn't quite right after a buddy pointed out the exhaust seemed to have a wheezing sound as though it were forcing the exhaust gasses out. Another indication was the performance didn't seem as crisp as other 440's he'd been in.
Upon closer inspection, he found that the system was a basic Chrysler dual-exhaust system using compression-bent tubing, factory Hemi mufflers, and 2 1/2-inch compression-bent tailpipes. It looked fine, but with the compressed pipe diameter constricted to 2 1/4 inches in the over-axle sections, the exhaust system was unnecessarily restricted. It was a typical, clean, musclecar muffler-shop installation. Compression-bent pipes are what most over-the-counter replacement pipes are, with the ridges formed on the inside of the bends, where the pipe is compressed. For stock and restoration purposes this may be fine, but for enthusiasts who are trying to squeeze every bit of performance from what they have, mandrel-bent pipes are a must. Mandrel-bent pipes are bent in a way that no wrinkling of the pipe occurs in the bends, and the exhaust flow is smooth for its entirety.
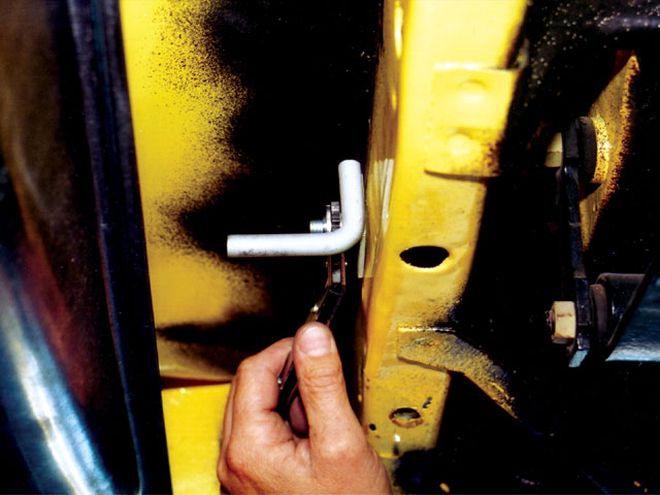 Before installing the exhaust system you will need to fully read the instructional material from Flowmaster. They supply you the fasteners, hangers and hardware to do a first-class installation. Install Flowmaster's tailpipe hangers to the rear framerail.
By chance, Flowmaster was looking for a B-Body Mopar to test fit a production version of their new Delta Force 3-inch exhaust system. So, David and Flowmaster got together and the test began. During the time of the exhaust install, David also installed tti headers.
The idea was to baseline test the stoutly built 440 on their new chassis dyno and then fit David's R/T with Flowmaster's new 3-inch B-Body performance exhaust and then dyno it again. This would quantify and evaluate any performance gains. To kick off the process, the dyno team strapped the R/T onto their new SuperFlo SF-840 chassis dyno. This rolling road is an inertia-weight dyno that is used in conjunction with eddy-current brakes. It offers accurate testing of acceleration, step testing, steady state full-throttle testing, and coast-down. It efficiently calculates rear-wheel horsepower right on the screen, and can calculate flywheel horsepower, as well. With an array of sensors, the dyno also allows for the precise measurement of backpressure, air/fuel ratio, and all engine temperatures, pressures and speeds through its 50 channels of data input. The baseline testing with its "as fitted" system tallied results of 288.9 hp and 365.5 lb-ft of torque. With that done, the R/T was put on the hoist for the installation of the new 3-inch Delta Force B-Body exhaust system.
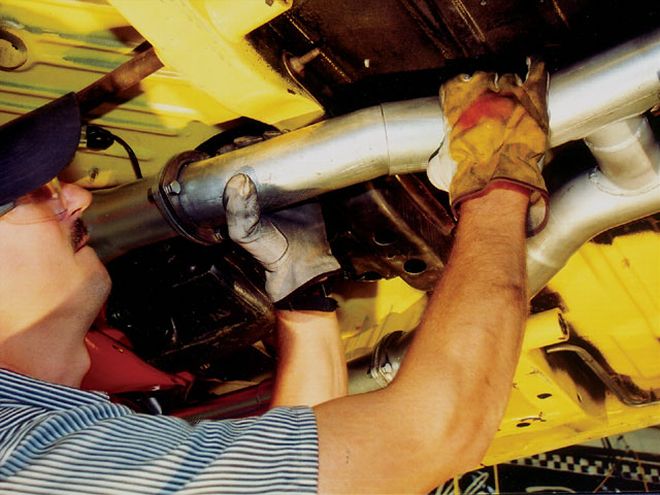 The H-pipe-to-header pipe-connectors are easy to install because the H-pipe assembly is hydrosized from the factory. After cutting to length, slip the connectors into place.
Lee Thompson, head of Flowmaster's R&D shop, prototyped this B-Body system, and here he shows us how easily the new production 3-inch system is to install on header-equipped cars. Non-header-equipped engines need an extra custom-made head-pipe to complete the installation. It took Lee about two hours to remove the old system and finish-fit the new 3-inch stuff. The installation requires only a basic set of hand tools, although a Sawall is handy for the removal of the old system. When we installed the system, all of the pieces were first hung in place, without firmly tightening anything. This way, the system can be checked for symmetry while going on the car, and to make sure we had at least 31/44-inch clearance around all components. Taking the time to fit your exhaust like this will ensure the whole system is symmetrical or asymmetrical as needed, and the tailpipes emerge at the correct angle and extension from the rear of the car.
The new Delta Force B-Body 3-inch kit (PN 17382) comes with a full set of easy-to-follow, step-by-step instructions. Install the new hangers and clamps, set the mufflers in place, position the H-pipe, install the tailpipes, and then cut the header to intermediate pipe to length needed. Re-check all clearances, tighten the clamps, and do a final check of the system's alignment.
While the system can be held together with clamps, it can also be fully welded to give a nice, clean look. If you don't have a welder, you can fit the system at home, and then have a muffler shop do the installation, or just have them do the finish welding after you've done the fitment.
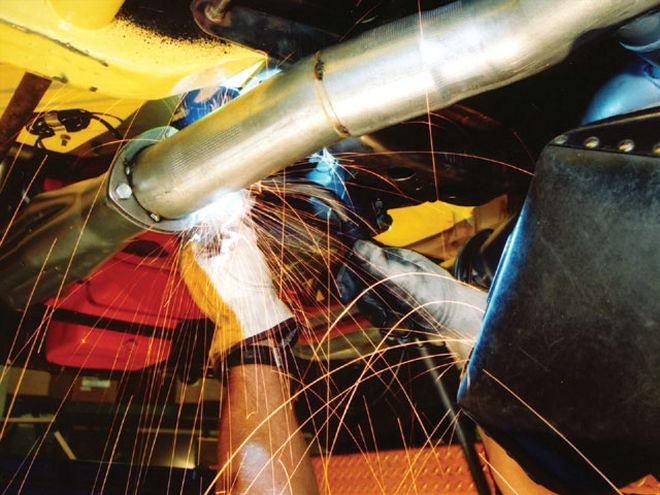 Now weld the connector pipes to the header collector flanges. After welding the collectors, tighten all exhaust clamps fully. Flowmaster strongly recommends welding all slip-fit connections. This will give you "leak free" installation that will last for many years to come.
Once the R/T's system was in place, it was given a quick test-drive to check for leaks and rattles, and then put back to the chassis dyno. According to David, he could immediately hear the difference.
The sound was certainly more musclecar-esque, compared to the wispy, constricted tone the R/T had before. The Coronet was again brought up to temperature, and without any further tuning tweaks, the engine instantly ran stronger, pushing peak horsepower to 341 hp. That's an impressive increase of 52 hp, and peak torque was up to 403.7 lb-ft, an equally amazing 41 lb-ft. These are truly impressive numbers, considering the extent of simply reconfiguring the exhaust so the 440 could breathe correctly. According to Kevin McClelland, Flowmaster's dyno manager, this 440 could have easily added another a handful of horsepower with some simple carburetor and ignition work.
So, what did David Hoffman end up with? A great sounding R/T with a bunch of additional horsepower. After driving it for a day, David was still all smiles. Not only did the exhaust sound great, but it was perfect for the style of the car, and he could feel the engine's crisper and more aggressive performance. Please keep in mind, do not expect to get this kind of improvement if you are using cast-iron manifolds. According to Flowmaster, there will be a substantial increase in hp and torque numbers, but not as much as a good set of headers can produce.
Dyno Data
David Hoffman '70 Dodge Cornet 440 R/T BaselineThree-inch system TQHPTQHP2000303.7116.1337.7129.52100305.2123.2339.3135.42200303.0126.7338.5140.82300304.0133.7340.7150.32400307.6140.4344.3157.82500316.4151.7350.0166.12600322.1159.7353.7174.42700328.1168.1356.9182.22800336.5180.5366.3196.92900341.7189.2372.7207.23000347.8198.5377.6216.23100352.4207.1382.4226.53200361.1221.5391.2238.83300363.0229.1395.5249.43400365.5236.6398.9259.23500365.1243.0402.4268.73600365.5249.4401.8276.23700365.1258.1403.5285.13800363.4263.2403.5292.23900361.2266.8403.7299.84000354.7271.0402.2306.24100353.1275.1401.4312.74200345.9277.5397.5316.94300341.7278.5390.5321.54400334.7280.9386.1324.14500329.3282.9381.2326.84600326.7285.5378.1330.34700323.2288.9372.6334.44800315.0288.1368.5336.34900307.0287.1364.3338.45000301.4287.0355.0337.75100293.3284.9345.9336.95200286.7283.9342.0337.55300281.3283.1335.9338.75400279.5287.9331.5341.05500273.0285.3323.4338.75600257.6275.3311.9332.35700248.9269.6301.9327.35800240.8265.9293.0324.1
Peaks are in bold with the largest horsepower gain of 57.7 hp at 5,700 rpm
All data is corrected to 29.92 standard barometer pressure at 60 degrees dry air.