We all love shiny paint and a killer engine bay, but when you think about it, the interior is far more important. Why? Because that’s where you spend the majority of your time. Given this little tidbit of truth we think a nice interior should be way up the “must do” list of any Chevy lover.
The bad news is that a custom interior can set you back a sizable stack of cash. We’re talking five-digit, spouse gives you a funny look, cash. The good news is that TMI is now churning out affordable interior parts that help you look like you dropped big coin at a custom shop. These soft goods, when combined with aftermarket interior parts from companies like Ground Up, can turn a worn-out or just boring interior into a show winner. And it can be done on something approaching a sane budget.
Rather than just making exact replicas of the parts that originally came in our Chevys, TMI focuses on making parts that fit the OEM seat frames but have a more updated vibe. According to TMI’s Waylon Krumrie, “We wanted the interior parts to have a more modern style, but still be true to the car and not look out-of-place.” Their new Sport-R and Sport-XR seats have aggressive race-seat inspired side and thigh bolsters, French seams, and suede side inserts. Since they utilize the original factory seat frames, the overall cost of having killer seats in your Chevy are kept down. As for costs, these kits price out a bit more than buying a bone-stock looking reproduction interior and far less than a custom job. Recently, TMI has also come out with a lot more options, like a custom dashpad for $500 and bolstered rear seats. And, unlike most of the OE reproduction parts, all the TMI interior bits are made in the good ol’ U.S. of A. SC
1. Besides being stock, the interior of our 1967 Camaro was beat to hell. The car was getting ready for some modern drivetrain and suspension parts, so we wanted the interior to get updated as well.
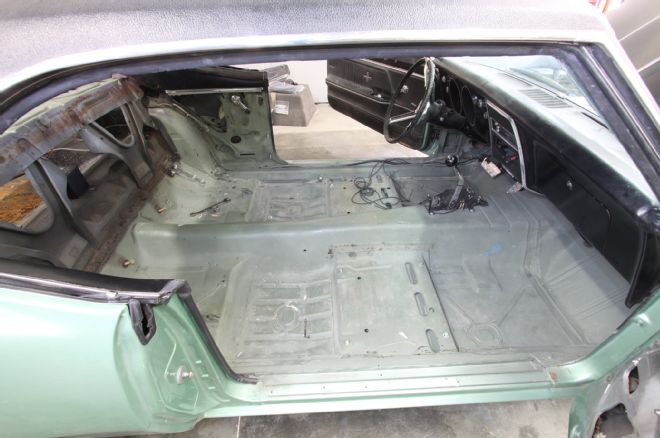
2. There wasn’t a whole heck of a lot we could salvage from the interior, but between the new soft parts from TMI and aftermarket parts from Ground Up we found just about everything we needed. The floors in this Camaro were some of the nicest we’ve ever seen.
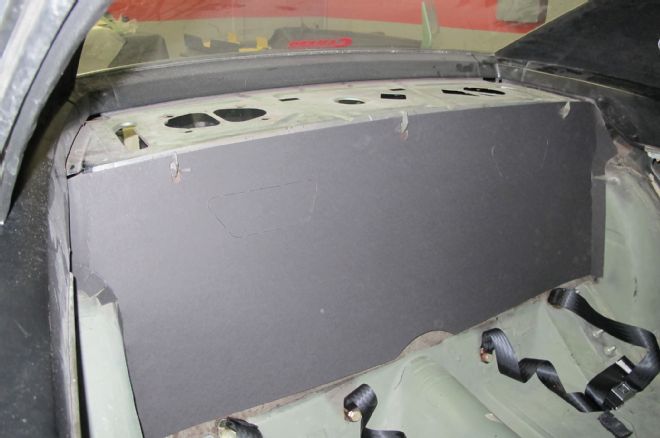
3. First up was a new trunk divider from Ground Up (PN ITD-3, $15). It’s the little things that make for a nice, finished project.
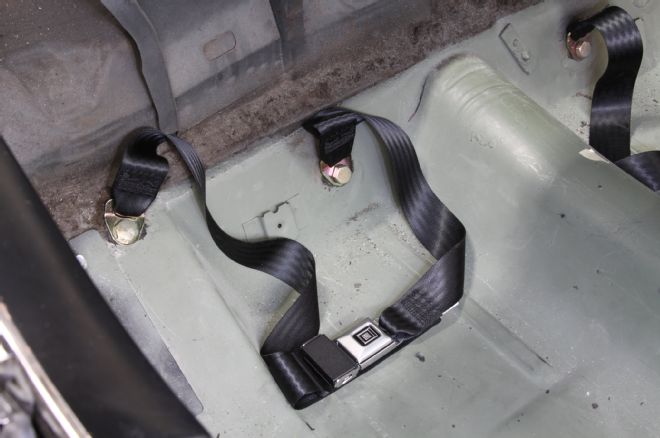
4. We also ordered some new seatbelts (PN SBL-1205-1000-K, $110) since the original ones were pretty faded and time tired. Plus, new seatbelts give us a warm, fuzzy, safer feeling.
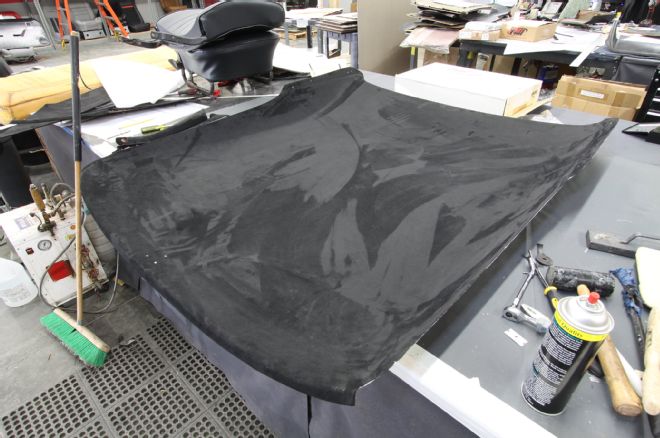
5. TMI’s new one-piece Sport fiberglass headliner has several benefits over the stock “fabric over bows” deal. It comes precovered in UniSuede, which is far more modern looking and it’s easier to install than a traditional bow-type headliner. It also yields a bit more headroom.
6. The material is pretty flexible and the whole piece was easily folded and inserted in from the side of the car. The entire kit runs just over $300 and includes the sail panels and A-pillars. If you don’t think that’s a deal, go get a quote from a custom interior shop.
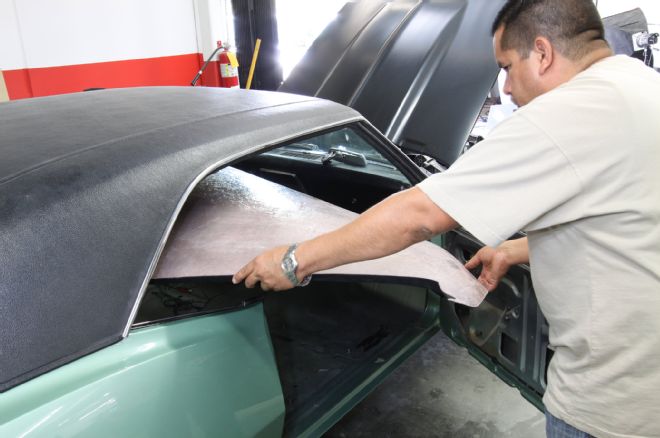
7. Once in place, a few self-tapping screws were used to secure it. The TMI kit also included sail panels covered in matching UniSuede. We ended up cutting holes in the sail panels to accommodate our RS-style interior lights.
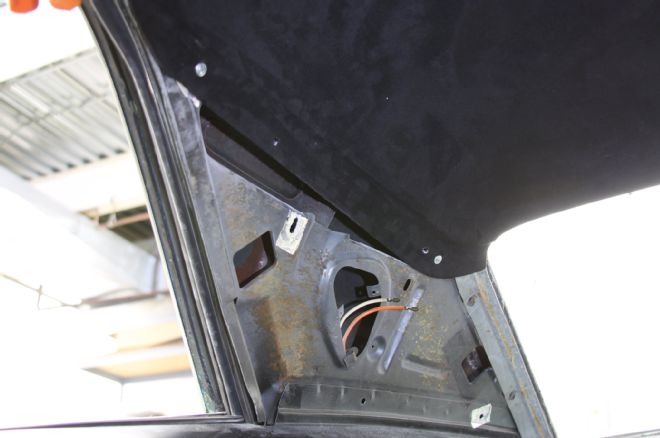
8. The sides of the fiberglass headliner were held in place by the original rubber U-molding.
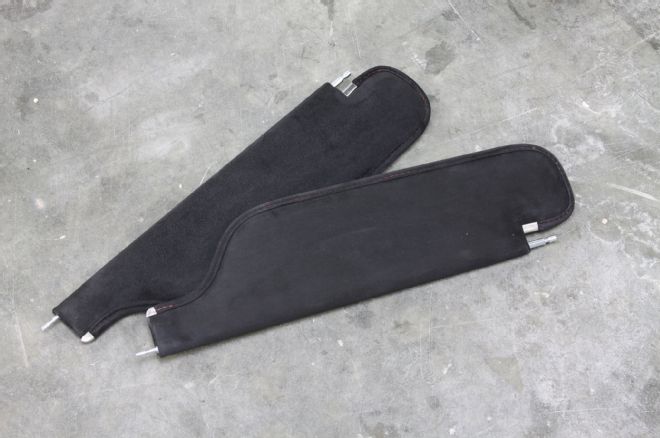
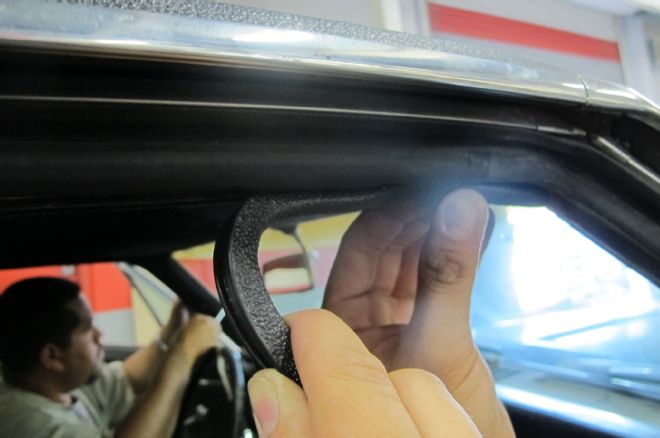
9. TMI also included matching UniSuede sunvisors in with red stitching.
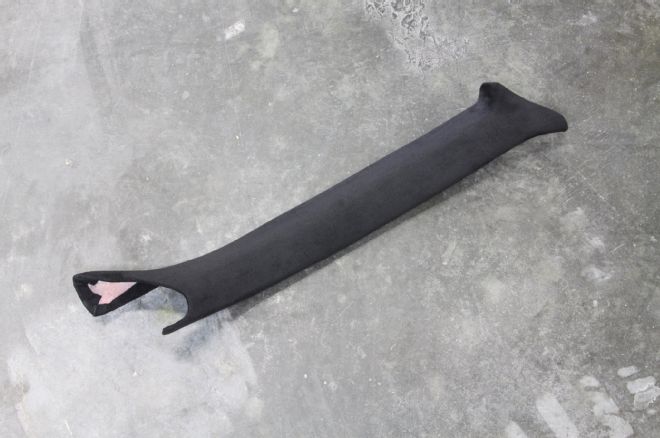
10. And here’s the matching A-pillar cover. Aside from looking great, the A-pillar cover hides the screws that hold the front of the fiberglass headliner to the roof.
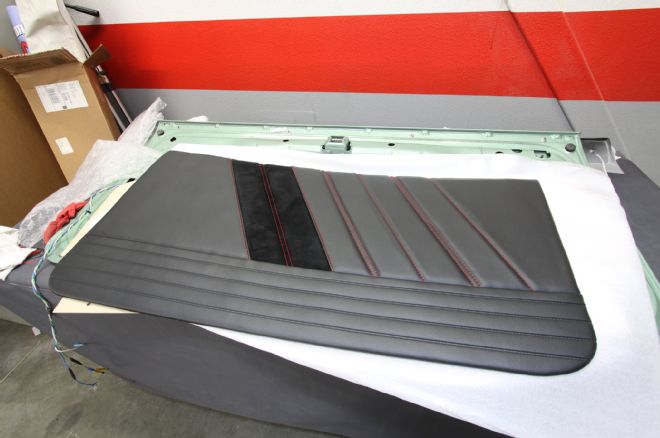
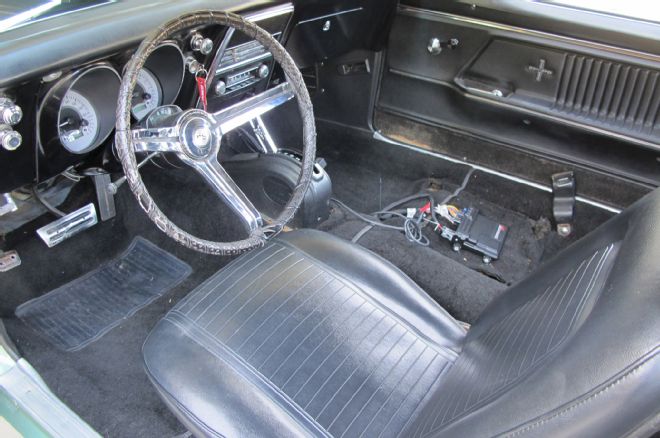
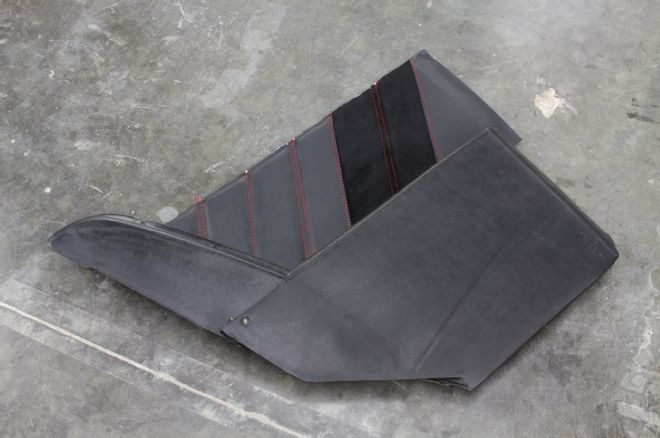
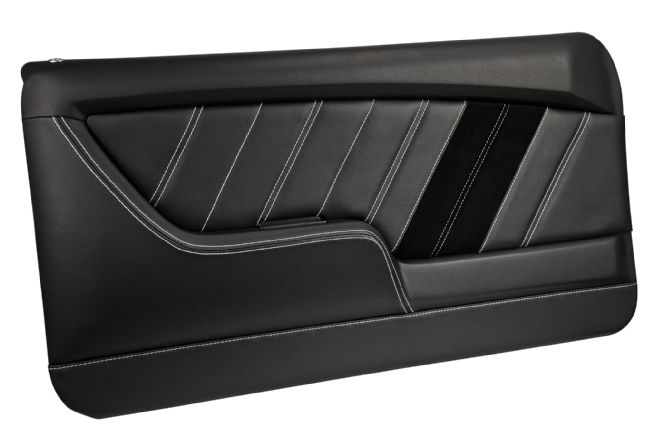
11. We opted to go with their Sport XR door panels for a more modern look and we really liked how the UniSuede stripes added a bit of contrast. To match the seats we chose a contrasting red thread for the stitching. The door panel kit, in our style has a street price of just over $500 and includes all four panels. Panels for 1968-’69 Camaros cost more (around $1,100) since they cover more of the door and include top rails and weatherstrips.
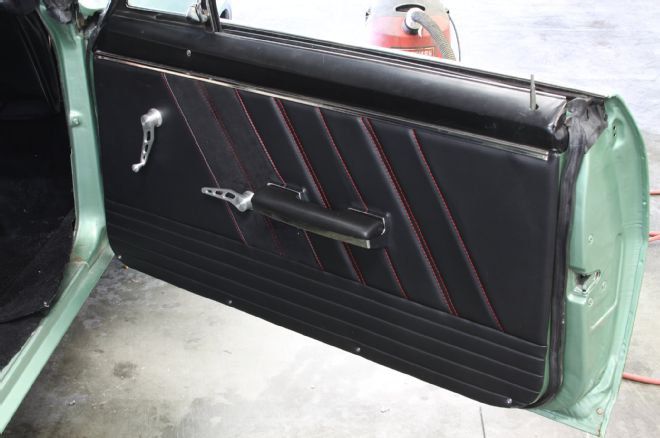
12. The door panels installed just like stockers. To finish them out we ordered new armrest bases and pads (PN ARM-kit-1, $55) from Ground Up and for a more custom look some billet door handles (PN IDH-2014, $84) and window cranks (PN IDH-2008, $84) from Lokar Performance Products.
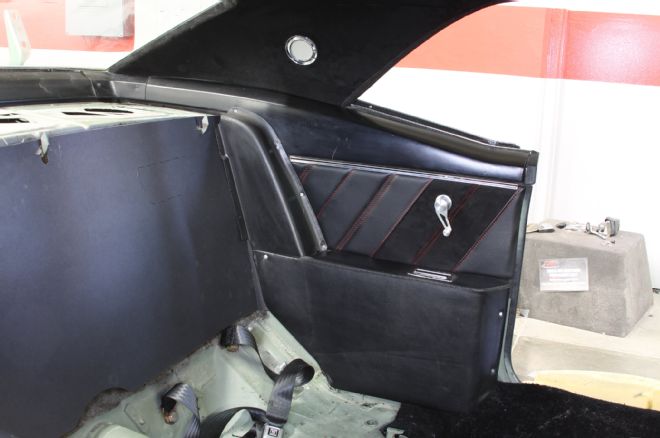
13. Our car was an RS and as such it had the narrower back seat. That wasn’t a problem for TMI to cover, but given that we were moving to flat door panels it did leave a gap. The solution was to mate the new TMI rear panels to the original RS armrest and seat spacer. The end result came out pretty cool.
14. And here it is installed in the car. Like the front, we finished it off with a short billet window crank (PN IDH-2020, $84) from Lokar.
15. Here’s a peek at their new Pro-Series “RS Style” door panels. Like the other interior offerings, they come in a wide array of colors, designs, and styles.
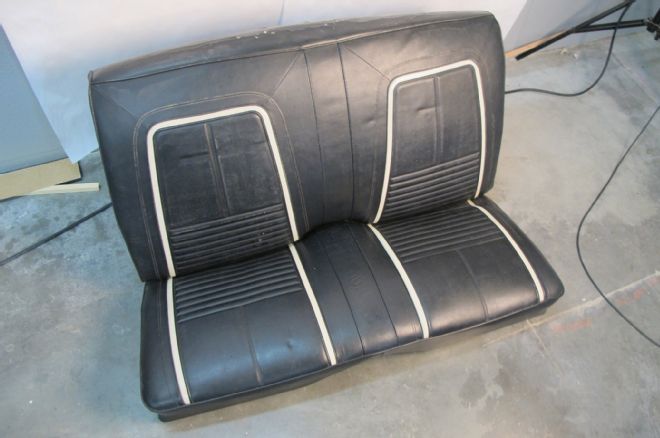
16. The original back seat looked like, well, an old, original seat complete with sun rot and tears. Still, we needed it since the new back seat uses the factory seat frame.
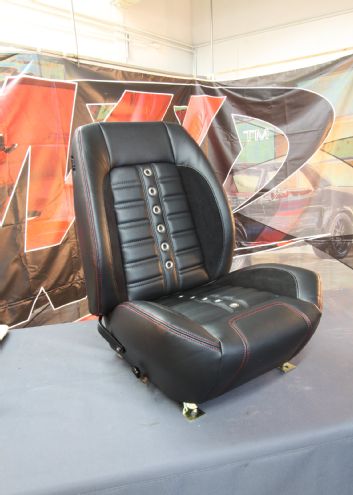
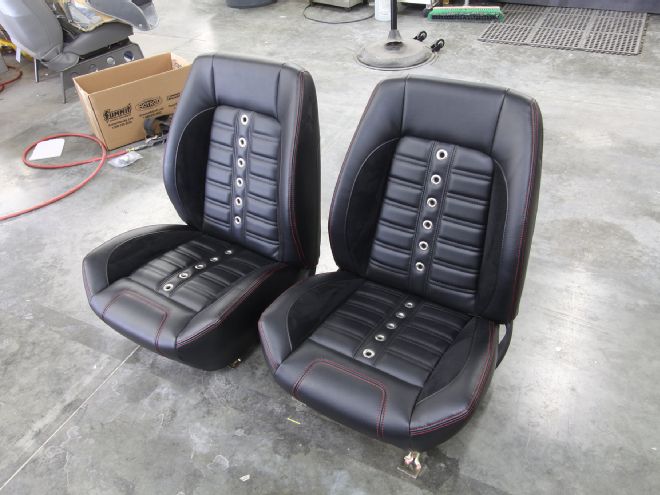
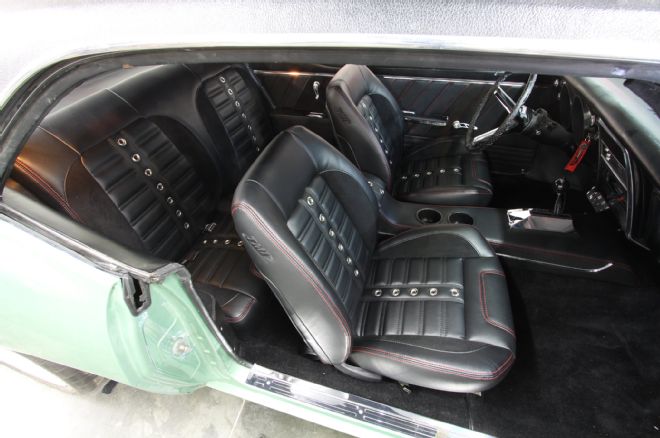
17. The front seats are built on the stock frames (or aftermarket replacement frames from a company like Ground Up) and come in an array of styles. We went for their Sport XR with UniSuede accents, red stitching, and accent grommets. The full front and rear kit, including seat foam, has a MSRP of $908. Keep in mind that their dealer prices are often 10-20 percent less.
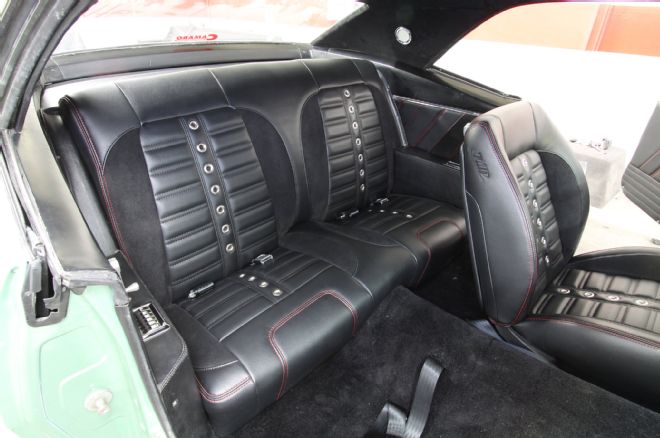
18. The re-covered rear seat simply slid in place like a stocker, but the look is far from factory. You can also see the new plush carpet kit ($150) we installed from TMI as well.
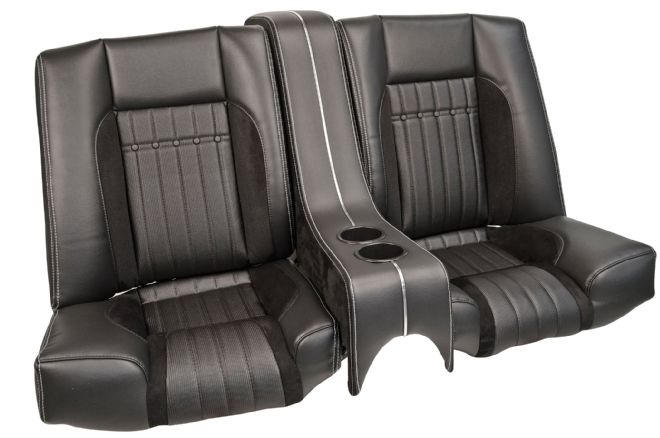
19. TMI used our car to prototype this new bolstered version called the Sport-R. It can be ordered with or without the center console, and can be had in any style or color offered for the front kits.
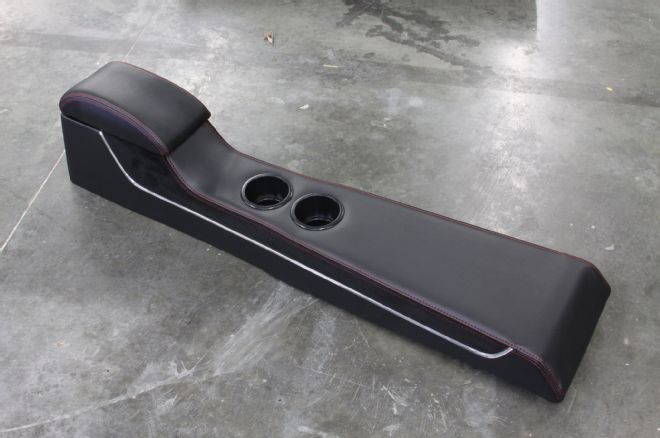
20. TMI also offers a line of center consoles that range from “shorty” versions that offer some storage and cup holders to this fullsize version that surrounds the shifter (retail price is a bit over $600). Less cash than a reproduction stock console.
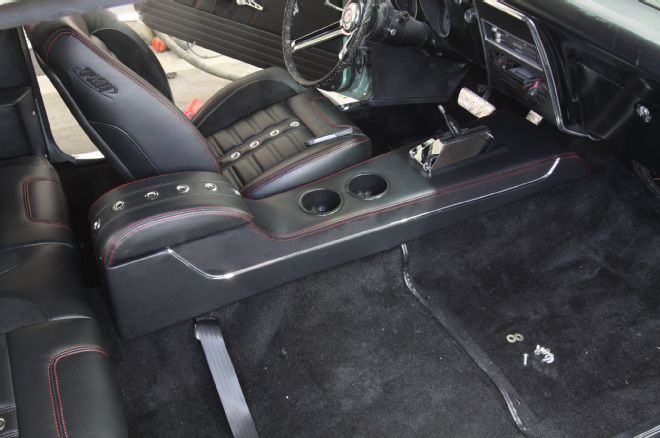
21. Like the rest of their parts, the center console just slid into place. For the shifter we cut the material where needed.
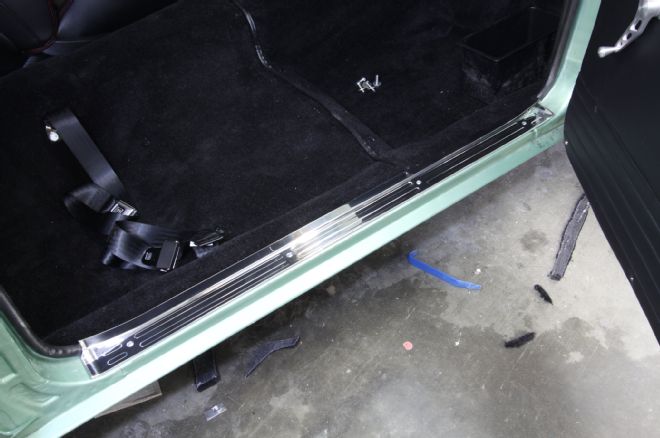
22. The battered stock sill plates were dragging down the rest of the interior so we picked up some polished billet ones from Eddie Motorsports (PN MS275-35P, $275).
23. The final result is an interior that looks custom, but cost a fraction of what you would get billed for at an interior shop. Total street price for the headliner, sail panels, seats, foam, carpet, and door panels from TMI was just over $2,000. Considering that a custom shop would charge between $5,000 and $10,000 it’s a lot of bang for your hot roddin’ dollar. Also, if you like a more OE style, you can roll with their Sport II line and shell out roughly $1,300.
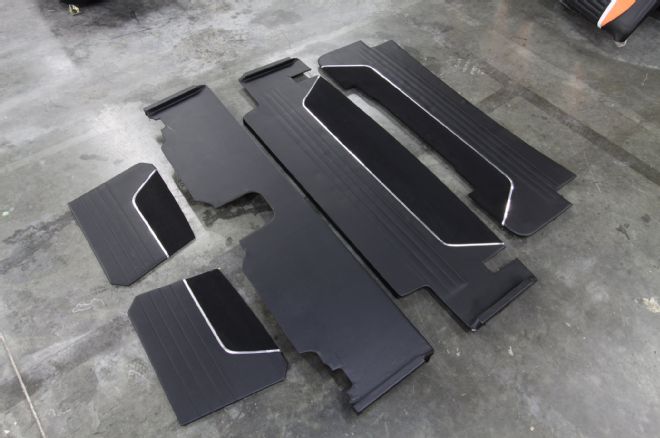
24. While we were at TMI they wanted to show us their new Sport XR trunk kit. Like the seats, this kit can be ordered in a variety of styles, colors, and options. The kit has a street price well under $600 and is a great, cost effective way to get your trunk looking like a custom shop worked it over.

25. The first step was laying the carpet in place. The carpet had a short bracing bar attached to it which will help support the main bulkhead.
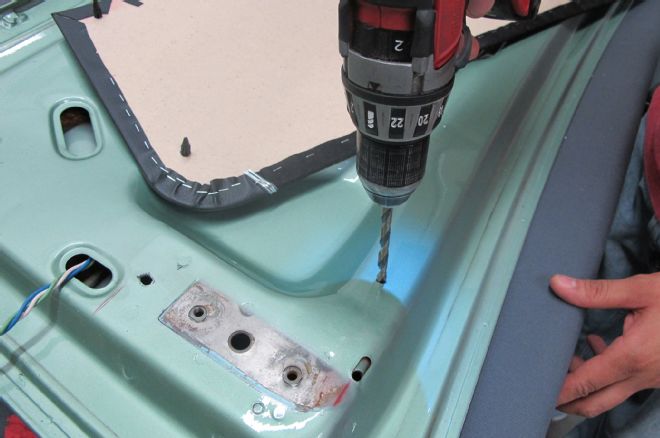
26. The trunk lid cover attached with small pushpins. This required drilling a few holes in the bottom of the lid. Care was taken since we didn’t want to put a dent in the other side of the trunk lid.
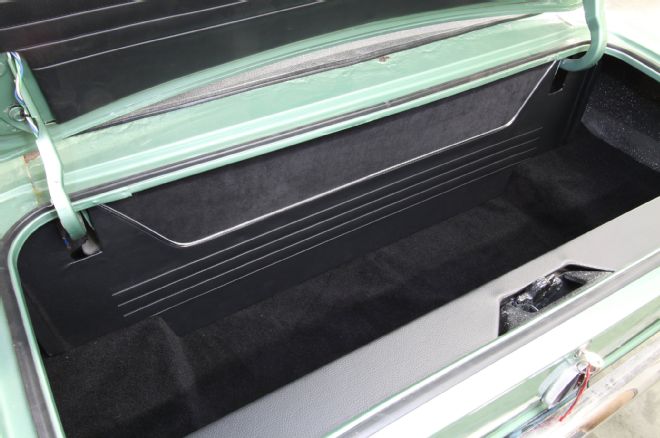
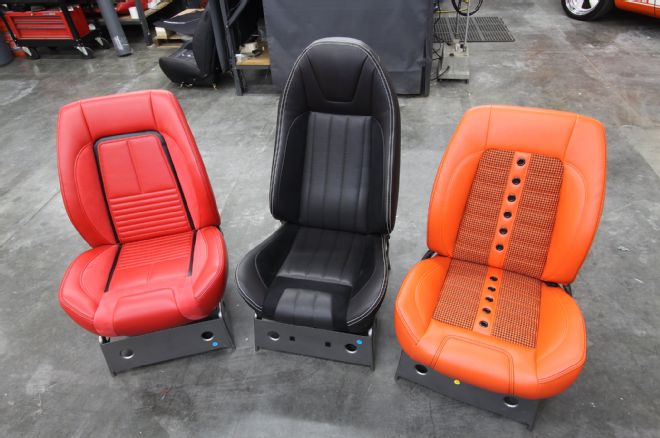
27. The main bulkhead just “snapped” in place and was held by friction on top and the bracing bar on the bottom. We also installed the panel that covered the taillights and gas-fill tube.
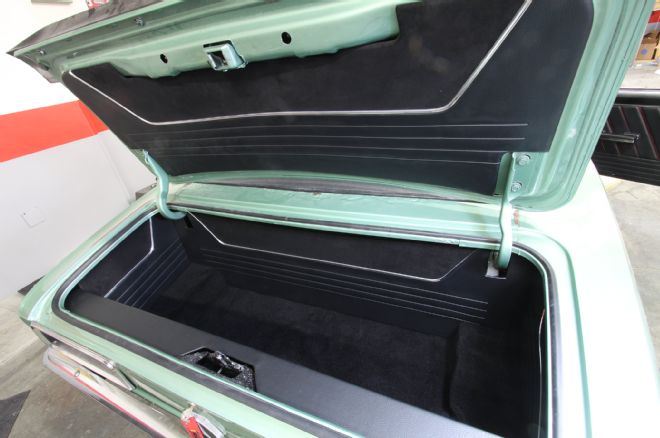
28. The two side panels were then installed and these serve to lock the other panels in place. You do lose some trunk volume, but the result is a show ready trunk that’s wallet friendly.
29. Remember how we said TMI offers a ton of seat options? Well, here are just a few. In addition to Houndstooth and Comfortweave, you can have a standard or deluxe style, suede inserts, contrasting stitching, black or silver grommets, and they even do custom orders and materials. You can also see their new high-back seat posed in the middle. These kits are a great option for giving your Chevy that custom look without breaking the bank.