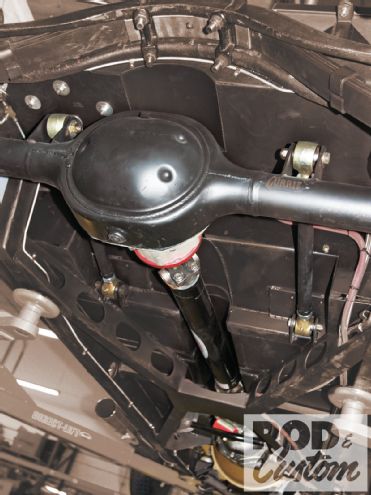
We’re backtracking slightly with the build of the Notso Special this month, as I reached the stage of the project where a lot of things were happening at once. You’ve already seen the rearend semi-mounted, as well as the installation of the Wilwood disc brakes in previous installments. What you don’t know is that it features a Torque Sensing Differential (limited slip), or why I chose an 8-inch over a 9-inch or any other rearend.
The reason for the latter is simple. With a four-cylinder engine, and its inherent lower torque rating over a V-8, as well as the fact that even with all the weight I’ve built into the car for high-speed stability, it’s still a relatively light car, an 8-inch is plenty capable of handling the power. Plus, it’s an all-new item from Currie Enterprises, featuring 28-spline axles, 3-inch axle tubes, and the larger Torino big bearing housing ends and bearings.
Opinions vary on whether an open, limited-slip, or locker differential is preferable at Bonneville, but I didn’t want a “one-legger” on the street, so I opted for Currie’s Torque Sensing Differential (TSD), with 4.11:1 gears in an aluminum case. The gear ratio selection was based on my calculations using the following formula: Gear ratio = rpm x tire diameter x 3.16228 ÷ mph. Though 4.11s may seem an odd choice for lakes racing, I have tall tires on the rear, and an overdrive transmission, and this is intended as a dual-purpose car. There’s not much point having to be push-started up to speed on the street!
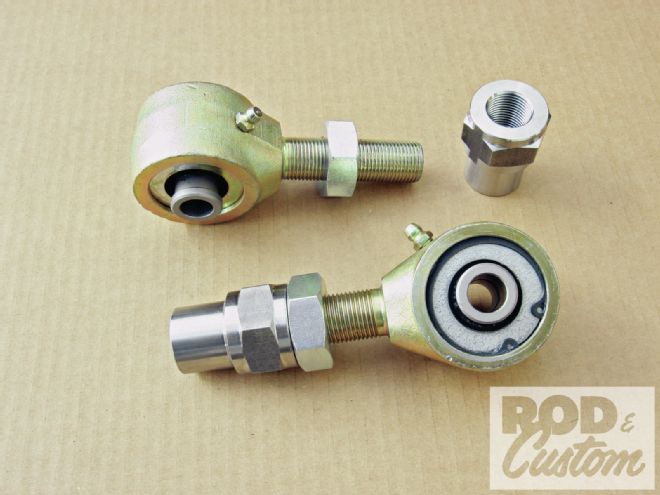
We’ve shown you how Currie Enterprises built a rearend in recent issues (search the tech section of our website for the buildup of the 8-inch in the Purple Pig ’49 Chevy from Feb. ’10 for an in-depth build), so we’ll skip that part, and show how the TSD is put together in a modified 8-inch housing. Currie also supplied what they call Johnny Joints for the suspension links. With more articulation than polyurethane bushing, but not as noisy as heim joints, these joints have found favor in the off-road market, as well as with chassis builders such as Art Morrison Enterprises. Simply described, they are a ball joint surrounded by a polyurethane bushing, they offer 30 degrees of unrestricted movement, and are available in a range of thread sizes and widths, as well as left and righthand threads for ease of suspension adjustment. Check them out in the “RockJock” section of Currie’s website.
Of course once the rearend was mounted, I needed a driveshaft, which was supplied by Dynotech Driveshafts, who supply teams in NASCAR, NHRA, and IHRA amongst other sanctioning bodies. They can build carbon-fiber, aluminum, or steel driveshafts. I opted for a steel version, with a tube diameter of 3 inches, to couple the 8-inch and T5 trans together. Simply fill in their build form and return it to them with the necessary measurements taken, and within a few days you’ll receive a made-to-measure driveshaft in the mail.
[1] As a comparison, here’s an 8-inch housing on top of a 9-inch. Note the smaller 8-inch offers more ground clearance, should this be an issue.
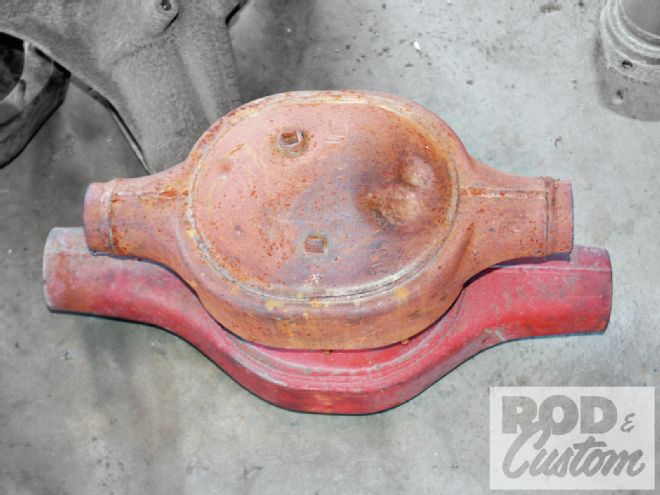
[2] Currie only uses the centersection of the housing, as larger, 3-inch axle tubes will be installed.
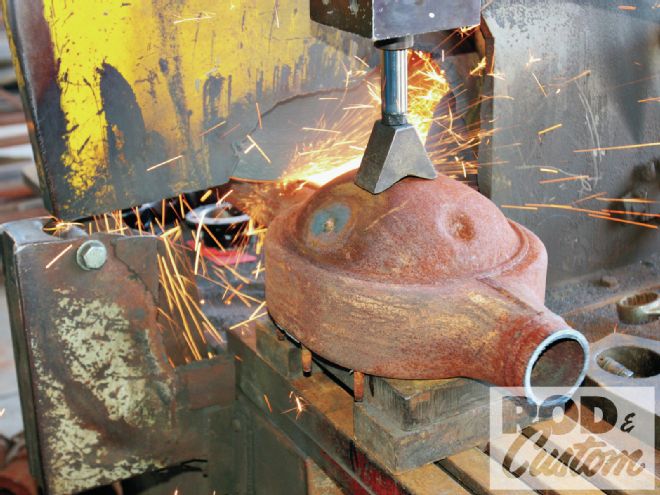
[3] Once blasted and cleaned, the housing is centered on a lathe and turned to accept the new tubes.
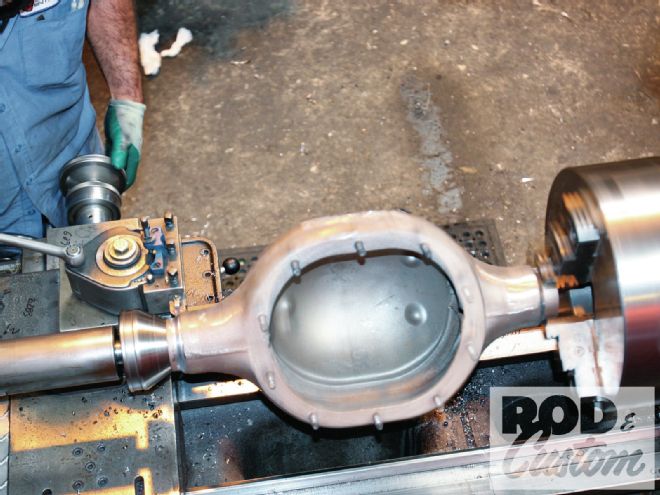
[4] Ready for assembly, the new tubes will slide over the turned sections, the tapered cut allowing decent weld penetration.

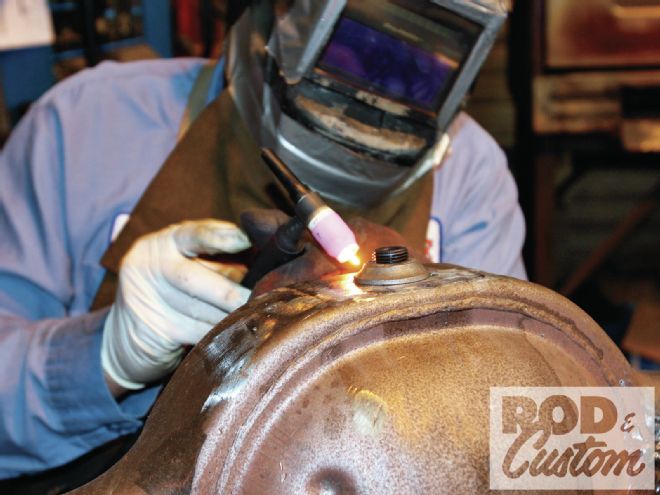
[5] I requested a drain plug be welded into the bottom of the housing. Currie offers this as an option.
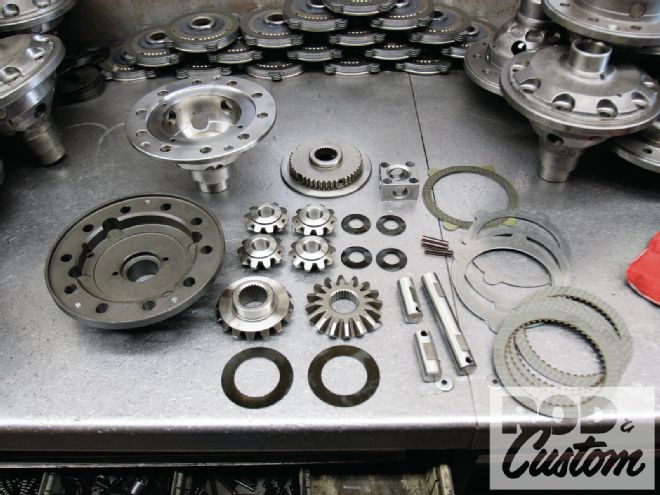
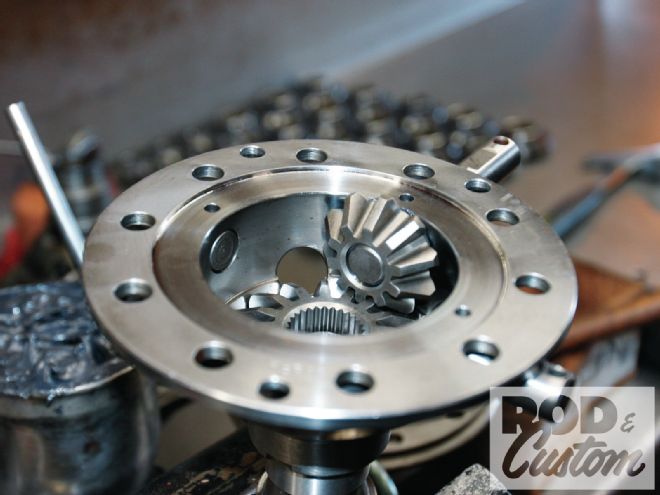
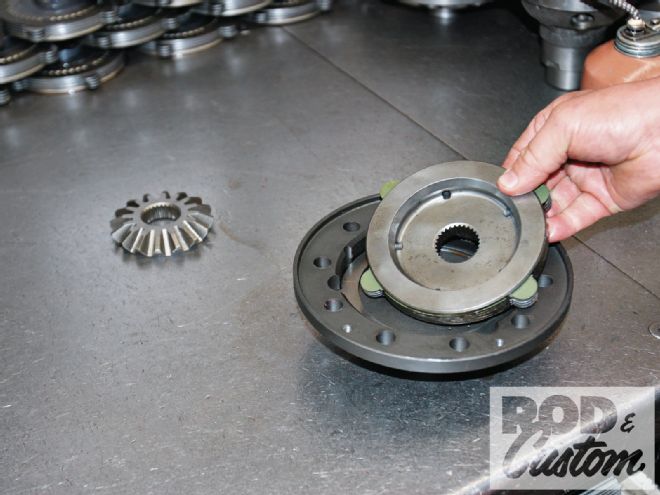
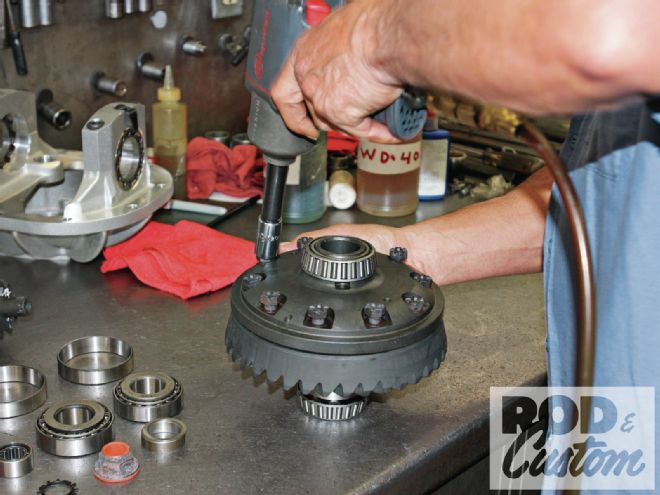
[6] Laid out on the bench, these are all the parts that go into a Torque Sensing Differential. We’ll describe them as they’re installed.
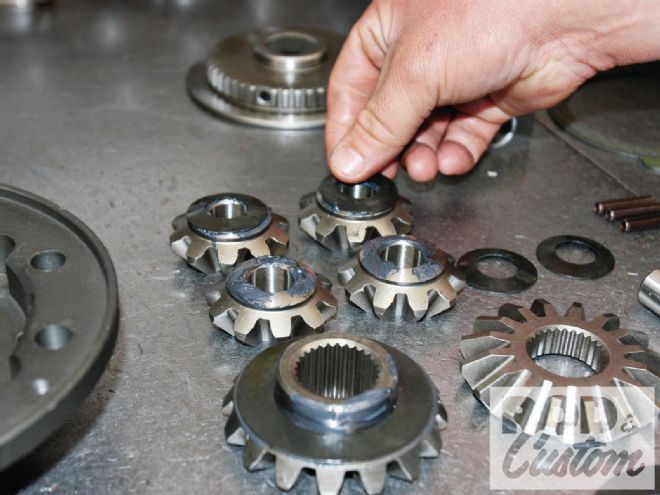
[7] Thrust washers are first placed on each of the spider gears using assembly lube.
[8] With the posi carrier bell half mounted on a splined shaft in a vise, the shaft locating in the stepped side gear (there is a stepped and flat side gear), the spider gears are assembled on their respective pins. The long pin (arrow) goes across the bell half, locating one pair of gears, while two short pins locate the second pair of gears.
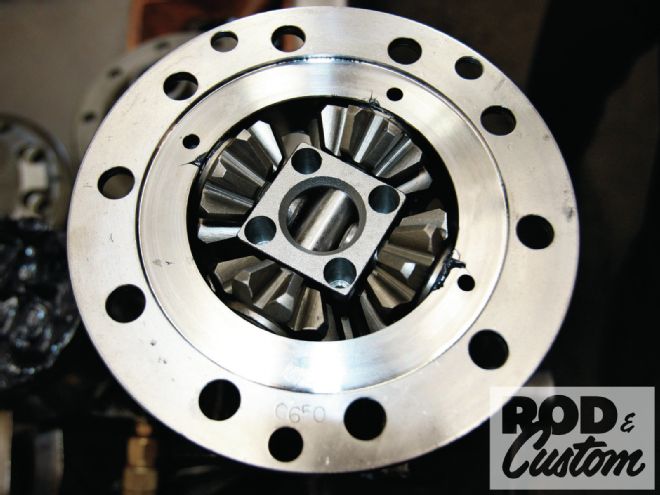
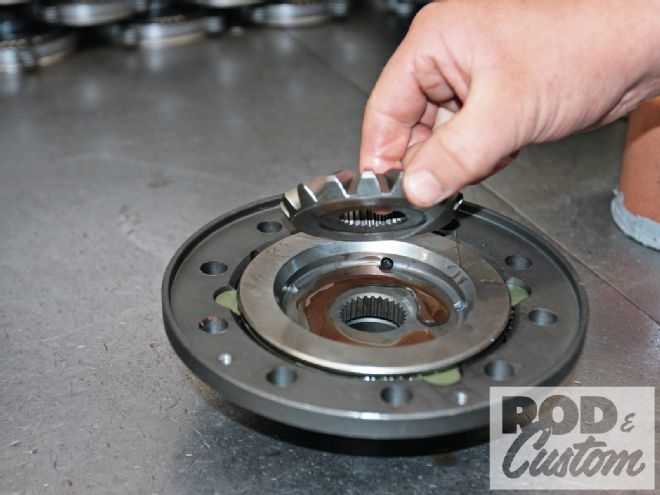
[9] With the spider gears in place, the two short pins located in the center block and the long pin passing through it, roll pins will be drifted into their respective holes (arrow), holding the long and short pins, and hence the gears, in place
[10] The roll pins are installed with a hammer and drift.
[11] Moving onto the clutch pack assembly, oil is applied between each component until the clutch pack is built up.
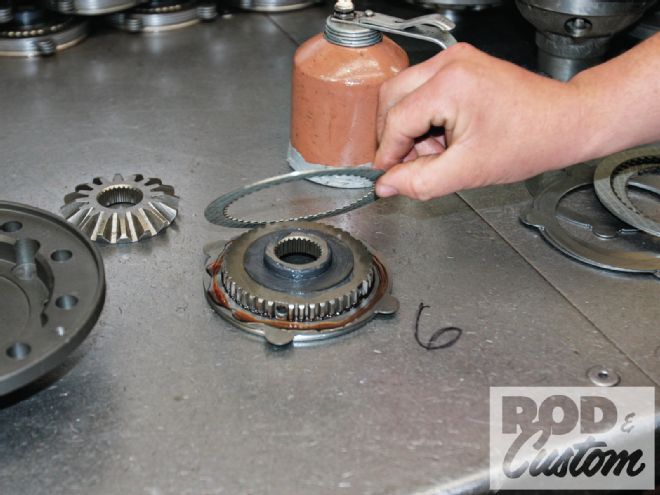
[12] Clutch shims are next installed in the clutch hub …

[13] … followed by the clutch pack.
[14] The flat side gear is then set into the clutch hub, along with a washer.
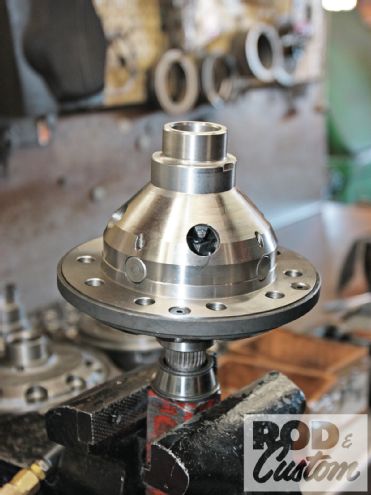
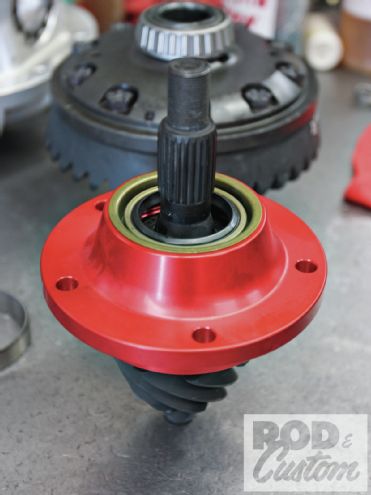
[15] The clutch hub and bell half are combined, the assembled unit now referred to as the carrier.

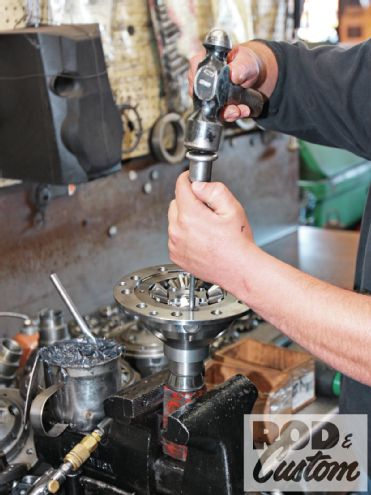
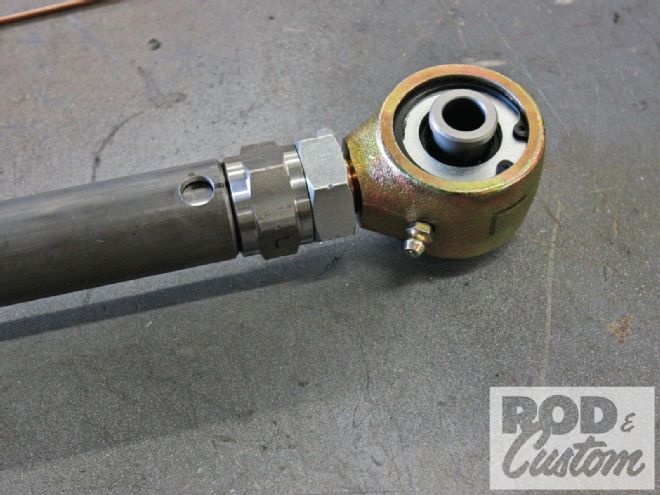
[16] Bolted together using countersunk Allen head bolts, and mounted on a splined shaft again, a torque wrench is used to determine
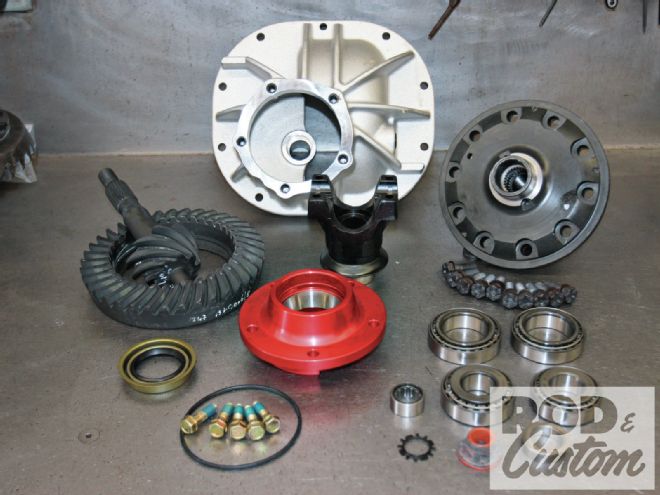
[17] The third member can now be assembled. Ours uses an aluminum case and pinion support with 4.11:1 gears.
[18] With the bearings pressed in place, the ring gear is pulled onto the carrier using the ring gear bolts.
[19] Here’s the assembled aluminum pinion support with seal installed. We’ve covered final assembly of these in the past, details of which can be seen in the tech section at www.rodandcustommagazine.com.
[20] We used Johnny Joints with a 3/4x16 thread and a 1/2-inch bore/2-inch-wide center assembly for our upper suspension links and the rear of the split wide center assembly for our upper suspension links and the rear of the split '40 Ford front wishbones we used. Currie also supplied the weld-in bungs
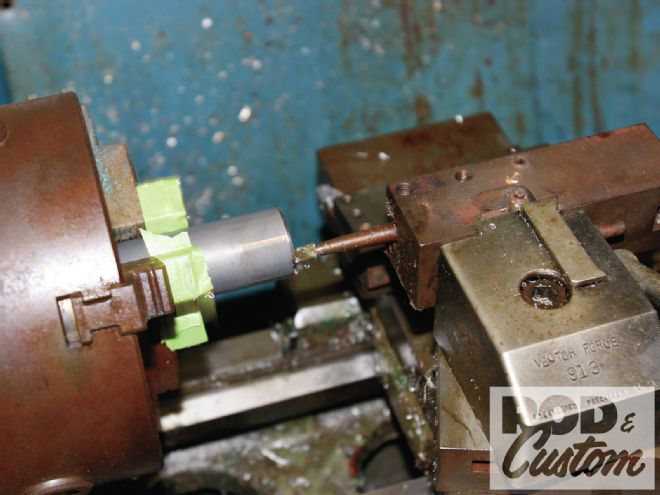
[21] I used 1 1/4-inch diameter DOM tubing for the upper suspension links, which my coworker, Wes Drelleshak from CLASSIC TRUCKS magazine, turned to length and bored to accept the bung.
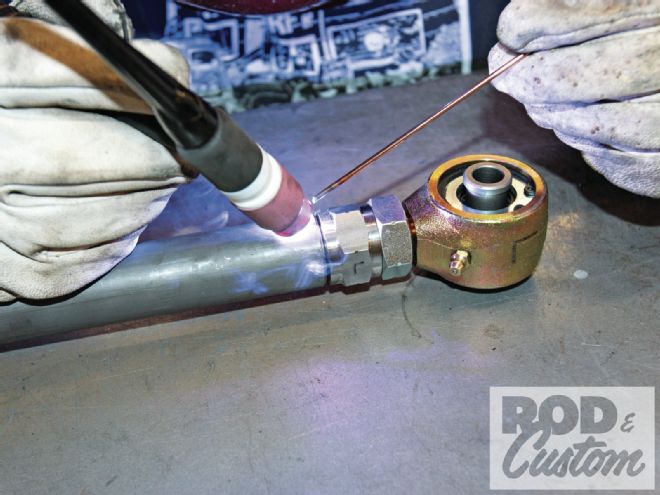
[22] With the ends of the tubing chamfered for weld penetration, and drilled for two plug welds at each end …
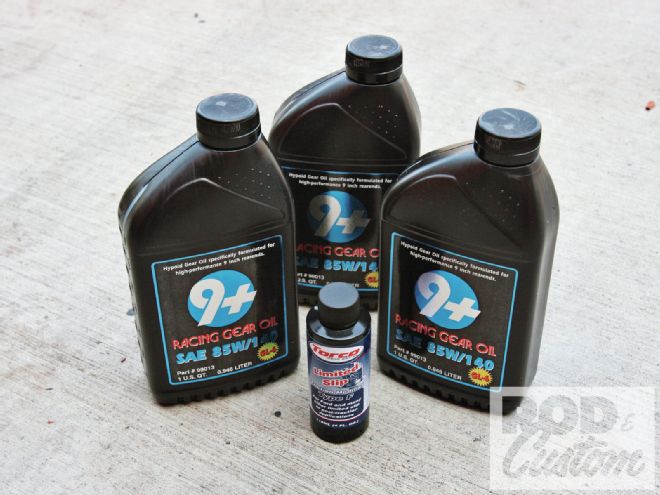
[23] … they were ready to be TIG-welded.
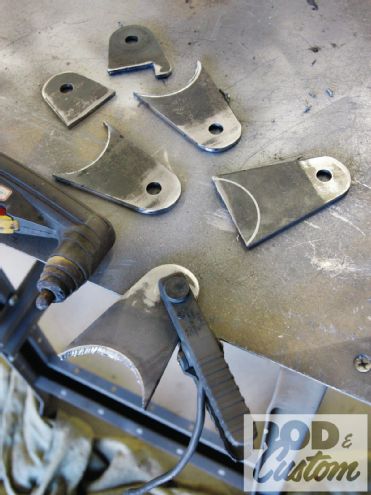
[24] Meanwhile, I used a plasma cutter to fabricate mounting brackets for both the rearend housing and chassis.
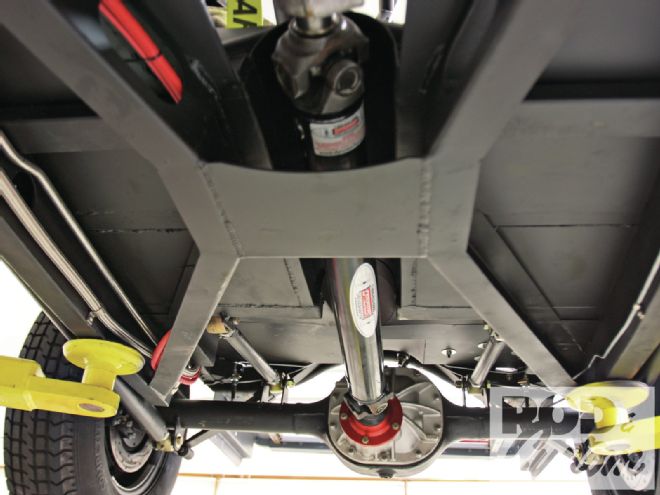
[25] A leftover from when the car was intended as purely a street-driven car, I’d used ’40 Ford front wishbones to locate the previous ’49 Merc rearend, and retained them, adding the upper links as torque arms. These are mounted pointing down toward the front of the car, in an imaginary line intersecting the front mount of the wishbones. Not ideal, as I’m sure someone will point out, but with the limited suspension travel, I can live with it. I shouldn’t need a Panhard rod with the transverse spring, but can always add one later if required.
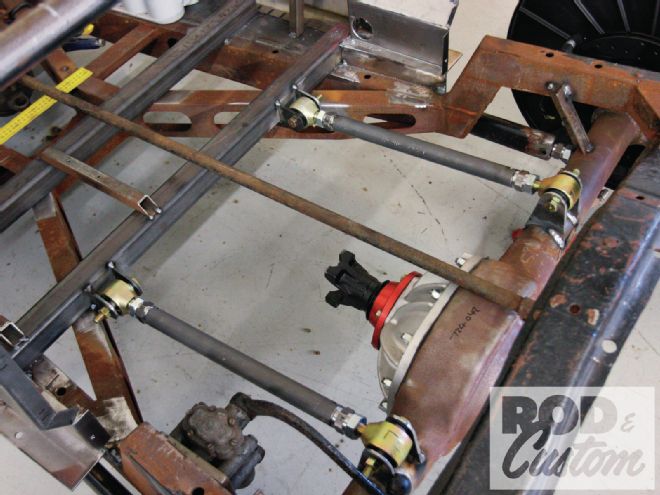
[26] The new driveshaft from Dynotech Driveshafts was a perfect fit, thanks to careful measuring!
[27] Currie Enterprises supplied their own-brand 9+ oil for the rearends, plus a bottle of Torco Limited Slip friction modifier.