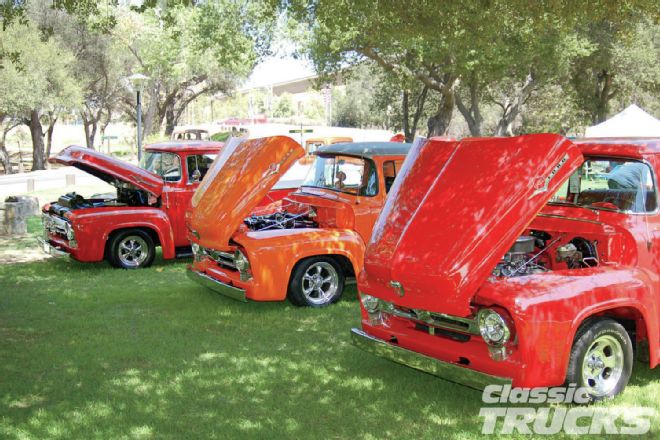
If you are driving or building a 1953-56 F-100 there's a real good chance that you either have or are contemplating a flip-front hood. It seems as though they're as common now as computerized fuel-injection.
The front-tilt hood is so popular now that it is almost unusual to see stock hinges used. The reason Bobco and I have used this kind of hood-opening assembly is because it will maintain the same hood lines when closed, every time. The hood only does two things: rolls forward to open and rolls back to close. With this motion fixed you can adjust your fender lines real close and they will stay like that. Plus the stock hinges have a real problem closing at the same rate.
Once the hood is closed, you almost always have to go to each side and push the corner of the hood down to completely close it. Some hinges won't even hold the hood up. In all the trucks I have touched over the years, I have only seen two sets of stock hinges that worked properly. One set was on a 50,000-mile original barn find.
Although the look of the hood opening in the stock form is classic, the access afforded by the front tilt is great. Working on the sides of the engine is easier and what you lose in front access is negligible. Filling the radiator isn't as easy as it used to be. A small price to pay to be cool.
Classic Performance Products flip-front hood kit comes with everything you need to install it and have it working. It comes in a couple of versions and has a real good set of instructions for the install. The kit I used here is the raw kit. The metal structure is raw metal and my roller tracks, hood support rod and bracket are silver plated. The combo kit still has the raw metal structure, but the roller tracks and hood prop are polished stainless. Finally the stainless kit is just that. Everything is stainless.
When you do the hood install and front end fitment there are a couple of new rubber pieces that need to be replaced. The U-shaped radiator mount (core support) is connected to the crossmember with two 7⁄16-inch studs. There is a flat rubber pad that goes under the core support at the 7⁄16-inch studs. It's called a core support kit and will also include two rubber spacers and 3⁄8-inch bolts for the outer mounting points of the core support as well. While you have Mid Fifty F-100 Parts on the phone, also have them throw in a rubber hood bumper kit too. Those are the ones that go on top of the fender lip where the hood meets the fenders. A rear cab mount kit is not a bad idea either. The 1-ton F-300s had a cast rear cab mounting arm. Very heavy-duty. Mid Fifty can set you up with either, the rebuild kit for yours or a set of new cast 1-ton arms.
 1. Flip front hoods have been around for years. Some truck owners have to have them. Others still want that stock look when the hood is open. With our great aftermarket industry, there are now a couple of companies making kits to make your hood flip forward to open. Follow along as I install a kit from Classic Performance Products.
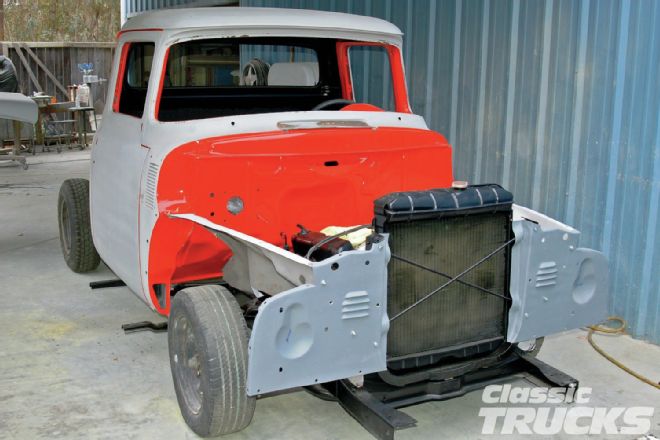 2. To fit the hood to the truck, we need to have the truck somewhat together. Here I have mocked the front air dams and inner fenders on the truck. The fenders and top valance were next.
 3. The top of the air dams have a slotted hole. I like making sure that I start out with it centered on the bolt. Moving these air dams, with their bottom bolts being the pivot, can raise or lower the front of your fenders and can also close or open up the line between the fenders and hood. Once you are satisfied with the fit and are ready to blow it apart for paint, drill a couple of small 1⁄8-inch alignment holes through the air dams, top and bottom, and into the radiator mount. When you reassemble, use a small scribe and alignment tool. Having these back in the original place when you fit the hood can save you hours of readjustment.
 4. I also make sure to drill out the top mounting hole for the rear of the front fender. It is usually 3⁄8 inch or so. I drill it out to 5⁄8 inch. This will give some movement room for fender adjustment when I start fitting the hood and fenders.
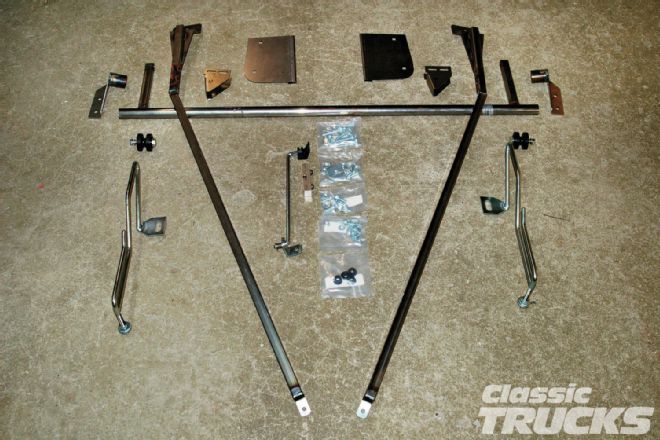 5. Here is a complete “raw” hood kit from Classic Performance Products. They also offer a combination kit with stainless roller tracks and stainless hood prop rod and bracket. The ultimate would be their full stainless version. These kits are very basic and easy to install. Everything is included to make your hood open and close.
 6. The rear wheel tracks are installed. The adjustment at that 3⁄8-inch nut will raise or lower the rear of the hood as it sits in its position. On some hoods I have done in the past, I have had to notch to top of the fender bracket for the lower rod so the track would go as low as I needed. (Depends on the truck.)
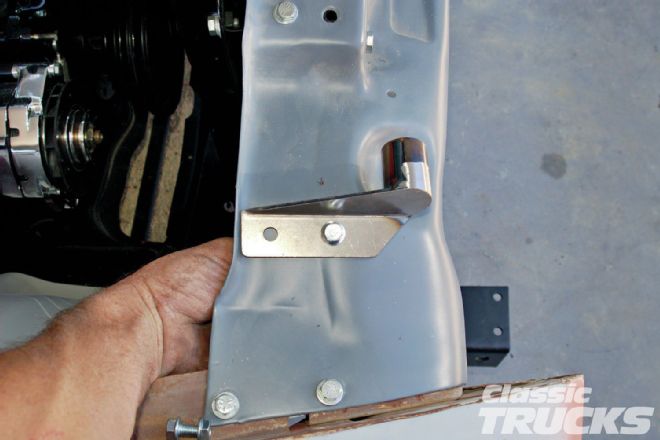
 7. The front bracket of the roller track tucks between the top of the inner fender and the bottom of the fender flange.
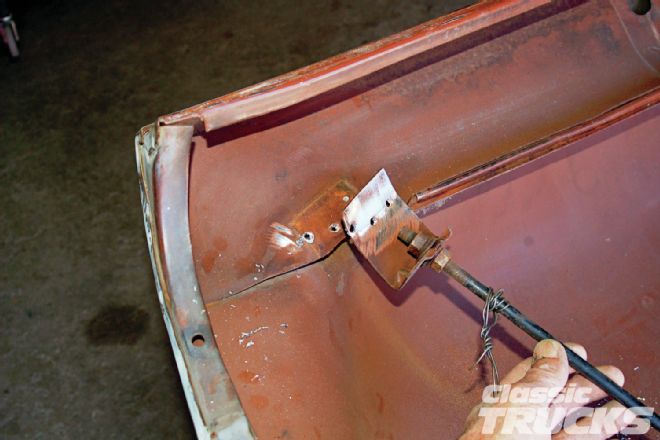 8. The stock hood support rods and their brackets need to be removed. They both have three spot welds that need to be drilled out. There is also a 5⁄16-inch bolt on each of them that needs to be removed. A light sanding with a sander will usually reveal the spot welds. Simply center punch and drill 1⁄4 inch. If you are careful you can usually drill out the weld without drilling completely through.
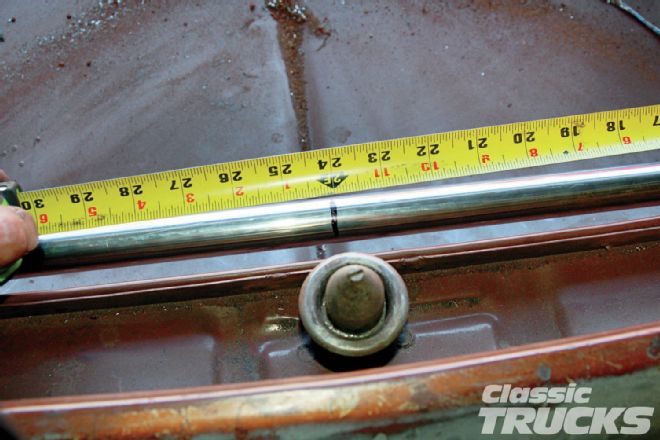 9. The 1x1 square bars of the hood pivot assembly need to be centered within the hood when mounted. To find a centerline, I measure between the two 1⁄4-inch holes on each side of the hood where the stock round rubber bumpers mount. Don't rely on the hood pin placement for a center. A lot of times the pin is not actually centered.
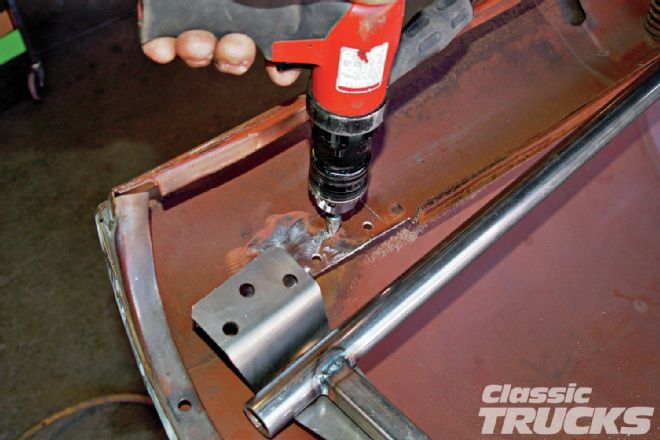 10. I then find the center of the pivot assembly and mark the tube. Once I line up the two centerlines, that gives me the placement of the holes for the brackets. These are marked and drilled 1⁄4 inch. The brackets are then bolted on with the bolts supplied in the kit.
 11. The slick nylon wheel for the rear of the hood is bolted on. Don't worry if the stock nutsert is stripped or missing, CPP's kit includes nuts, just in case. These wheels will sit on the tracks we bolted to the tops of the inner fenders.
 12. With the whole structure located and mounted I'm ready to install the hood on the truck and start fitting.
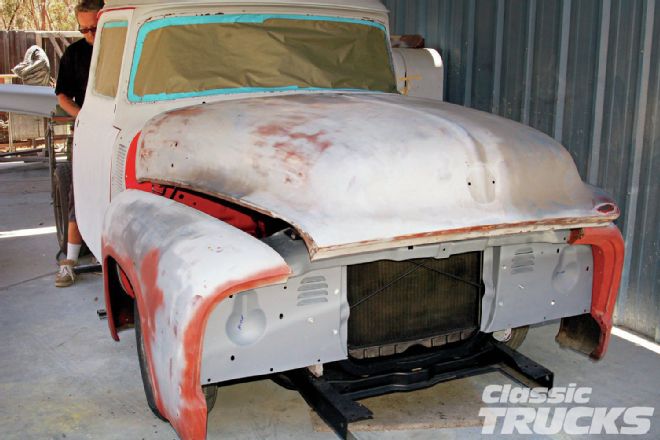
These kits will not cure a bad-fitting hood. The fender to hood and hood to cowl gaps should be good when you start. These can be adjusted to some extent. If you are putting this kit on a truck that is together and you're not happy with the gaps, start with checking the rear cab mounts. Worn-out cab mounts will let the back of the cab sag and open the gap of the hood and top of the cowl up. To adjust the fenders and cab to the hood, loosen the bolts for the fenders at the front air dams, lower valance, at the top of the fender/inner fender mating point, and at the firewall. Also loosen the fender at where it bolts to the cowl, behind the kick panels. This will allow you to move fenders forward or back, with the air dam bolts loose, you can roll the fender up the air dam a bit more to close up the hood gap.
Large gaps at the top of the back of the hood and the cowl of the cab can sometimes be caused by the front end install. If the truck had a Camaro, Volare, or some other subframe-style front clip installed, the front radiator mount crossmember could be off slightly. Shimming the radiator's U-shaped mount can help close that gap sometimes.
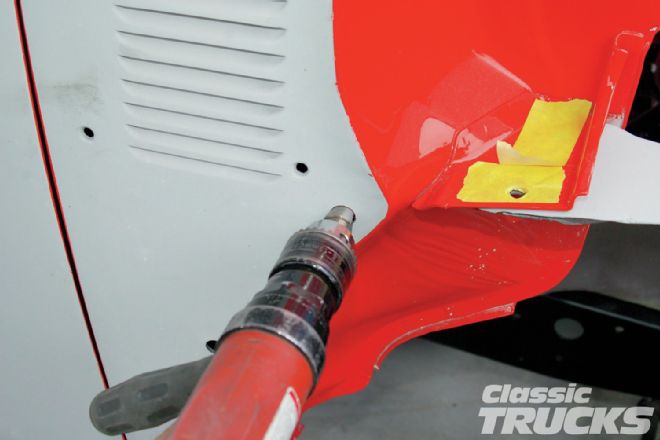
If you are moving into paint mode after doing the flip hood kit install and fitting the frontend, then take a few minutes and drill a few strategically located 1⁄8-inch alignment holes. This way all the fitting you have just done won't be wasted. If you drill a few realignment holes now, when you reassemble the sheetmetal after paint you can get the pieces back in the same spots.
I drill a couple of holes at the back of the fenders where they bolt to the cab. Then drill a couple, top and bottom, through the front air dams where they bolt to the radiator mount. Then drill one on each side under where it will be covered with the plates that mount the fender rods. Those holes ought to get you right back where you were when you reassemble. We have done them this way for years and it really speeds up reassembly of the front end and hood. Follow along with the pictures and see just how easy a flip front hood can be to install.
 13. These are the pivot supports brackets that attach to each side of the tube. The tube for the tilting assembly will fit inside the female tube that is this mount. The forward hole in the bracket bolts to the stock hole in the top valance and air dam. Once the hood is installed and fit, then I drill the rear holes on these brackets. Slight movement of these brackets can aid in adjusting some side-to-side gaps in the front of the hood/fenders.
 14. There is a couple of ways to put the hood on. Both will require at least one more person. The best way is to slide the female pivot brackets, in the last picture, onto the pivot tube. With a guy on each side of the hood, hold it open, and in place, and bolt the female brackets to the top valance.
 15. After the hood is positioned and you're happy with the fit, drill the rear mounting holes. Another way is to mount the pivot bar to the top valance, standing straight up. Then, with a guy on each side of the hood and one under the front, line up the bars from the pivot tube with the brackets of the hood kit. Then install the 3⁄8-inch pivot bolt.
 16. This is what is nice about these kits. You can adjust the fenders and hood for a perfect fit and it will stay every time you open or close the hood. Here we see that the hood is forward of the fenders, this is adjusted by moving the fenders to the front of their adjustment where they bolt to the cab or moving the hood back on its adjustment of the pivot tube brackets.
 17. After I was happy with the fit of the hood, I drilled a few alignment holes. These allowed me to have my sheetmetal in the exact same spot at reassembly after it had been unbolted and primed red. I drill the rear of the fenders here, inside the kick panel area.
 18. The front air dams determine fender placement and if these are just bolted on after fitment of the hood, you are basically starting all over again. Drilling a 1⁄8-inch hole at the top and bottom of the air dam will ensure it is remounted exactly where it was. The whole front end fit starts here with these.
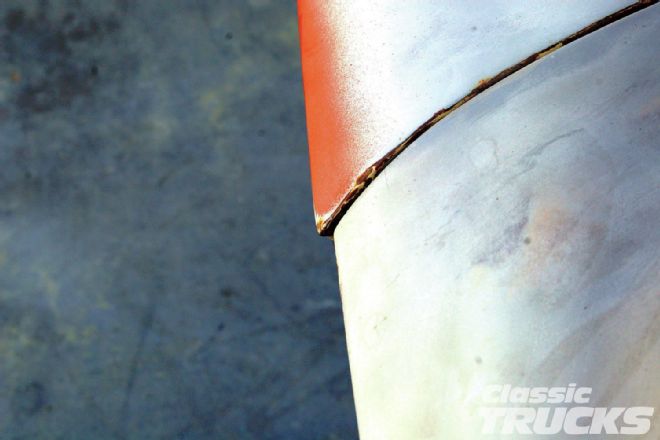
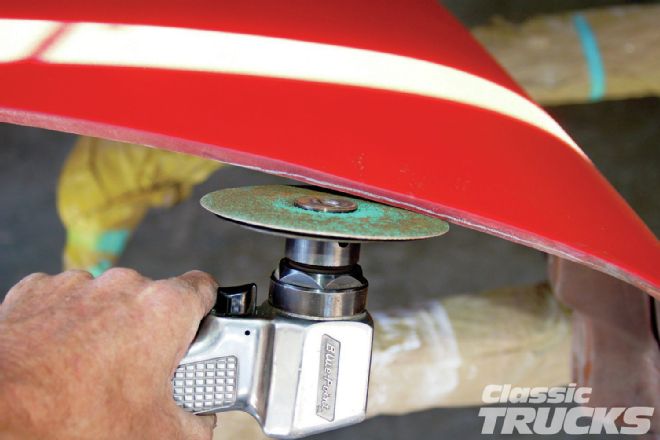 19. This back edge of the hood always hits the top of the cowl. I sanded some off during fitting, but wanted to make sure I had enough at the outer ends of the hood. Bob and Chuck were working so fast, they primed it before I could touch up the ends.
 20. This is another way to install the hood. Mount the pivot tube to the female pivot brackets and stand the pivot tubes straight up. With a buddy on each side of the hood, install and line up the pivot tubes with the brackets mounted to the hood. It is a single 3⁄8-inch bolt on each side that acts as the pivot point. As they set the hood on, line up the brackets and bushings in the tubes and install the 3⁄8-inch bolts.
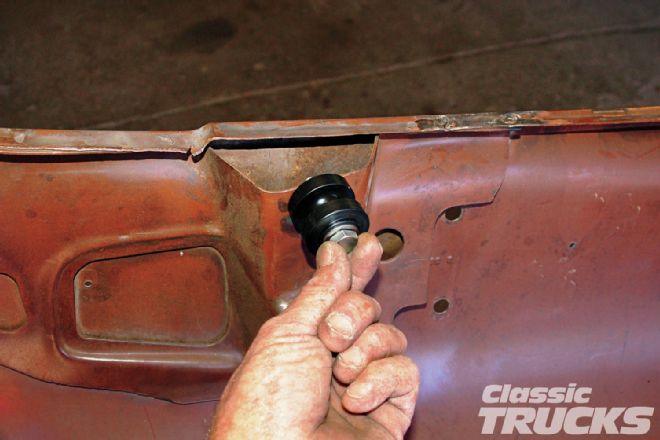
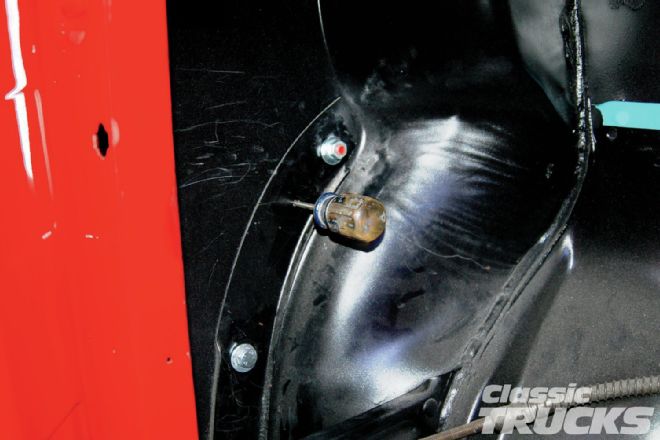
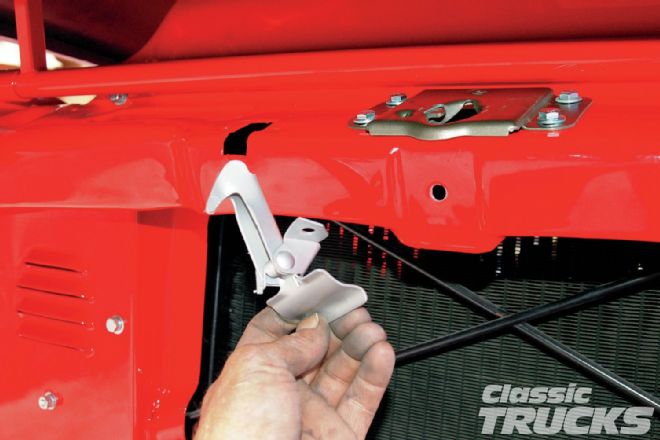 21. With the flip-front hood kit, you don't need the stock safety latch. If the hood ever does come unlatched, it doesn't move very far and won't come flying open.
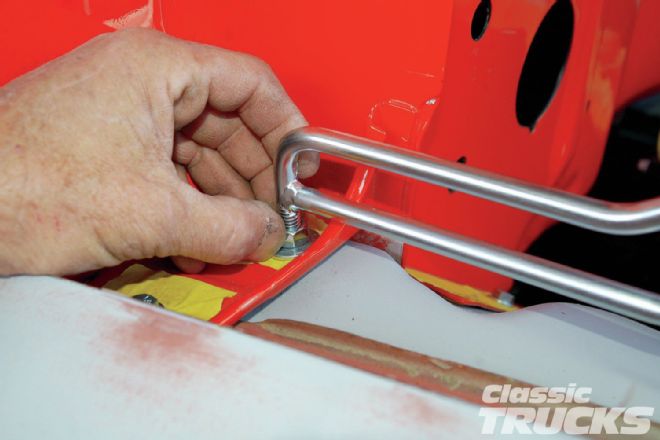
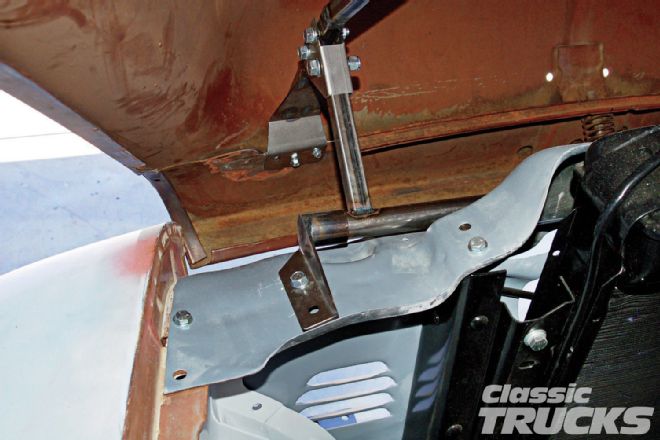
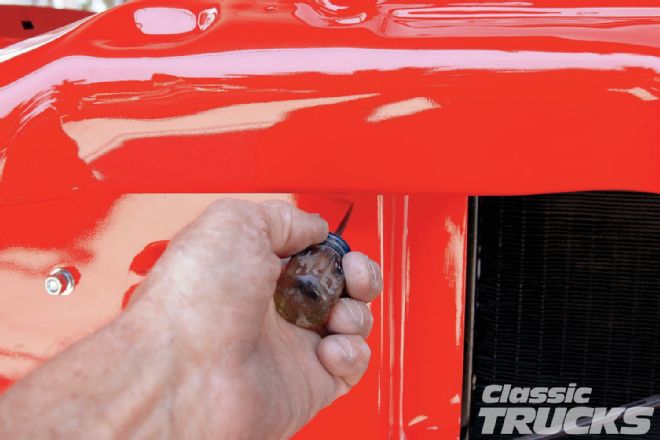
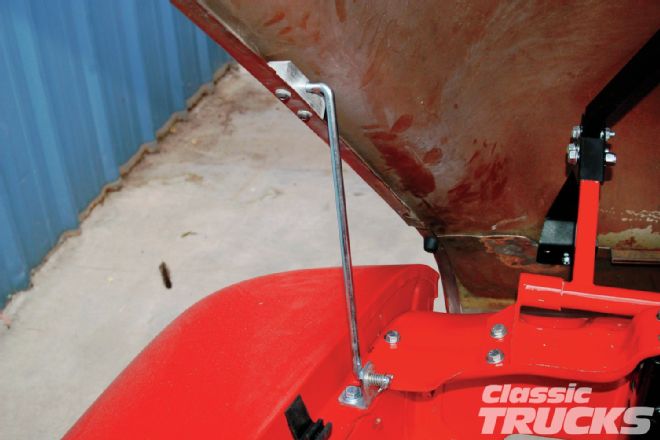 22. The hood rod is mounted on either side; I like the driver side, just behind the top valance on the fender flange. Drill a 5⁄16-inch hole and bolt it on. Open the hood to where you want it to be and mark the location of the aluminum block for the hood rod. Drill and mount the aluminum block and insert rod. These work great, but be aware on a windy day at a show. The rod can work its way out on some.
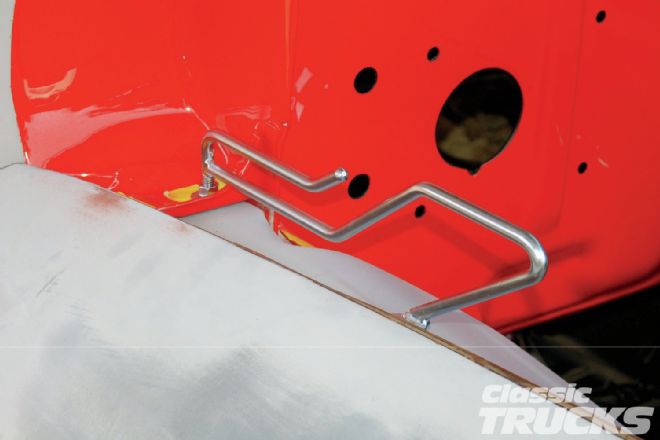
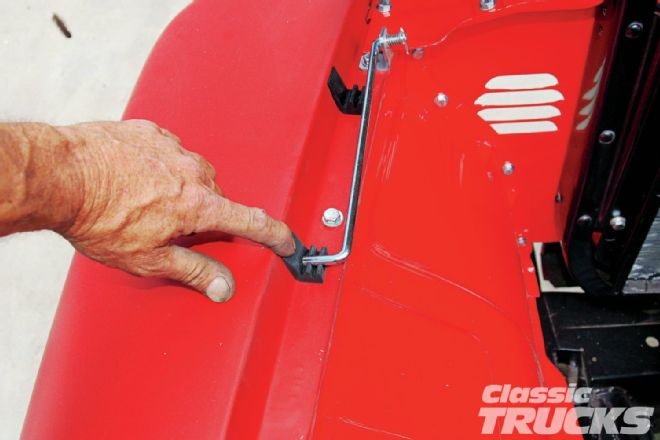 23. Drop the rod (well, don't drop it) into the supplied rubber hood bumper holder and glue it in place. I use black weatherstrip adhesive to hold it in place.
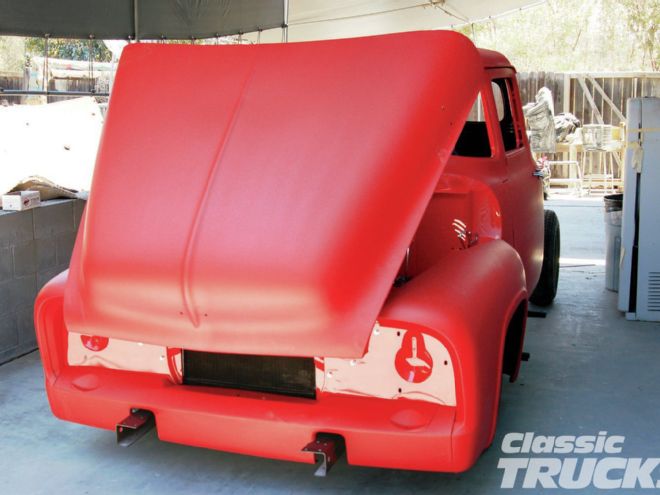
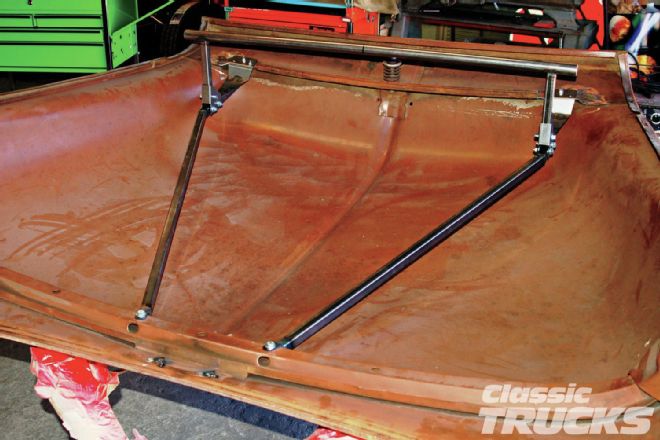
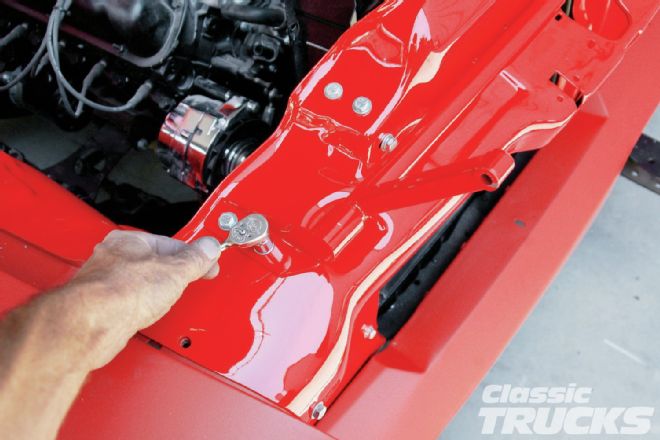
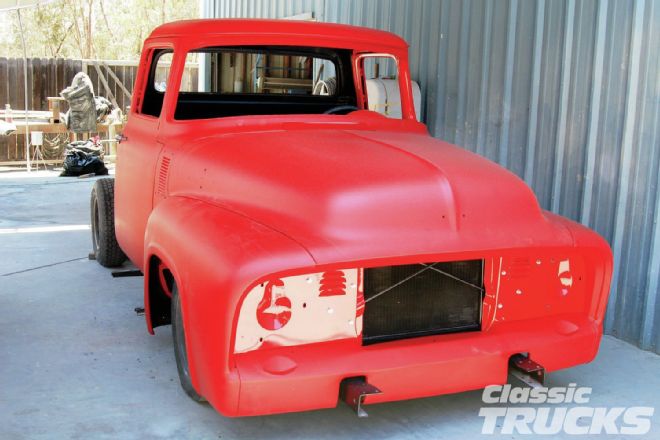 24. Here's how she looks all put together. Opens and closes like a dream. Now the hood/fender lines I have adjusted in will stay with every hood closing. And I won't have to push the back edges of the hood down anymore either when I close it. I love these hood kits.