The debate has been going on for a while. Should you stick with the heavy and cumbersome factory K-frame or should you install one of the new tubular-style K-frames? Installing a tubular K-frame gives you the option to install just about any engine you can think of, since the tubular unit takes up a third of the space of the original K-frame. Another plus is the weight of a K-frame. Depending on the materials used, a tubular piece could theoretically shave a serious amount of weight from the front of a car-definitely a bonus for guys who race.
The downside to tubular K-frames is that in order to install one, you also need to install a motor plate. A motor plate is a fairly thick piece of aluminum that attaches directly to the front of the engine and then bolts rigidly to the frame in some fashion. For a street car, the vibrations experienced by this type of engine mounting can take the fun out of driving.
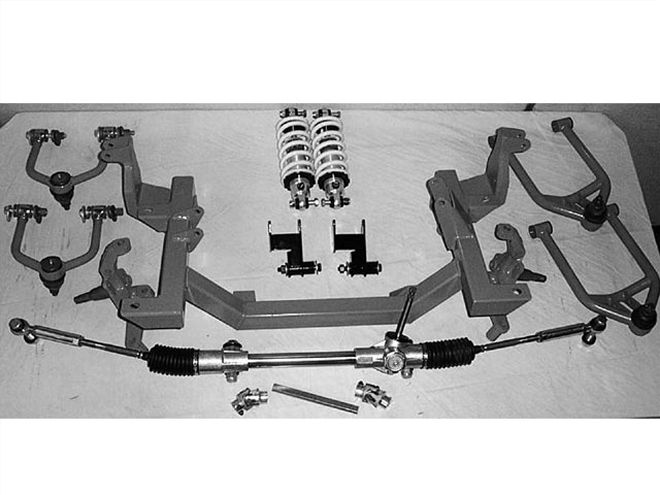 The parts are shipped unpainted, which helps keep the cost down. Most guys powdercoat the pieces anyway, or you could simply paint them the color of your choice.
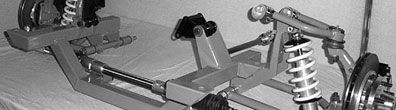
Enter the next generation of K-frames from Reilly MotorSports-the AlterKtion. The AlterKtion allows the car to ride lower with improved wheel angles. Bumpsteer, which is present in a lowered stock suspension, is eliminated. Ackerman (a term that explains the toe-out during turns) is designed in for excellent tracking and smooth, low-speed turning. A lower roll center decreases the chance of jacking under high cornering loads. Caster change, and fore/aft and side scrub movement are all minimized to hold the car in a more steady state. Caster adjustment and kingpin angle have been increased for maximum stability. Rigid components are designed to eliminate flexing, and small-diameter poly bushings are used to absorb vibration without allowing excessive movement.
All components are designed and arranged to provide the maximum possible undercarriage clearance while maintaining light weight. Depending on options and the brakes used, the system will save 95-120 pounds over a stock manual-steering suspension.
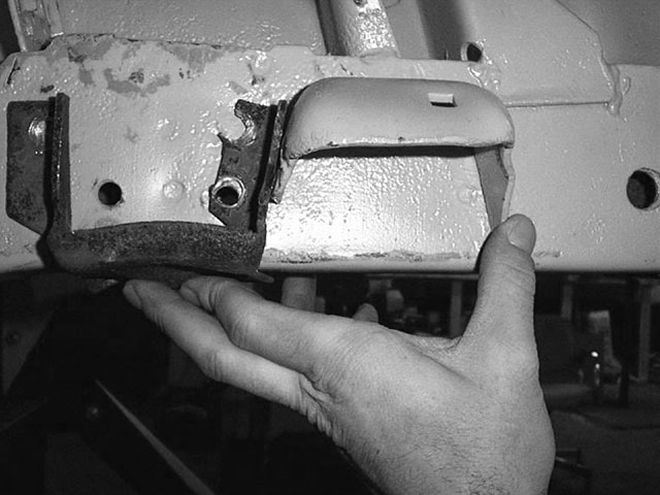 Using a drill with a 1/2-inch bit, remove and discard the lower bumpstop bracket. On '67-'72 models, this is all that's necessary. On '73-'76 models, the upper bumpstop bracket must also be removed.
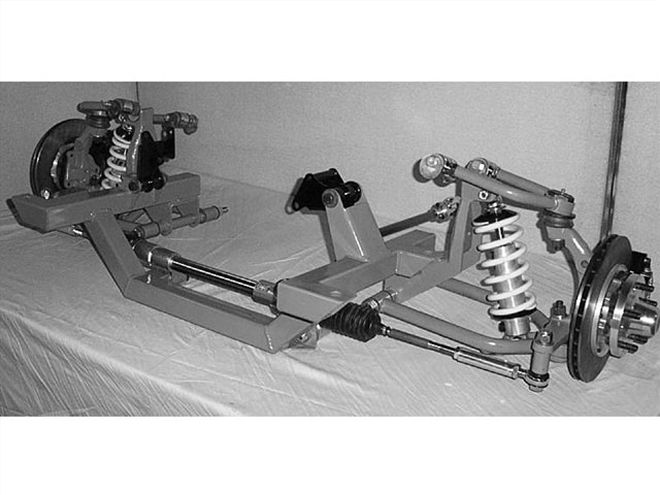
The entire system is designed to be bolted on, with only minor drilling and grinding. The supplied accessories are quality pieces from manufacturers, including QA1 12-position adjustable shocks and chrome-moly/Kevlar rod ends with dirt seals, AFCO Racing coil springs, Flaming River MII rack-and-pinion steering (manual or power), and TX-series heavy-duty aluminum U-joints. A Mustang II spindle accepts locally obtained economy brakes, as well as kits from Wilwood, Baer, Aerospace Components, Lamb, and others. Lower tubular A-arms and upper shock mounts are designed to handle abuse without flexing. The kit can be used with stock upper control arms, but tubular upper control arms are available and accept either chromoly adjustable bushing ends or chromoly/kevlar rod ends.
The basic system includes everything but brakes and engine mounts. Schumacher-built spool mounts allow a direct bolt-in for big- and small-blocks. There are many choices for brakes, and although Reilly Motorsports offers Wilwood or an economy version, you can use any brand you like. If you choose to use motor mounts, the optional mount kit is a bolt-on. If you use an engine plate, the basic frame has no mount provisions, thereby providing the lightest and cleanest arrangement of parts possible. Currently, A-Body and E-Body units are available for order.
As with any performance product, there are some compromises to achieve bolt-on status. In the case of this system, wheel backspacing is limited, depending on tire size used. The following numbers allow approximately 1/4 inch of clearance between the rim and tie-rod end. With a 14-inch rim, a maximum 3 1/4-inch backspace is allowed. On a 15-inch rim, a maximum 3 3/4-inch backspace is allowed. And with a 17-inch rim, a maximum 5-inch backspace is allowed. Note, even though a 17-inch rim clears the tie-rod end entirely, with more than 5-inch backspacing, the rim will hit the tie rod at full lock in either direction. If wider, 17-inch rims are needed, an adjustable stop may be welded to the lower control arm to limit the turning radius. These figures are based on suspension clearance only.
When removing the K-frame, it's important that you do not leave the engine and trans in the car supported by ropes and wire. Remove everything and support the car with jackstands behind the front wheels. Since any Mopar manual will show how to remove the K-frame, we won't go in-depth with that aspect-we'll just show how to install the AlterKtion K-frame.