
At some point, every hot rodder in the land will need a new driveshaft, and 9 out of 10 times it will need to be custom built. It could be because you've added an overdrive transmission, or upgraded the rearend, or bent the stock one at the drags—the time will come when you will need another one. And while you very well might be tempted to craft your own, you'll quickly find out what a nightmare that is without the specialized skills and tools that only a dedicated driveshaft shop can bring to bear.
Chances are, you've already been in the position to need a driveshaft, and have run across the name Inland Empire Driveline Services at some point. Those outside of California may wonder what that name means. The Inland Empire—or simply "the I.E."—refers to the sprawling metropolitan area to the east of Los Angeles, and includes cities like Riverside, San Bernardino, and Ontario. If you've ever flown into L.A., it's that long strip of civilization you fly over before you get to Los Angeles, Hollywood, Malibu, and the Pacific Ocean. It's where Inland Empire Driveline Services (IEDLS) is located, and they have shops in the towns of Ontario and Corona.

If you're measuring your Mopar for a new driveshaft, start by measuring from the end of the output shaft—not the end of the tailshaft housing. Also, take a measurement from the end of the output shaft to the edge of the transmission seal. If you live in the Inland Empire, IEDLS will come to the shop where your car is, and take the measurements for you.
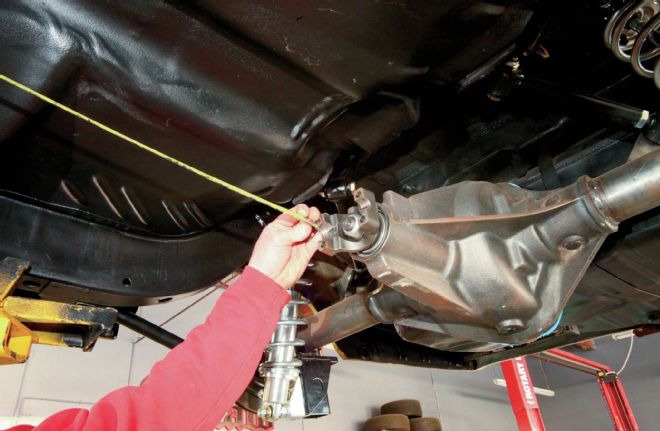
At the rear, the end point should be measured at the flat face of the pinion yoke. If you don't know what type of pinion yoke you have (our Strange S60 had a 1350), you will also need to take two more measurements: the width of the U-joint captured inside the yoke, and the bearing cap diameter.

At the IEDLS Corona facility, master technician Thomas Aragon begins each driveshaft build by gathering appropriate components for the U-joints, bearings, and yokes. Here he's assembling Spicer bearing caps on the pinion yoke with the tabletop press seen in the background.
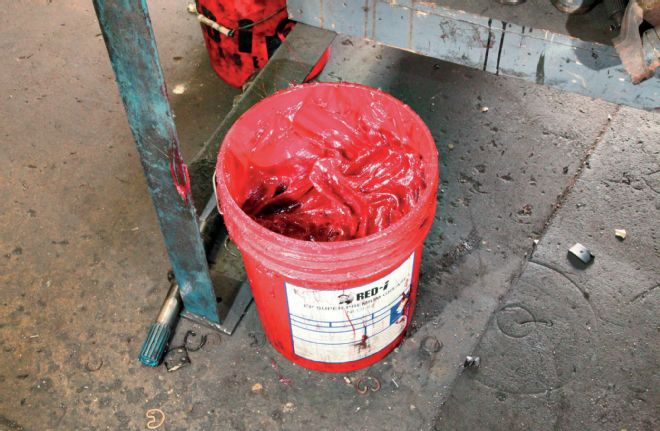
All U-joints are assembled by hand for each individual application using this red EP Super Premium grease. IEDLS says their driveshafts will go 75,000 miles without needing additional lubrication.
It turns out, there's a lot more to a precision-built high-performance driveshaft than meets the eye.
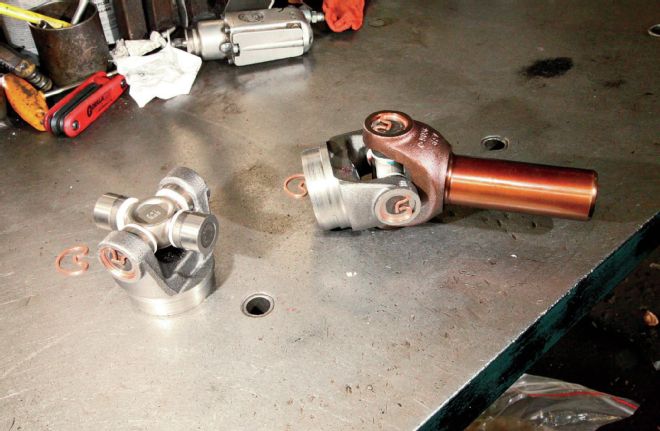
Here are the two assembled tube yokes, one with the transmission yoke attached. Note how the transmission yoke has an orange tint. This is an oxide coating designed to resist corrosion over time.
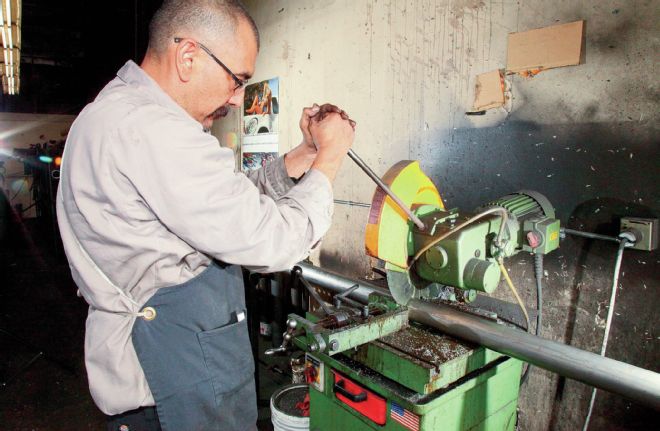
Here, Thomas cuts our driveshaft tube out of 3-inch diameter .083-inch wall DOM mild steel tubing. DOM (drawn over mandrel) tubing is virtually seamless, which means it balances easier, and has better torsional strength than seamed tubing. IEDLS also offers shafts in aluminum and carbon-fiber tubing. The cold saw speeds cutting while keeping the material cold, as the name implies. This reduces the distortion that happens from uneven heating, making the tube more square on its ends, and easier to balance.
We've called on IEDLS in the past to help us with driveshaft needs, and we've shown you how to properly measure your project for a driveshaft, but we've never actually seen one being made. This time, we decided to tag along to see what all the fuss was about. It turns out, there's a lot more to a precision-built high-performance driveshaft than meets the eye. Special techniques, fixtures, and tools abound—mostly to ensure a perfect balance—and once you've seen how they do it, you'll never think about high-performance driveshafts the same way again. Now let us show you how they built one for our Plymouth Valiant we're working on.
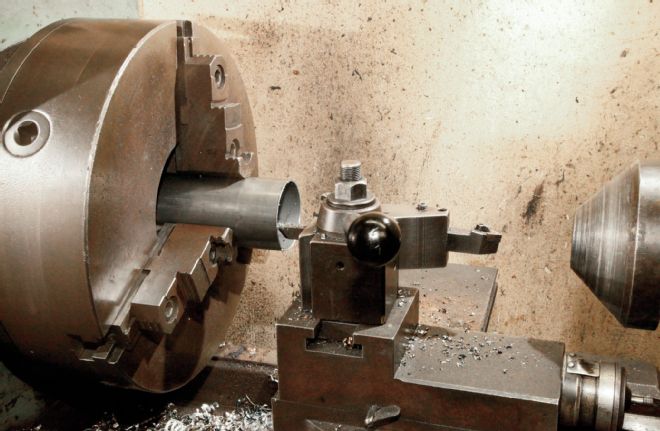
On this lathe, the shaft tube is being deburred and prepped for welding. The tube yoke will be pressed into the end before welding, so a slight bevel is cut on the inside. A bevel is also put on the outside to provide a nice weld channel for the tube yoke.
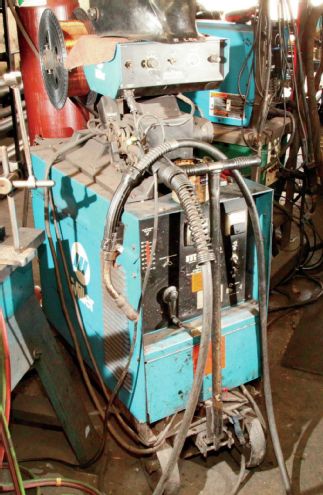
IEDLS uses Miller Electric industrial MIG welders because they last forever, they can be used hard all day long, and they make perfect welds every time.
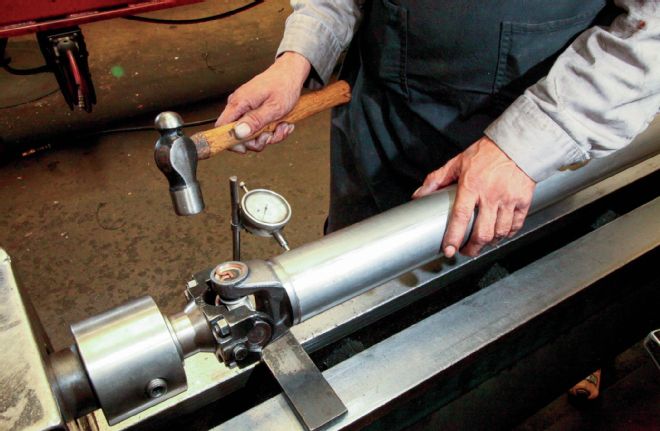
This long fixture (called a press welder) is designed to press in the tube yokes—a foot controller allows Thomas to control the press while he sights a bubble level placed on the U-joint bearing cap. Here, he's checking runout with an indicator, and making slight taps with a hammer to the tube yoke joint prior to welding. The idea is to minimize the runout while there's still some adjustment left. IEDLS likes to see less than .005 inch at the ends and no more than .010 in the center.
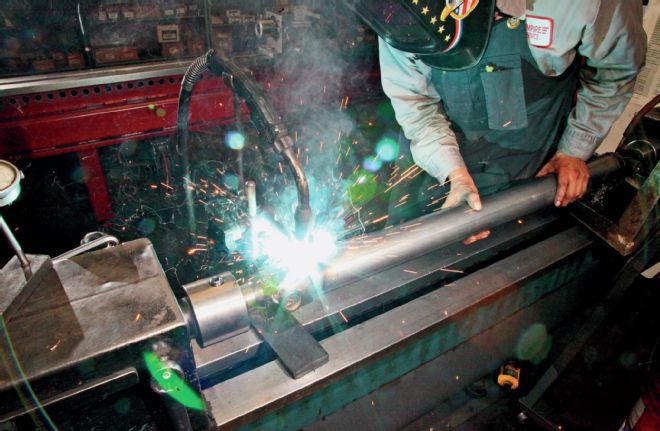
Here, the tube yokes are being MIG welded to the tube. Note how the welding handle is mounted stationary on a stand while Thomas slowly rotates the tube in the fixture. This is the point where most production driveshafts are finished. After welding, Thomas checked the runout again, and deftly applied localized heat to several critical areas with an oxy-acetylene torch followed by a water bath. This process further reduces runout.
Special techniques, fixtures, and tools abound—mostly to ensure a perfect balance…
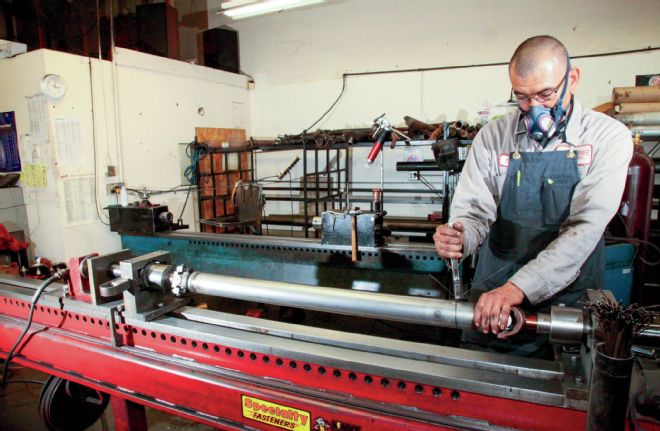
We're not finished yet! The driveshaft is next mounted into a wonderfully clever balancing machine that employs a saddle with a built-in contact circuit and dial indicator. As the driveshaft rotates, it wobbles slightly, completing a brief electrical circuit when it does. This lights up a number on a concentric dial, telling the operator where the radial imbalance is. Here Thomas adds a small weight as indicated, then rechecks the balance. As the shaft is balanced, he feels the saddles at both ends for vibration until the operation at 2,500 rpm is completely smooth.
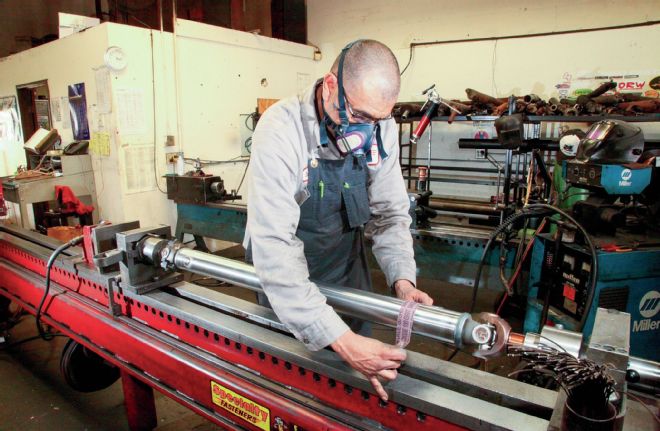
After welding the balance weights, Thomas spins the shaft with emery cloth to give it a polished appearance, followed by a coat of black paint. (We opted to keep ours in bare metal so we could spay ours at home with some Eastwood Extreme Chassis Black.) The total cost for a custom steel driveshaft like ours is around $430.
...once you've seen how they do it, you'll never think about high-performance driveshafts the same way again.