 | Popping The Cherry - 1991 Nissan 240SX
 At long last, it's time for you groovy readers to get a small taste of what has basically been brewing (or, rather, sitting and collecting a very heavy layer of dust) in my driveway for the past two years. Here's a little refresher, since even I've developed a tendency to forget about this car.
I wound up buying a '91 Nissan 240SX SE hatchback from Brent Romans, former Super Street tech guru, who had originally started the project himself but abandoned it once he left our staff.
What he was able to accomplish before I took the reigns was the not-so-easy/common-to-do-back-then conversion of swapping in the Japanese SR20DET engine in place of the US KA24DE. The now defunct V-Spec completed the wiring in the fall of 2001, and then the car remained untouched until I purchased it the following year. This was a step in a completely different direction for me because I had already gone through a small collection of Hondas. It would be an entirely new challenge, not only because I had no working knowledge of how Nissans operated, but also because I didn't have (and still don't have) any real talent when it comes to wrenching on cars. I decided at that point that I would begin amassing a select group of performance parts with the overall goal of coming out with a low-key but quick street car. No drifting, never dragged; just enough to make you say "damn."
Before I could get the ball rolling, the SR swap had a few kinks to work out before it would be suitable enough for daily driving. A wiring mishap caused the engine to sputter at low rpm, which was solved by Blast Racing. Wakita-san and his mechanic Naoto also added air conditioning, cleaned up the wiring, installed the Split Fire DIS coil packs, and had the car running in tip-top shape quickly. Next, a few calls to Andy Cheng at HKS USA and other key partners from Fluidyne, FAL, and Holley helped ensure that 2Fizzle would continue on the righteous path. Here's a list of what I decided to start out with, and after that we'll get into a brief overview of my Stage 1 selections along with a basic installation guide of the HKS Racing Suction intake system.
Project 2Fizzle: Stage 1
Fal: Slim electric fans
Fluidyne: Prototype S13 SR20DET aluminum radiator
HKS: Racing Suction intake, Super Sequential (SSQV) blow-off valve, S-Type intercooler, and engine dress-up accessories
Holley: Earl's oil cooler and oil filter relocation kit (see April '03 "Product Spotlight" for an in-depth review)
Split Fire: Direct Ignition System
You'd be this grumpy too if this was your first time working on a car in four years.
Some of you are probably aware that an intercooler is already installed from this picture because of the hot pipe. That's because Brent had a Blitz FMIC put on when the swap was first done. I decided to make a fresh start and go completely with HKS products, including the S-Type intercooler. Not that Blitz is a bad choice, but Ricky and Greg are proof enough that Blitz products work well. Also, a no-name air filter element was used and attached to the stock intake.
Installing the HKS Racing Suction intake is cake, particularly since I did it (but only after Yamz forced me to). Start out by unclipping the harness to the MAF sensor, and then unbolt the factory intake pipe from the turbo.
See? The mechanically and intellectually inept can work on cars.
A side-by-side comparison of the HKS and OEM intake pipes show a significant difference in diameter size. Stock is somewhere from 65-70mm, while HKS is 80mm.
Since I had an aftermarket air filter element to begin with, I simply unbolted it from the MAF sensor piping. You'll either do the same or remove the airbox. By default, HKS manufactures its Racing Suction piping to work with the Z32 MAF sensor piping, but it also includes a rubber adapter ring if you're still using the SR20DET as shown.
Included with the kit is HKS' own air filter element, the Super Mega Flow filter. Go ahead and bolt that onto the MAF sensor pipe.
Using the HKS Racing Suction intake leaves plenty of room in the engine bay for you to work with, not to mention that it goes quite well with the S-Type intercooler piping and SSQV blow-off valve.
As explained by Andy Cheng at HKS USA, the purpose of using a BOV is "to discharge the compressed air from a turbo when the throttle plate is closed." What makes the HKS SSQV unique are its dual stage pull-type relief valves, which do not leak under high boost conditions or under idle vacuum. They're actuated by pressure alterations to ensure a quick primary and secondary valve response as shown in the diagram.
The HKS S-Type intercooler kit is a very nice addition to any performance-oriented S13/180SX SR20DET applications. I chose the one made to work with the S13 Silvia front end, so make sure you choose the right one, as there is one made specific for those with the US front end. It uses a 600mm x 301mm x 65mm core and is good for up to 450 hp. Each S-Type core utilizes a multiple loop shape on the outer fins and a straight-through design on the inner fins, allowing the pressurized air to quickly pass through.
Mounting the Fluidyne aluminum radiator was easy breezy. All we really had to do was drain the radiator fluid, disconnect the radiator hosing, and drop in the Fluidyne unit. Soon we'll replace the OEM hosing with Samco silicone hoses. Also, we incorporated an electric fan kit from Flex-a-lite to further help keep engine temps down.
Getting the Earl's oil cooler to fit somewhere was kind of tricky because the front bumper was taken up by the HKS S-Type intercooler. Taking cues from the D1 drift cars, we opted to position it within the front passenger-side wheel area.
After a two-year hiatus, Project 2Fizzle is finally underway. Note the Earl's oil filter relocation kit along the passenger side of the engine bay, which totally eases the pain of not having to reach underneath the intake manifold, where the OE oil filter is originally located.
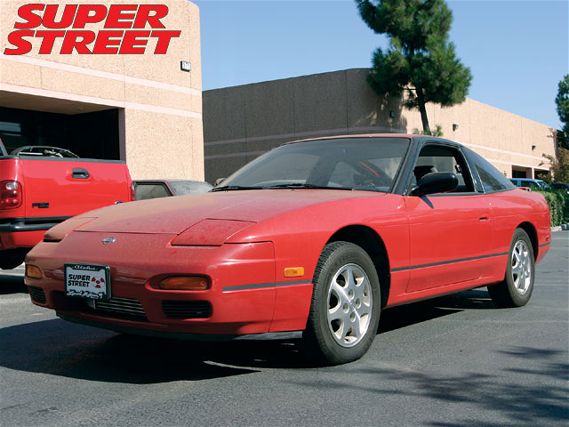
Now for the good stuff! Since I mentioned that the S-Type intercooler I'm using will only work with the S13 Silvia front end, that obviously means I've made the switch and converted my car to SilEighty status with the help of Miguel Ortiz and the crew at Mobworks. But you'll have to wait until the second installment of 2Fizzle to see how it came out. For now, I'll leave you with some photos of what it used to look like.