Although many enthusiasts go for the gusto and bolt-on power to their rides as soon as their bank account allows, braking power is as important as engine power. Remember, it is wise to be able to get out of trouble quicker than you got into it. The brake upgrade industry has seen an explosion in recent years with many enthusiasts realizing that upgraded braking packages add safety, performance and style to their car.
One company that has known the importance of braking all along is Stillen. With owner Steve Millen's exploits in IMSA GT competition, brakes are of the utmost importance. When Stillen designed its awesome GTZ package for the 300ZX in the early '90s, binders were part of the program. At this time, the upgrade consisted of Skyline brakes, because the GTZ was conceptualized with some sort of Nissan involvement and parts content was an issue. Brake upgrades on street cars can be traced to June 1990 at Mosport. The Nissan racer was having some problems with braking at a test session, which set in motion events that would become an industry. A car with innovative water-cooled brakes was run along with a car running a Brembo set-up, consisting of Ferrari F40 calipers and custom hats. A later test session at Willow Springs led to a conversation and negotiation between Stillen and Brembo. Millen told us Brembo didn't see much of a market and as a result, Stillen got a three-year contract. This was 1991.
Stillen's Brembo-based kits knocked 40 feet off a Z-car's 60-0 performance. Stillen came out with kits for Chevy pickups and Suburbans under the GT-S banner. The Brembo deal had some shortcomings. There was a limited number of applications available, because Stillen could only use the F40 calipers, there could be no rear brake upgrades or rear conversions and cost made it difficult to put together kits for Civics or any other less expensive cars. Stillen eventually moved to AP Racing components and has since expanded its line-up. Brembo has seen the light and has been offering kits for a few years now.
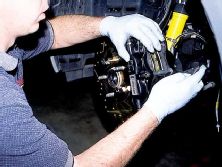
Over the years, the number of caliper pistons has increased steadily, kind of like a status symbol, and there are now plenty of applications with six-pistons and on the extreme side we have seen twin-caliper designs. Brake kits have evolved from one-off adapters for Corvette brakes to application-specific kits that are so complete that the DYI enthusiast can tackle the job. A word of caution, the braking system is the most vital system in a car and if you are not intimately familiar with your car, leave the installation to the pros.
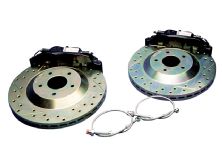
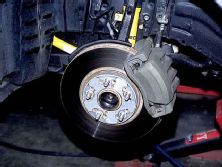
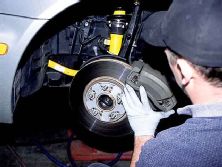
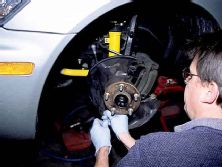
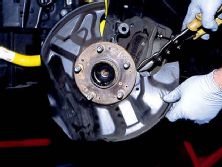
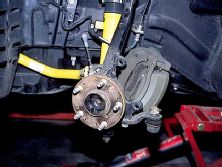
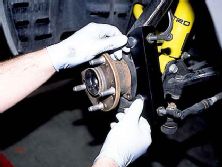
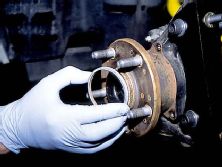
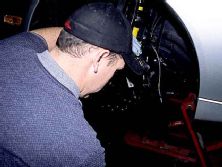
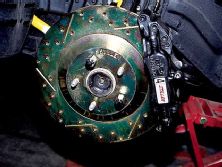
To illustrate the intricacies involved, we followed along as Stillen technicians installed a set of the company's IS 300 brakes featuring four-piston AP calipers and 13-inch cross-drilled rotors on our long-term Lexus. It should be noted that once the Stillen components are installed on both sides, the brakes should be bled and the lines re-checked for leaks. Re-tighten any fittings that show signs of leakage and re-bleed the brakes.
When re-installing the wheels, hand-tighten the lug nuts and check the backside of the wheel to ensure proper clearance has been achieved at the rotors and at the brake lines by turning the wheels lock to lock. If everything checks out, tighten lug nuts to spec. Too often, enthusiasts think the job is done once the tools are stored away. With upgraded brakes, the installation job is just beginning. Properly breaking in the system is paramount to achieve expected performance and OE-like durability. Breaking in the brakes boils down to controlling how the rotors and pads initially interact with heat. The easier this introduction, the better. Stillen recommends starting with a 10-mile drive in which light braking is used to bring the car from 50 or 60 mph to 30 mph. It is best to perform five stopping cycles at a time. Braking to a stop repeatedly at this juncture will only introduce heat to the outside of the rotor with the inside of the unit and the mounting area remaining cool. For the next 100 miles, increase the amount of pedal pressure only stop to zero when necessary. At this stage, there should be a blue tempered area around the mounting bolts, indicating all is going well and the correct heat soak has been achieved. Continue increasing pedal pressure for another 100 miles and then the brakes are ready for peak performance. It is best to note that leaving your foot on the brake pedal after long, aggressive stops can result in the pad creating a hot spot on the rotor, which can cause warpage and a vibration in the system.
The payoff for big brakes is threefold; performance, safety and looks. If you are after a balanced attack, upgraded brakes are a must.

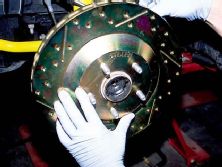
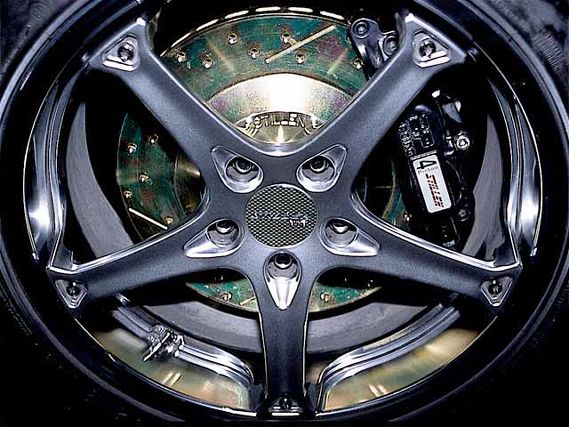 | Here is the finished product with Stillen's trick, five-spoke wheel.