Eddie Rios, the president of late-model, high-performance shop Addiction Motorsports, is really happy with how his '15 Chevrolet Silverado 2500HD truck works, but he knew it could
look a lot better than stock with less than a day's worth of upgrades. He's already added an Edge programmer with a tune that greatly improved the throttle response and a spray-in Line-X bedliner to protect the pickup box from camshafts, engine blocks, and other parts transported for his business. The only problem was the 6.6L Duramax-powered truck didn't have anything visible to set it apart from all the other Chevy 2500HDs roaming the streets of Los Angeles.
The two-wheel-drive 3/4-ton truck doesn't spend a lot of time off-road, but Eddie wanted to add a suspension lift for no-rub clearance over 22-inch wheels and nearly 35-inch tires. He decided to go with a ReadyLift Stage 1 SST 4-inch front/2-inch rear lift kit (PN 69-3412; $1,299.95) along with front shocks (PN 99-3414F; $419.95) for the torsion-bar front suspension and rear shocks (PN 99-3411R; $415.95) for the leaf-sprung rear axle.
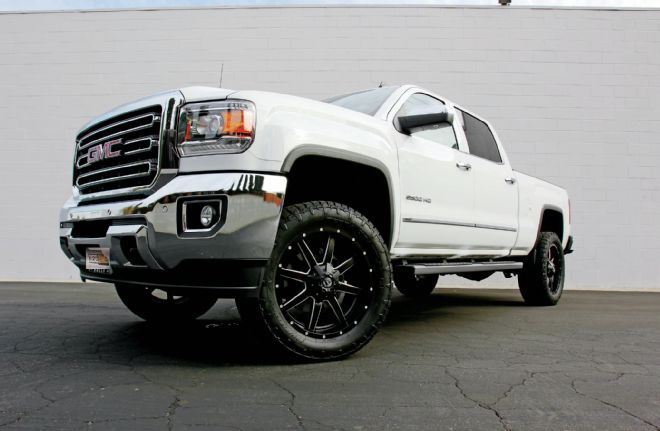
To fill the new space inside the wheelwells and give the truck a "definitely-not-stock" look, he chose a set of big, one-piece 22x9.5 Fuel Maverick D538 wheels (PN D53822951862; $365). For an aggressive look and off-road performance when needed— while keeping noise levels reasonable—Eddie picked out a set of the 325/50R22 Nitto Terra Grappler G2 tires (PN 215330; $474), which combine off-road performance with on-road comfort.
While one really good thing about owning your own performance shop is having access to a fullsize lift, this installation can be performed in a driveway or backyard by anyone with the proper tools, jacks, and stands. The following photos detail how Eddie and his technician, Jose Jimenez, turned this stock truck into a head-turner in about half a work day.
| Readylift Stage 1 Sst Lift Kit Install 2015 Chevrolet Silverado 2500hd
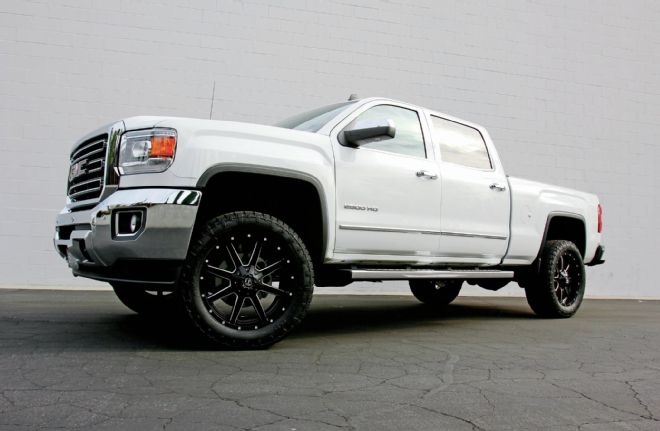
To make this '15 Chevrolet Silverado 2500HD stand out from the pack, Eddie Rios of Addiction Motorsports in Canoga Park, California, added a 4-inch front/2-inch rear ReadyLift SST suspension lift. That made room for 22x9.5 Fuel Maverick D538 wheels and 325/50R22 (34.84-inch o.d.) Nitto Terra Grappler G2 tires that don't rub—even when the steering wheel is fully cranked.
| Readylift Stage 1 Sst Lift Kit Install 2015 Chevrolet Silverado 2500hd Stock Height
Before
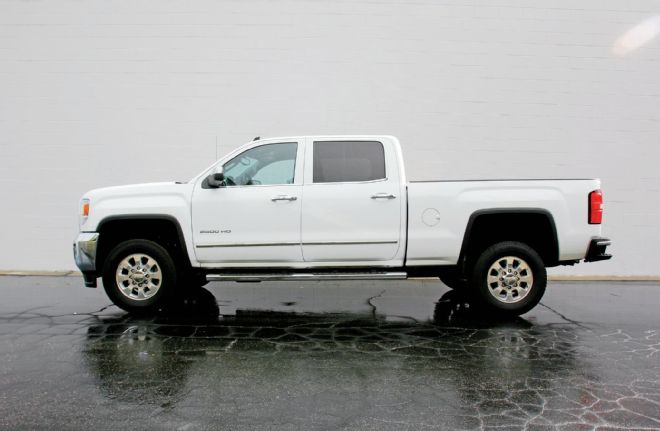
The stock ride height provides a fair amount of clearance around 265/70R18 tires on 18-inch wheels, but not enough room for the 34.84-inch tires Eddie wants to run. The ReadyLift SST kit and shocks make just enough room for this tire and wheel combination while improving the ride and strengthening the steering system. The suspension lift is rated for tires up to 34 inches but has not given Eddie any problems with his oversized tires.
| Readylift Stage 1 Sst Lift Kit Install
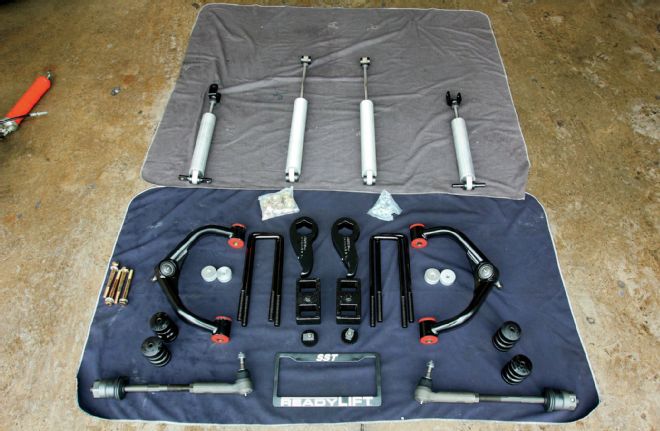
The Stage 1 SST Lift Kit by ReadyLift (PN 69-3412; 1,299.95) is a bolt-on kit that comes with heavy-duty, tubular-steel upper control arms, large tie-rod assemblies, forged torsion keys, 2-inch cast iron OEM-style rear lift blocks, U-bolts, and hardware. The kit also includes CNC-machined drop spacers to lower the front differential of four-wheel-drive models. The system requires the use of longer front shocks, so a set of satin-finish billet-aluminum ReadyLift SST9000 Performance Shocks (PN 99-3414F; $419.95) were ordered along with a matching pair of SST9000 rear shocks (PN 99-3411R; $415.95).
| Readylift Stage 1 Sst Lift Kit Install Stock Height Recording
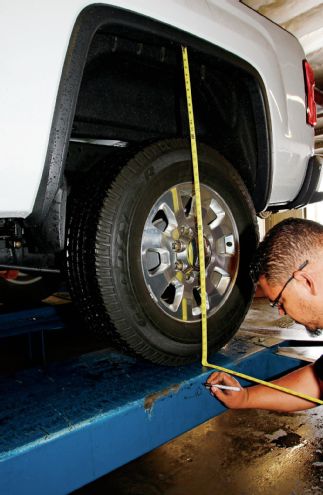
| Readylift Stage 1 Sst Lift Kit Install Stock Height Recording
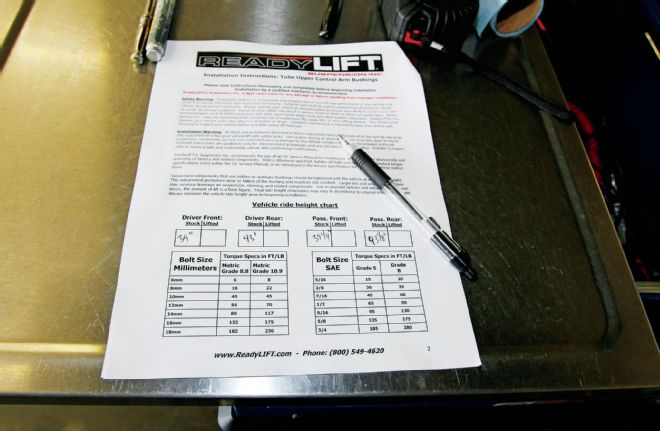
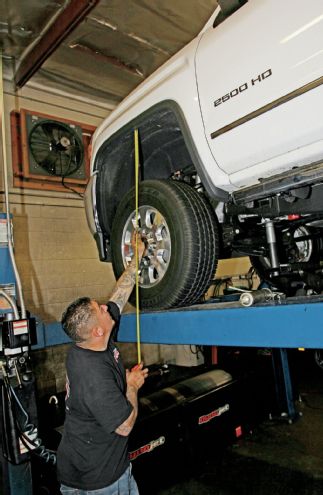
For the first step of the installation, Eddie measures the truck's stock ride height and writes down the measurements on the side of the lift before doing anything else (he also makes sure to write down the figures in the provided spaces in the lift kit instruction manual). Measuring the distance from the fenders to the ground at each corner before and after installation allows him to gauge the actual lift achieved and learn if adjustments are necessary.
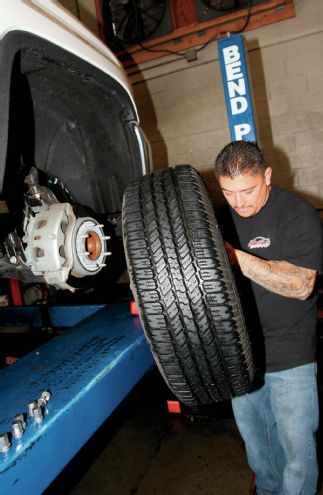
| Readylift Stage 1 Sst Lift Kit Install Wheel And Tire Removal
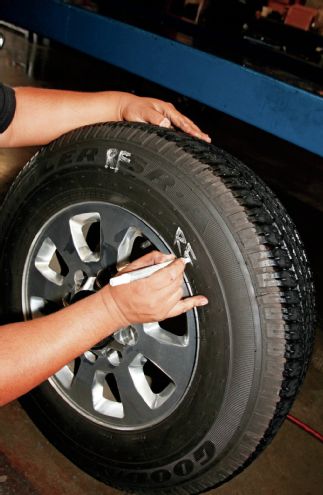
| Readylift Stage 1 Sst Lift Kit Install Tire Positioning Marking
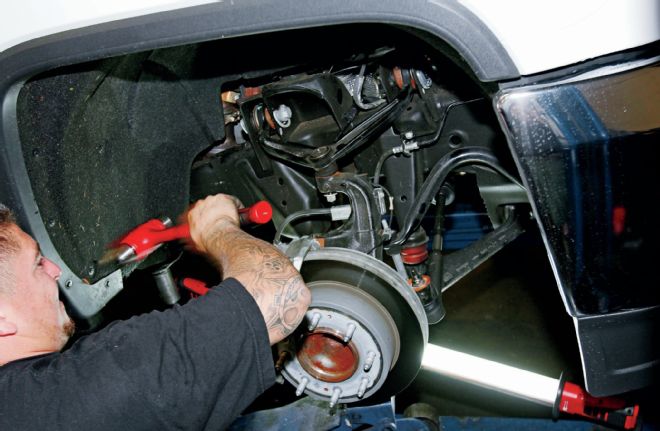
With the stock ride height measurements noted, Eddie and technician Jose Jimenez jack up the truck and remove the wheels and tires. As each one is removed, Eddie uses a paint pen to mark "RF" for the right front tire, "RR" for the right rear, "LF" for the left front, and "LR" for the left rear. This way, the factory tire-pressure sensors can be swapped into the new wheels and installed in their original positions.
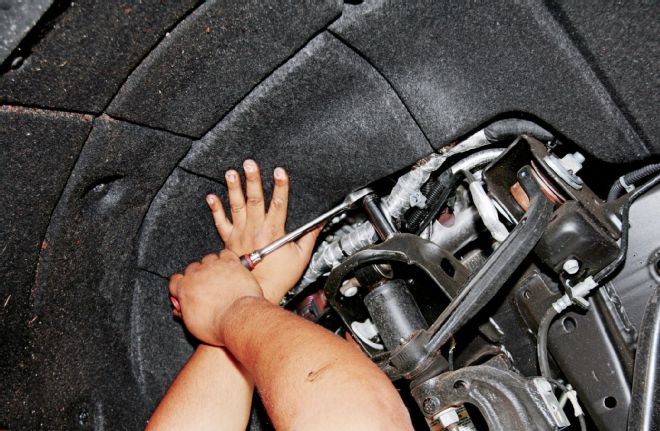
| Readylift Stage 1 Sst Lift Kit Install Top Mounting Bolt Removal
Once the stock wheels and tires are out of the way, Eddie pushes back the soft fender liner to access the top mounting bolts for the front shocks and removes them with a ratchet.
| Readylift Stage 1 Sst Lift Kit Install Factory Shock Removal
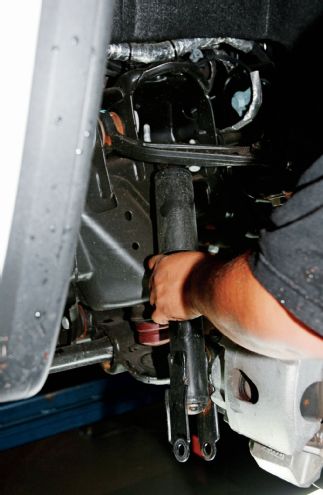
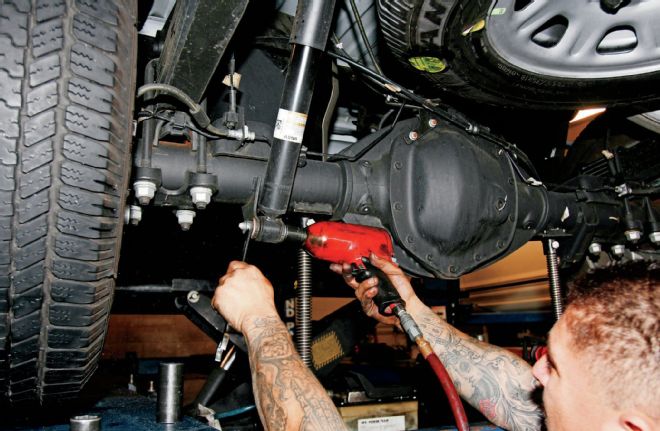
Next, he takes out the lower shock mount bolt, allowing the factory shock to be removed.
| Readylift Stage 1 Sst Lift Kit Install Torsion Bar Adjuster Bolt Removal
Jose removes the torsion bar adjuster bolt and sets it aside to be reused.
| Readylift Stage 1 Sst Lift Kit Install Keeper Block Key Removal
| Readylift Stage 1 Sst Lift Kit Install Keeper Block Removal
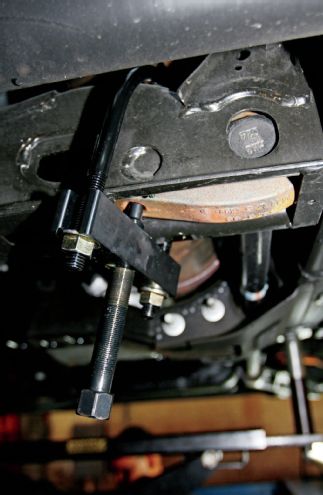
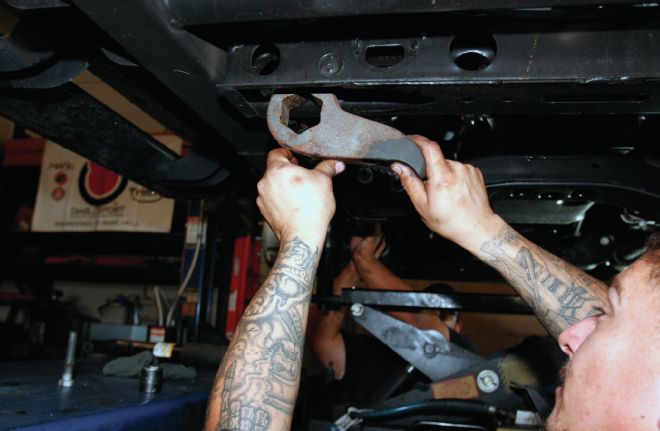
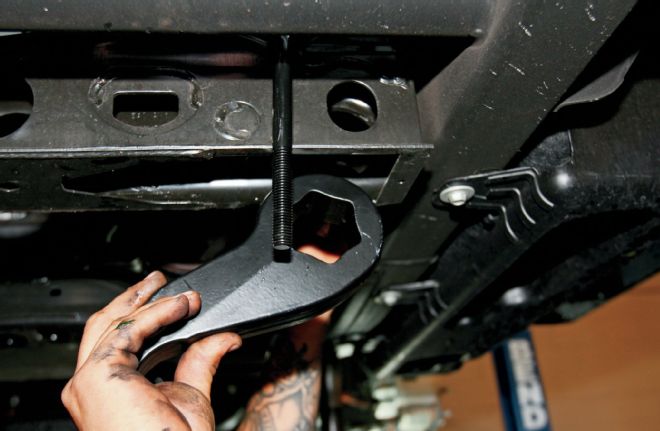
Using the ReadyLift torsion key unloading tool (PN 66-7816A; $149.95) made specifically for this job, Jose removes the tension on the keys until the keeper blocks can be taken out and set aside.
| Readylift Stage 1 Sst Lift Kit Install Torsion Bar Key Removal
| Readylift Stage 1 Sst Lift Kit Install Torsion Bar Key Removal
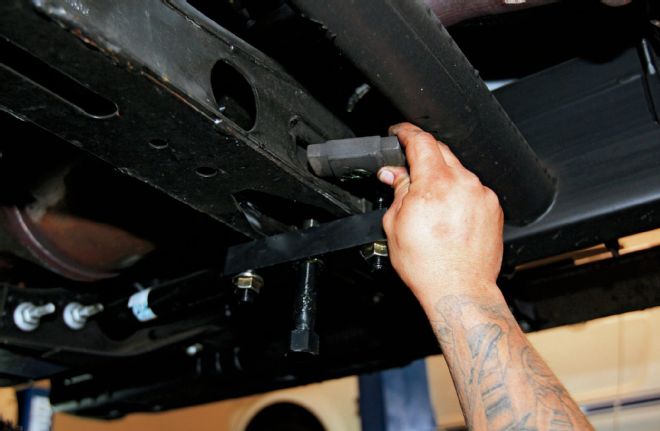
With the keeper blocks removed, Jose slides the torsion bars forward so the factory keys can be removed and replaced with ReadyLift's forged torsion keys, which are stronger than the factory units and have indexing unique to this suspension lift kit.
| Readylift Stage 1 Sst Lift Kit Install Spindle Removal
| Readylift Stage 1 Sst Lift Kit Install Spindle Removal
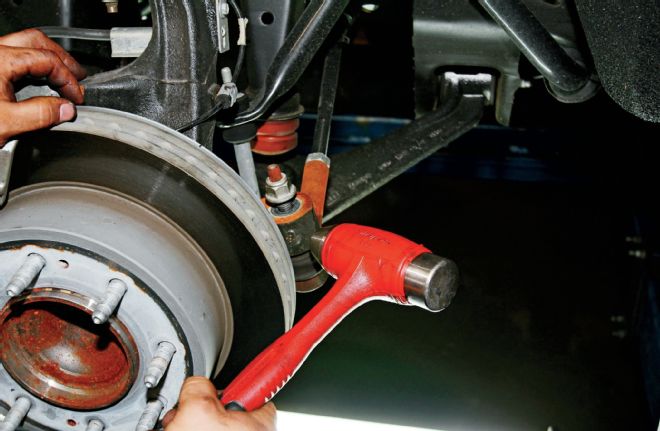
Next, Jose loosens the nut on the tie-rod end and uses a hammer to strike the spindle and break it loose so it can be disconnected.

| Readylift Stage 1 Sst Lift Kit Install Tie Rod Removal
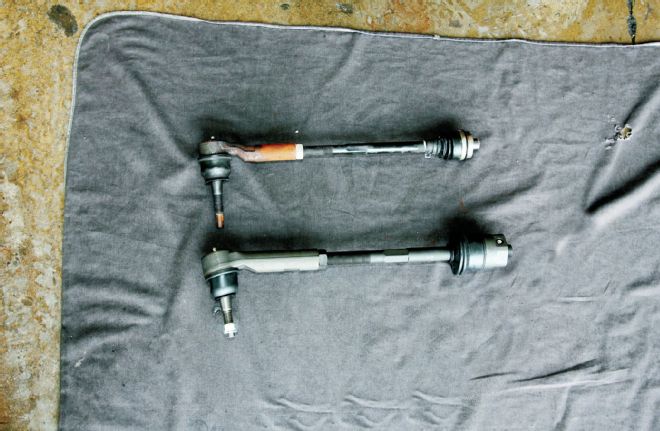
| Readylift Stage 1 Sst Lift Kit Install Tie Rod Comparison
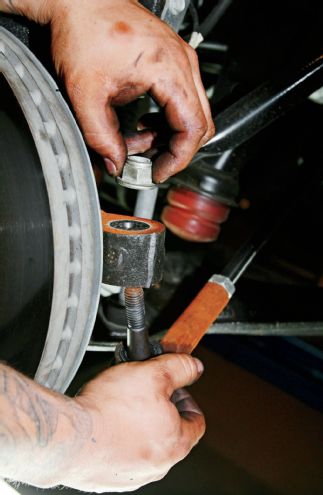
With the tie rod released from the spindle, the stock part is removed. The ReadyLift tie rod is much beefier than the GM part in every way to help deal with the added stress of the suspension lift and the larger tire and wheel combination.

| Readylift Stage 1 Sst Lift Kit Install Tie Rod Comparison
Eddie measures the heavy-duty ReadyLift tie rods and compares them to the stock parts. Adjusting the new tie rods before installation minimizes the steering adjustments that are necessary during the alignment procedure.
| Readylift Stage 1 Sst Lift Kit Install Tie Rod Install
After applying Loctite to the threads, Jose installs the new steering assemblies on the factory steering centerlink and then attaches the ReadyLift tie rods to the outer links.
| Readylift Stage 1 Sst Lift Kit Install Factory Pivot Bolt
Employing another trick to reduce the time spent during alignment, Eddie marks the position of the factory pivot bolts before the upper control arms are removed.
| Readylift Stage 1 Sst Lift Kit Install Upper Control Arm Removal
| Readylift Stage 1 Sst Lift Kit Install Upper Control Arm Removal
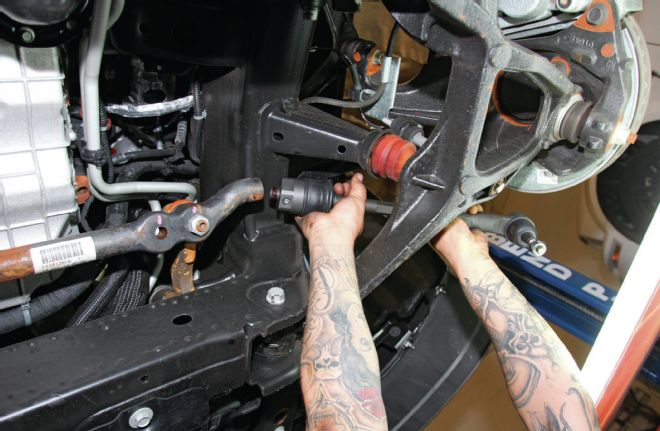
Jose loosens and removes the upper ball joint nut and then uses a hammer to break the control arm free from the spindle. With the pivot bolts taken out, the factory upper control arms are removed.
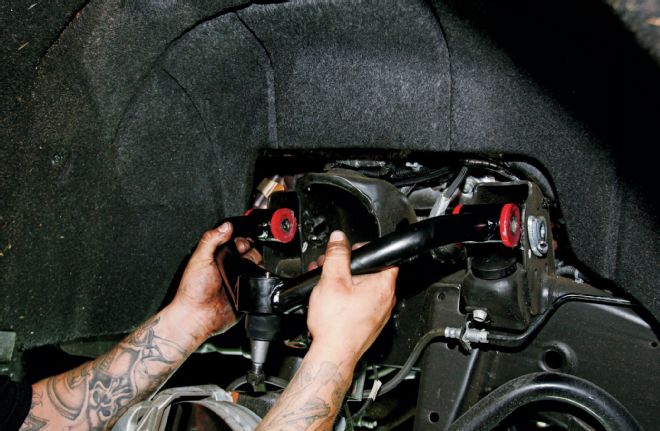
| Readylift Stage 1 Sst Lift Kit Install Upper Control Arm Install
After installing the bushing halves and crush sleeves using the supplied grease, Jose installs the ReadyLift upper control arms with the factory hardware (using the paint marks for guidance) and connects them to the spindles. He also installs droop-limiter bushings (arrow) that keep the parts from making contact with the frame. New, longer bumpstops are also installed in the factory locations to prevent the lower control arms from making contact with the chassis.
| Readylift Stage 1 Sst Lift Kit Install Front Shock Install
| Readylift Stage 1 Sst Lift Kit Install Ride Height Measuring
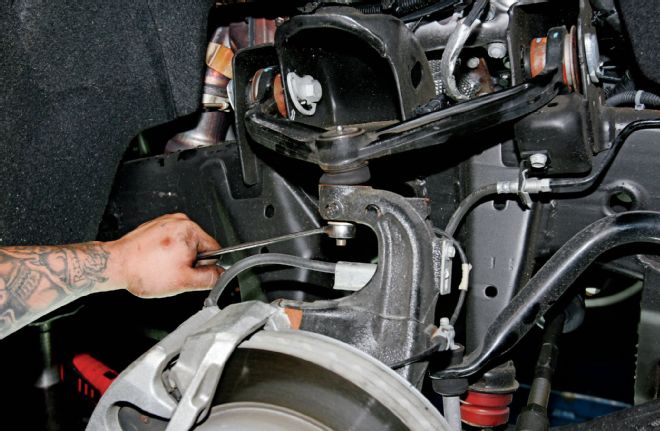
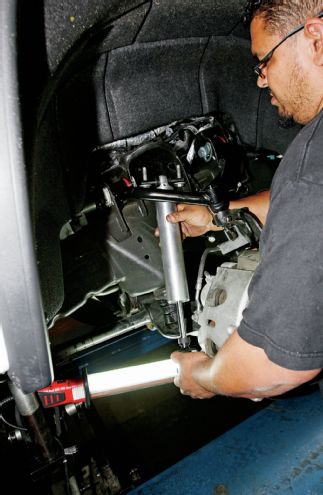
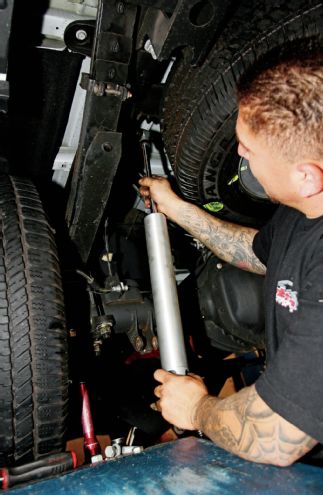
With the control arms in place, Eddie installs the new front shocks in the factory locations. The nitrogen-charged SST9000 shocks are rebuildable and can be revalved, have CNC-machined mounts, use 5?8-inch chrome-plated shafts, and are made from 100 percent satin-finish billet aluminum. With the shocks, control arms, and tie rods in place, the torsion bars are adjusted to the approximate ride height. Then Jose measures and records the new ride height with the stock wheels and tires.
| Readylift Stage 1 Sst Lift Kit Install Lift Block Install
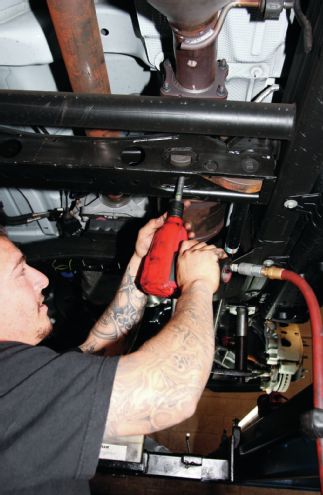
Once the front suspension is completed, Jose unhooks the rear ABS cables (to prevent damage) and lowers the rear axle so he can install 2-inch lift blocks (arrow) in the factory locations. Then, he replaces the U-joints and bolts with new ReadyLift parts.
| Readylift Stage 1 Sst Lift Kit Install Sst9000 Shocks Install
| Readylift Stage 1 Sst Lift Kit Install Sst9000 Shocks Install
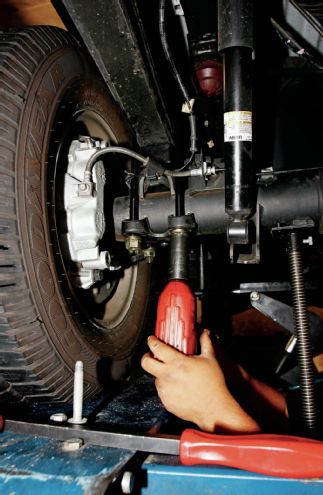
Jose removes the rear shocks and replaces them with SST9000 units. While these shocks are not required for this setup, ReadyLift says its parts are designed to be vehicle-specific with valving that's customized for large wheels and tires. With the rear suspension in place, Eddie measures the lift on each side and records the nearly identical results.
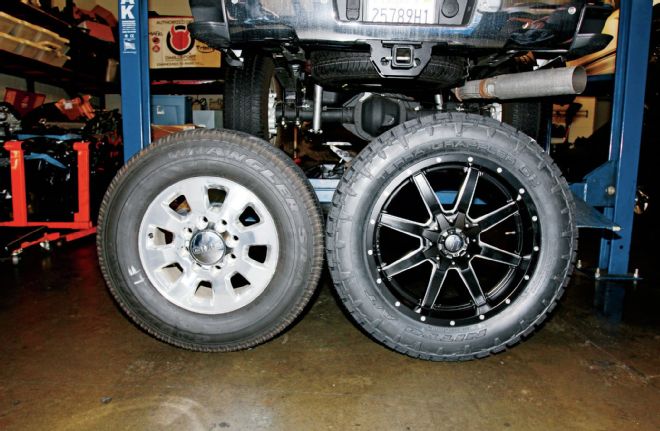
| Readylift Stage 1 Sst Lift Kit Install Fuel Maverick D538 Wheels

| Readylift Stage 1 Sst Lift Kit Install Fuel Maverick D538 Wheels
Using big wheels and tires is exactly the way Eddie wanted to upgrade the look of his '15 Chevy 2500HD. To achieve this appearance, he chose one-piece, black milled 22x9.5 Fuel Maverick D538 wheels (PN D53822951862; $365) and large 325/50R22 Nitto Terra Grappler G2 tires (PN 215330; $474) that dwarf the factory rims and rubber.
| Readylift Stage 1 Sst Lift Kit Install
Once the new wheels and tires are installed, the truck is taken to a shop where the alignment is corrected and the tire-pressure sensors are transferred into the Fuel wheels. ReadyLift says the Stage 1 SST 4-inch front/2-inch rear kit uses the 2-inch rear blocks and hardware to create a "Tow Package" with additional rake for towing and hauling, but Eddie does not plan on towing or hauling heavy loads for now and prefers a more leveled ride for daily driving. By removing the rear blocks, his truck now has a street-performance stance to match the new 22-inch wheel and tire combo.