It may not be summer yet, but it's coming! If you have experienced the high temperatures that can be generated during the summer months—especially while towing in the heat—we have a suggestion for you: It may be time to clean the stack of cooling cores tucked right in the front of your Chevy truck's powerplant. Our '04 1/2- Chevy Silverado 2500 HD had around 180,000 miles on the odometer when we visited our friends at Merchant Automotive in Zeeland, Michigan. This would be the first time the cleaning had taken place.
With a quick once-over, Eric Merchant suggested we remove the transmission cooler, A/C condenser, intercooler, and radiator for a complete cleaning that would at least assist in the cooling of our 6.6L LLY Duramax engine. It was quite surprising what had found its way into the cooling fins of our 2500 HD. Keep in mind that the home mechanic can perform this task, but it does require at least one special piece of equipment. You will need to evacuate the A/C system of its refrigerant before removing the A/C condenser. Our suggestion is that if you do not own an A/C reclamation device that will remove and reclaim the refrigerant until the cleanout is finished, it might be best to pay to have the entire process done. With that said, here is a quick course on what the process involved.
| How To Clean A Stack Of Cooling Cores Front Components Removed
| How To Clean A Stack Of Cooling Cores Front Components Removed
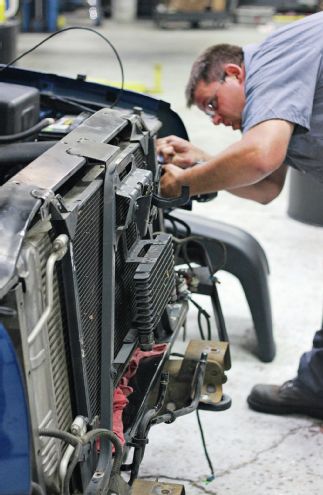
1, 2. With the removal of the headlights, grille, and front bumper (and its underlying components, as well as the inner fender- wells), we had a better view of the task at hand. The next step was to remove the refrigerant from the A/C system so we could get our condenser out of the truck. This took a little time, so removing the headlight buckets and unbolting the radiator support system as well as the air intake for the heavy-duty truck was our fill-in task to beat the clock.
| How To Clean A Stack Of Cooling Cores Transmission Cooler And Ac Condenser Removal
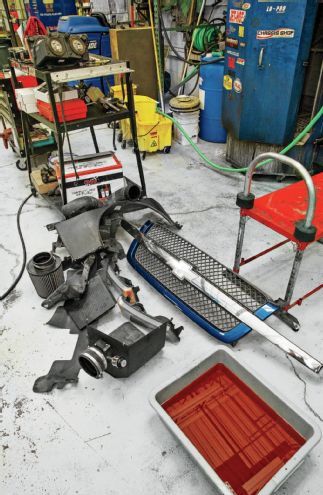
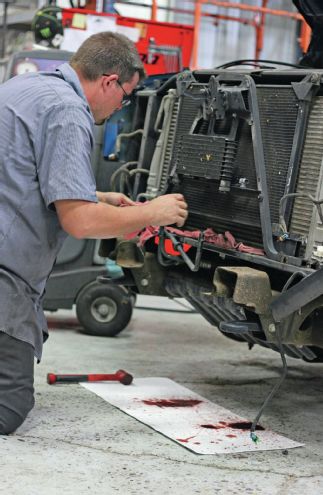
3. The transmission cooler was the first of the four items to be removed for cleaning. Placing some absorbent mats on the shop floor helped contain the trans fluid that had escaped the cooler. The transmission fluid cooler can remain on the radiator support for easier reinstallation, as it did not need much cleaning. After the refrigerant had been safely recovered, we removed the A/C condenser, which gave us room to access the intercooler and radiator next.

| How To Clean A Stack Of Cooling Cores Radiator Draining
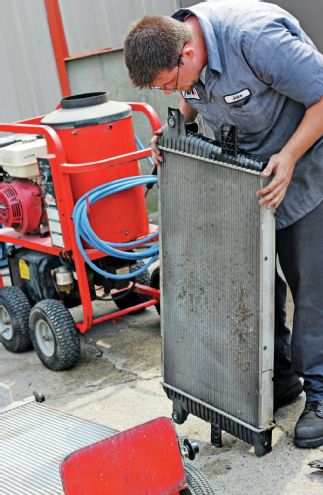
4. The radiator will need to be drained. While our radiator was draining, we removed the intercooler inlet and outlet duct connectors as well as the upper radiator support crossmember. Be sure to remove the inlet hose for the coolant reservoir as well. We were ready to pull the radiator and intercooler out together and head outside for some gentle pressure washing.
| How To Clean A Stack Of Cooling Cores Intercooler Cleaning
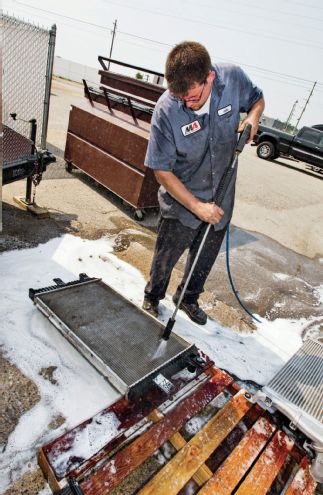
| How To Clean A Stack Of Cooling Cores Intercooler Cleaning
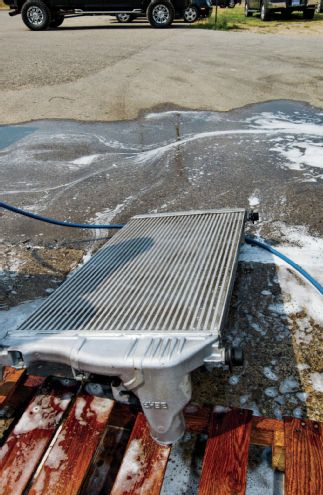
| How To Clean A Stack Of Cooling Cores Intercooler Cleaning
5, 6, 7. Cleaning each of these components has its challenges, as you do not want to get water in the condenser or in the transmission fluid cooler. Be patient as well as observant! Once outside, the intercooler was unbolted from the radiator. There was plenty of road trash in between the two. A heated water pressure cleaning machine and degreasing solvent were used to push out and clear any debris from each of the components.
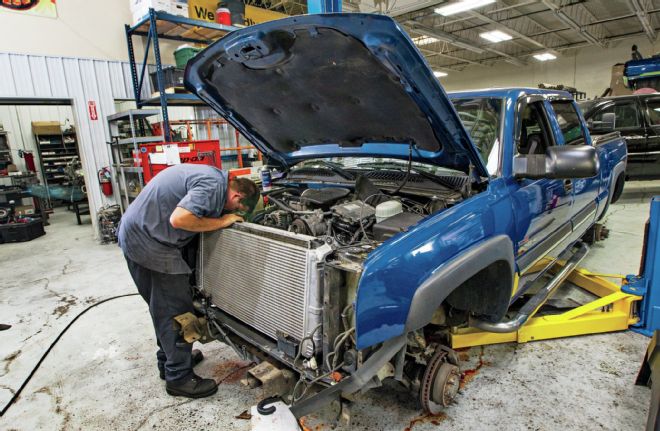
| How To Clean A Stack Of Cooling Cores Reassembly
8. After a thorough cleaning, the reinstallation was underway. Be sure to have a helping hand when lifting the radiator/intercooler combo out and putting it back in. When reattaching the A/C condenser, spend the extra few dollars and buy new O-rings for the supply lines. This may save you some headaches with your A/C down the road. It's also a great time to replenish the clean components with fresh fluids.
| How To Clean A Stack Of Cooling Cores 2004 Chevy Silverado 2500 Hd
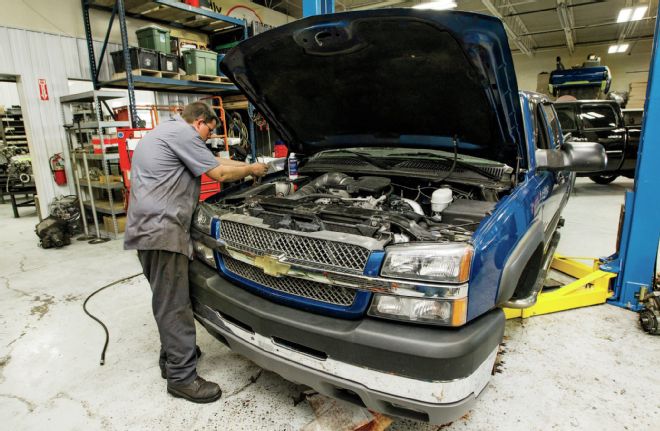
9. This entire process can take a few hours to complete, but the extra heat-transferring ability of clean cooling system components will make for a more reliable truck down the road. We looked for any other service items that would be a lot easier to get to while the front of the truck was wide open. If you haven't changed the serpentine belt lately, it is probably the most accessible at this point. Think about the age of your water pump during this process. You will be much happier changing that out with full access!