When we picked up a ’02 GMC Sierra a while back, one thing we knew we wanted to upgrade in the short-term was the stock stereo system. After 13 years, all of the stock speakers were rotted and the head unit was lacking many of the features we have become spoiled with in our other trucks. While a head unit replacement is not a big deal with most trucks, the ’99-’02 GM trucks use a 1.5-DIN; a size that was used for a few years on a handful of vehicles before becoming obsolete. What this means is that the aftermarket didn’t waste their time making products for these applications, and your replacement options are either cutting up your dash to relocate the HVAC controls and fit a 2-DIN, or install a single-DIN into the hole in the dash and stare at all that negative space that remains around the area.
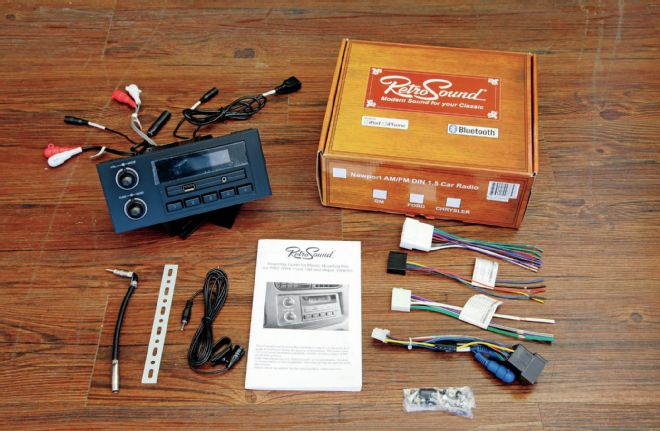
Luckily for us, we came across a really cool solution in the pages of the LMC Truck catalog. The Newport from Retrosound is a 1.5-DIN head unit made especially for these trucks and they come with all the bells and whistles. Bluetooth? Check! USB and iPod? Check! All the inputs and outputs you need for any components you’re using? Check!

| Ap Sounds And Customs
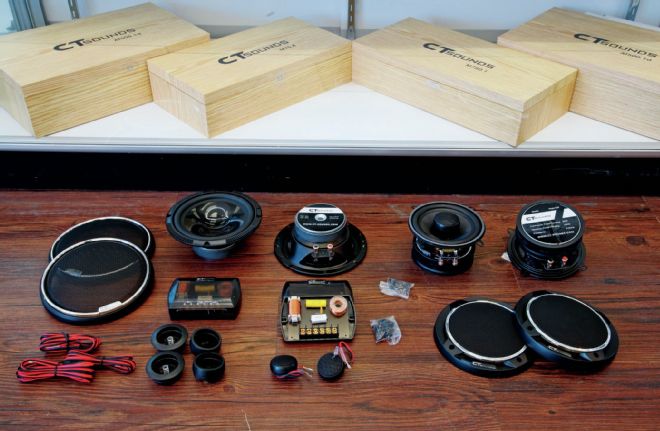
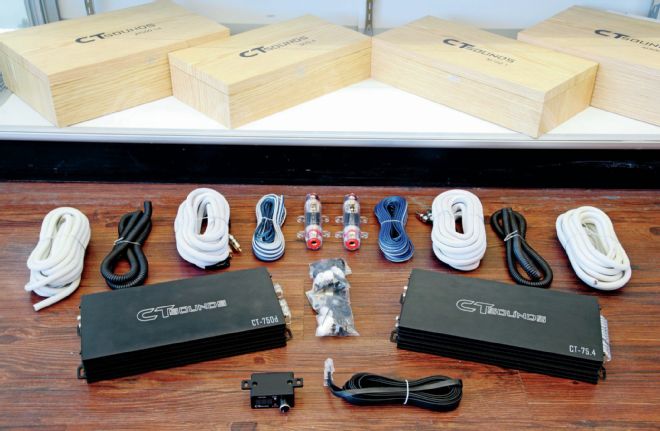
Speaking of components, CT Sounds is a fairly new company we’ve been hearing about, and they made a big splash at SEMA this year. There no-nonsense approach to building high-quality components that produce clean sounds and plenty of bass appealed to us and seemed like a perfect fit for this truck. In addition to the component speakers, we ordered two amps and two subs, along with a pair of installation kits.
AP Sounds & Customs, in Anaheim, California, handled the install. They have been working with CT Sounds since day one and know the product line well, making for a quick install. In fact, they knocked it out in about half a day, even after doing a lot of extra work, making ours an extremely clean install. Best of all, if you don’t hear the stereo then you’d never know it was there, which is appealing to us for security reasons when talking about a daily driver. Check out the install below, and log onto the websites for more information on LMC Truck, CT Sounds, or AP Sounds & Customs.
| Retro Sound Head Unit
Our idea for this build took shape after seeing this head unit. The Retrosound Newport 1.5-DIN digital media receiver fits a whole bunch of GM, Chrysler, Ford, and Jeep vehicles. It may look like a plain-Jane head unit from yesteryear, but that’s the point. Behind the unassuming face, it features an AM/FM tuner with 18 FM presets, it plays MP3 and WMA music files from external sources, has dedicated iPod and iPhone interface as well as built-in Bluetooth connectivity with the mic included. Finally, it has two sets of USB ports, auxiliary inputs, and six-channel preamp outputs with stereo sub outputs, which is going to work out perfectly with what we have planned.
| Ct Sounds Speaker System
The 88db Strato 6.5 Component speakers feature an injection-molded polypropylene cone, and come complete with tweeters, crossovers, wiring, and hardware. The 5 ¼-inch Tropo two-way coaxial speakers deliver a nicely balanced sound thanks to a silk dome tweeter combined with the carbon-fiber mid to make installation easy. These will take the place of the stock 4x6 speakers in the rear doors that typically don’t bring much to the party.
| Ct Sounds Compact Amps
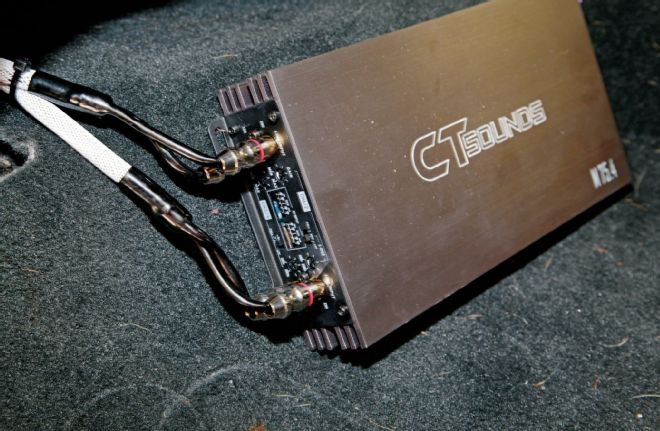
Looking to go incognito? We were, and that was the first line for the description of these small but powerful amps. The CT Sounds 750D. At 1 Ohm, this amp pumps out 750 watts RMS in a package small enough to fit just about anywhere. We paired this with the matching 75.4 amp for a full range of clean power without having to get creative with the amp placement. The 0-gauge install kits come with everything you need to get powered up.
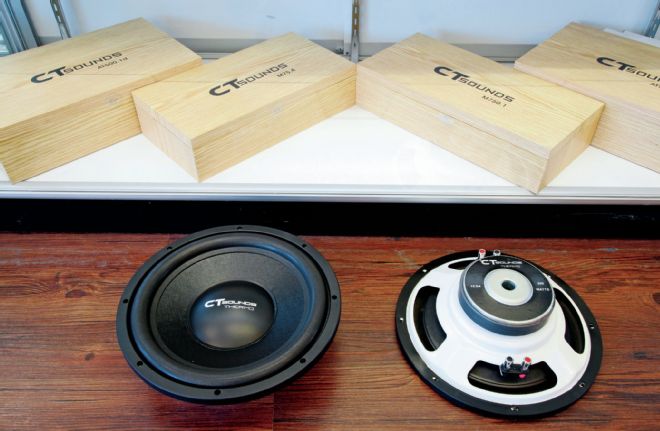
| Ct Sounds Shallow Sub
The CT Sounds Thermo 12-inch shallow mount subwoofer delivers a whole lot of bass in limited space situations. With a mounting depth of just 3.27 inches, these subs produce 300 watts RMS/ 600 watts max.
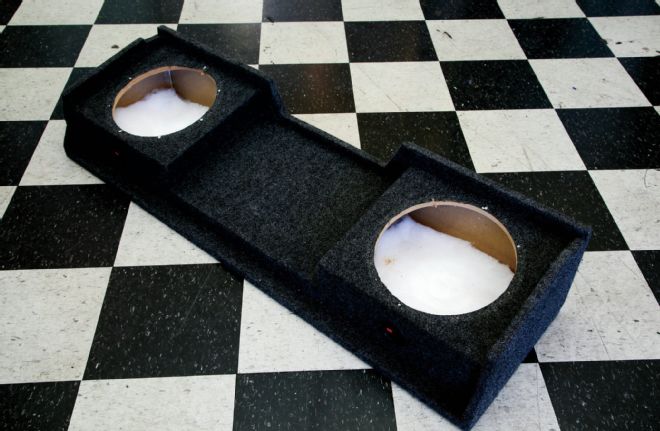
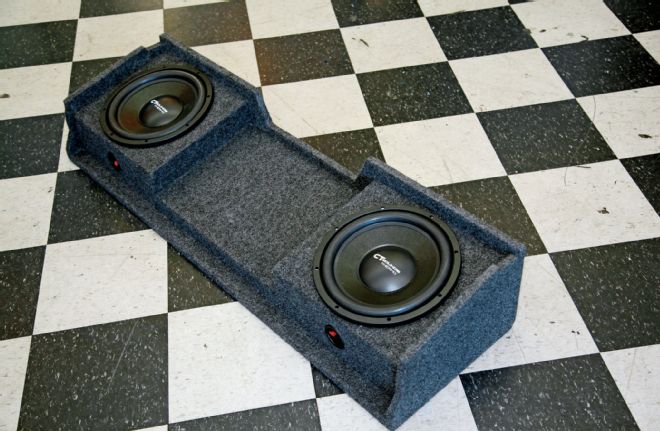
| Sub Enclosure
We’re all for custom-built sub enclosures, but the amount of work doesn’t really make sense in a daily driver. All we really needed was a sealed box for a set of 12s and there are many on the market that take advantage of all the available space under the seat. We found this one on Craigslist within minutes of starting our search.
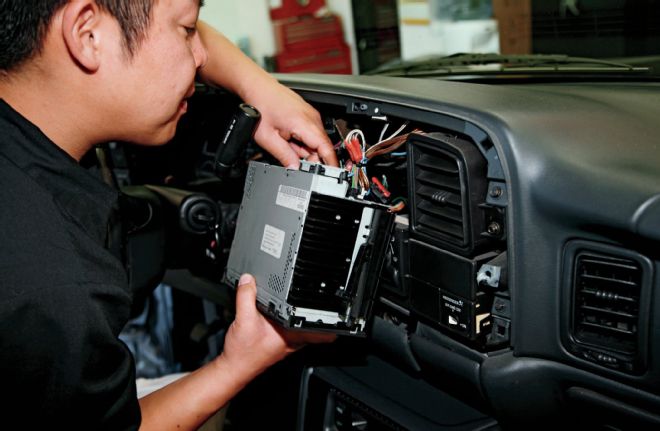
| Dated Head Unit
Our original head unit had seen better days. It was dated in the feature department. The crew at AP Sounds and Customs began the process by pulling our stock bezel, keeping our cool carbon-fiber trim intact.
| Radio Removal
Next, the radio was released and unplugged from the harness.
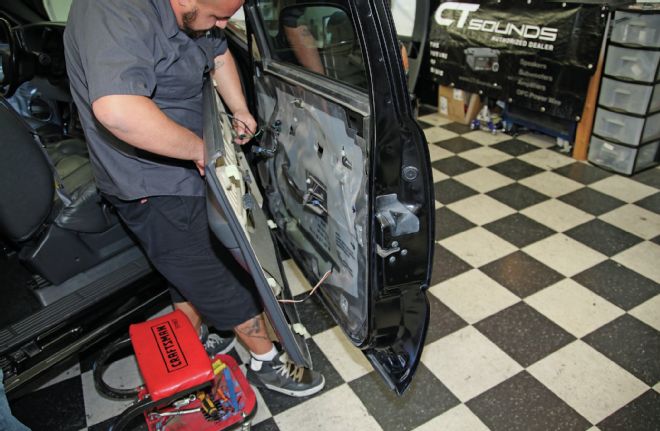
| Door Panel Removal
Now we moved to the doors. The front panels were pulled first.
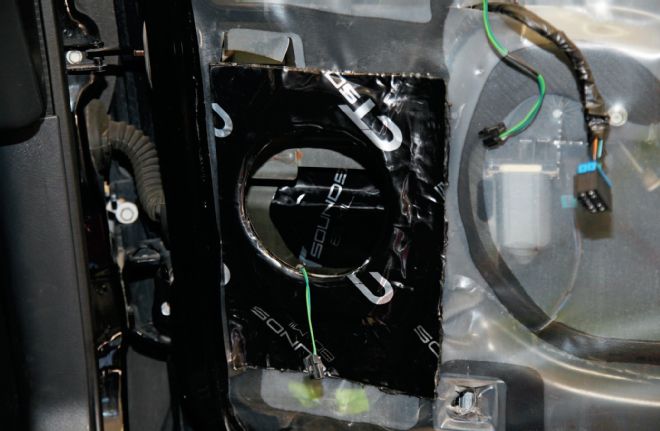
| Ct Sound Deadner
We removed what was left of the stock speakers. Then, CT Sounds thick and sticky 80-mil sound deadener was applied to the nearby area on both the inside and outside doorskins.
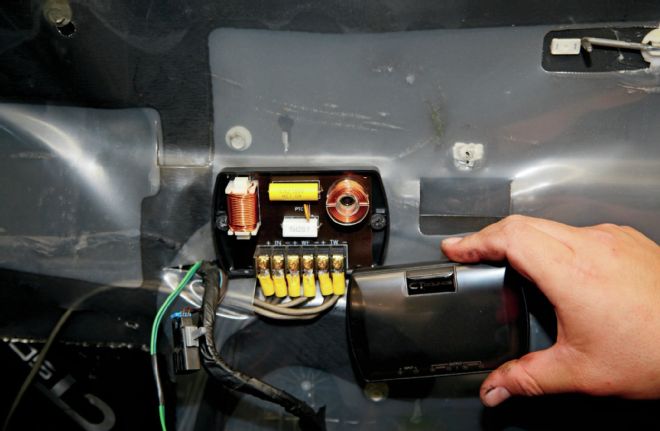
| Crossover Mounted
The crossover was wired up and mounted to the door. The factory wires were spliced into a heavier-gauge speaker wire and attached to the crossover. Then, wires for the component and the tweeter were connected.
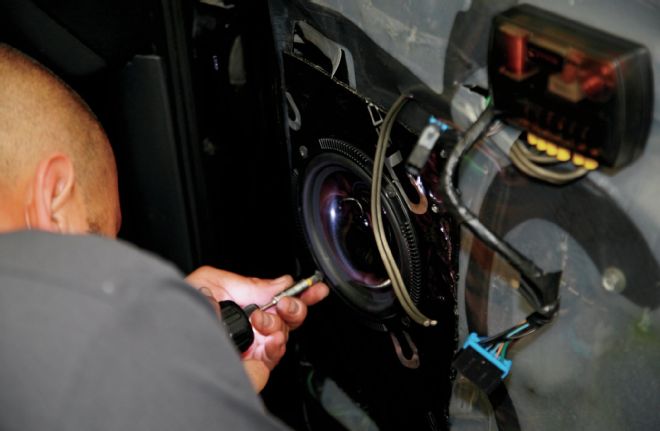
| Speaker Install
Now, the Strato speaker could be installed.
| Tweeter Install
The AP crew drilled out the stock tweeter location so the CT tweeter could mount in its place. Once that wire was connected, the door panel could be reinstalled.
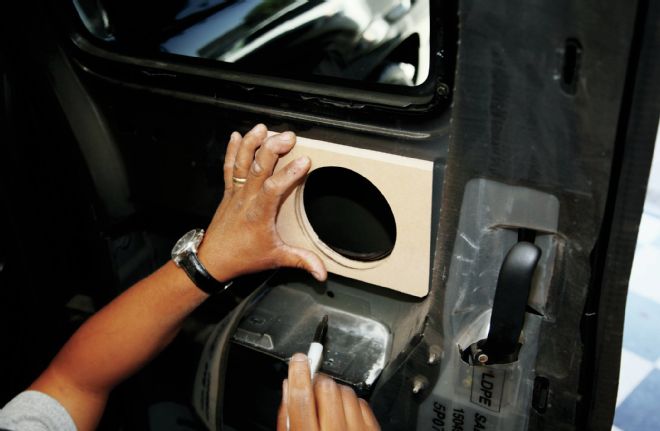
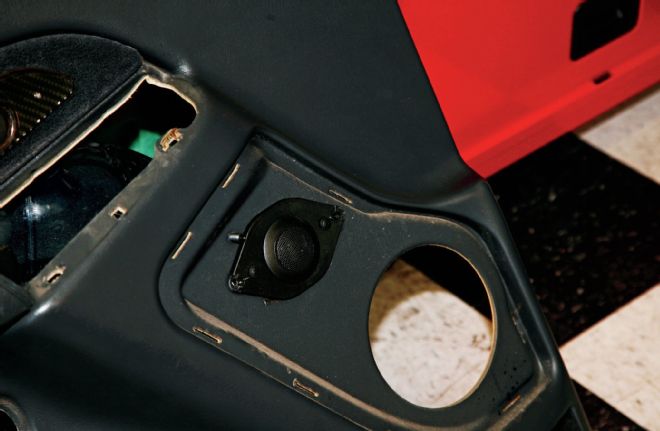
| Mdf Speaker Panel
Moving to the rear doors, we really didn’t want to waste the space on a set of replacement plate speakers. Luckily for us, the crew at AP were on the same page. Within minutes, they had cut out some MDF and trimmed out the oval hole so we could use one of CT’s coaxials.
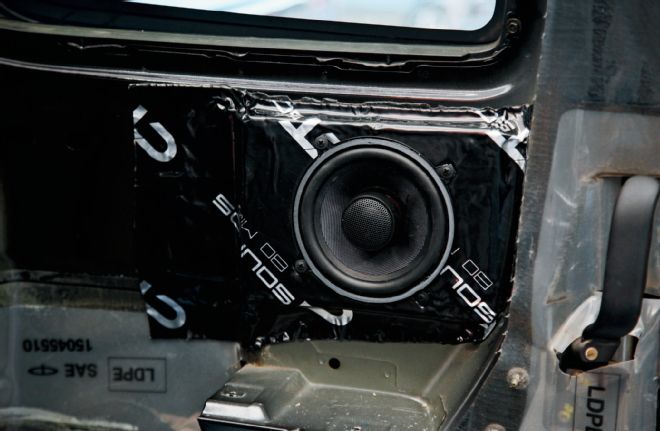
| Rear Speaker Installed
The MDF was first glued, then screwed, to the door metal. Then sound deadener was used to cover the entire area. Finally, the coaxial was connected to the stock wiring and screwed into place.
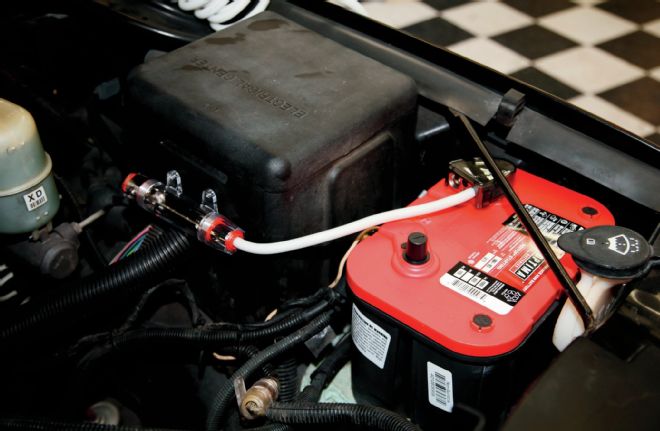
| Optima Red Top Installed
Before we started running all the wiring, we replaced the stock battery with an Optima Red Top battery, which will handle the increased power we’re adding. We then used the power wire and heavy-duty fuse from the CT Sounds 0-gauge installation kit and ran it through the firewall and down along the driver-side doorsill plate.
| Running Speaker Wires
Back in the cab, the amp, sub, and speaker wires were run from behind the head unit, down the passenger kick panel, and under the carpet to where the two amps would be located.
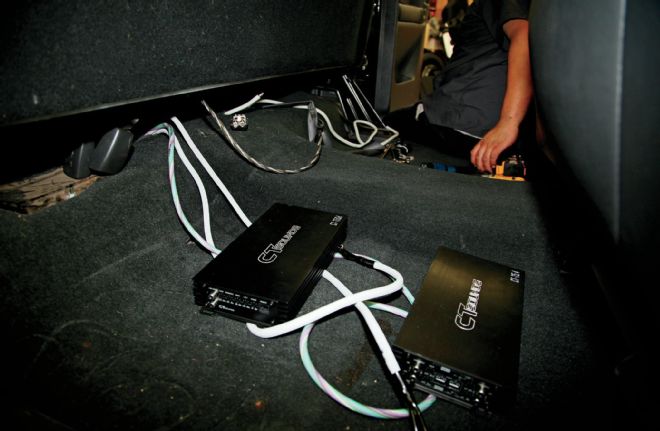
| Mounting Amps
The amps were being prepped to be mounted up on the ledge under the rear seat. The jack kit and mounting plate were removed, then a power splice and grounds were mounted in the center area.
| Ct Sounds Amp Mounted
We plugged in the inputs to the left side of the amp.
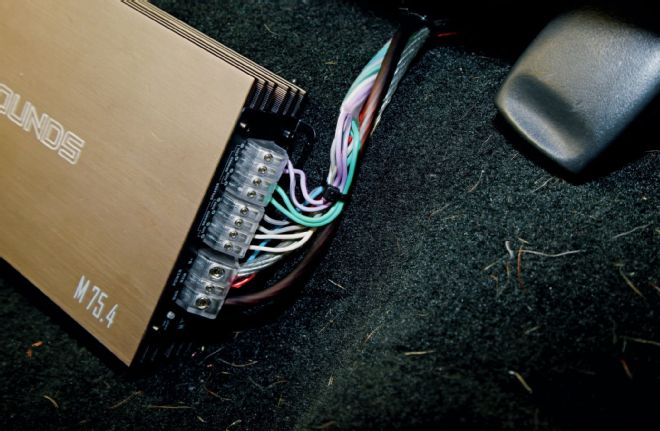
| Speaker Wires Ran To Amp
Power, ground, signal, and speaker wires were attached to the right side. We then slid the amp up on the ledge and mounted it to the floor.
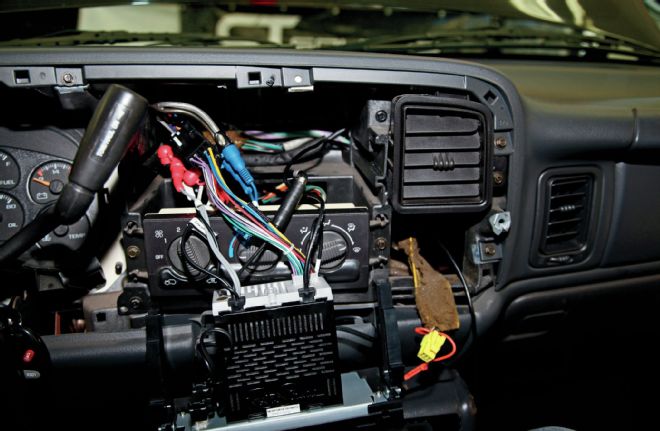
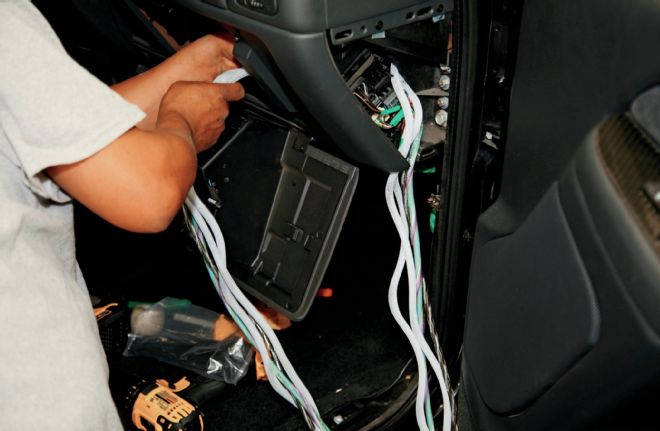
| Head Unit Wiring
Since truck-specific wiring kits are available with the Retrosound head unit, we simply connected the speaker wires to our 9-wire cable and plugged everything else in.
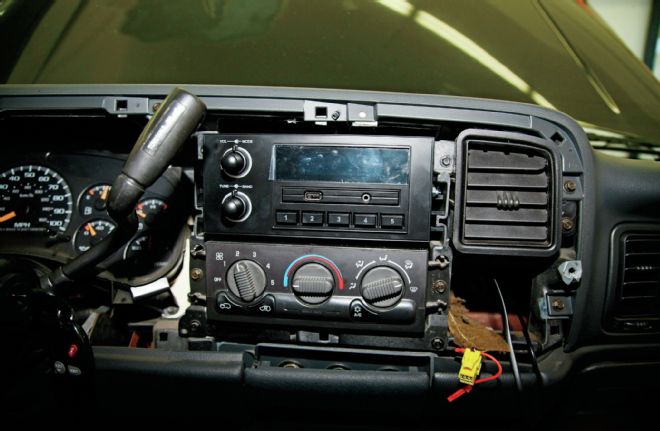
| Head Unit Installed
We added the clips from the install kit and slid the new unit in until it locked into place.
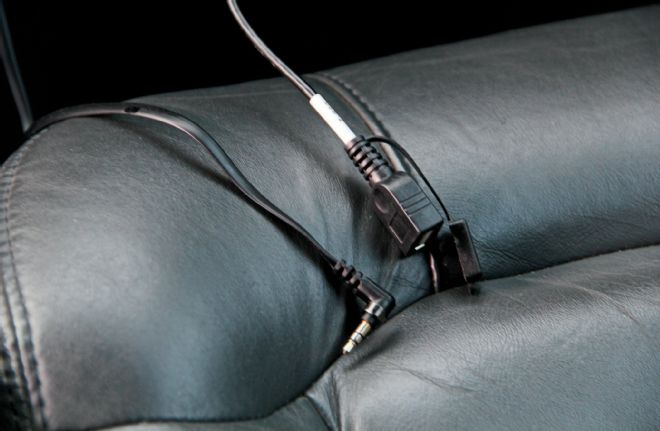
| Aux Plug And Usb Port
Our auxiliary plug and USB port were run so they would be accessible through the glove compartment.
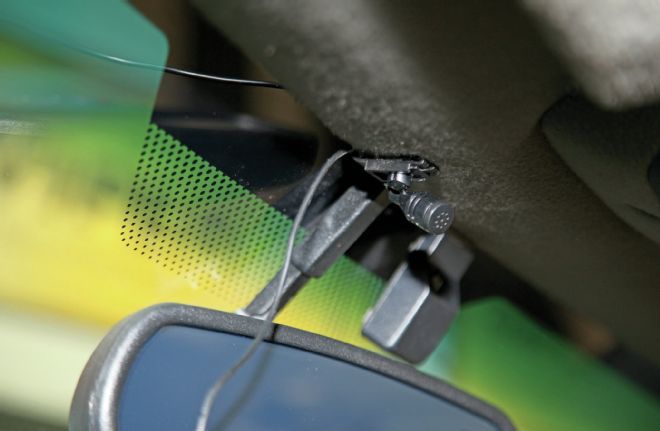
| Microphone Mounted
We ran our Bluetooth microphone wire up the A-pillar and behind the headliner to a point above the mirror.
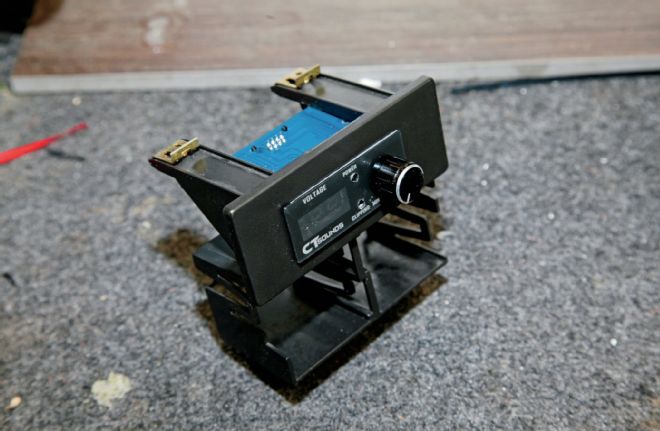
| Bass Knob Mounted
AP Sounds & Customs found a trick little spot to mount the bass knob. A little cutting, grinding, and hot gluing, and we were set.

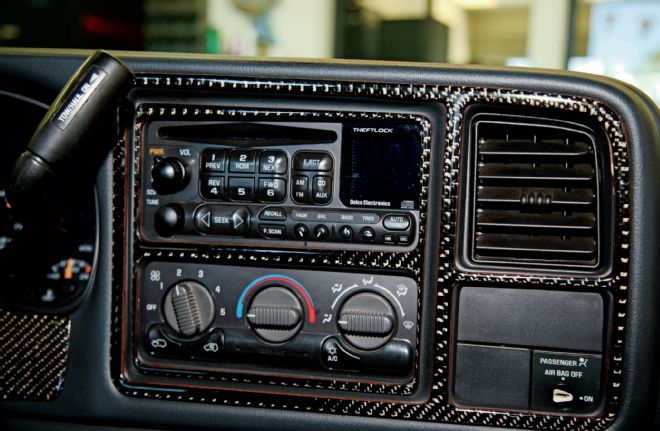
| Dash Bezel Install
Finally, we buttoned up the dash by reinstalling the bezel.
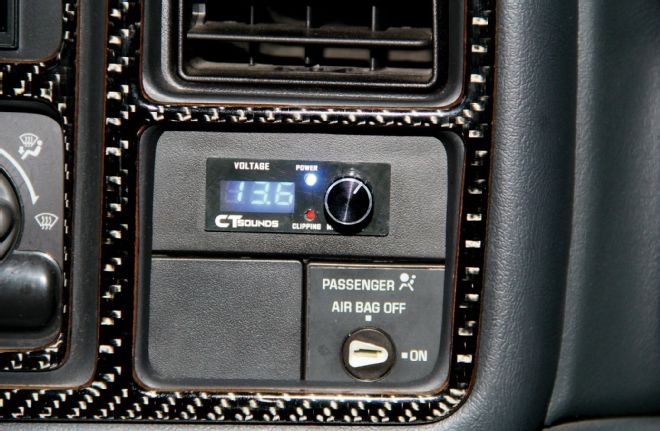
| Digital Voltmeter
In addition to quick access to our bass level, we now had a digital voltmeter right on the dash!
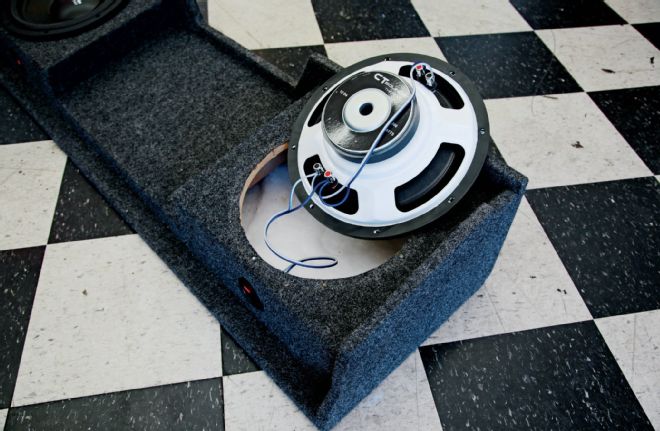
| Ct Sub Install
The CT Sounds Thermo 12-inch shallow mount subwoofer was a perfect fit for our pre-fab enclosure. We wired them up to the connectors for installation.
| Ct Subs Installed
Then, we simply screwed the subs in place. Finally, we were getting close to hearing some bass.
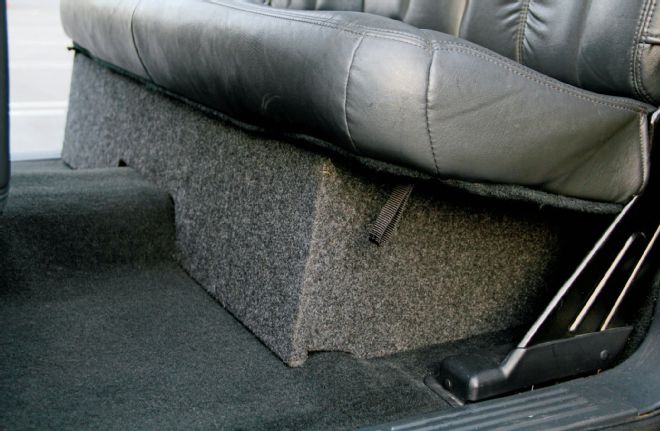
| Subs Installed Under Seat
We installed and removed the sub enclosure a few times to get the amp levels just right, but soon we were in business.
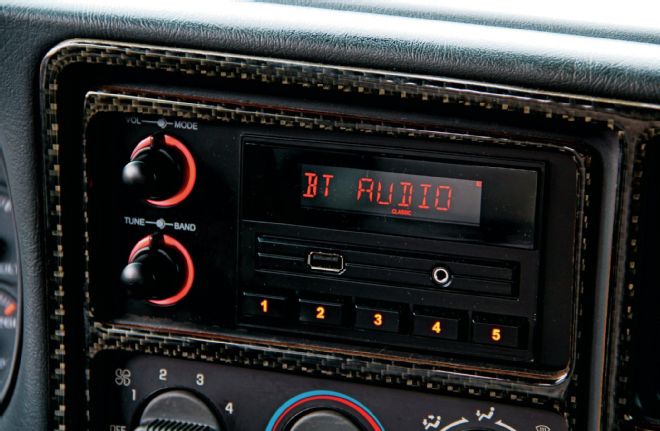
| Retro Sound Head Unit Installed
The Retrosound head unit was a breeze to dial in; we paired our phone up with Bluetooth and were bumping old school rap in no time! We couldn’t have been more excited about the huge bass or overall sound quality, but it was the grins on the AP crew that told the story. They do this every day, and they were genuinely impressed with the sound we got from this relatively simple install.