Traditional propane-electric RV refrigerators have dominated the RV market for decades. Nowadays, though, more and more larger RVs are equipped with residential refrigerators. Residential-grade refrigerators operate strictly on 120-volt AC current and don’t use propane to cool their contents. RV owners have always had a love-hate affair with RV fridges. They have limited cooling ability and take a fairly long time to cool down their contents after they are initially fired up. As the ambient temperature swings between hot and cold, so does the refrigerator’s interior temperature. In addition, propane can have serious safety issues. The cooling system locks up if the unit is out of level, and if any of the hydrogen-laden ammonia refrigerant leaks out it becomes a fire hazard. All and all, it’s easy to see why propane-electric refrigerators aren’t an ideal solution. On the up side, they don’t require 120-volt AC power to operate. By switching over to propane, it’s possible to operate the refrigerator while traveling or dry camping without having to run a generator.
RVs have changed significantly over the last 10 years. Many larger units contain inverters that can provide AC power when traveling or dry camping. And more RVers spend time at full hook-up parks where AC power is always available. Placing a residential-grade refrigerator in a motorhome or large fifth wheel doesn’t present the drawbacks that previously arose. The residential refrigerators cool faster and more consistently and are available in larger sizes. They also lack the fire hazards and safety concerns of propane-electric units. The efficiency of the cooling system and better insulation mean these units consume much less electricity than you would expect.
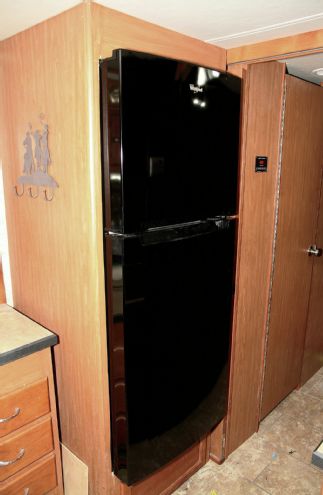
The majority of current upper-end motorhomes are manufactured with residential refrigerators, and there’s also a huge market for retrofitting existing RVs with residential refrigerators. I recently had a chance to install one myself and it wasn’t difficult. In this case, an 8.5-cubic-foot RV refrigerator was beginning to develop problems. It needed to be replaced after seven years of full-time use. The owners decided to replace it with a larger 10.7-cubic-foot Whirlpool residential fridge, and I offered to help.
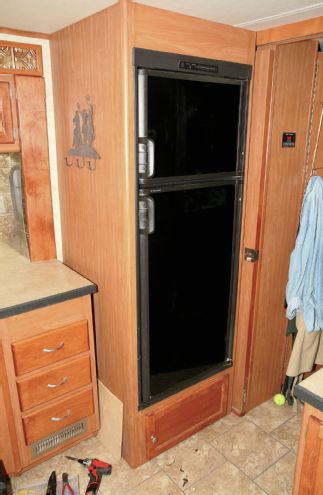
| 1: The original 8.5-cubic-foot RV fridge was developing problems and needed to be removed from the enclosure to make room for its replacement
Preparation and Planning
First, figure out which size is needed. Not every residential refrigerator will work in an RV. Find a unit closely matching the dimensions of your existing unit, unless you want to do serious cabinetry modifications. Fortunately, the dimensions of your current fridge—and your potential replacement—can be found on the manufacturer’s websites. Also, consider the door size and your aisle space. A unit that fits into the opening may not have enough aisle room to open the door or slide out a freezer bin. Careful planning can prevent problems surfacing later during installation.
How will you move the old refrigerator out and transfer its replacement into the RV? In most motorhomes, the major appliances and interior cabinetry are installed prior to adding the sidewalls. You’ll need to find an entry point large enough to pass the two units, existing and replacement, through. They may occasionally fit through the entrance door after removing the refrigerator’s doors. If not, you may need to temporarily remove a large side window. Larger refrigerators are heavy may require a forklift and crew of strong backs.
Your travel style affects how best to power your refrigerator. Those who spend a lot of time in full hookup sites can power your refrigerator with a generator while traveling. The fridge will keep its contents cold for quite a few hours, so you don’t need to power it on a steady basis. Run the generator for a bit midday and plug in once you reach your campsite. Those who travel frequently or overnight in truck stops or other parking areas can use a small inverter to power the refrigerator. Overnight stays typically require four to six coach batteries to power the fridge throughout the evening. An inverter will also allow you to power your icemaker while driving.
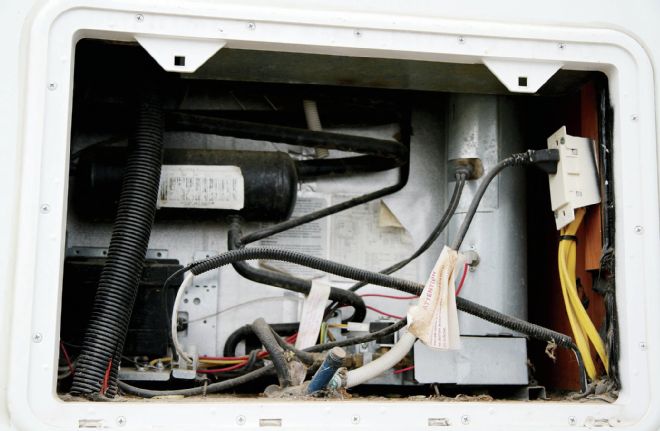
| 2: Removing the exterior access panel allowed access to the refrigerator’s components and connections.
Removing the Old Refrigerator
Removing the old refrigerator wasn’t hard. First, we unplugged the power cord to stop the flow of AC power in the refrigerator. This particular refrigerator had no icemaker and only one plug. However, refrigerators with installed icemakers may have a second electrical outlet powered by an inverter in order for the icemaker to operate during driving or dry camping. In those cases, the new refrigerator is generally plugged into that outlet, so the inverter circuit provides 24/7 power. Next, we removed the 12-volt DC power used to power the control circuitry and interior lights. The wiring was traced back to the fuse panel and permanently removed. The propane hose ran to a manifold with three ports. After shutting off the main valve at the LP tank, we removed the propane line and replaced it with a pipe plug. The plug was coated with thread sealant approved for propane use and the main tank valve was reopened. We checked the plug with a propane leak detector to ensure no leaks existed.
We had to remove the doors and interior shelving. Both the old and new refrigerators squeaked through the motorhome’s entry door with a little less than 1 inch to spare with the doors removed. Luckily, we didn’t have to remove any motorhome windows to take out or install the refrigerators. The approximate 100-pound weight was easy enough for two men to handle. We removed the mounting screws, slid the old refrigerator out of its cabinet and carried it outside.
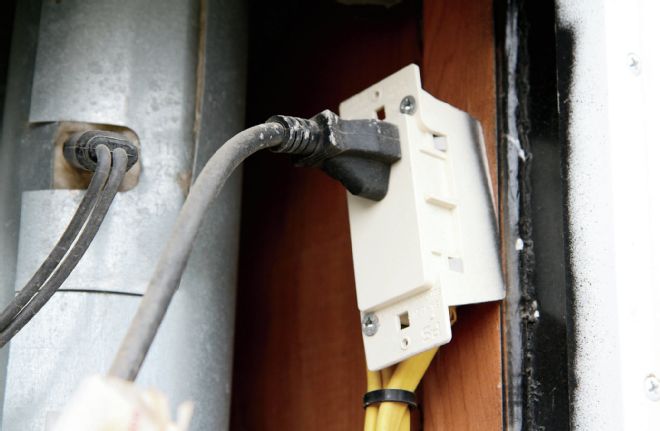
| 3: The first step was to unplug the 120-volt plug from the receptacle behind the refrigerator.
Installing the New Refrigerator
The new fridge was slightly wider and we slightly trimmed the cabinet’s face molding. We laid down blue masking tape, scribed the new cut line, and brought out the jigsaw to increase the opening about three quarters of an inch. After removing the new refrigerator’s doors, we brought it inside and set it into its enclosure. The rear wheels and front leveling legs were unneeded and were removed. We installed a wooden shim block under the front to support and level the refrigerator. The refrigerator was secured in place with screws and we applied trim molding to cover the support block. At the rear of the refrigerator, we drilled two additional holes into the steel support brace to securely fasten it to the wooden cabinet base. The shelving and crisper bins were reinstalled and the refrigerator plugged in. The unit promptly fired up and was cooling in no time.
Neither the original nor the replacement unit had an icemaker, and thus, didn’t require a water line running to the rear of the refrigerator. The existing access panel was blocked off. For units with icemakers, you must insulate the area to prevent freeze-ups. The area near the refrigerator’s rear still gets warm, though, when the condenser coil rejects its heat. Recent factory installations provide louvers to allow airflow behind the refrigerator from the motorhome’s interior. In our case, we kept the existing roof vent open to prevent heat buildup at the rear of the refrigerator.
The end result is remarkable. The refrigerator cools off instantly, instead of taking a long time to recover. You can leave the door wide open while you stare at your food selection without worrying about the unit cooling back down in a reasonable time. The increased size offers much more interior space and the temperature is more consistent. The RV’s owners travel style didn’t require an inverter, which meant the installation’s electrical needs were minimal. They spend the majority of their time at a full-time spot. Any travel is in warm southern climates. The generator will already be running to power the motorhome’s air conditioning most of the time, so an inverter wouldn’t be that beneficial. Most importantly, the owners are pleased.
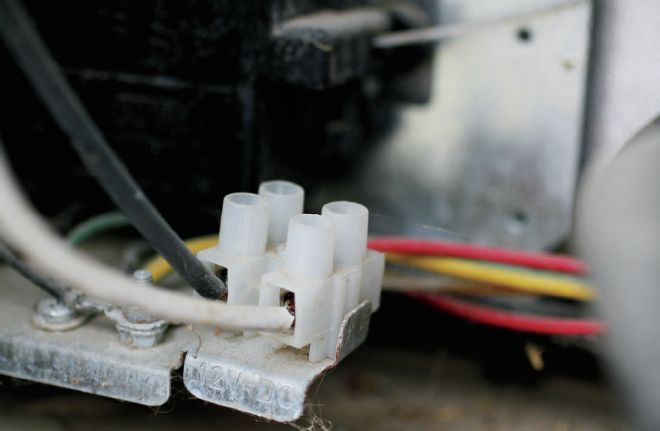
| 4: 12-volt DC power connections were also removed because they were unnecessary for the replacement refrigerator.
| 11: After a slight widening of the cabinet opening, the fridge was slid into place, fastened down, and the doors reinstalled.
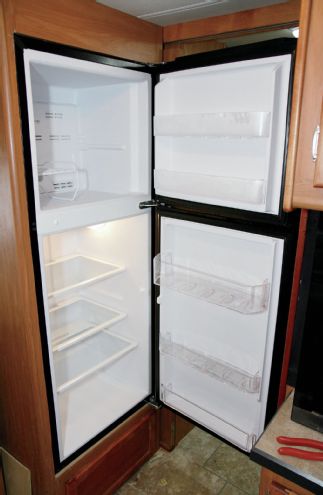
| 12: The new refrigerator provided additional space and consistent operation and pleased the owners.


