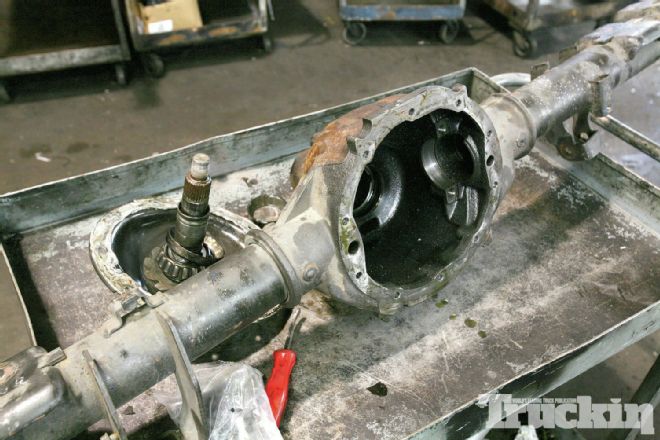
One-wheel burnouts are embarrassing, and that’s about all Blue Bomber’s stock open differential was good for. It certainly wasn’t helping us hook up and leave the line quickly, so we knew it was time for a change.
No matter how powerful your truck’s engine is, or how strong your transmission is, all that horsepower and torque goes to one place -- your rear axle. So, it stands to reason that this vital stress point should be just as strong as the rest of your setup. In the case of Project Blue Bomber, our 2011 Chevrolet Silverado performance truck, we already had a supercharged 4.8L engine pumping out 443 hp and 446 lb-ft of torque. However, our factory work truck open rear axle wasn’t letting us put the power down, so we called up Randy’s Ring and Pinion for a setup that would get the power to the ground.
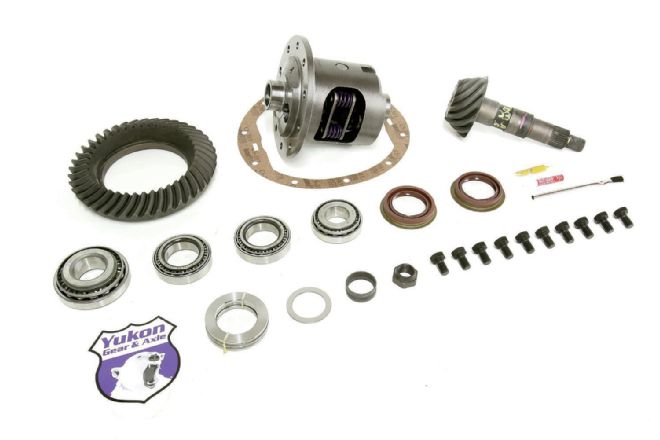
The experts at Randy’s recommended a new Dura Grip posi and ring-and-pinion set from Yukon Gear and Axle. A new Yukon Dura Grip positraction will make sure the truck spins both rear tires and hooks up quickly, while a Yukon 3.73 ring-and-pinion set will give our chevy truck improved acceleration out of the hole. Yukon also sent us new bearings, as well as seals, shims, hardware, and grease in their Gear Install Kit. While we were at it, we also picked up a junkyard donor axle from an 2009 Chevy Silverado Crew Cab, since it had factory rear disc brakes, unlike our rear drum-equipped standard-cab work truck.
With the new axle and our Yukon parts in hand, we drove over to Unitrax Drivetrain in Anaheim, California. With nearly 30 years of experience working with every kind of automotive differential on the market, the guys at Unitrax made quick work of our upgrades. Follow along to see how we turned this junkyard rear axle into something that was truly ready to hit the dragstrip.
| 1.
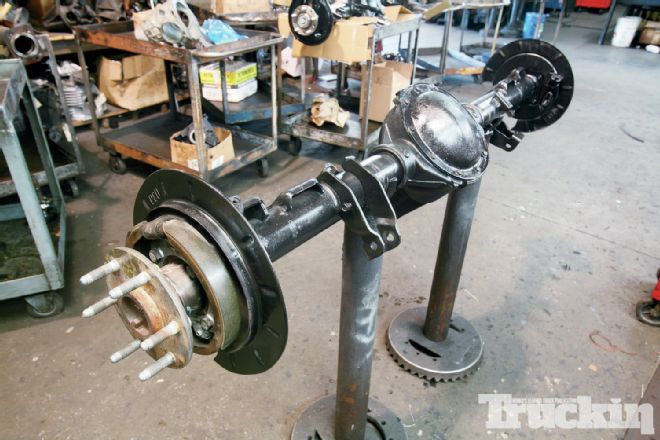
1. After we brought the junkyard rear axle to Unitrax, in Anaheim, California, it was immediately opened up and gutted. The only parts we will be reusing are the axlehousing, axleshafts, and disc brake backing plates, so those components were put in the hot tank to be thoroughly cleaned.
| 2.
2. While our axle parts were being cleaned, we opened up the Yukon Gear and Axle boxes that Randy’s Ring and Pinion sent us and inventoried everything. In addition to the Dura Grip positraction (YDGGM8.5-3-30-1) and 3.73 ring-and-pinion set (YG GM8.5-373), Randy’s sent us all-new bearings, seals, shims, hardware and grease (BK GM8.6-B) -- everything we needed for a smooth install.
| 3.
3. First, the Dura Grip posi unit was placed in a vice while the ring gear was attached with the 10 included bolts. Each bolt was carefully torqued to ensure the gear was held firmly in place.
| 4.
4. A hydraulic press was used to press a new conical bearing onto the pinion shaft, then it was thoroughly greased to prepare for installation. New carrier bearings were also pressed onto each end of the posi at this point.
| 5.
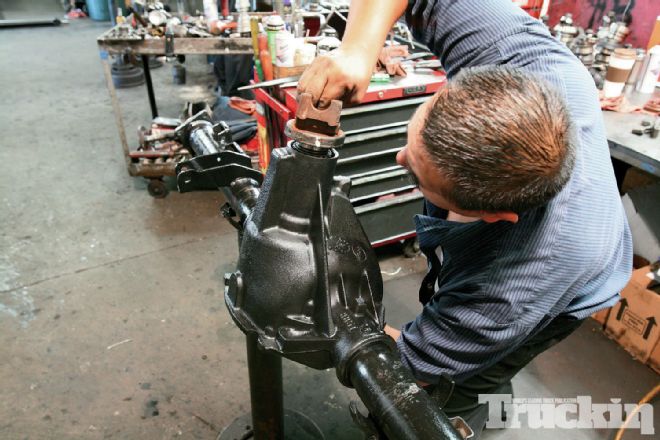
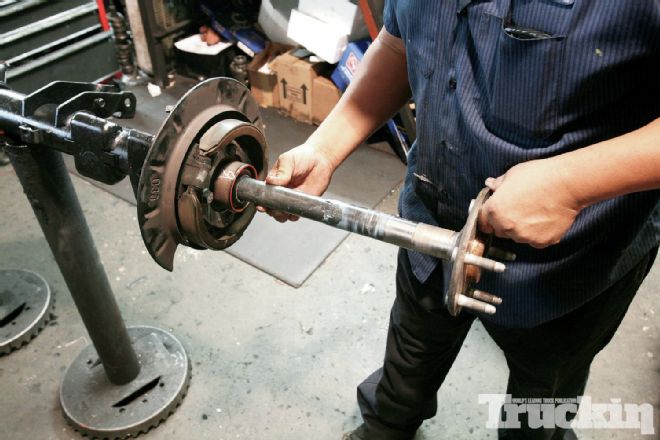
5. With the cleaned and painted axlehousing on a stand, the pinion gear was inserted from below while the driveshaft yoke was installed from above. The included pinion nut was brushed with red thread-locker and finger-tightened to hold the two together.
| 6.
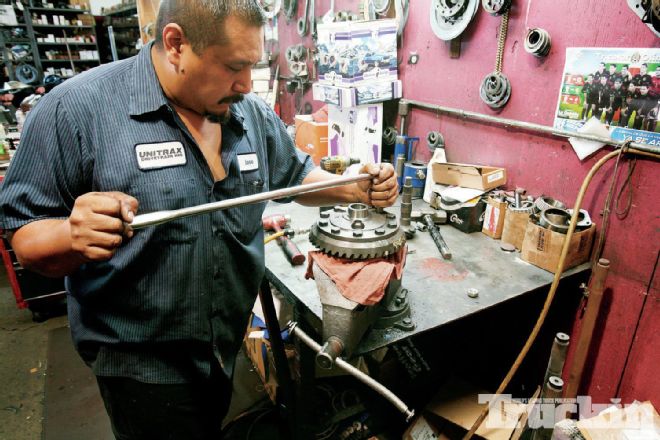
6. A 1 1/2 inch socket was placed onto the new nut, and this special tool was used to check preload in inch-pounds. This determines how freely the pinion will spin, and is necessary for smooth, quiet rotation of the gears.

| 7.
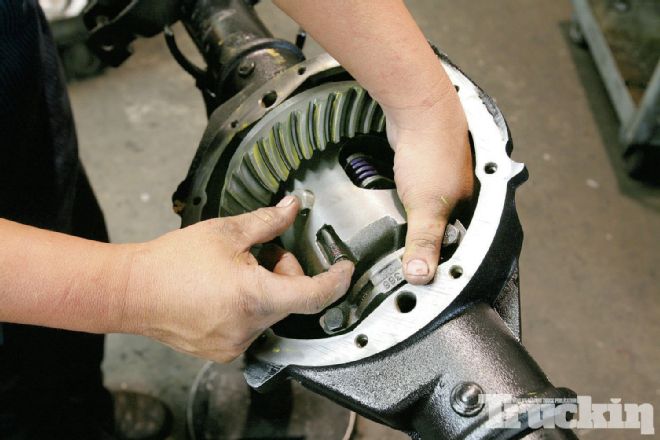
7. Next, the axlehousing was turned over, and the Dura Grip posi was lowered carefully into place.
| 8.
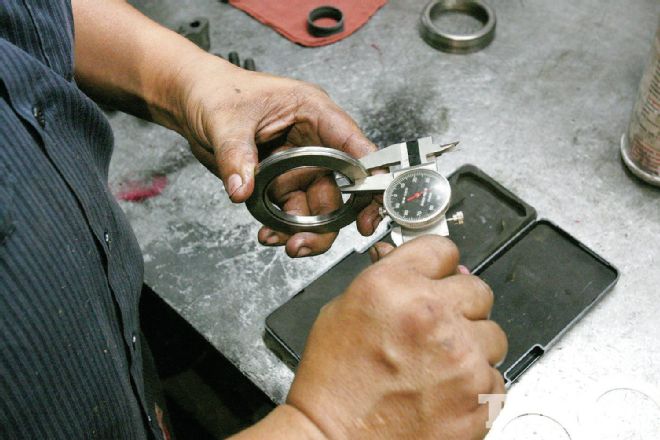
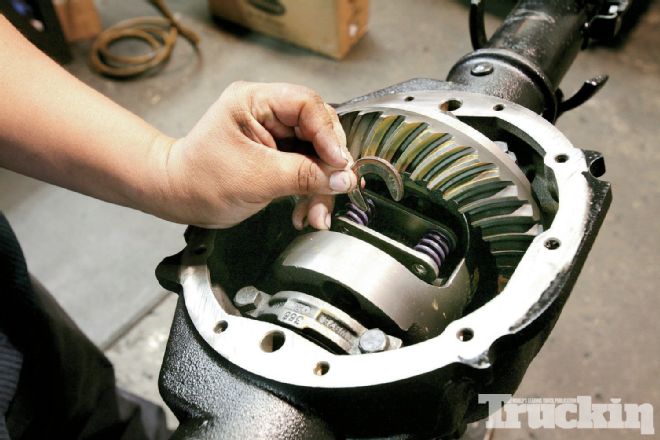
8. Calipers were used to measure out new Yukon shims, which were then slid in place on each side of the posi unit. Bearing caps were then bolted down to hold the shims, carrier bearings, and posi securely inside the housing.

| 9.
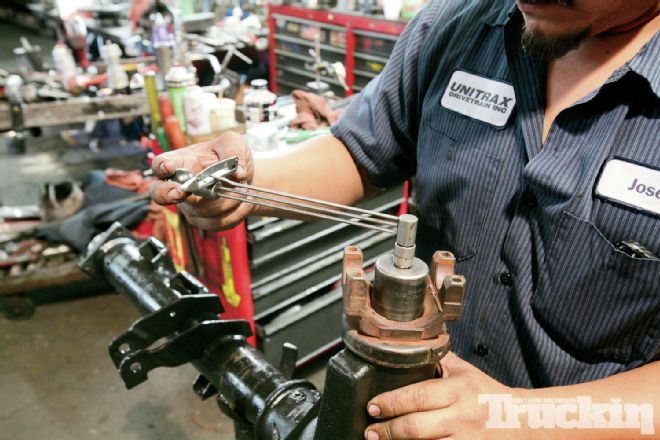
9. Using a backlash dial indicator gauge mounted to the housing, the ring gear was turned by hand to check gear backlash, which is the clearance between tiny gaps in the gear teeth. Too much or too little backlash can cause gear whine and premature wear, so it’s important to get it just right at this stage.
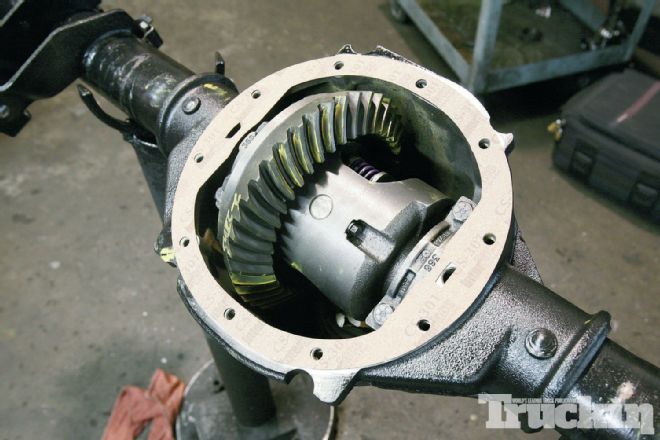
| 10.
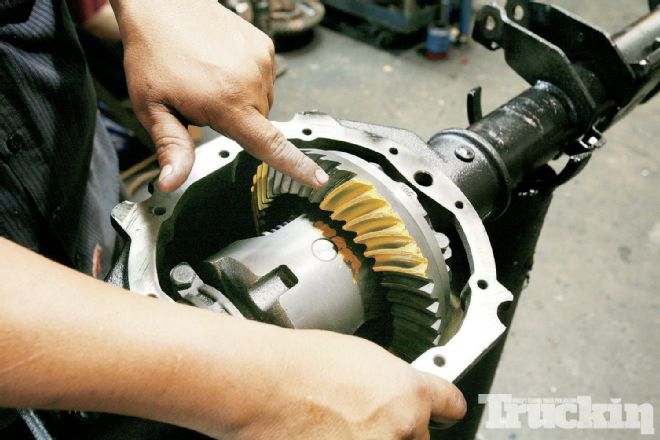
10. To visually check backlash, bright yellow grease was applied to the ring gear teeth before turning the gear several rotations. The slight displacement of the grease shows the teeth are meshing smoothly, and that backlash is set correctly.
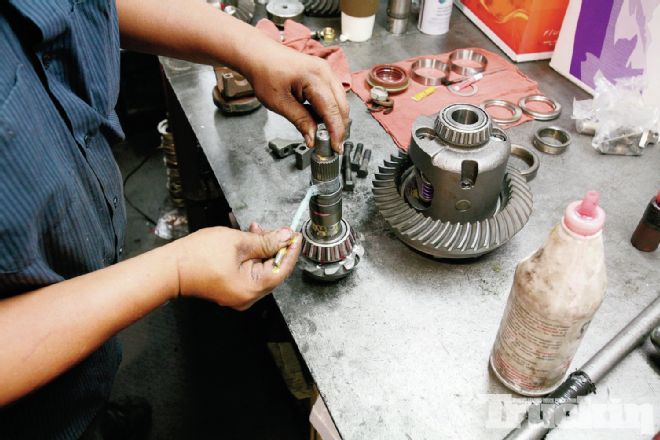
| 11.
11. The original disc brake backing plates, new bearings, and seals were installed before sliding the factory axleshafts back in.
| 12.
12. This C-clip was inserted into the center of the differential, where it prevents the axleshafts from sliding back out of the housing.
| 13.
13. Finally, the cross pin shaft was carefully slid into the differential while the 10mm retaining bolt was inserted. It’s important to hold one finger behind the pin to prevent it from falling through its hole into the differential.
| 14.
14. With the cross pin retaining bolt torqued to spec, the included differential cover gasket was set in place, and the diff cover was bolted back onto the housing.
| 15.
15. With the upgrades complete, we installed our new axle underneath Blue Bomber and properly broke in the new rearend setup by easing onto the gas at stoplights and keeping freeway cruises to 65 mph for 500 miles. Once broken in, a firm application of the go-pedal launched the Silverado forward like a freight train. Before, we would have been greeted with a one-wheel tire fire burnout, but this time the truck simply chirped its tires and rocketed forward. It’s amazing how the shorter gearing and positracion differential from Yukon woke up the truck, both on the street and at the strip. So, if you’re tired of leaving one-wheel rubber stripes off the line and getting embarrassed at the track, give Randy’s a call for some much-needed axle upgrades.