Question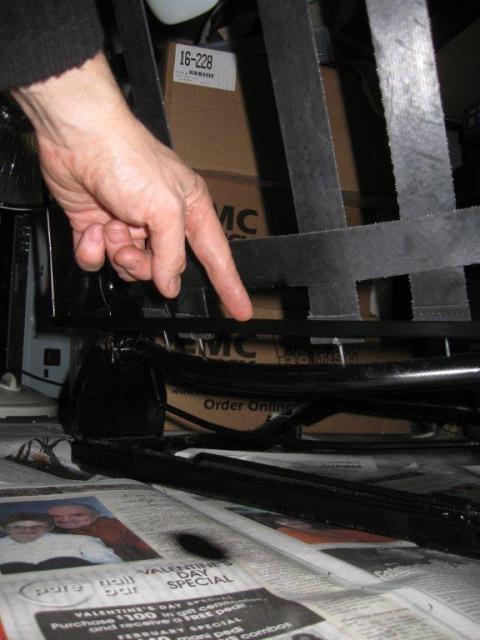 Seat Frame cross bar
QUESTION: Howard,
On my seat back frame, near the bottom, there is a bar running across the back side to side with an 'L' shaped cross section - the flap for the back seat cover is clipped to it. That's how my old seat was done and my instructions mention the same, so I don't know if you need to run a cord across the back unless you want it higher or lower. That bar actually does double duty - holds the seat inside flap and the short one on the inside of the back part of the seat cover.
Cheers,
Steve.
ANSWER: The trim shop that made my covers didn't leave the center flap long enough so I will have to add something across further up which I have decided to use a heavy cord. If your center flap is long enough that might be the best way to secure it.
Howard
---------- FOLLOW-UP ----------
 Finished Seat
QUESTION: Howard,
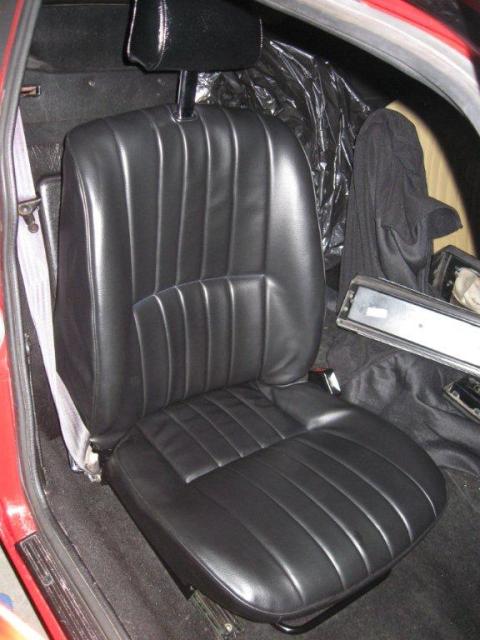
Finally finished the seat, in the end I stitched 4 strips of fabric to the seat bottom cover flap and pulled them through the holes in the diaphragm as you mentioned. The last problem I had was the area to the sides of the center square of the bottom seemed flat and didn't follow the angle of the foam so first I tried gluing this part of the cover to the foam - didn't help, so I inserted 1 inch thick panels of foam there to fill out the seat cover and try to improve the bucket shape. The original seat covers had internal flaps on each side of the square so the front and both sides of the square could be pulled down but the new covers had only the 1 flap at the front seam. Another design flaw that cost me lots of time.
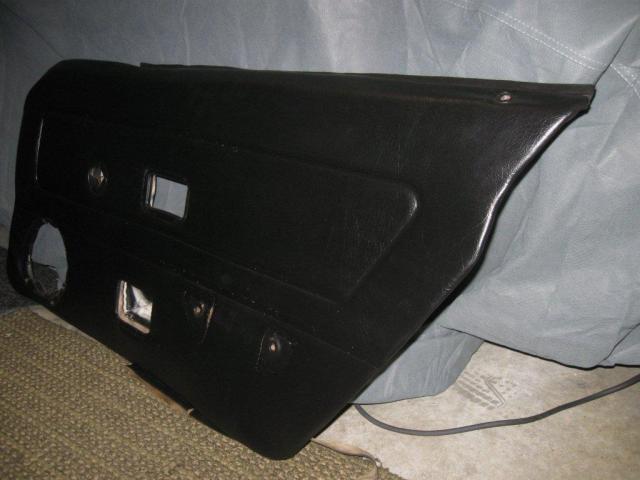
I have a question about the door cards - mine are a bit warped - is there anything that can be done to soften and reshape them - like maybe steam ? The later door cards are available but not the ones like mine that didn't have the lights in the door...
Thanks,
Steve.
ANSWER: Hi Steve,
Most of the door and kick panels I seen from the factory were damaged and warped due to moisture and I never tried to do anything with them other than use them as a pattern and I got the board material from a local trim shop that is moisture resistant. Using the old board as a pattern I just cut out new boards. I have used a hand jig saw and a band saw and both work well and I found it an easy job. On some I did, the cover material was good so I just put it on the new board. I have had covers made by a trim shop and also just put plain material on my self depending on the job. You can purchase the thin foam and just glue it in. I had one that I made the new boards and had a trim shop make a custom cover and had them sew it in place. A friend just had a trim shop redo his seat covers and all the interior panels in leather and they sewed the leather in place in a pattern. This was for an MG Midget. First class job but a little expensive for me.
Your seat looks good so you should continue on. I have a shot of the back of my TR-7 seat fitted to my MG V-8 project. I removed the head rest on mine and had the covers made to match the sceme of the car. http://mg-tri-jag.net/Seat%26Wheel1x1.jpg
Howard
---------- FOLLOW-UP ----------
 TR7 Door Card
QUESTION: Howard,
Interesting you removed the headrest permanently - it has more of a 60's look to it. I'm trying to keep my car stock to try to get Collector plates in my area that gives about a 75% discount on insurance to cars 25 years and older but they have to be good condition and period correct. As for the door cards, my problem is the TR7 cards are more complicated than other sports cars of the era. They curve around the top by the window so even if I build new ones I'll have to figure out how to put a curve up there. Maybe a mix of board and sheet metal... I've attached a photo. Thanks again for all your help !!
Steve.
AnswerYes, you could just add a piece of sheet metal or cut and splice the top on to a new flat board with a piece of sheet metal close to the splice. Some times you have to improvise. I recovered several jag head liners and that was not a problem except for the sun roof and I tried several different methods and finally found that all I needed to do was to first cover the inner sun roof with a piece of house roof flashing then cover it with the foam backed head liner material and I ended up with a better looking sunroof than the factory had.
Howard