The 1995 Buick Regal was produced as a Custom Coupe and a Gran Sport sedan. It was equipped with the choice of a 3.1-liter V-6 or a 3.8-liter V-6. The 1995 Regal came standard with four wheel anti-lock disc brakes, including ventilated front discs. The rear disc brakes on the 1995 Regal have calipers, pads, and rotors similar to the front disc brakes.
Remove the initial torque from the rear wheel lug nuts, using a tire iron. Do not remove the lug nuts completely, but turn them so they are unstuck (3/4 turn). Lift the rear of the Buick using a 2-ton jack or a jack with greater capacity. Set jack stands beneath the rear suspension arms or the rear axle beam, just inside the rear wheel assembly. Remove the lug nuts completely with a tire iron, then remove both rear wheels from the Regal.
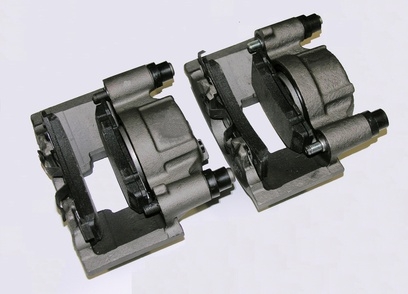
Remove the rear caliper mounting bolts on one side of the Regal. Use a 3/8-inch ratchet to turn the caliper bolts counterclockwise until they are removed. Remove the caliper from the brake assembly, using a pry bar to gently pry the caliper off. Set the caliper on the suspension arm behind the brake assembly. Do not let the caliper hang freely or you can damage the fragile rubber brake hose.
Remove the old brake pads from the caliper mounting bracket, using a pry bar to gently pry the pads off if necessary. Lubricate the portion of the caliper mounting bracket that touches the brake pads. This is the part of the mounting bracket that the tips of the brake pads slide into. Proper lubrication is essential in reinstalling the brakes, to ensure optimal performance and function of the new pads. Use caliper grease that is rated for disc brakes.
Install the new brake pads onto the caliper mounting bracket. Two of the brake pads have wear indicators. These pads go on the inside of the caliper bracket, behind the rotor. Do not place both pads with wear indicators on one side of the Regal. The wear indicators are small metal tongues on the end of the pads that have a 90-degree bend in them, and are the reason for the "squealing" noise when pads get low. Install the wear indicator-equipped pad behind the rotor, and the non-wear indicator pad on the front or outside of the caliper bracket.
Lubricate the backing plates or shim plates on the back side of both of the newly installed brake pads. Failure to lubricate the back of the pads can cause squeaking in the new brakes within a couple hours of installation and driving. Dab caliper grease on the back side of the pads to create a thin film on the pads.
Install a 6-inch extension onto a 3/8-inch drive ratchet. On the opposite end of the extension install a caliper brake tool. The caliper brake tool is a 6-sided cube that has different adapter teeth on each side for use on multiple different vehicles. The rear calipers of the Regal have oscillating or rotating pistons. As the piston expands when you hit the brake pedal, it also rotates in a screw-like motion. The brake tool is essential in working on the rear brakes of many vehicles, as there are many vehicles with rotating rear caliper pistons.
Insert the caliper tool onto the piston of the rear brake caliper. Hold the caliper in one hand, while holding the ratchet, extension, and tool in your other hand. Turn the ratchet clockwise while simultaneously applying pressure to the piston on the rear caliper. This turning and pushing movement will compress the rear caliper piston. Compress the piston until it is nearly flush with the inside back wall of the caliper. The piston does not compress completely flush.
Install the compressed rear rotor back onto the Regal with one hand. Start the caliper mounting bolts through the caliper and into the mounting bracket, by hand. Turn the bolts clockwise to start them until the caliper can stand freely without you holding it. Tighten the caliper bolts to between 60 and 80 foot-pounds of torque. You can approximate this without using a torque wrench by snugging the bolts with a 3/8-inch drive ratchet and socket, then turn the ratchet 1/2-turn farther once the bolts are snug -- but using a torque wrench is best.
Repeat Steps 2 through 8 to complete the second side of the rear pads on the Regal. Performing this project on one side of the vehicle at a time will provide a visual reference for how the brakes look when they are assembled. This is useful if you have any questions about how the brakes go back together.
Install the rear wheels on the Regal after you have installed and torqued both rear brake calipers on the vehicle. Snug the lug nuts onto the wheel studs, using a tire iron. Lift the rear of the Regal off of the jack stands, and remove the jack stands from beneath the Regal. Lower the vehicle and tighten the lug nuts between 90 and 110 foot-pounds of torque. Use a certified torque wrench and lug nut socket to properly torque the wheel nuts.