Cutting the rotors when performing disc brake service on a vehicle is not quite as common as it used to be. While many old-school mechanics still swear by cutting rotors for every brake job, manufacturing companies like GM do not always agree. Replacement rotor pricing has come down the past few years, so replacing rotors is sometimes more of a viable option. Turning, cutting, resurfacing or truing (all different terms for the same task) rotors has to be done on a bench brake lathe or on the hub of a vehicle with an on-car brake lathe. Because of cost, the bench brake lathe is much more common in repair shops.
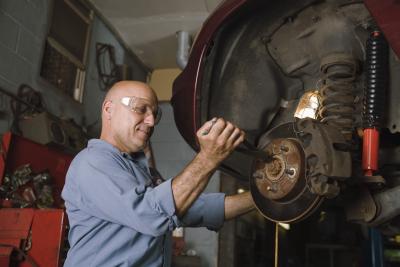
Put on safety glasses and then place a bell clamp face first on the arbor of the brake lathe for hubless rotors. These are more common now than hubbed rotors.
Brake the tension spring inside the cup of the bell clamp and then match up a centering cone that will fit inside the center of the rotor.
Place the rotor on the arbor with the front or top of the rotor facing away from the brake lathe. Sit the center of it onto the centering cone and then place a bell clamp onto the arbor. This time, have the bell clamp cup facing the center hub of the rotor.
Place an adapter on the arbor for spacing until the arbor is filled with enough room to accommodate the concave/convex washer and arbor nut. Once near the end, place the concave/convex spacing washer on the arbor and the arbor nut. Most bench brake lathes employ reverse threads on the arbor tips and nuts. This means you'll tighten the nut in a counterclockwise manner and loosen it in a clockwise manner. Tighten the nut the lathe wrench until it secures the components on the arbor.
Wrap the silencer band around the circumference of the rotor. Make sure the band will not come into contact with the cutting blades in any spot.
Make sure the rear lateral arm (for drum resurfacing) is back off all the way and then locked. Turn the handwheel until the arm is all the way back. Locate the finger locks for the arm up on top of the arm and turn them clockwise to secure it.
Unlock the rotor cutting arm (if locked) by turning the finger locks counterclockwise and then turn the handwheel to align the cutting blades over the rotor. If necessary, adjust the measurement wheels to fit the cutting blades over the rotor.
Turn the lathe on and then adjust the outer measuring wheel until the outside cutting blade contacts the rotor. Do the same for the inside blade. Back the blade adjusters off slightly and turn the handwheel to move down the entire surface of the rotor plate. Be careful not to cut into the surface of the center hub of the rotor.
Retighten the blade adjusters and then turn each measuring wheel about 3/1000 to make a cut on a the blade. Place the lathe on high speed to start and then put the arm gear into position. This will allow the arm to move along the surface of the rotor.
Continue on high speed cuts (making sure you're not taking off too much material) until the surface of the rotor is clean and moving in between 2/1000 and 3/1000 of measurement each time you reset the cut. On the final cut of the rotor, turn the lathe down to low speed and make a slow cut.