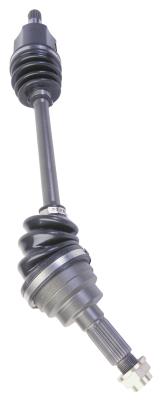
The Ford Contour, designed by Ford's European division, is a mid-size sedan that was produced for the 1995 through 2000 model years. It was billed as having spirited performance, composed handling, aerodynamic styling and a European feel. Although customers said the Contour was a fun car to drive, they also complained that it fell short in back-seat legroom and comfort. Replacing a CV shaft yourself on your 1995 Ford Contour -- or Mondeo, as it's called in the European market -- will save you the expense of paying a repair shop.
Park your Contour on a solid, level surface. Place wheel chocks behind the rear wheels. Loosen the lug nuts about a half-turn each with a lug wrench. Loosen the axle nut until it's hand tight with a ratchet and socket. Place a floor jack under the center of the front crossmember and raise the front end. Place jack stands under the pinch welds behind the front wheels and lower the Contour onto the jack stands. Remove the lug nuts and wheel.
Remove the upper stabilizer link nut with a ratchet and socket. Separate the stabilizer bar from the strut with the tie rod end removal tool. Remove the cotter pin from the tie rod end with pliers. Remove the castle nut with a socket and ratchet. Separate the tie rod end from the steering knuckle.
Remove the pinch bolt securing the steering knuckle to the strut. Remove the steering knuckle from the strut by tapping downward on the knuckle with a brass hammer. Remove and discard the axle nut. Hold the outer CV joint while pulling the knuckle off of the axle shaft. If the shaft is stuck inside the knuckle, tap the end of the shaft with a brass hammer to loosen it.
Place a drain pan under the transaxle if you are removing the driver-side axle. Remove the shaft from the transaxle by prying against the inner CV joint housing and the transaxle with a pry bar. If removing the passenger-side axle, tap the inner CV joint housing with a brass hammer until you can remove it from the intermediate shaft.
Install the inner CV joint of the replacement CV shaft in the transaxle by pushing the shaft into the case. You will hear the snap ring click when it is seated in place. Gently pull on the inner CV joint housing -- not the joint or shaft, only the housing -- to make sure the snap ring is locked in. If you are replacing the passenger side, you will be installing the inner CV joint onto the intermediate shaft, but the rest of the procedure is the same.
Install the outer shaft in the steering knuckle. Install the strut into the steering knuckle and tighten the pinch bolt to 40 foot-pounds with a torque wrench. Install the tie rod end on the steering knuckle. Tighten the nut to 18 to 22 foot-pounds and install a new cotter pin. Install the stabilizer link and tighten the nut to 37 foot-pounds.
Install the replacement axle nut on the shaft and hand-thread the nut on as far as possible. Install the wheel and lug nuts. Tighten the lug nuts in a star pattern as much as possible with the wheels off the ground. Lift the front end of your 1995 Ford Contour, remove the jack stands and lower it to the ground. Tighten the axle nut to 210 foot-pounds. Tighten the lug nuts in a star pattern to 62 foot-pounds. Check the transaxle fluid level and fill as needed.
Drive to an alignment shop for an alignment.