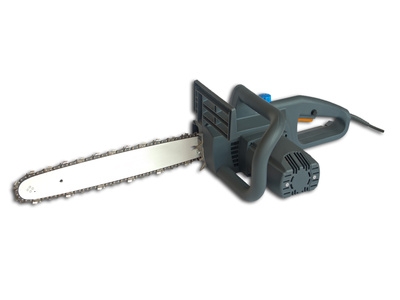
Two-cycle engines can be found in a variety of applications, including snow blowers, chainsaws, weed-eaters and hedge trimmers. Lightweight, with compact designs, they offer ease of portability and are often found in handheld garden and landscaping equipment. A two-cycle engine turns one crankshaft revolution for every power stroke, whereas a four-cycle engine requires two revolutions to complete the combustion process. Although two-cycle engines offer more working horsepower per revolution than the four-cycle variety, they can also be more temperamental.
Transport the engine to a well-lighted workbench for inspection. Examine the contents of the gas tank, making sure the engine has adequate fuel. Many transparent two-cycle engine tanks will show fuel in the bottom of the tank, yet will not have enough to start and run the engine when held at certain angles. Top off the tank, after preparing the correct amount of mixing oil with the fuel in the proportion indicated in your engine owner's manual. Use the recommended oil and proper octane fuel.
Use a screwdriver to open the air cleaner case and remove the fiber or sponge element. Clean the sponge-type filter in a bucket mixed with warm water and dish washing soap. Squeeze the sponge several times under water, removing all oil and dust. Compress the sponge in a towel to dry it. Add some oil to the sponge and compress it further in a clean towel. Reinstall it. Replace the fiber element if you cannot see light through it as you hold it up to the sun or a light source.
Pull the spark plug wire from the top of the cylinder with a pair of insulated spark plug pliers. Use a plug socket to remove the spark plug. Check the plug electrode for wet fuel, black soot, rust or carbon buildup. Clean the plug with a wire brush and use a feeler gauge to gap the electrode, according to manufacturer's specifications. An initial gap can be set between 20 and 35 thousandths.
Connect the plug wire to the spark plug tip and hold the electrode against the bare metal on the engine head. Give a slow but steady tug on the starter pull rope. Look for a blue-white spark arcing from the plug electrode to the block. No spark will indicate a problem with the spark plug, coil, magneto or ignition points. Replace a dead plug with the manufacturer's original plug type and size.
Use a screwdriver to unscrew the two point case screws and remove the cap. Examine the ignition points for burned or carbon-corroded contacts. Use a small piece of sandpaper to sand both contact points to remove carbon or pitting. Turn the flywheel until the point gap closes. Loosen the adjusting screw on the points lever arm and gap the points with a feeler gauge, according to manufacturer's specifications. Replace dead points and condenser, using a screwdriver.
Pull the starter rope and look for a blue-white spark between the point contacts. If no spark appears, check the magneto or coil wire for proper connection. Sand the magneto contacts on the end of the flywheel and magneto poles. Remove any twigs, rocks or grass from the flywheel fins. Wiggle the flywheel to make sure it sits firmly down over the crankshaft and that the key way and key sits intact on the shaft.
Locate the in-line fuel filter or filter screen at the carburetor intake line. Remove the intake line fitting at the carburetor with a socket and clean the small fuel screen until the mesh has no debris. Use a screwdriver to remove the fuel line clamps and remove the fuel filter. Blow through both ends of the fuel filter. Air should exit through both ends. If clogged, replace the fuel filter. Reinstall the screen and fuel filter with a socket and screwdriver.
Examine the emergency kill switch in the handle. If equipped with a cable, make certain the cable has not broken or become disconnected, allowing the engine to disconnect the circuit. Adjust the tension on the cable with a screwdriver at the coupler location, taking out excess slack.
Make certain the choke shows in the "off" position. Even a partial choke will flood the engine. With the choke off, pull the start rope several times with the plug removed from the head, to expel all flooded gas from the cylinder.
Refer to your owner's manual for the location of the fuel reeds. Loosen and remove the fuel reed case with a screwdriver or socket. Examine the small fin-like reeds, making sure they have spring tension and have no chips, nicks or cracks. Clean them gently with carburetor cleaner and a rag. Reinstall the case; align the gasket while inserting the screws or bolts. Tighten the screws or bolts with a screwdriver or socket.