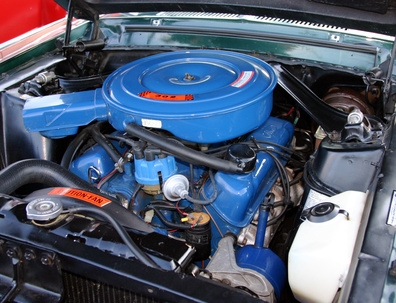
The primary function of an engine's head gasket is to provide a seal between the engine head -- the detachable metal piece that fits onto the top of a cylinder block -- and the block -- the main body of the engine. The head gasket prevents mixing of the engine's radiator coolant and the engine's lubricating oil. Insufficient coolant and improper cylinder detonation are the primary causes of gasket failure. The Land Rover's performance and durability require attentive maintenance and good quality replacement parts and accessories.
Open the valve under the radiator and drain all coolant. Disconnect the battery cables. Remove the two radiator intake hose clamps and remove the intake hose from the throttle housing. Unclip the four clips that secure the upper part of the air cleaner housing. Pull off the positive crankcase ventilation (PCV) hose.
Disconnect the coolant expansion tank connecting hose and the upper and lower coolant hoses from the thermostat housing. Disconnect the vacuum hoses from the brake servo, the air plenum chamber or valve cover, the fuel pressure regulator and the manifold absolute pressure sensor.
Disconnect both vacuum hoses from the throttle housing. Detach the throttle cable. Disconnect the fuel pipes.
Disconnect the electrical wiring. Mark all wires with a sticky note to facilitate reconnection. Remove the distributor cap.
Disconnect the engine breather hose with the valve from the cylinder head cover. Disconnect the fuel rail and remove the gasoline injectors.
Remove the cylinder head covers (eight bolts and washers each). Remove the gaskets. This may require scraping. Take care not to gouge the head cover or block. Remove the two rocker shafts and withdraw the push rods, taking care to keep them in the correct order.
Detach the intake manifold by disconnecting the connecting hose running to the thermostat housing. Remove the gasket. Remove the cylinder heads.
Check the surfaces of the head and block for flatness with a level and a straight edge. Your service manual will provide specifications. Send the blocks or heads that are out of specification must be sent to a machine shop to be repaired. The machine shop will also be able to check for cracks and advise you on solutions.
Prepare the surfaces of the head and block. Do not scratch the deck of the block or mounting surface of the head because even the smallest scratches can cause problems with the sealing of the gasket.
Clean the head bolts and stud holes and threads with a tap or thread chaser to remove any leftover dirt and prepare the threads. Blow out any bits with compressed air or suck them up with a shop vacuum. Any dirt can throw off the torque readings which are crucial to proper sealing.
Lay the head gasket on the block in the correct orientation. Insert dowels into the water jacket tube holes to guide the gasket into its proper place. Do not use sealant unless the gasket came with sealant or unless specifically required by the manufacturer. The service manual will explain the proper sealant locations.
Correct bolt tightening sequence and torque is crucial for proper head gasket sealing and to ensure that the head does not warp. Remove the dowels from the water jacket tubes. Replace the head over the block with the gasket. Be sure it is in the proper position.
Use new bolts. Coat head bolt threads with some engine oil before installing. Always follow tightening sequence and torque instructions. Tighten each bolt only until snug then go back and torque each to the specified foot-pounds.
Reconnect all the hoses, lines and electrical wires. Refill the radiator with the appropriate coolant.