Soldering is the process of joining two wires or components together to make a complete connection so that current can pass through the joint. All manner of wires can be soldered, but different methods and techniques must be used for different applications. Automotive wire commonly comes in multi-strand configurations and easily adapts to regular soldering techniques with ordinary products and tools. Anyone can learn the basics of soldering technique and develop the skills to make small or even delicate repairs on a vehicle.
Locate the damaged wire to be repaired. If the wire has burned, as evidenced by a black soot-like material on the insulation, you will need to cut the wire back at least 3/4 of an inch past the burnt marks on both sides. Mark both margins with a felt tip pen. Use a wire stripper's flat cutting blade to cut clean, even lines in a good portion of the wire. Discard the damaged section. Notice if the interior strands of wire have individual insulators or not. There could be three or more individually insulated wires inside the loom.
Slide the wire stripper tool back about 2 inches from the cut end. In the case of multi-strand insulated wires, you'll need to fit the wire loom into the appropriate gauge hole in the tool and gently compress it, making a tiny cut. Turn the tool and make another cut--not too deeply. Cut all around the perimeter of the loom. Remove the outer insulation on the loom and separate each individually colored wire. Repeat the process on the other end of the wire.
Place a small colored wire into the appropriate cutting gauge socket on the tool. Compress the tool and strip about 1/2-inch of insulation off the wire. Repeat the process for the other colored wires on the same side. Use the wire strippers on the other end of the cut loom and strip the colored insulation off the individual wires. Make certain you leave enough colored insulation on the wires to tell them apart. You will join them, color to color, even though they may be multi-strand wires.
Cut about a 6-inch section of shrink tube and run it over the main loom, positioning it back and behind the damaged area. Match one color wire to its mate on the other end. Cut a small section of shrink tube that will fit over the spliced area. Slip the shrink wrap tube onto one wire and push it back out of the way. Push the two matching multi-strand wires together, meshing their tips and weaving them together. Take a small piece of very fine scrap copper wire and wrap the meshed joint from one end to the other in a spiral circle--this will hold it together.
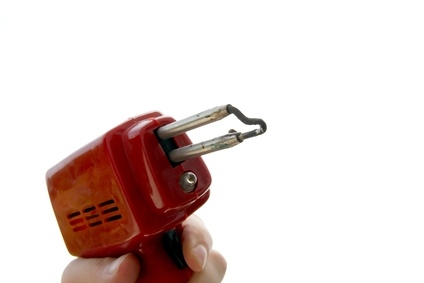
Use a hot soldering iron or gun to touch the wire at its repaired joint and let it heat up. Unroll a single strand of solder and place the solder end onto the wire. Run the solder along the joint as it melts. Let it cool for a few seconds then twist the wire so you can add solder to its side. Rotate the wire and solder the backside. Note: do not touch the solder joint with the gun tip, only the wire. When it has cooled, pull the small scrap wire off the joint. Slip the shrink wrap over the jointed splice and heat the shrink wrap with a propane torch. The shrink wrap will collapse around the new joint.
Perform the same operation on each individual wire. Make certain you slip the shrink tube on the wire before you solder it. Wrap each joint connection with the small scrap wire to keep the ends together. Pull the scrap wire off each joint and discard it, then slip the shrink tube over the joint and heat it with the propane torch until it shrinks over the spliced joint.
Squeeze all of the spliced connections together, forming a compact wire. Pull the large shrink wrap tube down over all of the spliced connections and heat it with a propane torch. The larger gauge shrink wrap will cover the entire damaged area, overlapping it by a few inches on both sides. For added protection, wind some black electrical tape around the wire loom.