The wiring harness of a Vespa PX scooter provides the electrical skeleton for all the lights and indicators. Understanding how to repair or replace such a part tends to be one of the harder repair jobs on this Italian scooter, but the repair can be made with patience.
Use a socket wrench to loosen the bolts that secure the scooter seat. Put the seat aside and place the bolts in a metal pan for safekeeping. Pull the engine panel off and, using a Phillips screwdriver, disconnect the fuel line from the carburetor. Loosen the bolts securing the gas tank and pull it upward, feeding the fuel line back into the scooter body. Put the tank aside along with the bolts in the metal pan.
Pull the other side panel off and, using a crescent wrench and Phillips screwdriver, disconnect the battery and regulator wiring. Free up the wires and push them through the body holes into the main scooter frame cavity. Move to the engine side and open the engine wiring junction on the top of engine. Disconnect all the wiring connections. Go to the back of the scooter and disconnect the taillight.
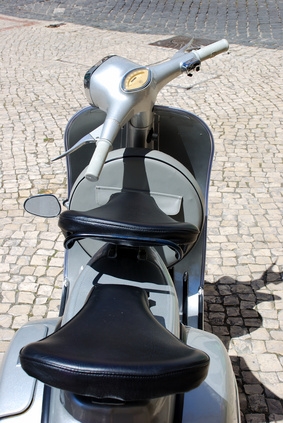
Use a Phillips screwdriver to unscrew the headset screws underneath the scooter headset. Put the screws in the metal pan, disconnect the speedometer cable by hand and gently lift the headset top upward (you may also need to push the speedo cable at the front fork bottom upward). Disconnect the electrical connections to the ignition switch, signals and the hand brake switch. Go underneath and disconnect the rear brake switch as well. Use a socket wrench to access the rear brake pedal switch.
Open the glove box and loosen the two bottom horncast screws in the frame. Go to the other side and, using a screwdriver, loosen the top horncast screws. Remove the horncast after disconnecting the horn from the wiring. Go back inside the glove box and disconnect the front turn signals.
Pull the wiring through the frame, starting from the horncast until the headset wiring is completely pulled out. Then take the base wiring at the bottom of the fuel tank cavity and pull the wiring from the front back and upward out of the frame. Remove the old wiring completely once free of the scooter frame.
Spread out the new wiring harness. Identify the front end from the rear. Use electrical tape to wrap up the front end of the wiring. Straighten out a coat hanger. Run it through the frame cavity from the tank side to the front so that one end pokes out where the horncast would be. Use tape to connect the harness to the coat hanger end on the tank side. Carefully fish and pull the new wiring through the frame until it can be grabbed on the front scooter end. Remove the coat hanger and open up the taped wiring.
Peel off the wiring to the front turn signals and route them to the signal connectors, reconnecting by hand. Use a long screwdriver to fish the untaped wiring through the upper part of the frame to the headset. Pull it through the top, making sure it doesn't get pinched as the headset turns. Reconnect the front brake switch and headlight wiring.
Reach into the fuel tank cavity and guide the rear brake wire to the front hole for the brake pedal. Once it reaches, pull the wiring out a bit and reconnect the rear brake pedal switch. Re-install the brake pedal with a socket wrench. Route the remaining rear wires to the taillight, engine junction box and the battery and regulator.
Connect all the new wires to their parts using a Vespa PX wiring diagram for reference. Pay special attention to the wiring colors and the parts they need to connect to in the engine junction, taillight and regulator (these parts all connect with multiple wires). Don't forget to reconnect the battery, starting with the black wire.
Lower the headset close enough so that you can connect the remaining wires in the headset to the ignition switch and signals. Reconnect the speedometer cable and guide wires so they don't get pinched as you close up the headset. Reinstall and tighten the headset screws to secure the headset. Reconnect the horn wiring and horncast, securing them with the previously removed screws.
Reinstall the tank, running the fuel line through the frame and reconnecting it with the carburetor. Place the seat back on top and bolt it down while securing the fuel tank to the frame. Insert the ignition key into the headset and turn it to the power-on position (not the engine start). Test the lights, pressing on the brake, flipping the turn signals and checking that the headlight works properly.