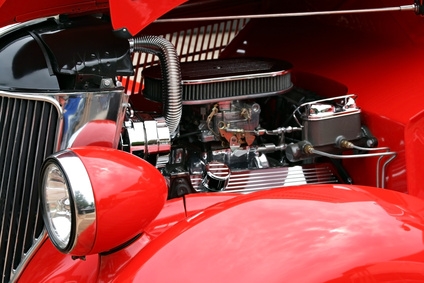
Proponents of fuel injection often refer to carburetors as "carefully metered fuel leaks." While somewhat pejorative, this phrase is a fairly accurate description of the purpose and function of a carburetor; fuel pressure fills the carb's fuel reservoirs ("bowls"), and engine vacuum draws the fuel through a number of valves and metering orifices into the intake tract. The fuel that flows through the carburetor is not only corrosive; it can also carry contaminants and leave a thin layer of varnish on internal components. Carburetor rebuilding isn't the simplest of procedures, but it's not particularly difficult if you approach methodically.
Drain all of the gasoline out of your carburetor and remove the fuel bowl screws or bolts. On most carburetors, there will be one on each corner. If the fuel bowls and metering block don't just slide off of the mounting studs, you may need to pry them loose with a gasket scraper. Once the bowls and metering block are free, scrape whatever gasket remains off of the carb body and metering block. Lay the components out in a straight line as you remove them.
Identify the metering block: it's the plate that was sandwiched between the front fuel bowl and carburetor body. Remove the power valve in the center of the metering block with a box-end wrench. Holley and Edelbrock four barrels require a 1-inch wrench for this job.
Remove the four accelerator pump screws from the top of the rear fuel bowl, remove the cap and lay the components you find inside the accelerator pump housing out in a straight line in the order of disassembly. Remove the fuel line fittings to access the filter elements behind them.
Remove the vacuum secondary housing, the throttle shaft (it will be retained with a small C-clip) and the electronic choke assembly. Do not disassemble the choke housing unless you need to fix something. Flip the carburetor over and remove the six Phillips head screws that secure the base plate to the body. Remove the Phillips head screw from the top center in between the secondary barrels. At this point, the carburetor should be completely disassembled.
Soak all of the metal components in 1 gallon of liquid carburetor cleaner for at least 12 hours, preferably 24. Remove the components from the cleaner bath and either allow them to air-dry for two hours or blow the passages clear with compressed air.
Reassemble the carb in the reverse order of disassembly, replacing the old seals, gaskets, rings and springs with the new ones included in the kit. Procedures here will vary greatly by carburetor manufacturer, kit maker and model year of carb, so you'll need to pay close attention to the kit's instructions.
Reinstall the carburetor base plate, followed by the vacuum secondary (making sure the new cork gasket is in place on the secondary body), the electronic choke assembly, the power valve into the metering block, the metering block on the carburetor body and the accelerator pump into the float bowls.
Install the new needle-and-seat assembly into the float bowls, the throttle assembly into the carb body and the float bowls onto the carburetor. Re-check all of the fittings and bolts.