The key to diagnosing electrical problems is to use a process of elimination combined with testing. A good memory and the ability to concentrate on one problem at a time will be helpful. Understanding how circuits are wired will become easier as the work progresses and is not necessarily a needed skill to start with. Positive, negative and ground are terms that need to be understood. Basic electrical and mechanical tools and skills are needed.
Put on your safety glasses first. Find the car battery. Identify the large black negative ground wire. Remove it from the battery. Identify the large positive red wire. Remove the large positive red wire from the battery and place it where its end cannot touch anything metal. Verify the positive terminal is completely vacant of any wires..
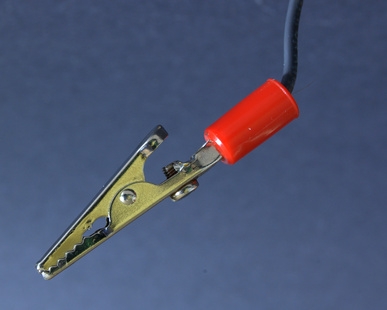
Find the electrical device that is not working.Visually inspect the wiring, as old wires can have defective insulation. Identify the positive wire and unplug it from the device. Connect the positive wire to the positive lead on the volt/ohm meter using an alligator clip. Identify the negative wire on the device and unplug it. Connect the negative wire to the negative lead on the volt/ohm meter using an alligator clip.
Place the volt/ohm meter scale on 12 volts dc. Place the volt/ohm meter where it can be seen from the battery. Trace the positive wire to the fuse panel and look at the fuse to see if the small bare wire in its middle is melted. Replace the fuse if necessary. Trace the negative wire to the vehicle's ground strip and verify the connection is tight.
Go to the car battery. Connect the large positive wire back to the battery. Connect the large black negative ground wire back to the battery. Turn on the switch that controls the device. Look at the volt/ohm meter and verify it is showing 12 volts.Turn off the switch that controls the device. Disconnect the negative ground wire from the battery. Disconnect the positive wire from the battery and place it where its end cannot touch anything metal.
Replace the electrical device if the meter read 12 volts. Completely replace the ground wire with a new one if it did not read 12 volts. Repeat the test at the battery after connecting the positive cable back on the battery first and then the negative ground wire back on the battery and turning on the switch. Look at the volt/ohm meter and verify it is showing 12 volts. Turn off the switch. Disconnect the negative wire from the battery. Disconnect the positive wire from the battery and place it where its end cannot touch anything metal.
Completely replace the positive wire to the fuse box if it did not read 12 volts. Repeat the test at the battery after connecting the positive wire back on the battery and the negative wire back on the battery and turning on the switch. Verify the volt/ohm meter is reading 12 volts.
Turn off the switch that controls the device. Disconnect the negative wire from the battery. Disconnect the positive wire from the battery and place it where its end cannot touch anything metal. Disconnect the ohm meter leads and reconnect the positive and negative wires to the device by plugging them in if the volt/ohm meter read 12 volts.
Connect the large positive wire back to the battery. Connect the large negative wire back to the battery.Turn on the switch that controls the device.Test the device to see if it is operating properly.