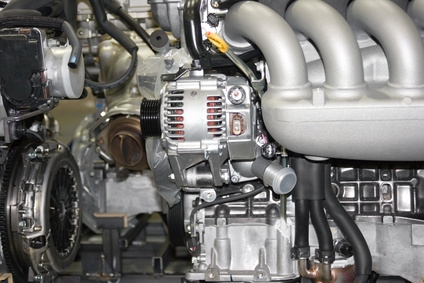
A car's alternator is essential to keeping the battery charged. Changing an alternator on a 1999 Caravan can vary depending on the exact engine type the van has, so consulting with your mechanic is recommended. In any case, you need to replace the alternator with an exact duplicate that has the terminals in the same location and size and with the same ID numbers. Because of this, it's best to remove the old alternator before acquiring the new one.
Disconnect the vehicle's negative battery cable.
Remove the windshield wiper housing if your van has a V6 engine; you will need to remove the wipers and the cowl cover first.
Remove the alternator's drive belt by loosening the belt tensioner with a wrench and slipping the belts off the pulley.
Unscrew and remove the bolts holding the alternator mount bracket to the engine. The exact position of these bolts will vary depending on the engine type. Remove the bracket from the engine.
Disconnect the wire connector from the alternator's rear side, remove the nut holding the B+ wire terminal in place and remove the wire and terminal from the alternator. On a 3.3 or 3.8-liter V6 engine, you'll need to rotate the alternator to do this.
Remove the mounting bolts for the alternator and remove the alternator.
Install the replacement alternator on the engine and apply the bolts.
Connect the B+ wire and terminal to the alternator along with the push-in field wire connector.
Install the alternator mounting bracket and apply its bolts.
Install the drivebelt, using the wrench on the tensioner, making sure the belt follows the same path along the pulleys. In most cases, the belt will have an automatic tensioner that will set the correct tension.
Reinstall the windshield wiper housing if needed.