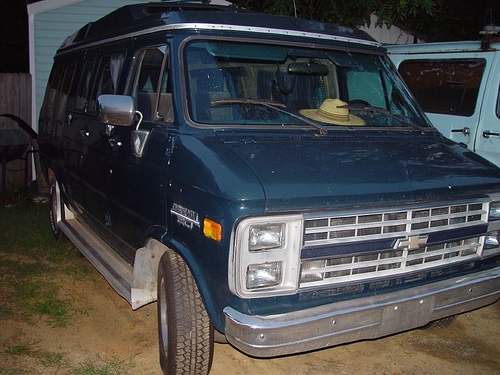
Turn signals warn other motorists before you intend to turn, and can help to prevent an accident, especially on a vehicle with large blind spots like a Chevy Van. Dim, malfunctioning or broken taillights are a hazard and in most areas are illegal. Fortunately, most malfunctioning taillights are a result of either a burned out bulb or a corroded or nonfunctioning light fixture, all of which can easily be replaced by the vehicle owner.
Disconnect the ground cable from the negative battery terminal by loosening the nut on the retaining clamp and pulling the clamp off the post.
Remove the four screws that connect the headlight/parking light/turn signal trim piece to the grille and remove the trim piece.
Remove the three screws that connect the parking light/turn signal assembly retaining ring to the radiator core support.
Remove the retaining ring and the lens cover.
Remove the light bulb.
Use a 12-volt test light to test the operation of the light fixture. A test light usually looks like a screwdriver with a pointed end and a long wire coming out of the handle. Turn the key to the "run" position and switch the turn signal on. The clip on the end of the test light wire should be attached to a metal part on the vehicle's body, preferably an unpainted surface. Then place the test light's probe on the positive contact point in the center of the light fixture. The light in the handle should flash with the same rhythm as the turn signal.
If the fixture is working, simply replace the bulb; if the the test light does not light up, go on to the next Step to replace the fixture
Remove the two screws that connect the light fixture to the radiator core support.
Cut the wiring as close to the fixture as possible on early models. Later models will have a wiring connector that you can pull apart. Do not cut the wiring on models with a connector.
Use barrel crimp connectors to connect the positive and negative electrical leads together on early models. Cut half an inch of insulation off the end of each wire. Thread the wires into each end of the barrel connector, then crimp the ends of the connector with an electrician's pliers.
Position the fixture into the radiator core support and reinstall the two screws that retain it.
Install the light bulb.
Reinstall the parking light/turn signal lens and the retaining ring.
Reinstall the headlight/parking light/turn signal trim piece.
Reconnect the ground cable to the negative battery terminal.
Remove the four screws that secure the tail light/brake light/turn signal housing cover lens and remove the lens.
Remove the light bulb.
Test the fixture using a 12-volt test light. If it works, simply replace the bulb; if it doesn't, move on to the next Step.
Remove the four nuts on the interior side of the fixture that connect it to the body.
Cut the wires as close as possible to the fixture.
Connect the turn signal, back-up light and negative electrical leads with barrel crimp connectors. Match the colors of the wires from the leads to the new fixture.
Position the fixture in the body and reinstall the four nuts that secure it.
Install the light bulb.
Reinstall the tail light/brake light/turn signal lens.
Locate the tail light wiring harness. On later models, the turn signal can be accessed from the interior of the vehicle. There will be two wiring harnesses. The turn signal will be the lower one.
Twist and pull the plastic connector to disengage it from the tail light housing.
Remove the bulb.
Use a 12-volt test light to test the connector. If it works, simply replace the bulb; if it doesn't, proceed to the next Step.
Cut the old harness out and replace with a new one using barrel crimp connectors. Match the color of the wiring on the new harness with the wiring in the vehicle.
Install a light bulb.
Push the connector into the tail light housing and twist until it seats.
Remove the four to seven screws (depending on the year of your vehicle) that secure the housing to the body. They will be located around the perimeter of the housing. On later models, the rear taillight lens and housing are one piece.
Pull the housing away from the body.
Twist and the pull the light bulb fixtures away from the housing
Insert the light bulb fixtures into the new housing and twist until they seat properly.
Push the housing into position and reinstall the the screws that connect the housing to the body.