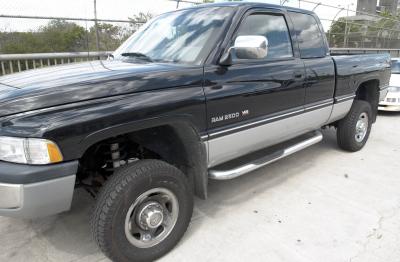
Replacing the valve body in the 47RE or 48RE will bring noticeable benefits. An upgraded valve body will allow more fluid to reach the shift gears resulting in a smoother shift and lower transmission temperatures.The factory valve body used in 47RE and 48RE transmissions is a capable and well-designed unit for a stock motor, but it has difficulty controlling the power of even a lightly modified motor. There are several manufacturers who have designed upgraded valve bodies for Dodge including BD Diesel, NAD and ATS Performance parts.
Install a pressure gauge on the 1/8 inch port on the passenger side of the transmission. The gauge will thread into the port and can be read from underneath the vehicle.
Test the performance of the transmission before the valve swap begins. Test #1 involves placing the transmission in drive with the engine at idle. Record the pressure on the gauge. To conduct test #2, record the RPM while the transmission is shifting from second gear to third. This must be done while driving the vehicle.
Apply the parking brake. Make sure that your Dodge is secured in place and cannot accidentally roll while you are working underneath the vehicle.
Make sure the replacement valve body is the proper part for your vehicle. Remove the kick-down lever, spring and clevis pin from the shifter rod. These pieces will come off with the ratchet and 10mm socket. Rotate the shift lever toward the rear of the vehicle to place the vehicle in park.
Loosen the shift lever bolt with the 10mm socket and place the lever toward the front of the truck; this will place the transmission in the first gear position.
Disconnect all the electronic sensors and connections that attach to the transmission. They all can be undone with your hands.
Drain the transmission fluid from the pan. Use a bucket to catch the old fluid. A 9/16 inch socket and ratchet will remove the bolts on the transmission pan.
Remove the three screws that hold the transmission filter to the valve body. The screws are Phillips head.
Remove the 10 valve body bolts (10mm) that hold the valve body to the transmission. Remove the transmission shift position sensor and shifter shaft linkage.
Lower the valve body from the bottom of the transmission. Be careful not to damage the parking rod while removing the valve body.
Change the second gear band strut to the heavy-duty one supplied with the new valve body. Loosen the band adjusting screw lock nut with a 3/4 inch wrench, then unscrew adjuster until the stock strut can be removed.
Remove the electrical solenoid and sensor and install the electronics on the new valve body. Make sure that all the parts, including the accumulator piston and spring, are placed on the new valve body.
Insert the new valve body in place. Make sure the park rod is placed in the transmission. Install the E-clip into the park rod.
Bolt the valve body to the transmission. Be 100% positive that all the bolts are in the correct holes. If the bolts are in the wrong places, the transmission will not seal or shift properly.
Install the manual lever on the outside of the transmission and check for full movement of the shifter. You should be able to feel five distinct positions.
Install the transmission filter onto the valve body of the transmission, using the three screws. Install the drain pan back onto the bottom of the transmission.
Reattach all the electronic sensors and connections back to the transmission. Reconnect the shift linkage to the manual lever on the transmission. Tighten nut securely and install kick-down linkage and return spring. The kick-down cable is now attached to the ball socket.
Refill the transmission with ATF +3 or 4 depending on any additional upgrades that the transmission may have. Shift through all the gears once the fluid has been added. Eight quarts of fluid is an estimate of how much will be needed. Test drive the truck after the fluid has been added and shifting has occurred in all gears.