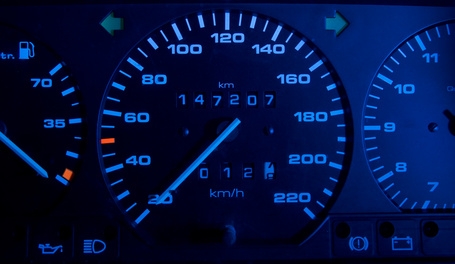
The dash lights on every automobile are used to relay vital information about the engine, transmission and fluid levels to the driver. Without this information the driver may end up driving the automobile when it shouldn't be driven, potentially causing permanent damage to the car. In order to avoid this it is essential to replace your dash lights when they burn out. On the 1998 Ford Explorer, the dash lights will usually burn out anywhere from 100,000 to 150,000 miles of use.
Open the hood of your Explorer and disconnect the negative (black) battery cable.
Remove the two bolts underneath the radio with a 7mm socket.
Remove the three bolts above the instrument cluster with a 7mm socket
Remove the four bolts on the lower dash piece (underneath the instrument cluster and the steering wheel) with a 7mm socket.
Pull off the lower dash piece and remove the two bolts on the metal plate underneath with an 8mm socket.
Pull the metal plate down to expose two bolts. Remove them with a 7mm socket.
Pull the radio trim out and disconnect any electrical connectors. The number of connectors will depend on how well-equipped your Explorer is.
Pull off the instrument panel trim making sure to disconnect the wiring harnesses on the left and right side.
Remove the screws on each side of the instrument cluster with a 7mm socket. There will be four screws altogether.
Tilt the instrument panel forward to exposed the gear shift indicator. Then push the two tabs on the indicator and slide it out.
Disconnect the three plugs on the back of the instrument panel.
Twist the dash light that you are replacing to unlock it, then pull to remove it from its socket.
Place the new light inside and twist to lock it. Repeat this for all dash lights that you are replacing.
Place the instrument panel back into the dashboard and reattach the three plugs you removed earlier.
Slide the gear shift indicator back into place.
Reattach the instrument panel to the Explorer with the four 7mm bolts you removed earlier.
Reattach the instrument panel trim to the interior making sure to reattach both the plugs you disconnected earlier.
Reattach the plugs on the radio trim and slide the trim back into the Explorer.
Bolt the two 7mm bolts behind the metal plate back into place.
Bolt the two 8mm bolts back onto the metal plate.
Bolt the four 7mm bolts on the lower dashboard panel back into place.
Bolt the three 7mm bolts on the instrument panel back into place.
Bolt the two 7mm bolts on the radio back into place.
Reattach the negative (black) battery cable to the battery terminal.