Yep, you read the title right. Aligning a bellhousing on a five-speed can be a little tricky, but with some basic math skills and a universal magnetic dial indicator it's easy. Why do I need to align my bellhousing in the first place? The transmission is built to spin free in a circular motion and not have side-load. When I say side-load I'm referring to the transmission's input shaft in relationship to the pilot bearing/flywheel. If the bellhousing is off to one side then the transmission's input shaft will have side-load to one side more than the other. This makes the transmission do all kinds of crazy things like shift erratic, and prematurely wear bearings and seals to name a few.
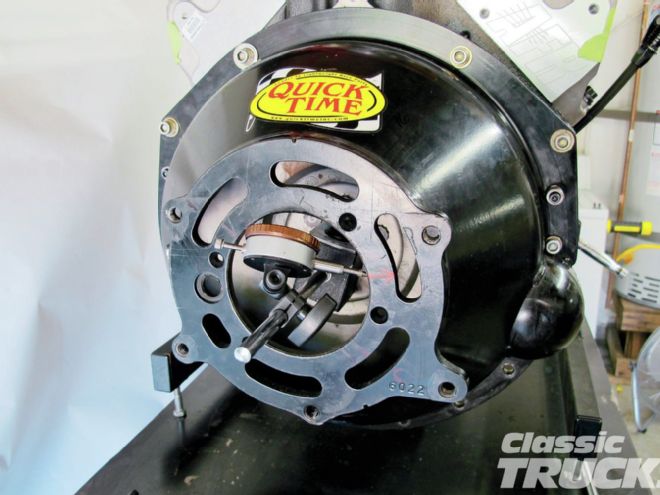
So how do I start to align my bellhousing to my engine? The easiest way I found is to remove two bolts from the flywheel and attach a magnetic dial indicator to the flywheel. Then with the spark plugs removed you can easily spin the engine, thus moving the flywheel. While watching the dial on the inner opening of the bellhousing make sure it does not hit anything, causing a false reading. Also make sure the magnetic base is strong enough to spin around the inner circle of the bellhousing without moving.
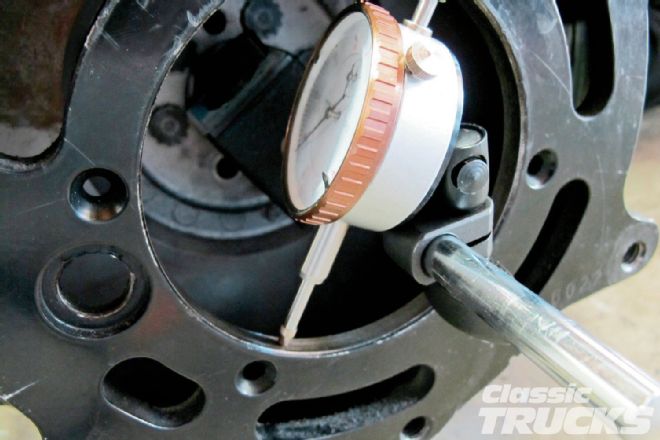
The next step is to watch the dial as it spins until it starts going toward the positive direction. As soon as the dial indicator starts moving in the negative direction, stop and zero out the indicator. This is also the time to place a mark on the bellhousing the same direction as the needle is pointing. The mark you placed on the bellhousing indicates the direction it needs to move.
The next step is to turn the engine 180 degrees opposite of the zero mark and write that number down. With my bellhousing it was off .018 to one side. You may not think that is a lot, but specs for my transmission's bellhousing alignment were .0 to .005. This is where it gets a little tricky because even though I have the number of .018 you would think that my bellhousing was off by that much, right? The number .018 is divided in half to get .009 for my total bellhousing run-out.
If you think about it, I would need to move the bellhousing half the distance of what was measured (.018) to be close to 0. Now it's time to order adjustable dowel pins so that I can align the bellhousing. Hurst Driveline Conversions recommended ordering the dowel pins from RobbMc Performance because their dowel pins lock in place with a set screw. Robb sells dowel pins in three offsets for a small-block .007, .014, and .021. I chose the .007 because my bellhousing was off by .018, divide that in half .009, and with .007 alignment dowels I could get the bellhousing within .002.
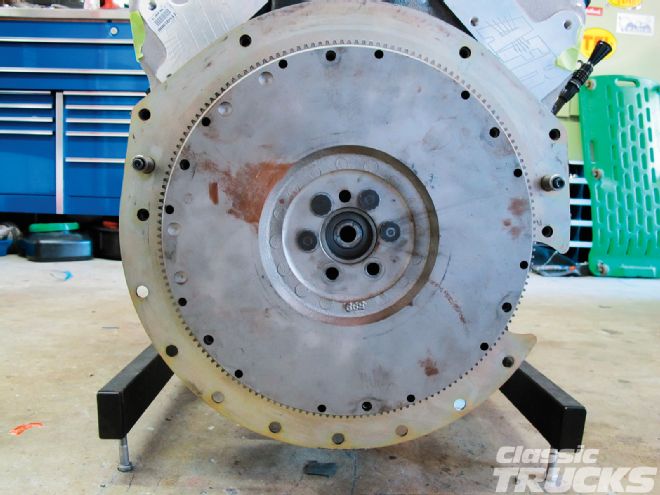 1. Remove flywheel bolts so the magnetic base would lay flat on the flywheel.
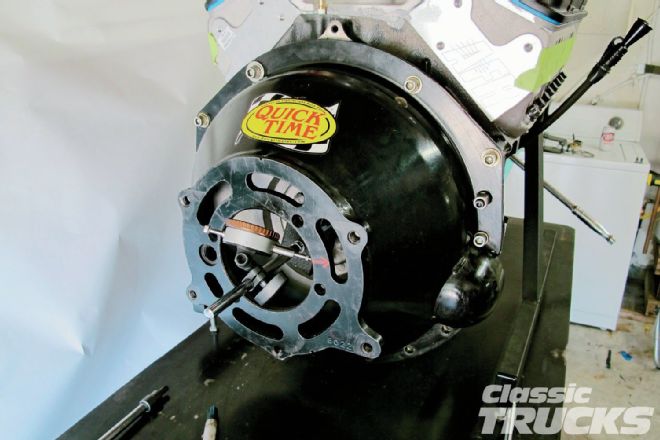
 2. Make sure the base and dial indicator don't hit anything when spinning the engine by hand.
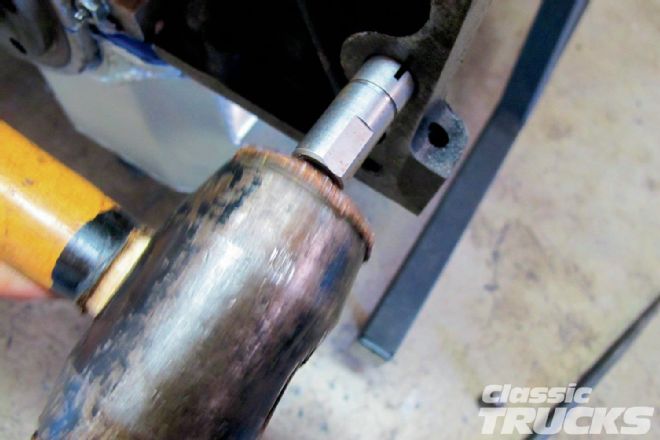
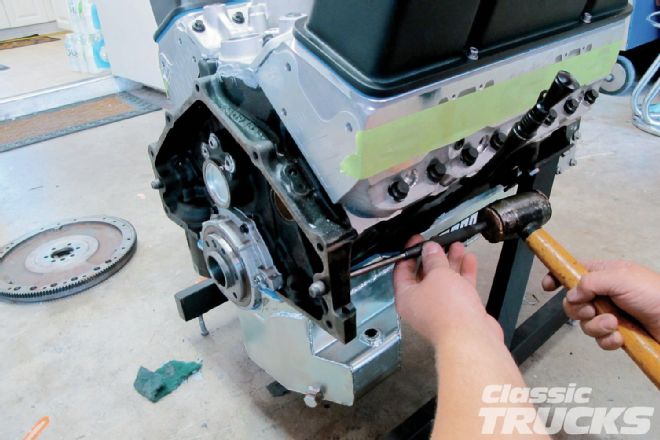 3. A drift and a large hammer will knock the old dowel pins right out. Make sure to clean the engine/transmission mating surface.
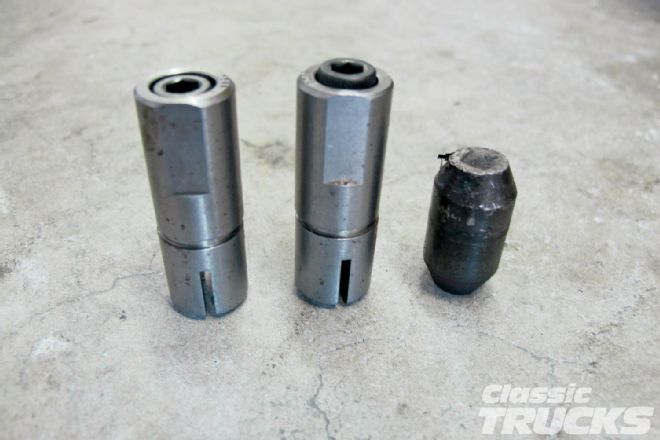 4. Shown are the RobbMc Performance adjustable dowel pins next to the stock pin.
 5. The dowel pin is then placed in the direction that the bellhousing needs to move in. I measured the bellhousing run-out before ordering what size dowel pins I needed to order. Make sure to torque the bellhousing before measurement begins.
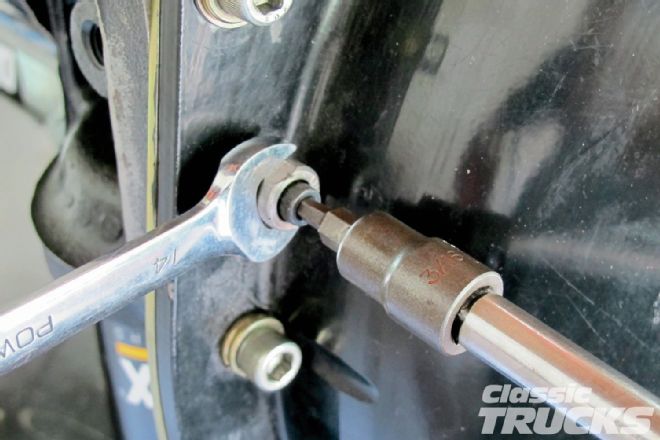
 6. I repeatedly hand spun the engine until I was within .004-.005. toward my original zero mark or as shown in the photo.
 7. After a little tuning I was able to align the bellhousing to .004 and when dividing that number in half I was .002 and well within specs. Make sure to apply thread sealer to lock nuts on the adjustable dowel pins. That's it folks, not so bad huh? Hopefully I explained it so you understood how to go about aligning the bellhousing and don't forget to visit Hurst Driveline Conversions for further directions if needed.