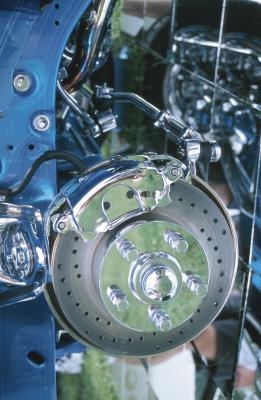
The rear brake system on a Toyota pickup uses brake shoes. The rear brake shoes do not need to be replaced as often as brake pads, but need to be replaced after reaching a thickness of less than one-eighth of an inch. Brake shoe replacement on a Toyota pickup can be performed by its owner and the replacement brake shoes can be purchased from a local auto parts store.
Park the vehicle on level ground and turn off its ignition. Loosen the lug nuts on the rear wheels using a lug wrench. Make sure the the parking brake is off or you will not be able to remove the vehicle's brake drum.
Loosen the lug nuts with the lug wrench. Raise the rear of the vehicle with a floor jack. Place the jack stands beneath the vehicle for support. Remove the lug nuts and wheels.
Remove the rear brake drum. If the drum does not pull off easily, use a hammer to hit the sides of the drum to loosen it.
Inspect the inner surface of the drum. Look for damage caused by the brake shoes. If there is damage, you will need to take them to a brake shop and have the shoes turned on a lathe.
Remove the shoe return spring, the long spring located at the top of the assembly and attached to both brake shoes, from the rear brakes using locking pliers.
Remove the hold-down spring and pin from the rear shoe. Hold the pin in place and turn the washer until the pin is lined up, then pull it out. Remove the rear brake shoe and the anchor spring located at the bottom of the shoe.
Remove the E-clip and spring that secures the automatic adjusting lever in place. Remove the lever. Remove the C-washer that secures the brake lever in place and remove the parking brake lever.
Clean the brake assembly and brake hardware using brake-parts cleaner and a rag.
Apply bearing grease to the six places where the brake shoes contact the backing plate. This will help your brakes operate smoothly and quietly.
Reinstall the automatic adjusting lever and the parking brake lever using the C-washer to secure them to the new brake shoes. Be sure to use the new hardware.
Apply grease to the threads of the adjuster. Install the adjuster onto the new rear brake shoe. Put the rear brake shoe onto the backing plate and secure it using the pin and hold-down spring.
Attach the anchor spring to the bottom of both brake shoes. Put the new front shoe in place. Install the pin and the hold-down spring for the front shoe. As you install the shoe, attach the parking brake cable to the parking brake lever. Reattach the return spring to both brake shoes.
Inspect the adjusting bolts. The bolts should turn when the parking brake lever is up. If the bolts do not turn, the rear brakes shoes are installed incorrectly.
Adjust the adjuster until it is at its shortest possible length. Install the brake drum.
Pull up on the parking brake lever located inside the vehicle until you can no longer hear a clicking sound.
Remove the drum. Measure the brake drum's inside diameter and the diameter of the brake shoes. Compare the two diameters to ensure that it has the correct shoe clearance, 0.6 mm (0.24 inches). If the shoes do not have the correct clearance, check the parking brake system.
Install the brake drum. Loosely place the lug nuts onto the wheel studs.
Raise the rear of the vehicle using the floor jack and remove the jack stands. Lower the vehicle to the ground.
Tighten the lug nuts on the wheel studs using the lug wrench.